Getting started with the Wizard component
Learn how to build a step-by-step interface with multiple paths using the Wizard component.
The Wizard component allows you to group components into a series of steps that follow a linear path or branch into multiple ones. It supports running queries on step change or reset, virtual steps that display a loading screen, and setting the initial step dynamically. The Wizard component also includes a workflow editor to add or remove steps and define transitions between them.
This guide walks you through building a wizard to deactivate a user. Before doing so, the wizard checks that the user's account is in good standing. If not, you have the option of sending the user an invoice to collect an outstanding balance. The wizard also requires you to provide a reason before you deactivate the user.
Generate user data
For the purpose of this guide, your app uses sample user information that's generated from our REST API generator. This online tool creates a REST API endpoint with a custom dataset for you to interact with.
Generated API endpoints require no authorization and are limited to 150 rows of data. Retool may delete APIs that have not been used in the last 30 days.
Launch the REST API generator and create a new dataset with the following information:
| Column name | Data type |
|---|---|
| user | Email address |
| active | Boolean |
| balance | Random number (set the minimum and maximum range of 0—10) |
Set the API Name to wizard and # Rows to 25, then click Generate API.
Retool automatically generates a custom API and outputs details of the endpoint.
Query user data
First, create a new app. Retool automatically creates a new query (query1) to get started. Select the query and change its Resource to RESTQuery, then configure it to perform a GET request from your generated API endpoint URL (e.g., https://retoolapi.dev/cZQzL3/wizard). Click Save & Run to save the query and run it.
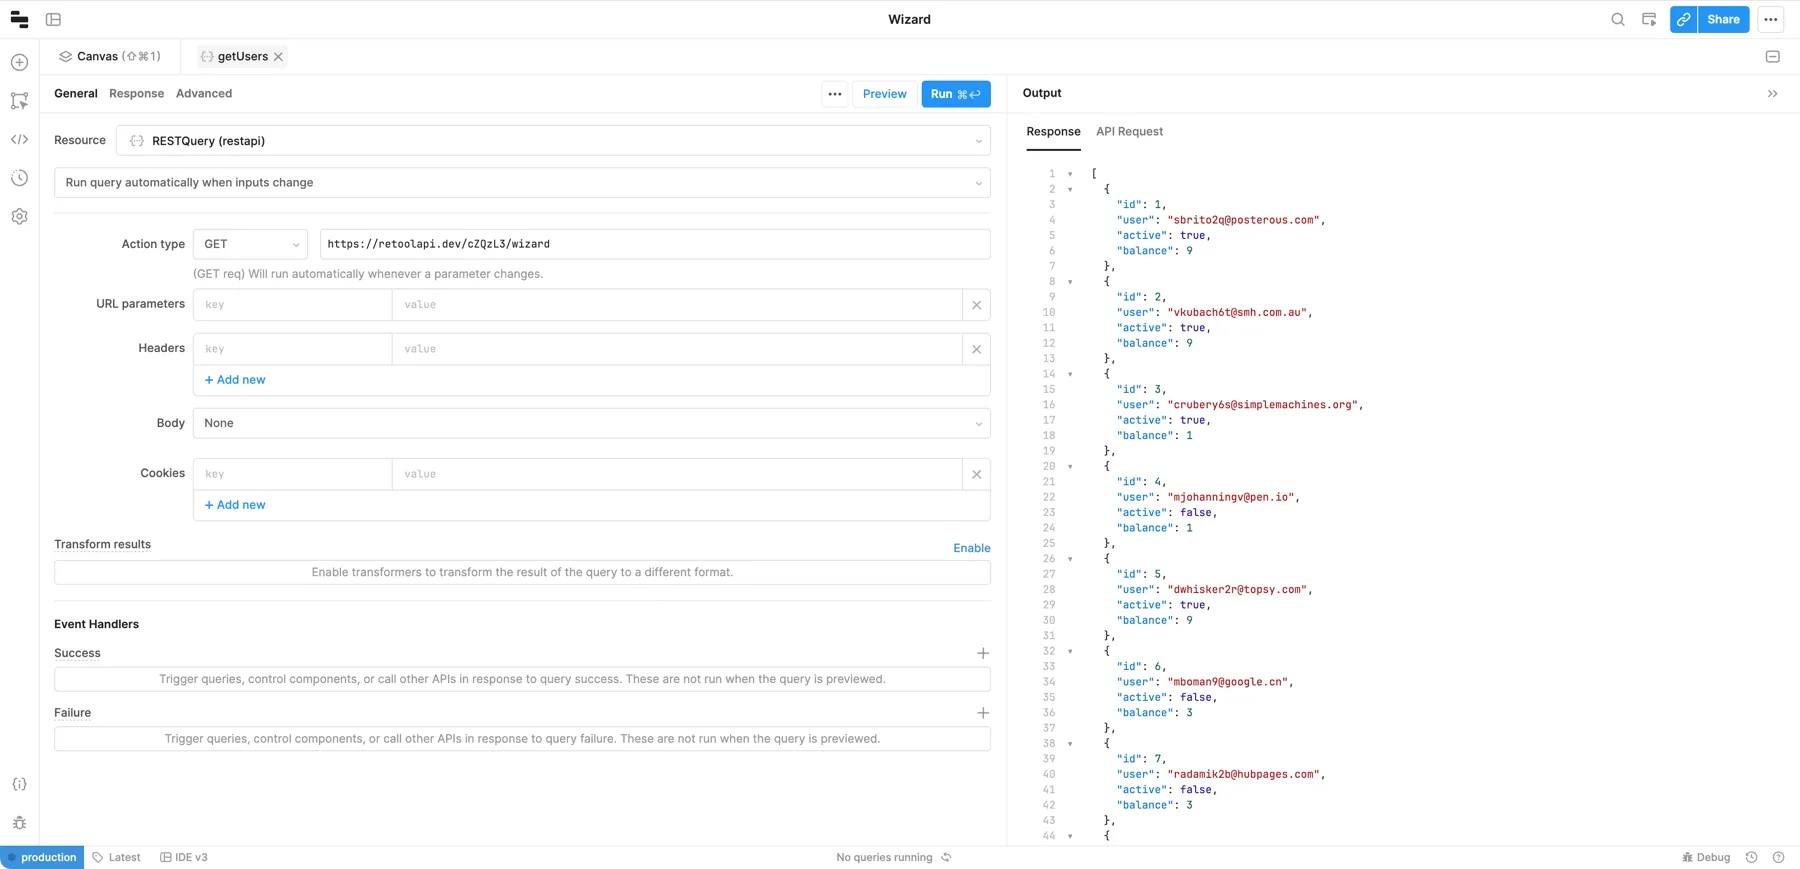
This API returns sample data with the following structure:
[
  {
    "id": 1,
    "user": "sbrito2q@posterous.com",
    "active": true,
    "balance": 9
  },
  {
    "id": 2,
    "user": "vkubach6t@smh.com.au",
    "active": true,
    "balance": 9
  },
...
]
Click the query's name and rename it getUsers.
Build the wizard
Drag a Wizard component onto the Retool canvas. Wizard functions like the Container component and groups other components together. Next, drag a Table component onto the Wizard. The table automatically uses the most recent query as a data source to display the API data.
Right click the table and select Rename. Rename it to selectUser.
Create additional steps
Select the wizard and click Edit workflow in the Edit section of the right panel to open the Workflow editor. You use this to add additional steps and define paths through the wizard.
You can pan and zoom around the Workflow editor as you build out additional steps.
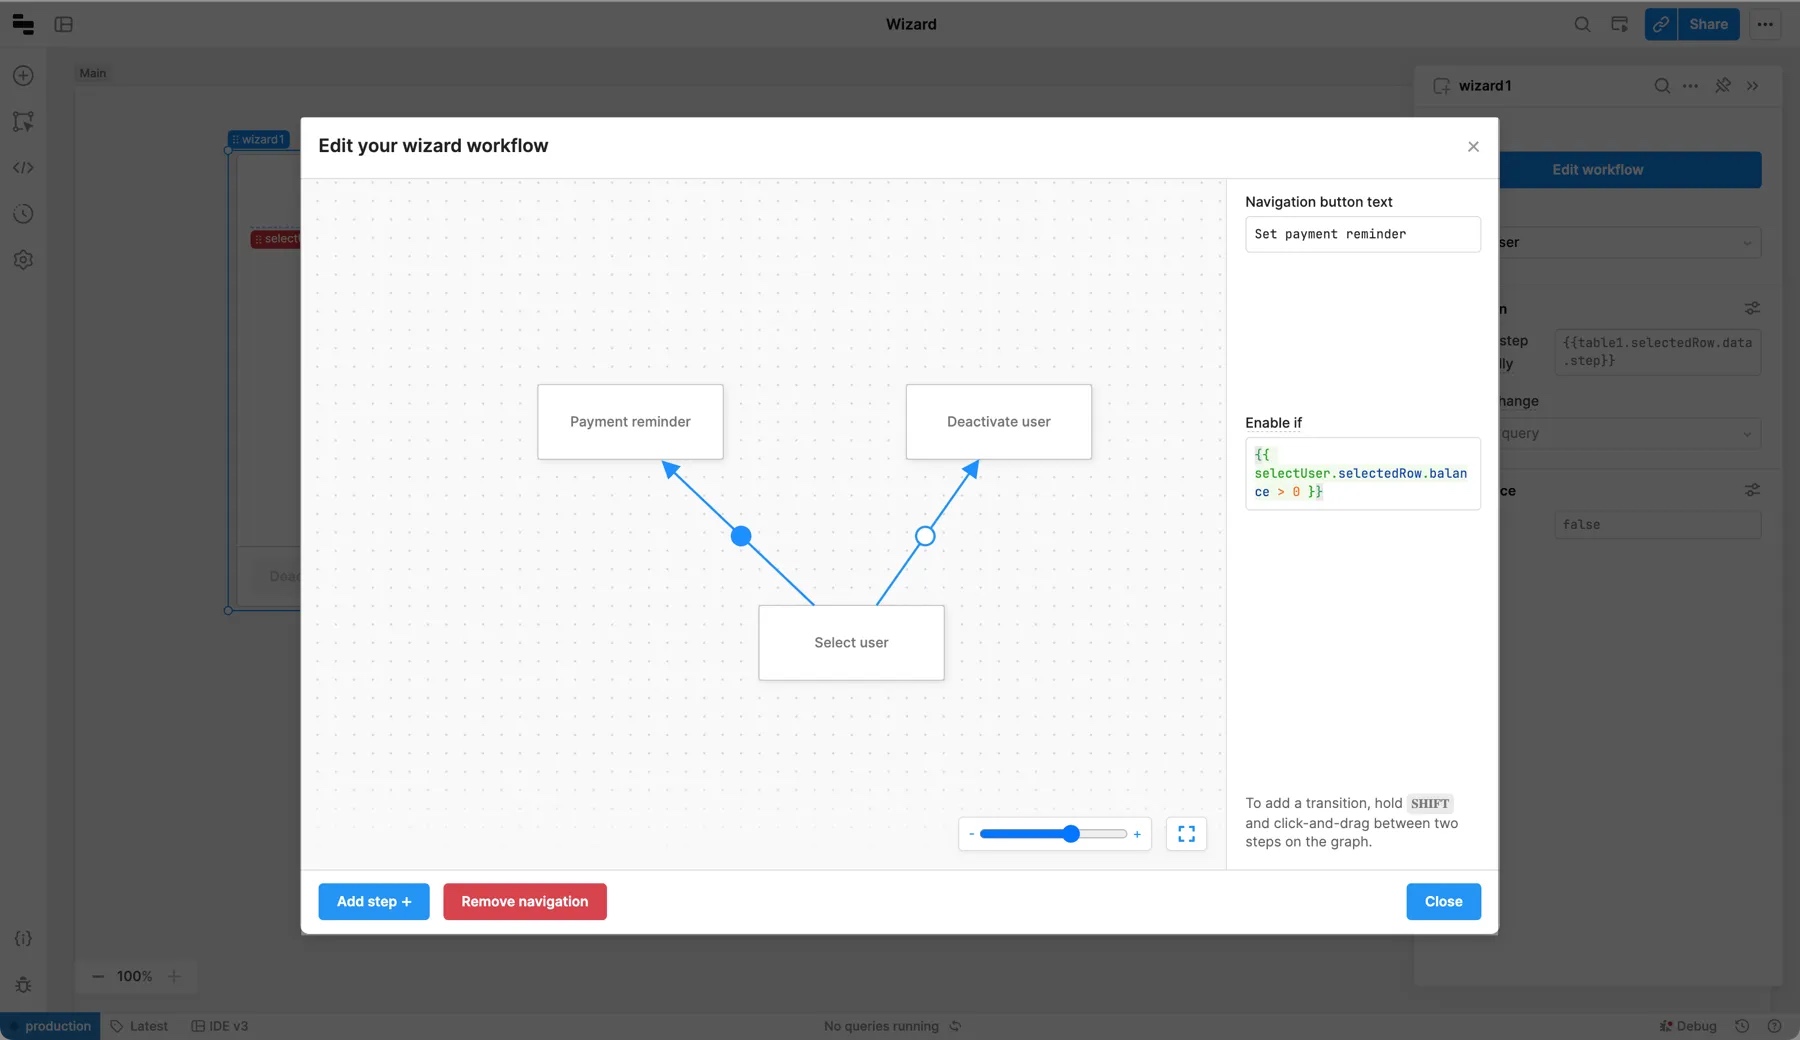
Rename this first step to Select user and add two new steps for Payment reminder and Deactivate user. Connect Select users to both new steps by holding the Shift key as you click-and-drag.
Define paths
The wizard can follow different paths depending on truthy conditions. If the path's Enable if value evaluates to true, the wizard presents this as a next step. If it evaluates to false, the step is not available. Set the value of Enable if between Select user and each path of the following:
- Send payment reminder:
{{ selectUser.selectedRow.balance > 0 }}. This enables the path to the Send payment reminder step only if there's a balance remaining. - Deactivate user:
{{ selectUser.selectedRow.balance === 0 }}. This enables the path to the Deactivate user step only if the balance is zero.
Customize payment reminder step
Each step of a wizard is independent and can contain different components. Click on the Edit step dropdown in the Edit section of the right panel, then select Payment reminder.
To create a form that can be used to send a payment reminder:
- Drag a Form component to the wizard and update its title to
Reminder form. - Drag an Email component to the form. Set its value to
{{ selectUser.selectedRow.user }}. - Drag a Currency component to the form. Set its value to
{{ selectUser.selectedRow.balance }}.
The form automatically uses the email address and the balance as values for the inputs. You could use these fields within a query to send emails using the Retool Email resource. For the purpose of this guide, you won't configure the form to perform any further action.
Customize the deactivation step
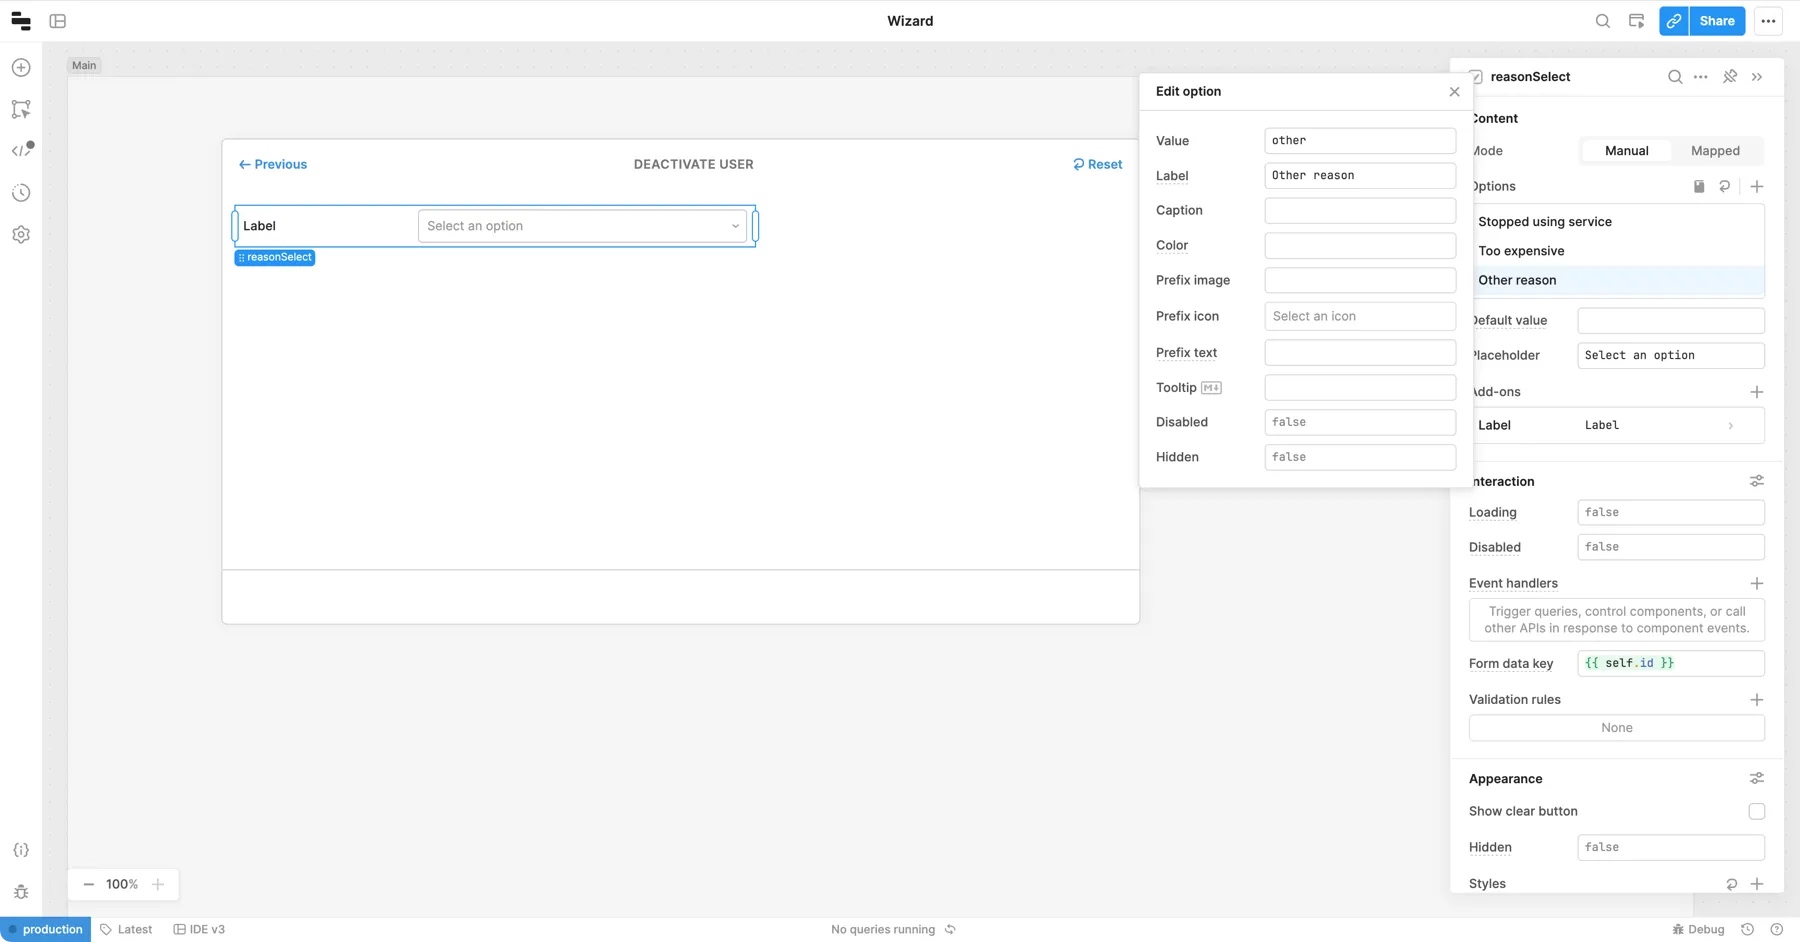
The last step in the wizard is to deactivate the selected user. Select Deactivate user in the Edit step dropdown of the Inspector, then drag a Select component on to the step and rename it to reasonSelect. Update its list of options to include:
| Value | Label |
|---|---|
| stopped | Stopped using service |
| cost | Too expensive |
| other | Other reason |
Configure a virtual step to deactivate user
You can use a virtual step to automatically trigger a query or conditionally route to a different step. In this case, to deactivate a user and submit the reason.
Create deactivation query
First, create a new RESTQuery (restapi) query with the following information:
- Action type: PATCH
- URL:
[endpoint-path]/{{ selectUser.selectedRow.id }} - Body:
reason:{{ reasonSelect.value }}active:false
Save the query, then rename it to deactivateUser.
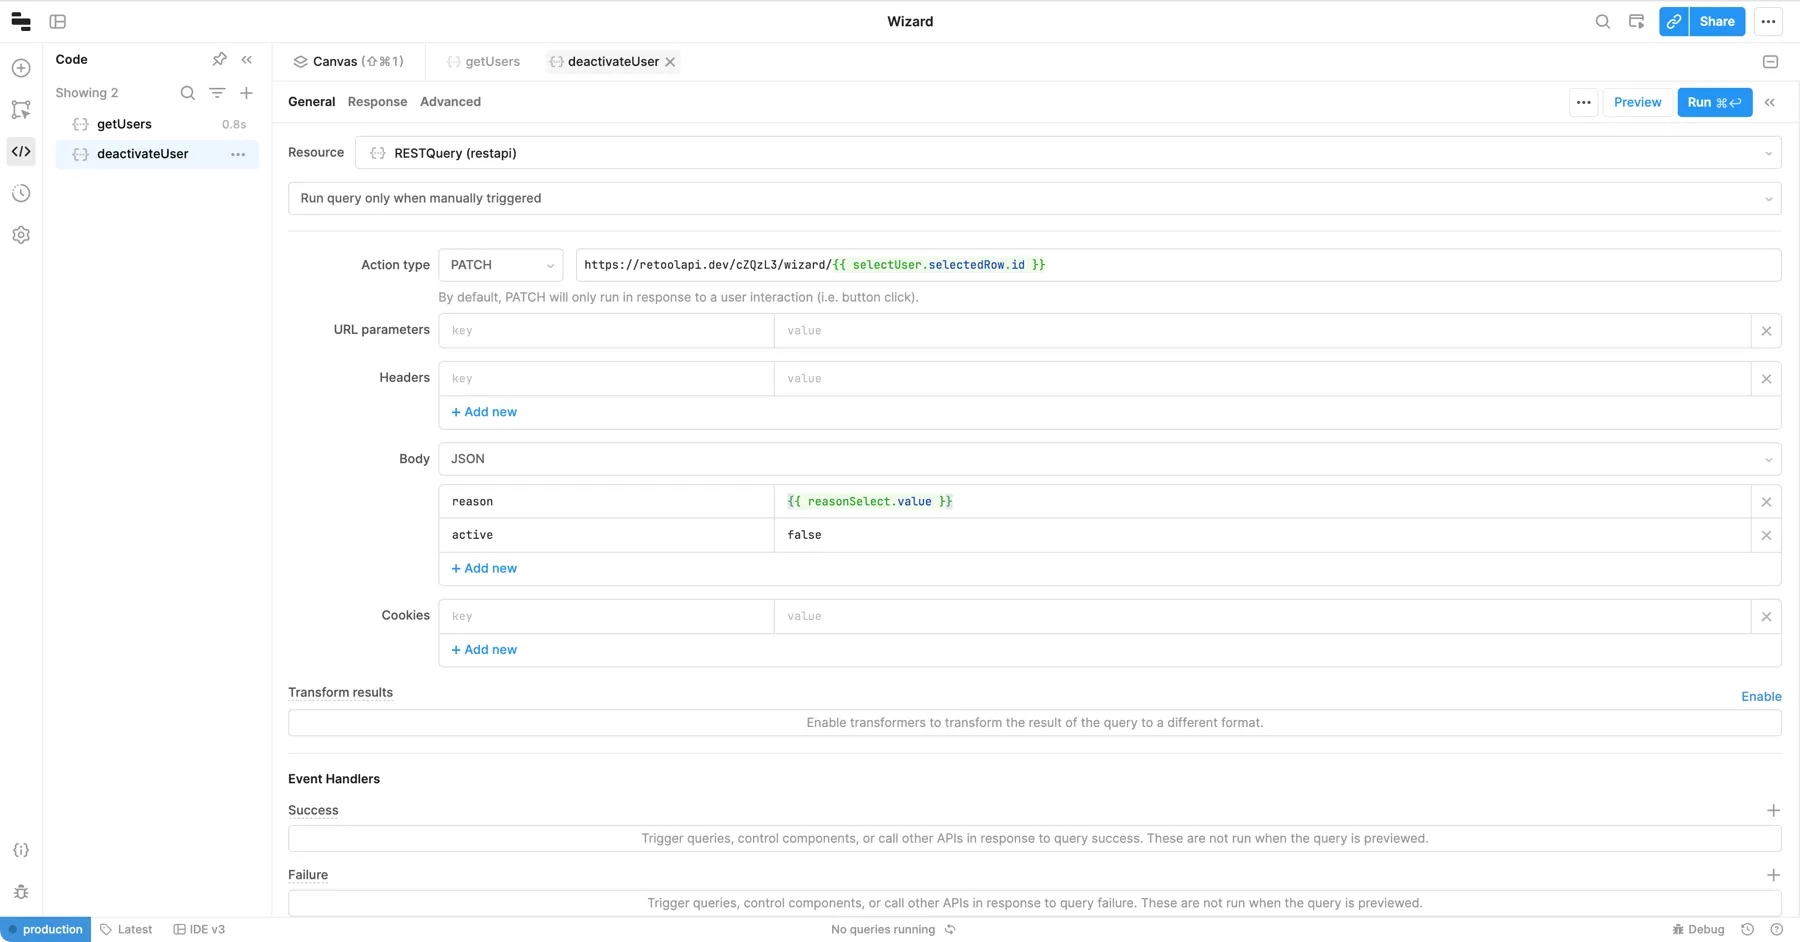
This query performs a PATCH request with the selected user's ID. It includes the reason from the dropdown menu and sets active to false, disabling the user.
Add virtual step
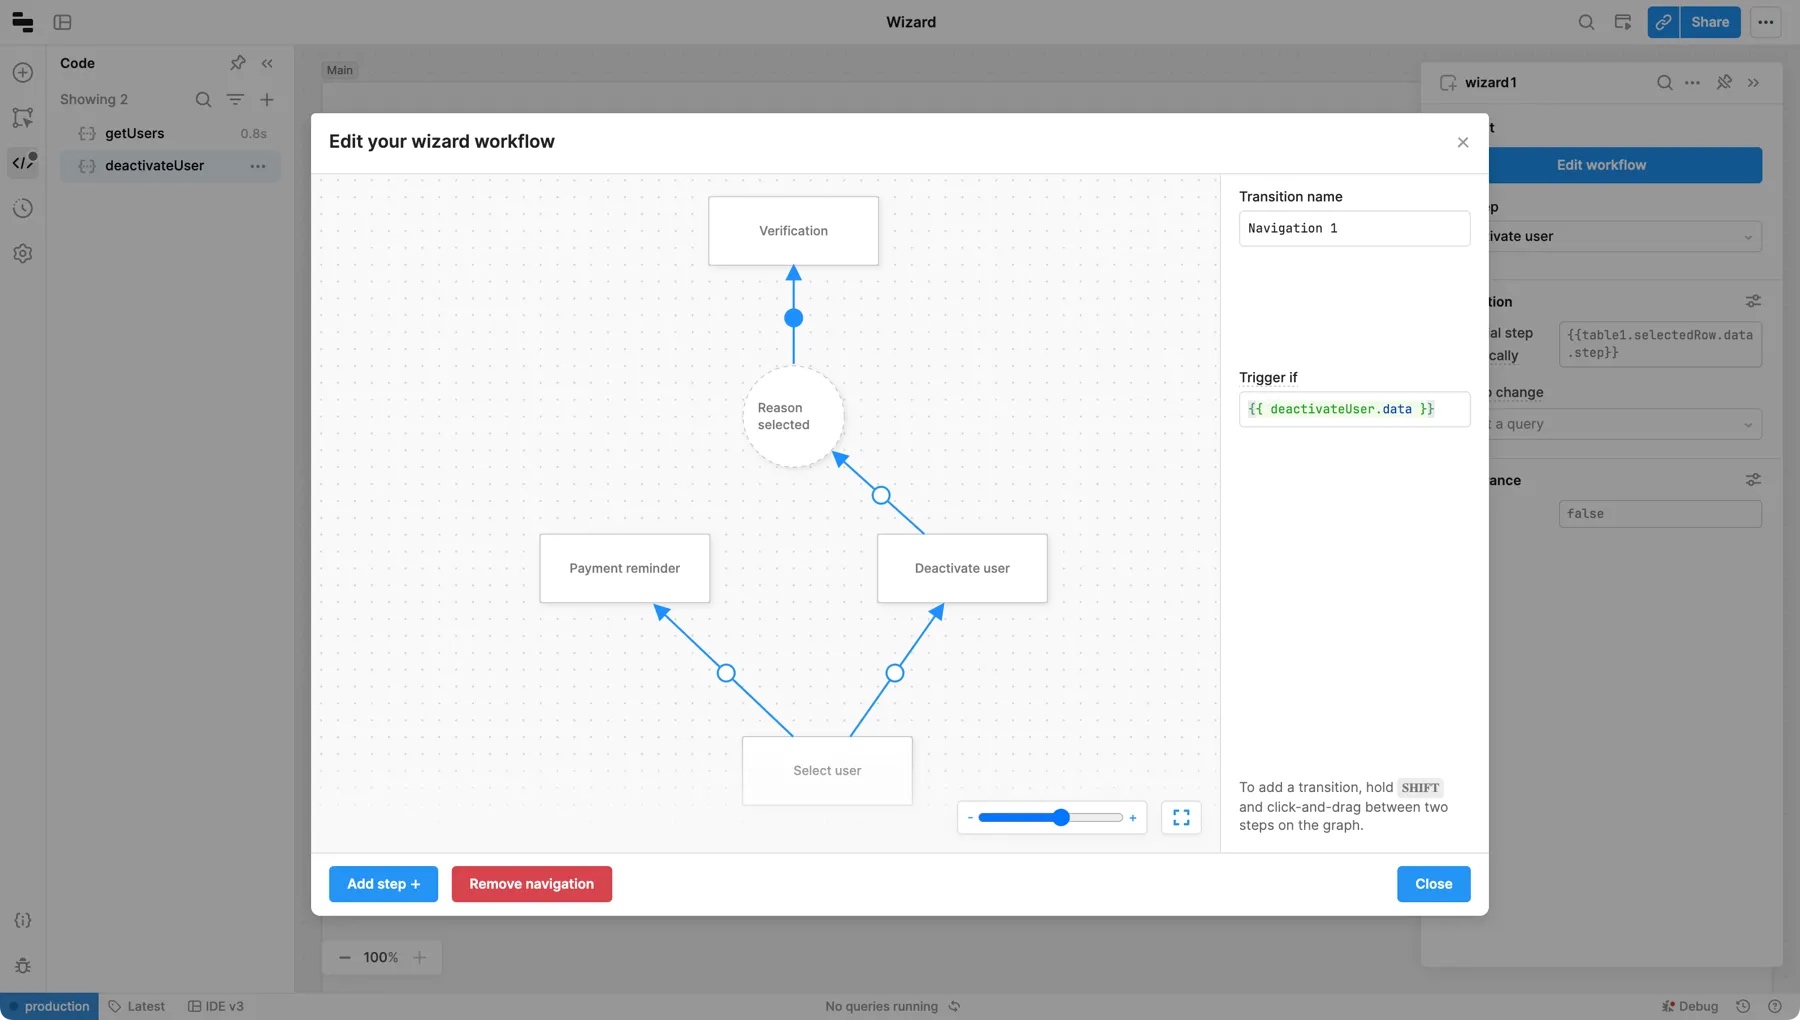
Add a virtual step to the workflow editor named Reason selected and toggle Virtual step on. Set On enter query to the PATCH query you just created. Next, create a path from the Deactivate user step to this new virtual step. To ensure that a reason is selected, set this path's Enable if to {{ reasonSelect.value !== null }}.
Selecting a reason enables the virtual step. As you progress to it, the virtual step triggers the query and deactivates the user.
Add a final step to verify the changes
Virtual steps appear as loading screens and automatically progress to another step once a query is run. The final step of this wizard verifies the changes have been made.
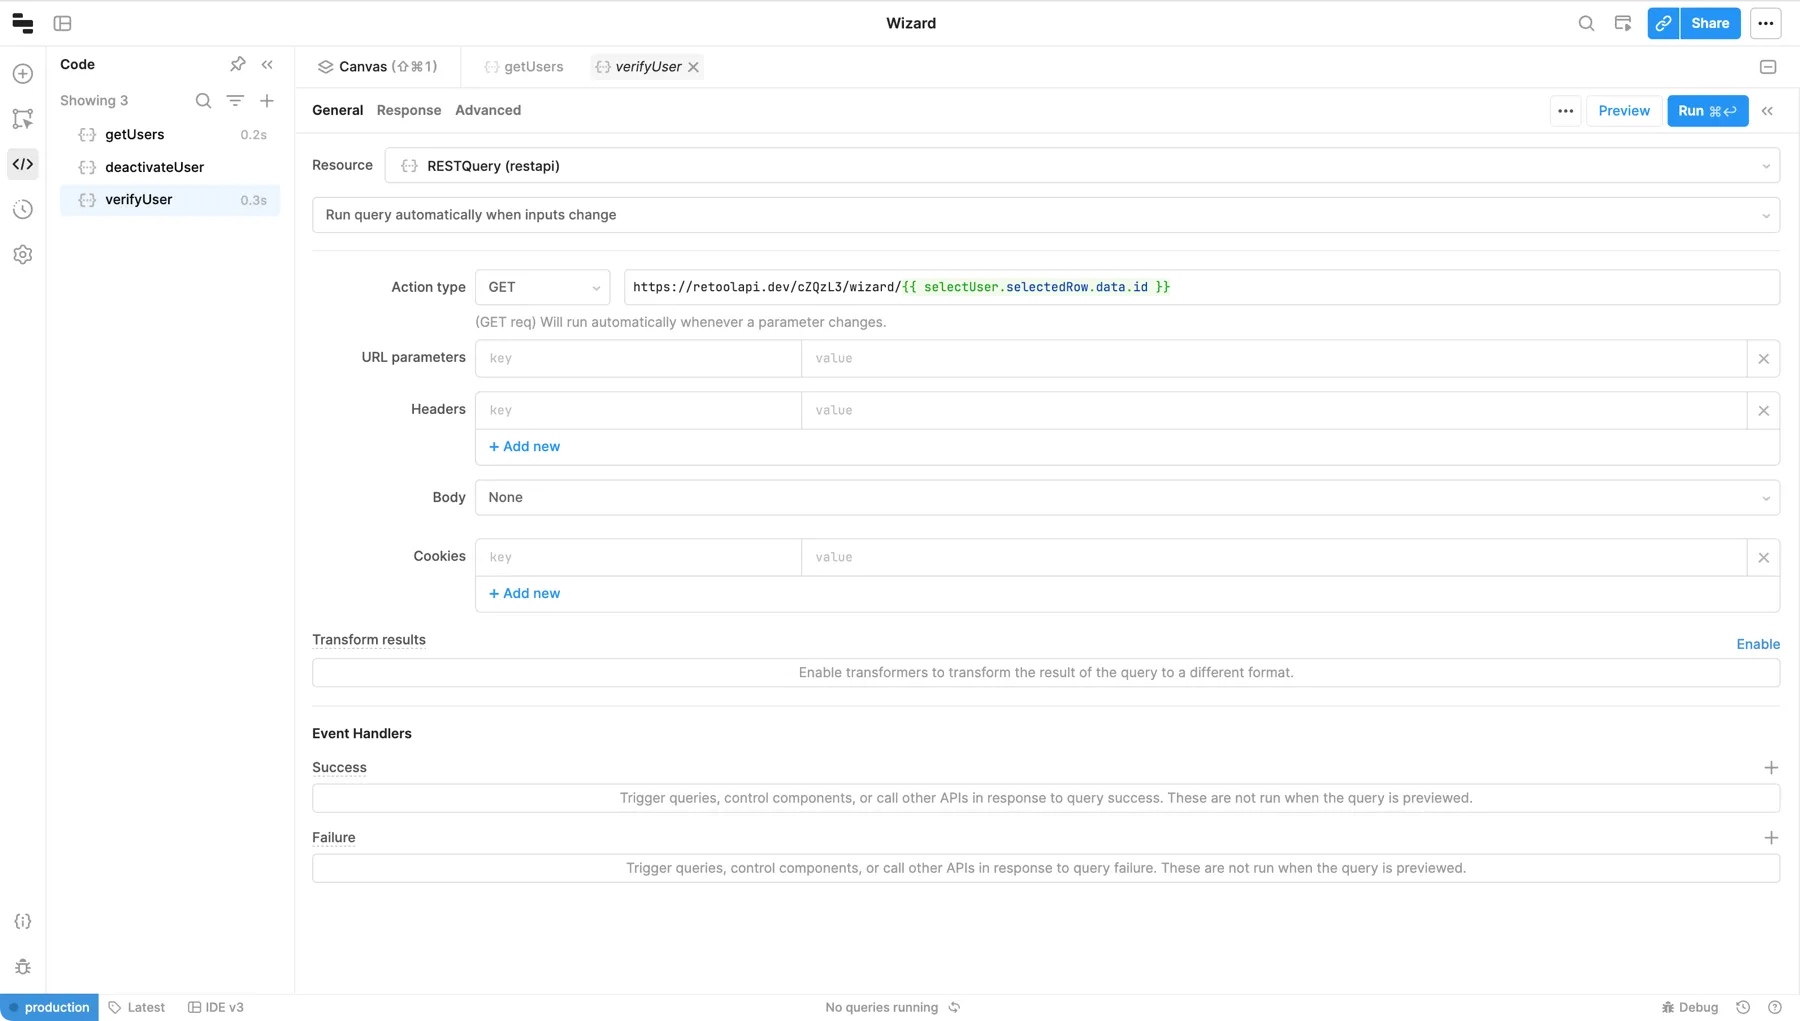
Create another query to perform a GET request that retrieves the deactivated user from the API:
- Action type: GET
- URL:
[endpoint-url]/{{ selectUser.selectedRow.id }}
Update the query's name to verifyUser.
Add another step to the wizard and name it Verification. Connect a path from the Reason selected step and set Trigger if to {{ deactivateUser.data }}, so it immediately moves to the next step after triggering the deactivation query.
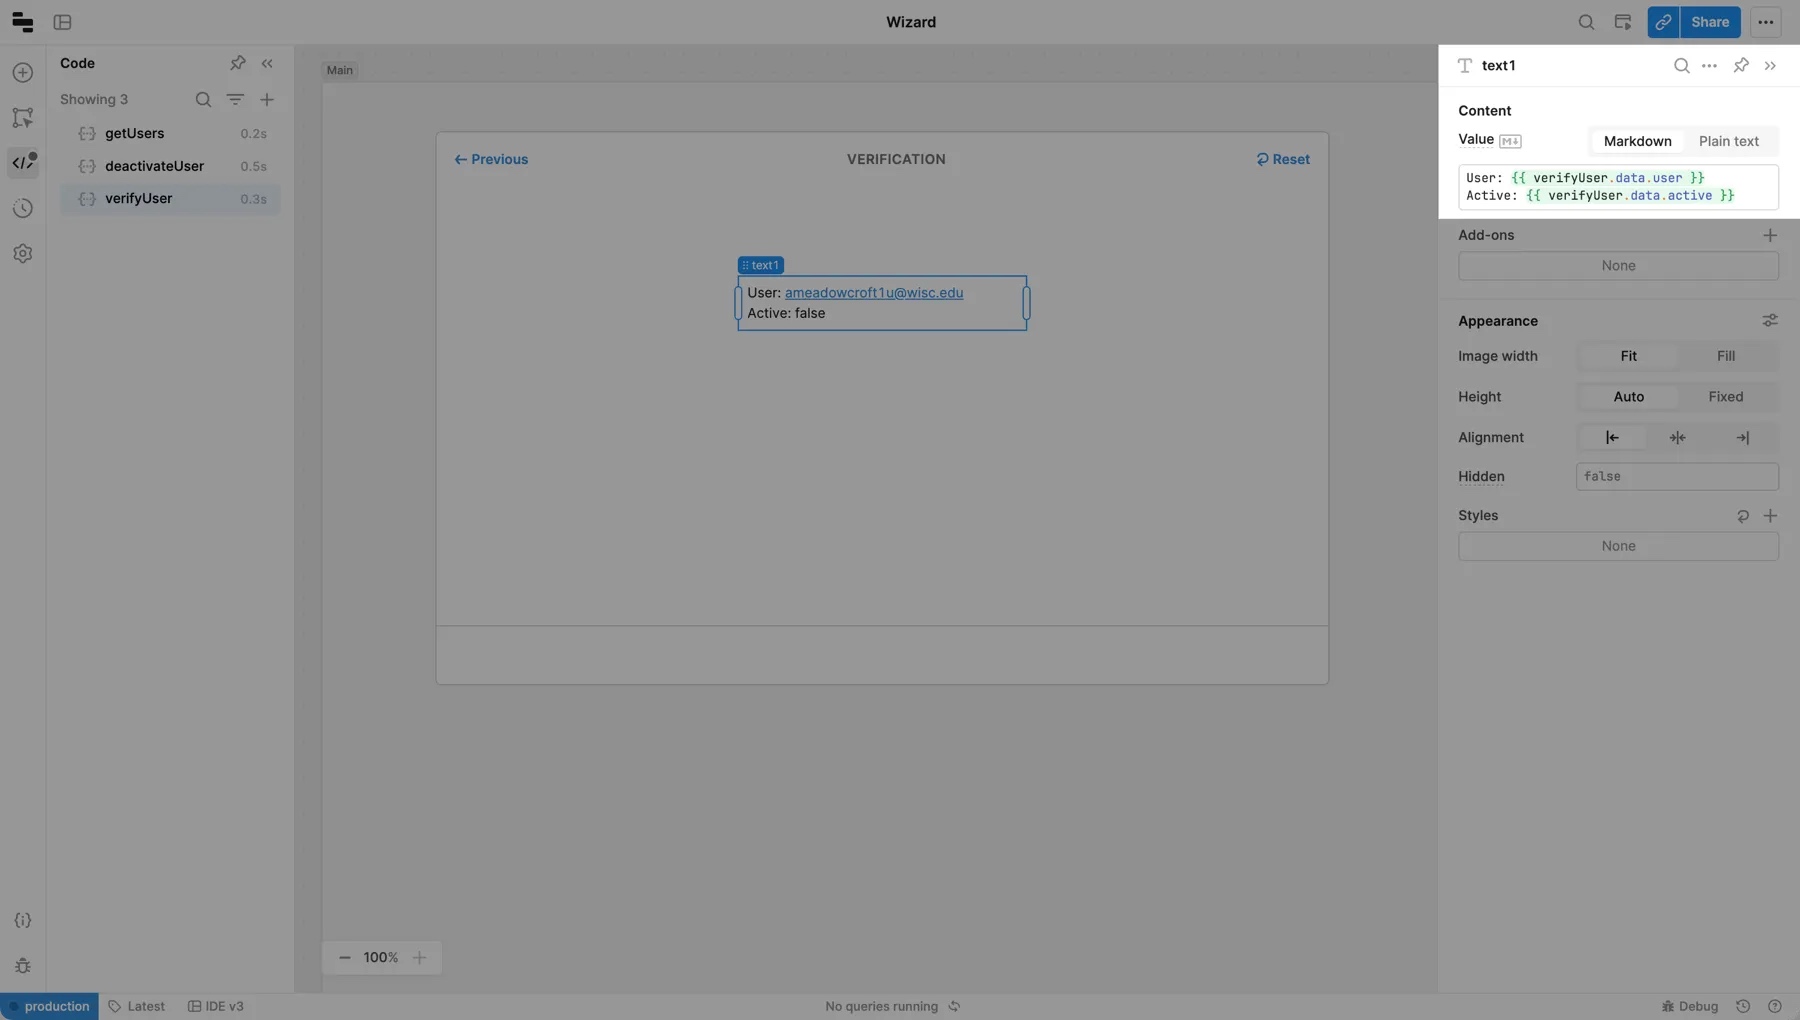
Select the Verification step and drag a Text component to it. Update its value to display the query's results.
User: {{ verifyUser.data.user }}
Active: {{ verifyUser.data.active }}
Your wizard is now ready and can deactivate users. If a user has an outstanding balance, it presents the option to send a reminder instead.