Build modules to reuse queries and components
Learn how to reuse groups of components and queries across classic apps.
A module is a collection of components and code that you can build and embed within other classic apps. Modules enable you to reuse components and code in multiple classic apps, and modules can pass data to and from the parent app. This can help reduce maintenance as you only need to update a module; any parent apps immediately reflect the changes.
Common uses for modules include:
- Sharing specific functionality across different apps. For example, a module to send SMS notifications using Twilio could be used in apps used by different teams rather than rebuilding the same functionality multiple times.
- Splitting large or complex apps into smaller, more maintainable parts. Multiple app builders and teams can then maintain their own functionality without making changes to the parent app.
As modules are a type of classic app, they support many of the same features. You can import or export modules using JSON, set permissions to restrict access, and create new releases.
Best practices
Modules are an efficient way to encapsulate reusable logic and UI elements. If overloaded, however, they can introduce hidden performance costs—especially when they load data, run logic, or render components that aren’t directly used by the parent app. When used correctly, modules don't have an impact on the performance of your app.
Keep the following best practices in mind when working with modules:
- Minimize hidden components: Avoid creating a module with a large number of hidden components. Hidden components must still be rendered and can have an impact on app performance.
- Be cautious with nested modules: It is possible to nest one module inside of another module. This does not have performance impacts, but it can make the module difficult to debug.
- Don't fetch or transform data that won't be used: Ensure that input and output queries are only running when necessary by configuring the run behavior. If your module loads data that’s not shown or needed in the parent app, move that logic out or behind a conditional.
- Utilize the Debug Tools: Use the Debug Tools to identify if a module is contributing excessive load time, query execution, or render cost—especially if performance seems fine in the parent app but slow overall.
- Module components contribute to app size: Retool separately executes each component inside your module. Including a component in a module does not prevent the component from impacting the app's performance.
- Follow app best practices: General best practices for building in Retool apply to modules. Refer to the web app best practices and the query best practices for more information.
Defer module evaluation
To enable this public beta, navigate to Beta > Settings and enable [Perf] Module deferred evaluation.
You can choose whether to defer module evaluation until it’s viewable using the [Beta] Defer evaluation until visible setting in the Inspector. When a "deferred" module is hidden (either ’hidden’ state is true, or it is in a hidden frame, or otherwise not being rendered), Retool defers the module’s initialization. When the module is shown, Retool invokes the initialization procedure that would typically happen during app startup.
If this setting is disabled, Retool initializes all modules on initial page load.
Limitations
Modules have the following limitations:
- Modules inherit custom CSS and preloaded custom JavaScript from the parent app, and these settings are unsupported for modules themselves.
- User permissions for modules must be the same as those for the parent app.
- Using modules inside List Views is not supported.
- While it is possible to create new releases of a module, all apps that contain the module use the live version. Different apps cannot use different versions of the same module.
Build a module
You can create a module from scratch, by cloning a module from a classic app, or by copying components to a module.
Create a new module
To create a new, empty module, navigate to the Apps tab in your organization and select Create > Module.
After creating a module, assemble components using the same methods you would use to build a classic app.
Add the module to a classic app
Add a module to your classic app in the same way you would add a component. Just like with components, you can reposition and resize modules on the canvas.
Click + in the left sidebar to open the Add UI tab. Switch to the Modules tab and then drag the module onto the canvas.
Once embedded within your app, you can return to editing the module by right-clicking on the module and clicking Edit module.
Export components to modules
You can also select one or more components and export them to a module from within the classic app editing experience. All the related logic, such as queries, variables, and transformers, are automatically included in the exported module.
To copy components to a module, select the components—click and drag or + click—and select Export to module.
Once the export is complete, Retool automatically replaces the selection with the newly created module.
Send data to and from the module
Once you've created your module, you can define it further with inputs and outputs. These enable your module to exchange data with the parent app and other modules.
Add inputs
You can pass in data inputs and query inputs to your module from parent apps or other modules.
For example, you could build a module that simplifies how hiring managers review job applicants. The parent app contains a Select component with the list of applicants. Then, add modules that enable the manager to view the total number of applicants, or view each person's portfolio. The modules can be reused in multiple classic apps without rebuilding the UI and logic. The examples in the following sections explain how to build this classic app and configure the data inputs and query inputs.
- Data inputs
- Query inputs
A data input is a property that classic apps can pass into modules. Use a data input when you want your module to reference a component on the screen, a variable, or a certain value.
From the module editor, add an input using the Module settings, found within the Inspector. Set the Type to one of the following values:
- Any
- String
- Number
- Boolean
- Enum
Choose from String, Number, Boolean, or Enum for type validation on your module input. Selecting a Type enforces stricter validation rules and displays a warning if the input type does not match what you selected. You can also define additional characteristics about the input, such as options for Enum, and default values for all types.
Changing the type of the module input does not alter the actual value passed into the module—invalid values are still passed through as-is. The validation only affects how the input fields behave and display warnings.
If you set the Type to Any, Retool performs no validation on the module input.
Once your module is configured, navigate to the classic app editor. Click on the module and add the corresponding input in the Content section of the module Inspector.
Example
For example, you could create a module for your applicant review classic app that displays a preview of a selected candidate's portfolio by using an IFrame component.
To create this module, complete the following steps in the module editor:
- Add an IFrame component to the canvas.
- Open the Module settings and add an input.
- Update the Type to String. Optionally set the input Description and Default value. If the Default value is not of the correct type, you will see an error.
- Select the IFrame, and set the URL to
{{ input1.value.website }}.
To add this module to the parent app, complete the following steps in the classic app editor:
- Drag the module onto the canvas.
- Set the module's input to
{{ select1.selectedItem }}.
Query inputs allow you to pass queries into modules from parent apps. The module can then trigger these queries directly, calling them in event handlers and as success and failure trigger queries.
Though query inputs are not defined in modules, you can view them in the query editor and add event handlers to them.
From the module, add a query input using the Module settings, found within the Inspector. From the classic app, click on the module and add the corresponding input in the Content section.
Example
For example, you could create a module for your applicant review classic app that queries a dataset of job applicants to find the total number and display that number to the user using a Statistic component.
To create this module:
- Create a query that finds the total number of applicants.
- In Module settings, add a query input, which automatically creates a query that is triggered upon the input of the parent app. Set the success event of
input1toquery1. - Add a Statistic component to the canvas.
- Update the Statistic component settings to use
{{ query1.data.id }}as the value.
To add this module to the parent app:
- Drag the module onto the parent app's canvas.
- Set the module's input to
getApplicants, a query that retrieves the full list of applicants.
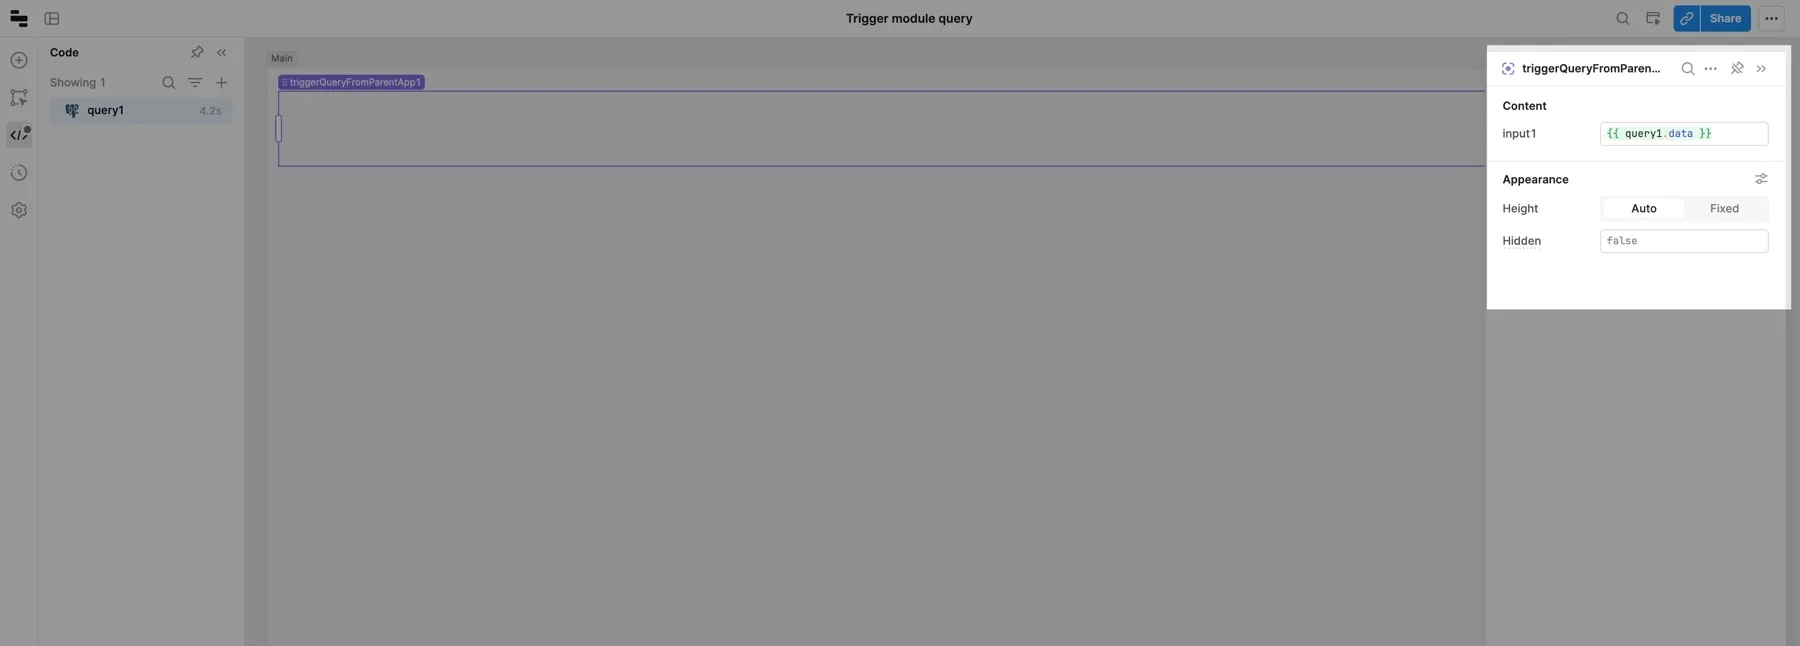
Trigger module queries from parent apps
Use query inputs to trigger queries within a module, not from the parent app defining the query. If you need to trigger a module's query from its parent app, you can use data inputs.
- In your module, create a data input. You'll use this input to watch for changes from the parent app.
- In your module, use the Query JSON with SQL resource to write a query which runs automatically when your data input changes. The result of this query won't be used. For example, given
input1as a data input, the query could be:
select id from {{ input1.value }}
- In your module, define the query you want the parent app to trigger. In the Query JSON with SQL query, trigger this query as a Success event handler.
- In the Inspector of your parent app, pass data to the module's data input. To trigger the module query based on the result of a query in the parent app, set the data input to
{{ parentQuery.data }}. The module then watches for changes toparentQuery.data.
To test out this behavior, download and import the JSON of an example module using data inputs.
Test inputs with sample values
Because module inputs are controlled by the parent app, you can pass through test values to preview your module. When you select the module container, the right panel of the classic app IDE shows a Test inputs section. There, you can test your module's behavior by giving expected values for each of your inputs.
Add outputs
Outputs are properties that parent apps can reference. Outputs are the only way to pass information from your module to a parent app—no other data from within your module is accessible to it. Module outputs must be formatted as strings.
From the module, add an output using the Module settings, found within the Inspector.
For example, imagine creating a search field that can be reused between all your classic apps. To do so, create a module and add a text input field. Create an output, and set the output1 value to {{ textInput1.value }}.
To use the module to search a table within a parent app, drag the module onto the canvas. Select the Table, and set the Search term to {{ moduleSample1.output1 }}.
Customize layout
You can also configure the layout of your module using the Spacing and Appearance sections of the Inspector:
- Height: Whether the height of the module is automatic or fixed.
- Margin: Whether the module should have a normal margin or none.
- Overflow: Whether overflow content in the module is hidden or accessible via scroll.
When you configure these settings inside the module editor, the settings apply as the default values only to new module instances. Existing module instances are unchanged. You can also override these settings for a single module instance by changing them in the Inspector of the classic app that contains the module.