Amazon ECS Installation
Retool does not recommend deploying to physical machines for team development and deployments. Consider deploying to managed container orchestration service such as Amazon ECS.
The following example focuses on using Amazon ECS for educational purposes.
Requirements
- Retool Enterprise License Key
- AWS CLI
- An Amazon IAM user with administrator privileges
- A registered domain configured as a Route53 Hosted Zone
The following steps are outlined in the Retool Docs here. The following lab covers:
- Create an Amazon Network with VPC, Subnets, Internet Gateway, NAT Gateway.
- Deploying Retool using Retool CloudFormation template for private subnets.
- Create certificate in Amazon Certificate Manager
- Updating Amazon Route53 with A and CNAME Record
- Update the ELB with ACM configuration details and create a HTTPS listener.
- Update Security Group to allow 443 traffic through.
Create Network Infrastructure
This lab will leverage the Amazon VPC Wizard to setup the following:
- 1 VPC
- 2 public subnets, 2 private subnets
- 1 Internet Gateway
- 2 NAT Gateways
- Routing tables for public and private subnets
Go to the AWS Management Console > VPC > Create VPC. Select VPC and more.
- Specify a VPC Name as
retool-ecs-training. - Specify an IPv4 CIDR block range,
10.0.0.0/16.
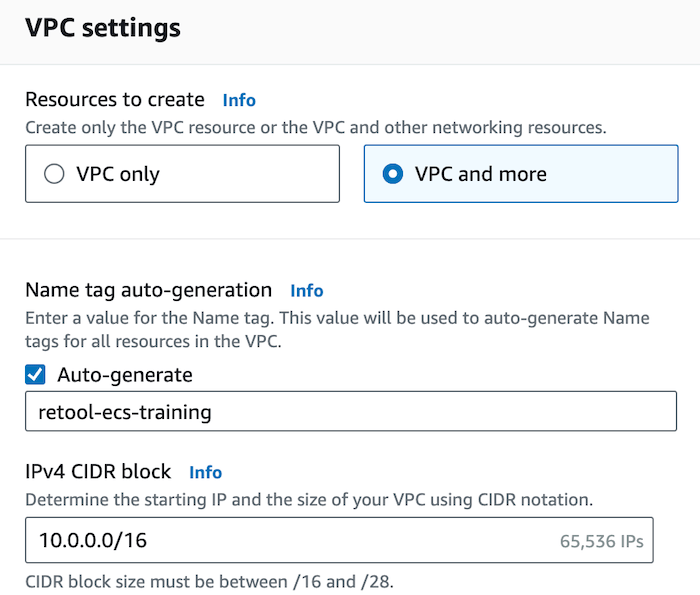
- Specify 2 for the Number of Availability Zones (AZs), 2 for the number of public subnets, 2 for the number of private subnets.
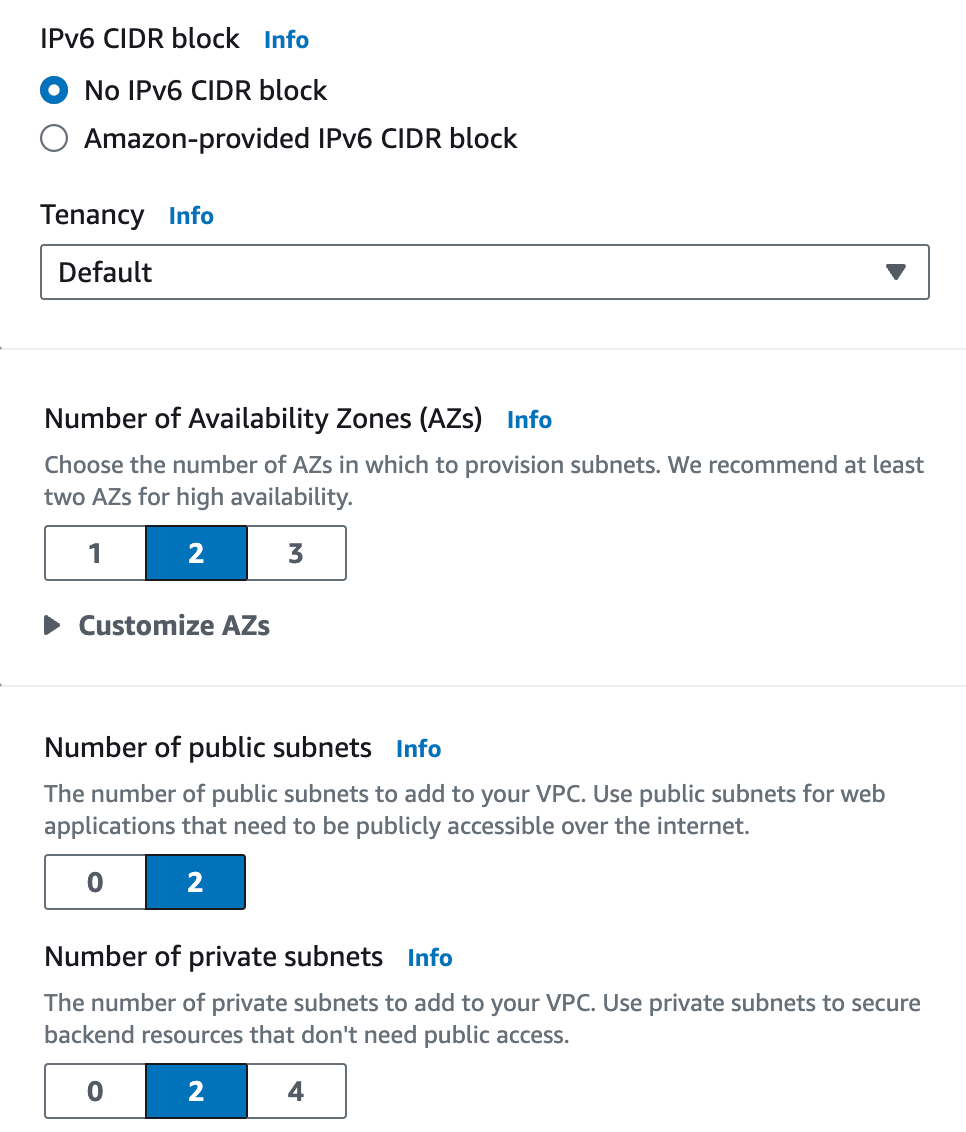
- Specify the subnet range as
10.0.1.0/24,10.0.2.0/24,10.0.3.0/24and10.0.4.0/24in public and private subnets as shown in the following figure. - Specify NAT gateways as 1 per AZ and None for VPC endpoints.
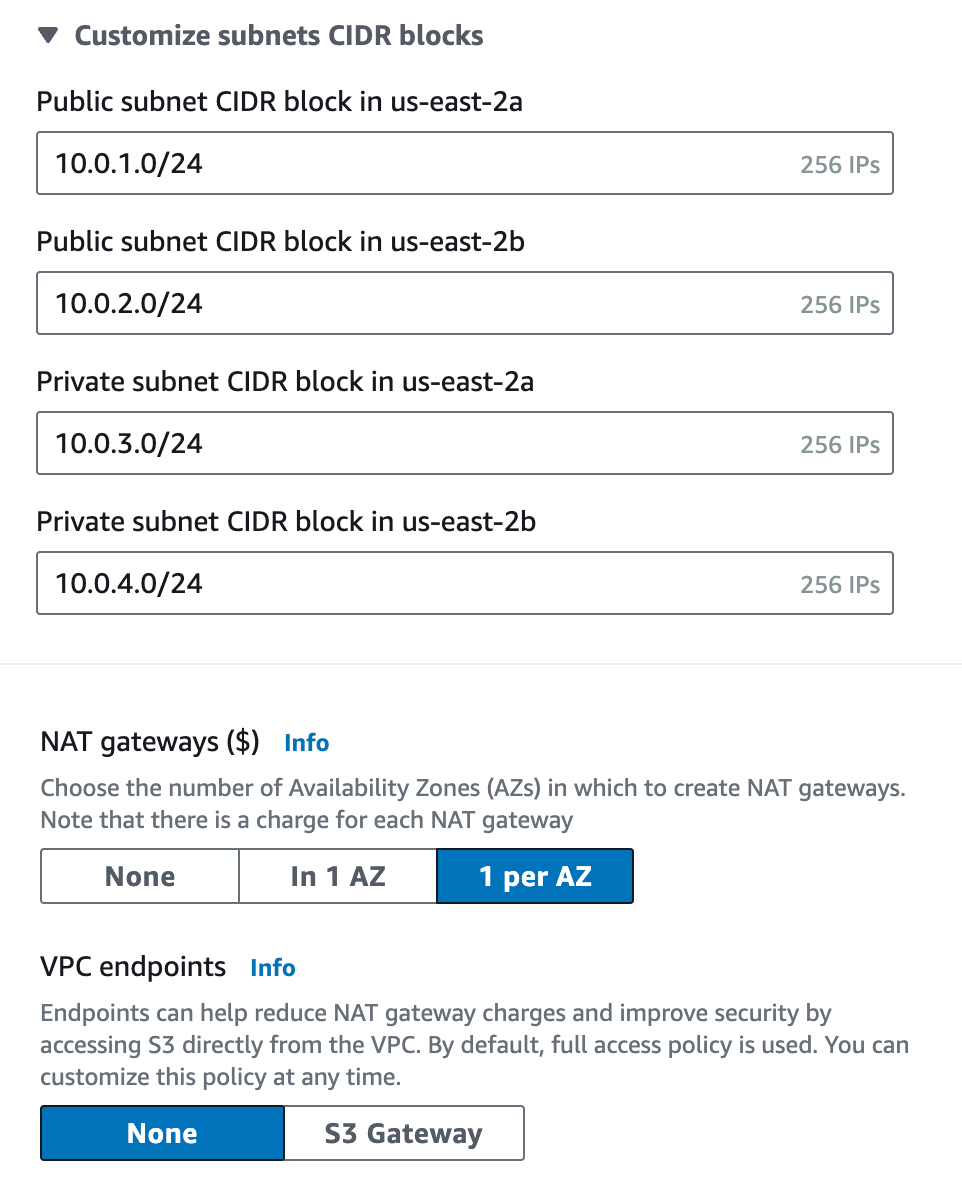
- Leave the DNS options default values.
- On the right-hand side, the VPC, Subnets, Route tables and Network connections are displayed. Confirm your configuration is similar.

- Select Create and the following display shows the VPC and supporting networkg artifacts creation status.
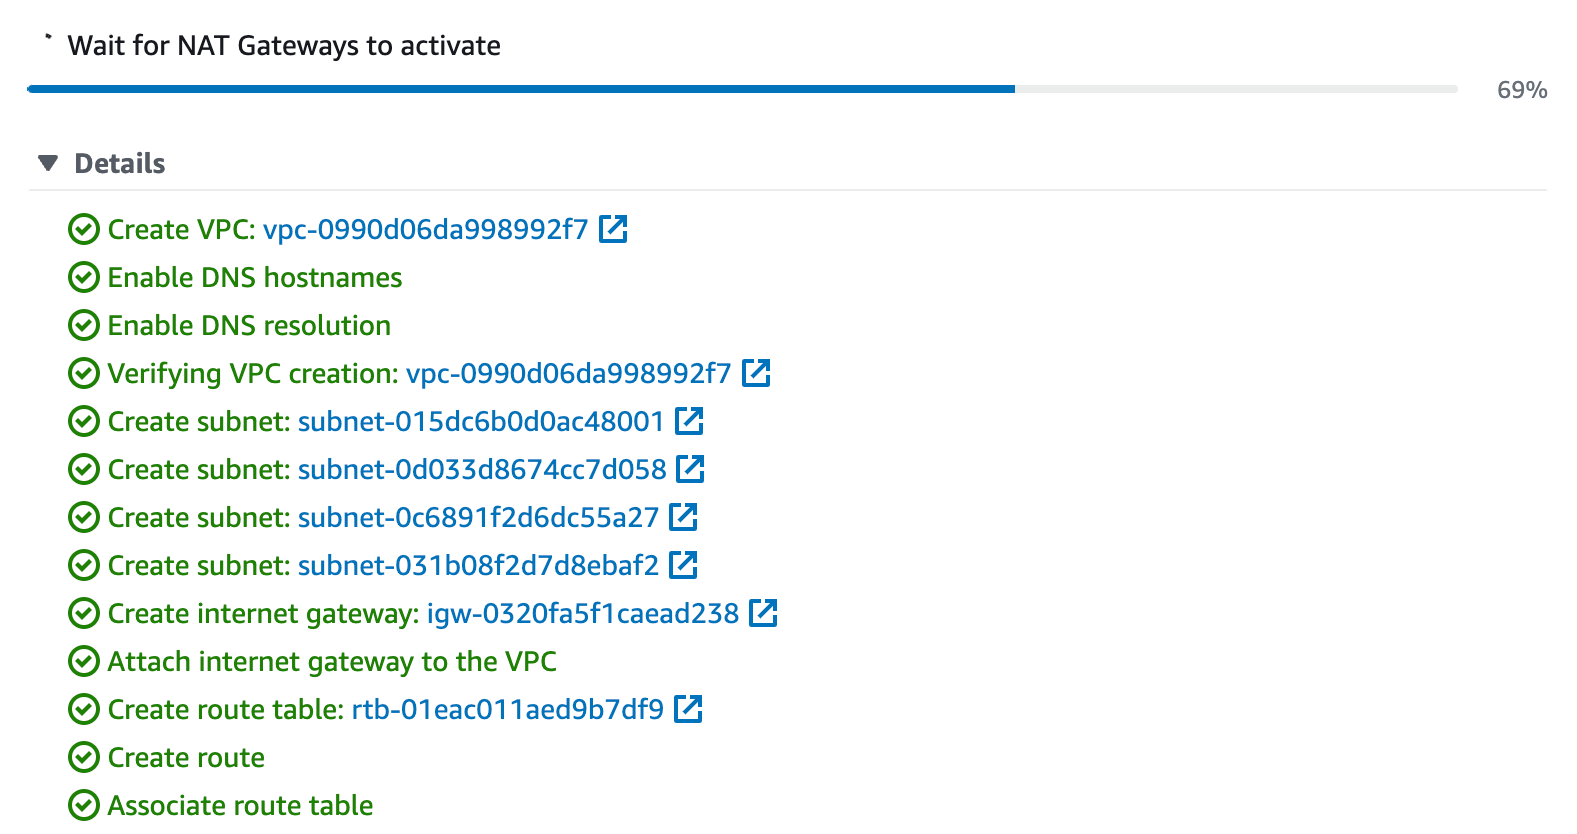
When successfully completed, the VPC will display with a VPC ID as shown in the following figure. This will be required during the Cloud Formation step.

Create Amazon ECS Cluster
This step focuses on creating the Amazon ECS Cluster that Retool will run within.
- Select Amazon Elastic Container Service in the AWS Management Console.
- Select Create cluster.
- Enter a Cluster name,
retool-ecs-training, default namespace (optional) and make sure AWS Fargate (severless) is selected.
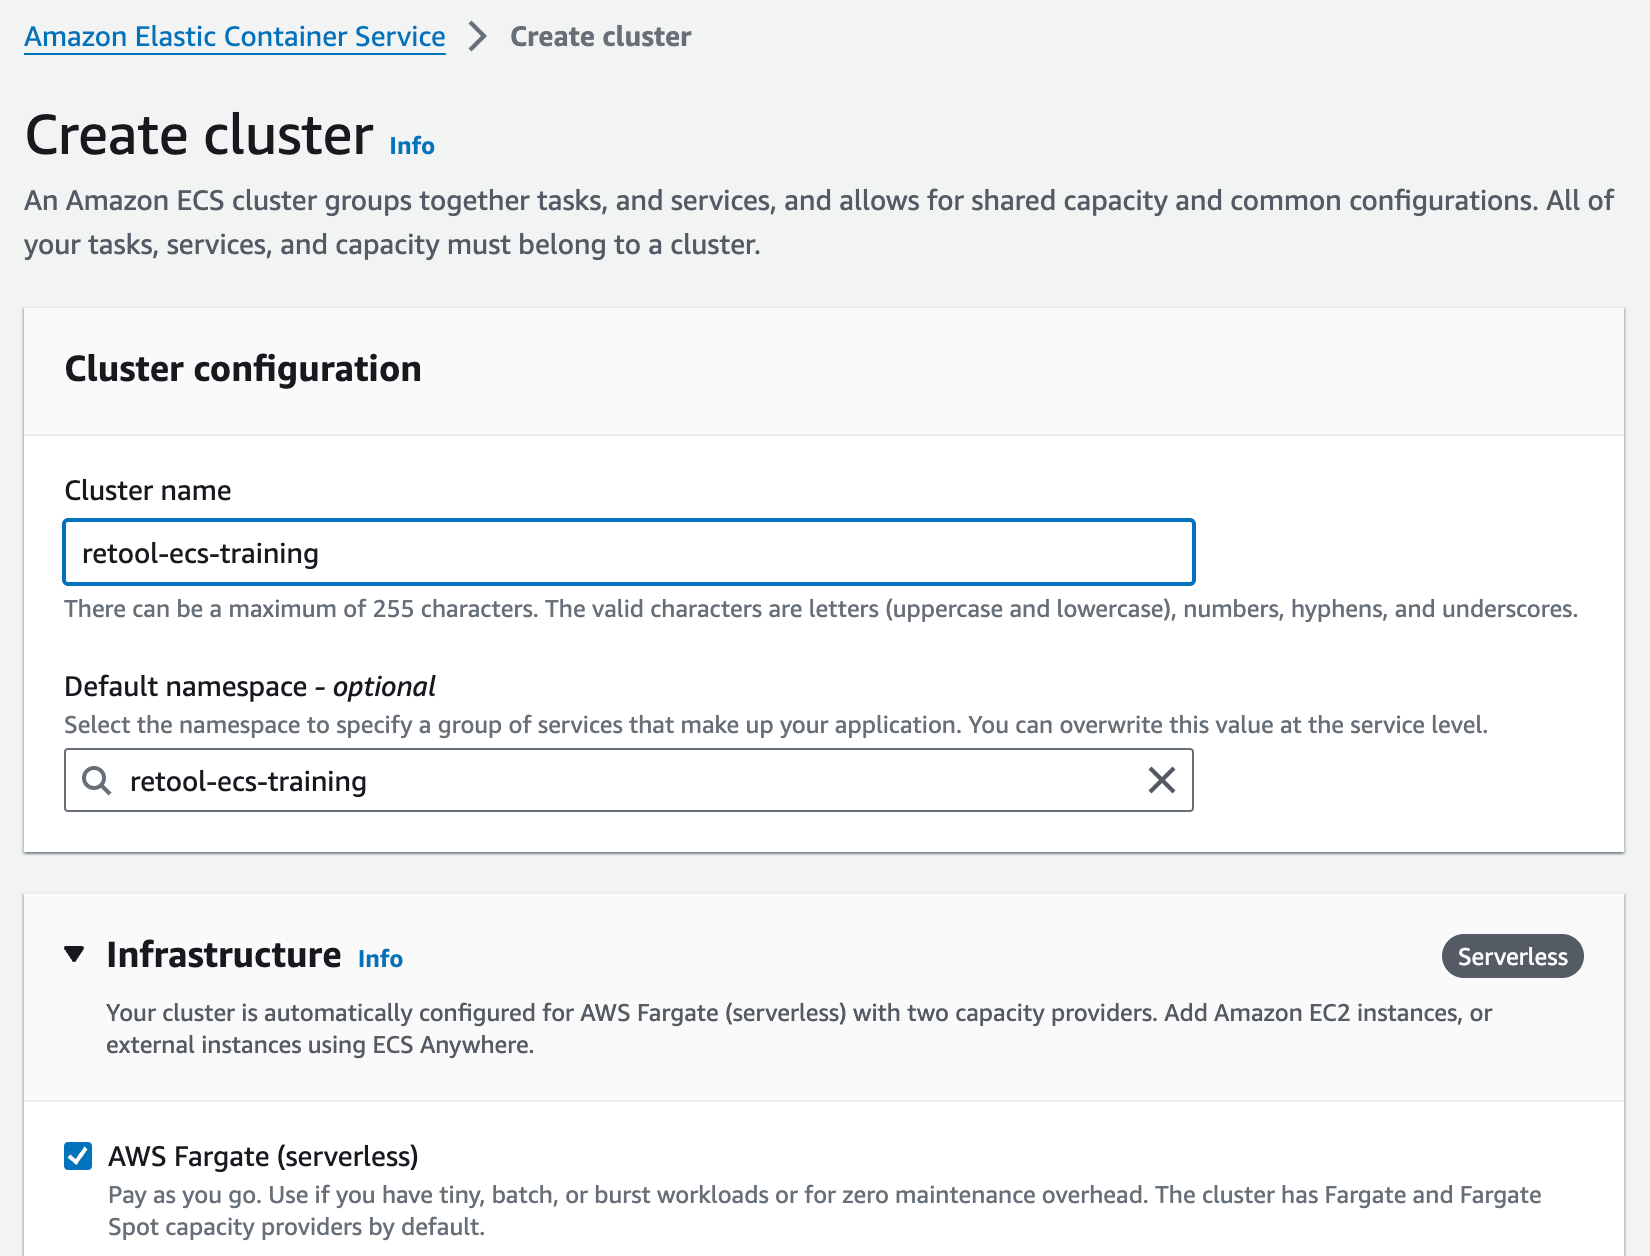
- Select Create and verify that the cluster shows in the Clusters list.

Run CloudFormation Template
This step will focus on running the private subnet CloudFormation template. Open up a terminal and execute the following command:
curl -L -O  https://raw.githubusercontent.com/tryretool/retool-onpremise/master/cloudformation/fargate.private.yaml \
&& mv fargate.private.yaml fargate.yaml
- Edit the template to add your Enterprise License Key in the
RetoolTaskandRetoolJobsRunnerTaskunder the Environment sections.
Environment:
...
- Name: LICENSE_KEY
  Value: "xx-yy-zz-aa"
-
Once edited, go to AWS Management Console > Amazon CloudFormation and specify Create stack > With new resources. Select Upload a template file and Choose file. Select the modified
fargate.yaml. -
Select Next. Specify Stack name
retool-ecs-training-stack. Then specify the following parameters:- Cluster =
retool-ecs-training - DesiredCount =
2 - Environment =
Staging - Image:
tryretool/backend:latest - LoadBalancerSubnetId =
select the 2 public subnets created in VPC setup - MaximumPercent =
250 - SubnetId =
select the 2 private subnets created in VPC setup - VPCId =
select the VPC created in VPC setup
- Cluster =
-
Select Next.
-
Accept the default and select Next.
-
Accept the defaults, select the checkbox
I acknowledge that AWS CloudFormation might create IAM resources.and select Submit.
The display will show the status of events, resources and eventual output. When successfully completed, the Outputs tab will display the ECSALB value. This is the ALB URL.
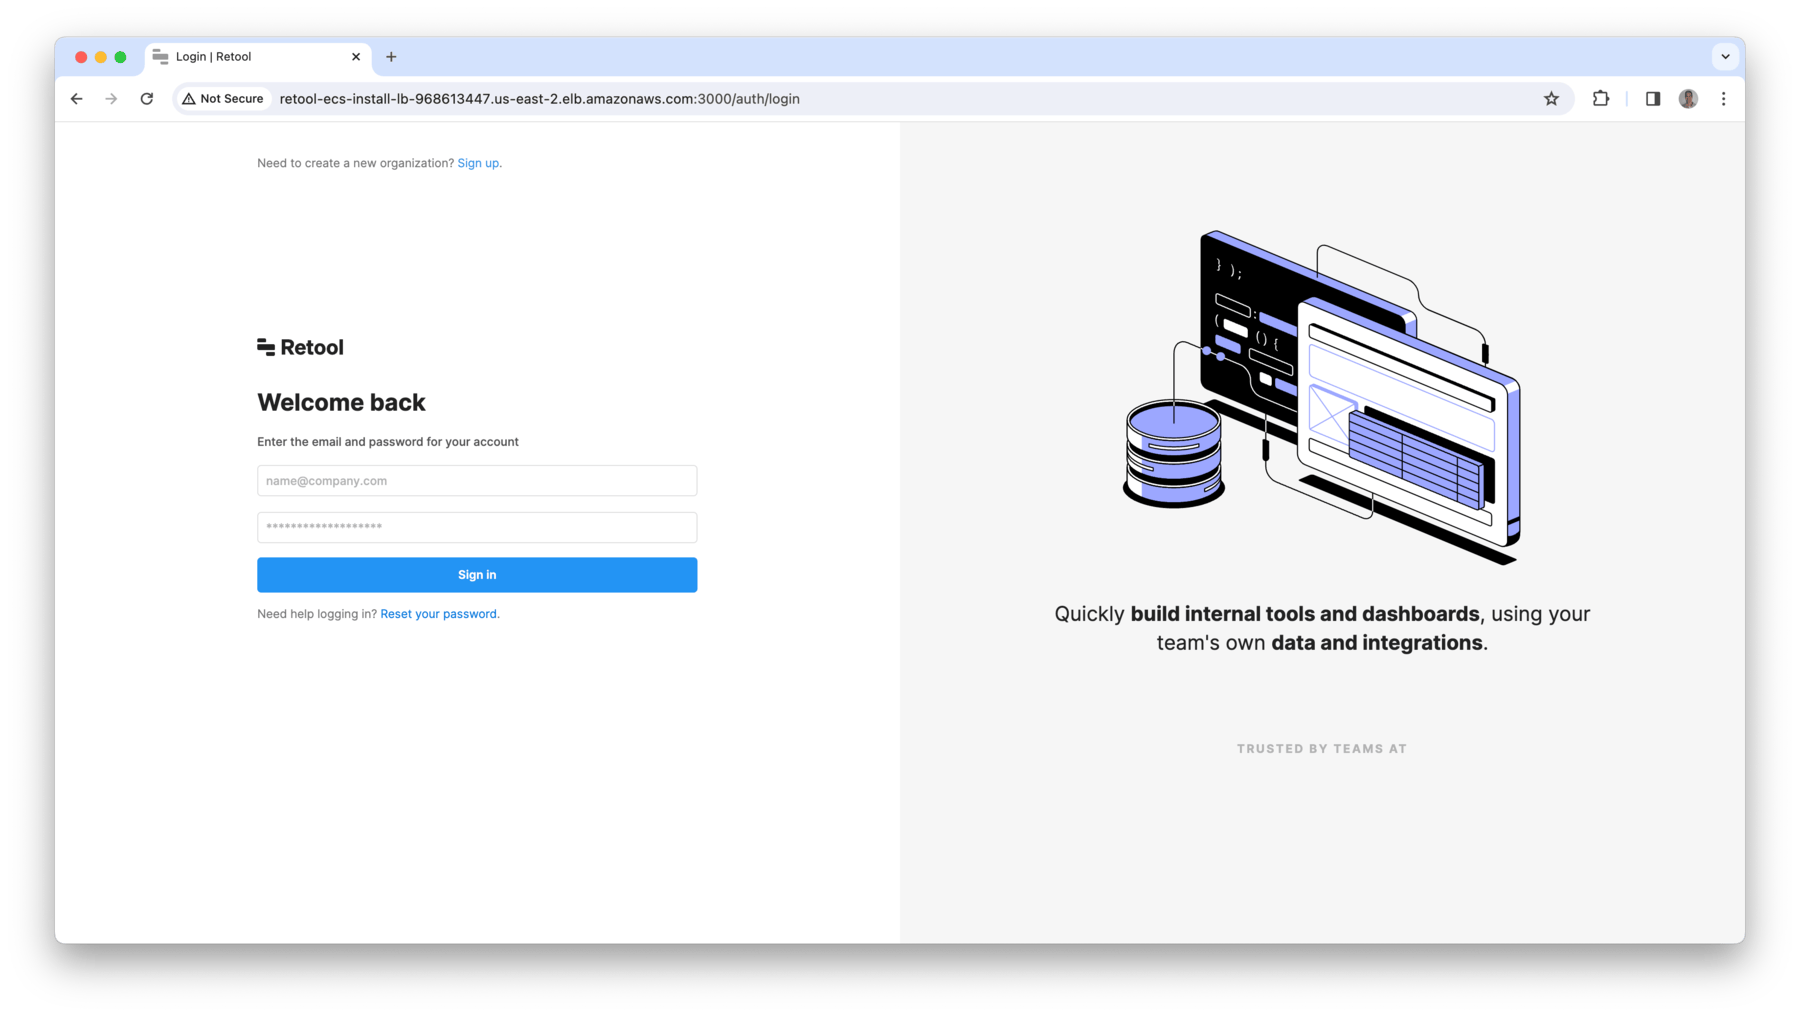
- Test the url by opening a browser and entering:
http://YOUR_ALB_DNS_URL:3000
- Retool login screen should appear as shown below.
Update Amazon Route53 with A Record
Using the ECSALB value, an A Record needs to be created in Amazon Route 53 under an existing Hosted Zone.
- Go to Amazon Route 53 > Hosted Zone > [Select your Zone] > Create record.
- Specify under Record name a wildcard,
*. - The Record type should be A - Routes traffic to an IPv4 address and some AWS resources.
- Enable the Alias switch and then populate with Alias to Application and Classic Load Balancer, the AWS region you are running in, and then select the matching load balancer as shown in the following figure.
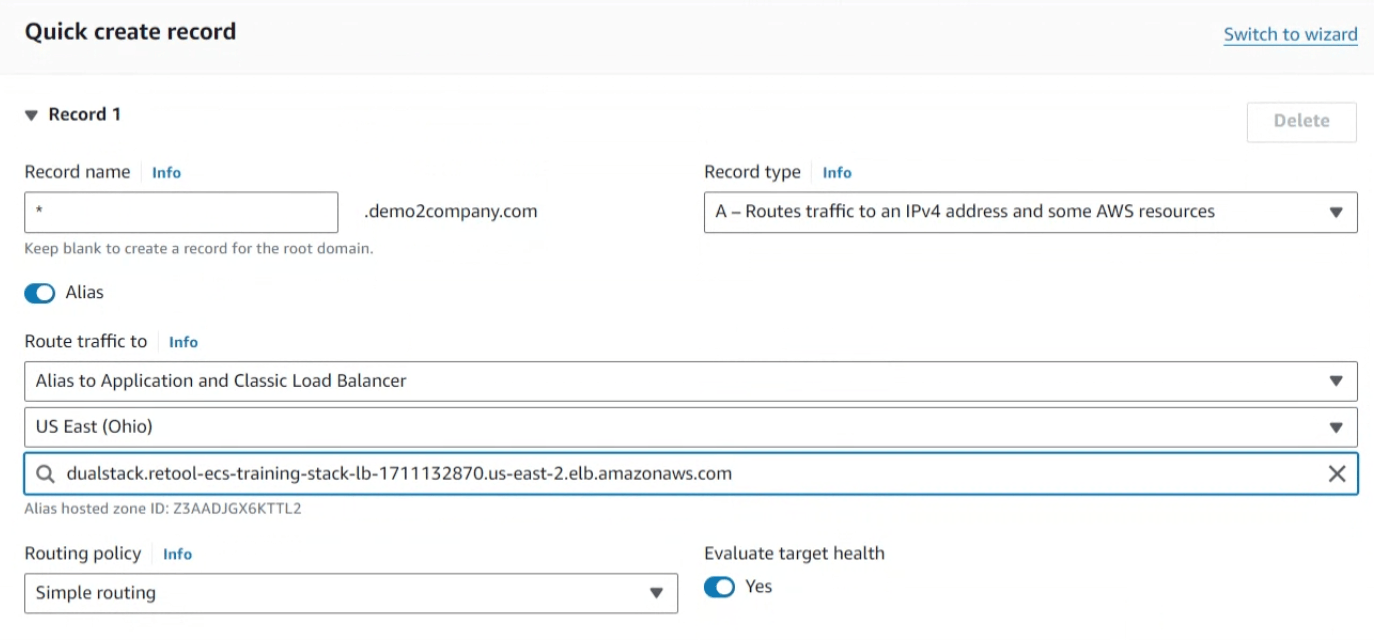
- Leave the remaining defaults and select Create record.
Create ACM Certificate and update Route53 with CNAME record
Next a public SSL/TLS certificate needs to be created matching the domain defined in Amazon Route 53.
- Go to AWS Management Console > AWS Certificate Manager.
- Select Request a public certificate and Next.
- Specify a Fully qualified domain name using what you have in the Amazon Route53 Hosted Zone.
- Select DNS validation. The following image shows the wild-card domain of (e.g., *.demo2company.com) and a Validation method of DNS validation.
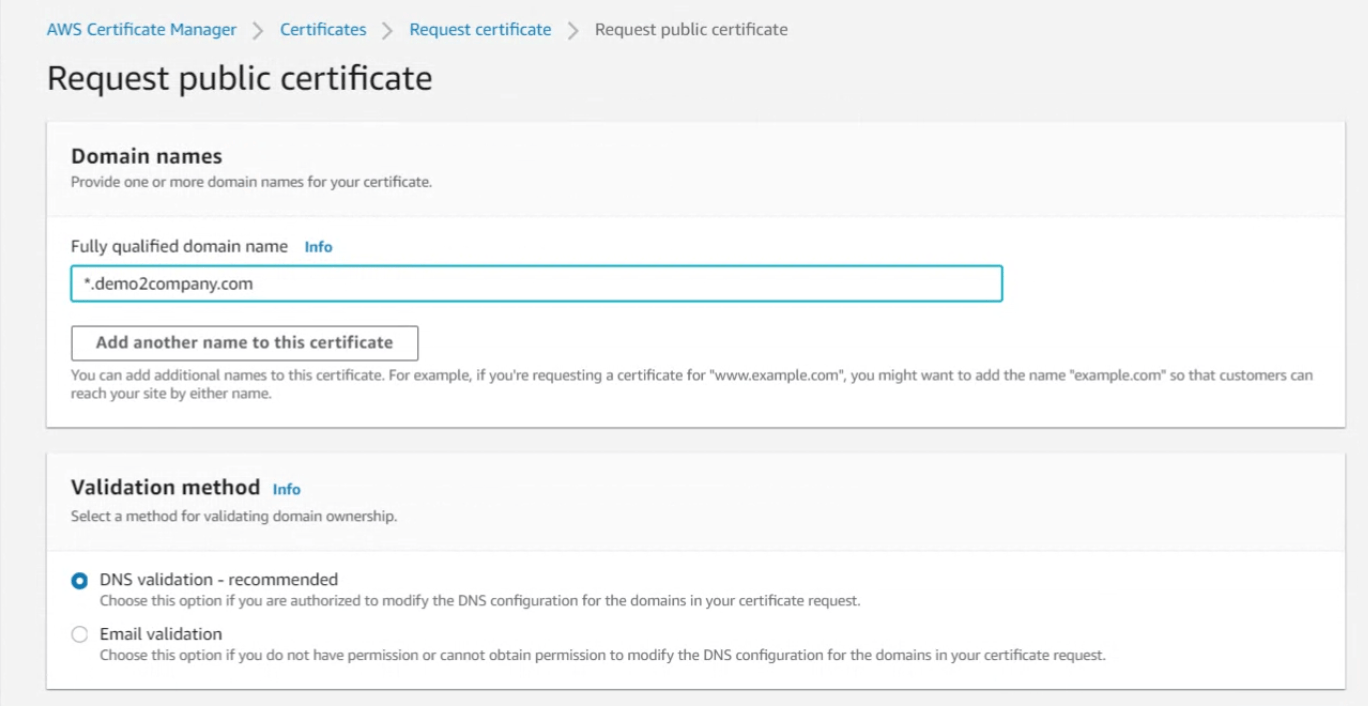
- Select Request and the status will change to
Validating. - Select Create records in Route 53. This will create a CNAME entry in Route53 with ACM details allowing ACM to validate the DNS. Once this is selected, it could take about to 30 minutes to complete the validation.
Update ELB with ACM and HTTPS Listener
Once the DNS Validation is complete, we need to update the load balancer created by CloudFormation with a HTTPS Listener.
- Go to EC2 > Load balancers. Select the applciation load balancer created by the CloudFormation template and then examine Listeners.
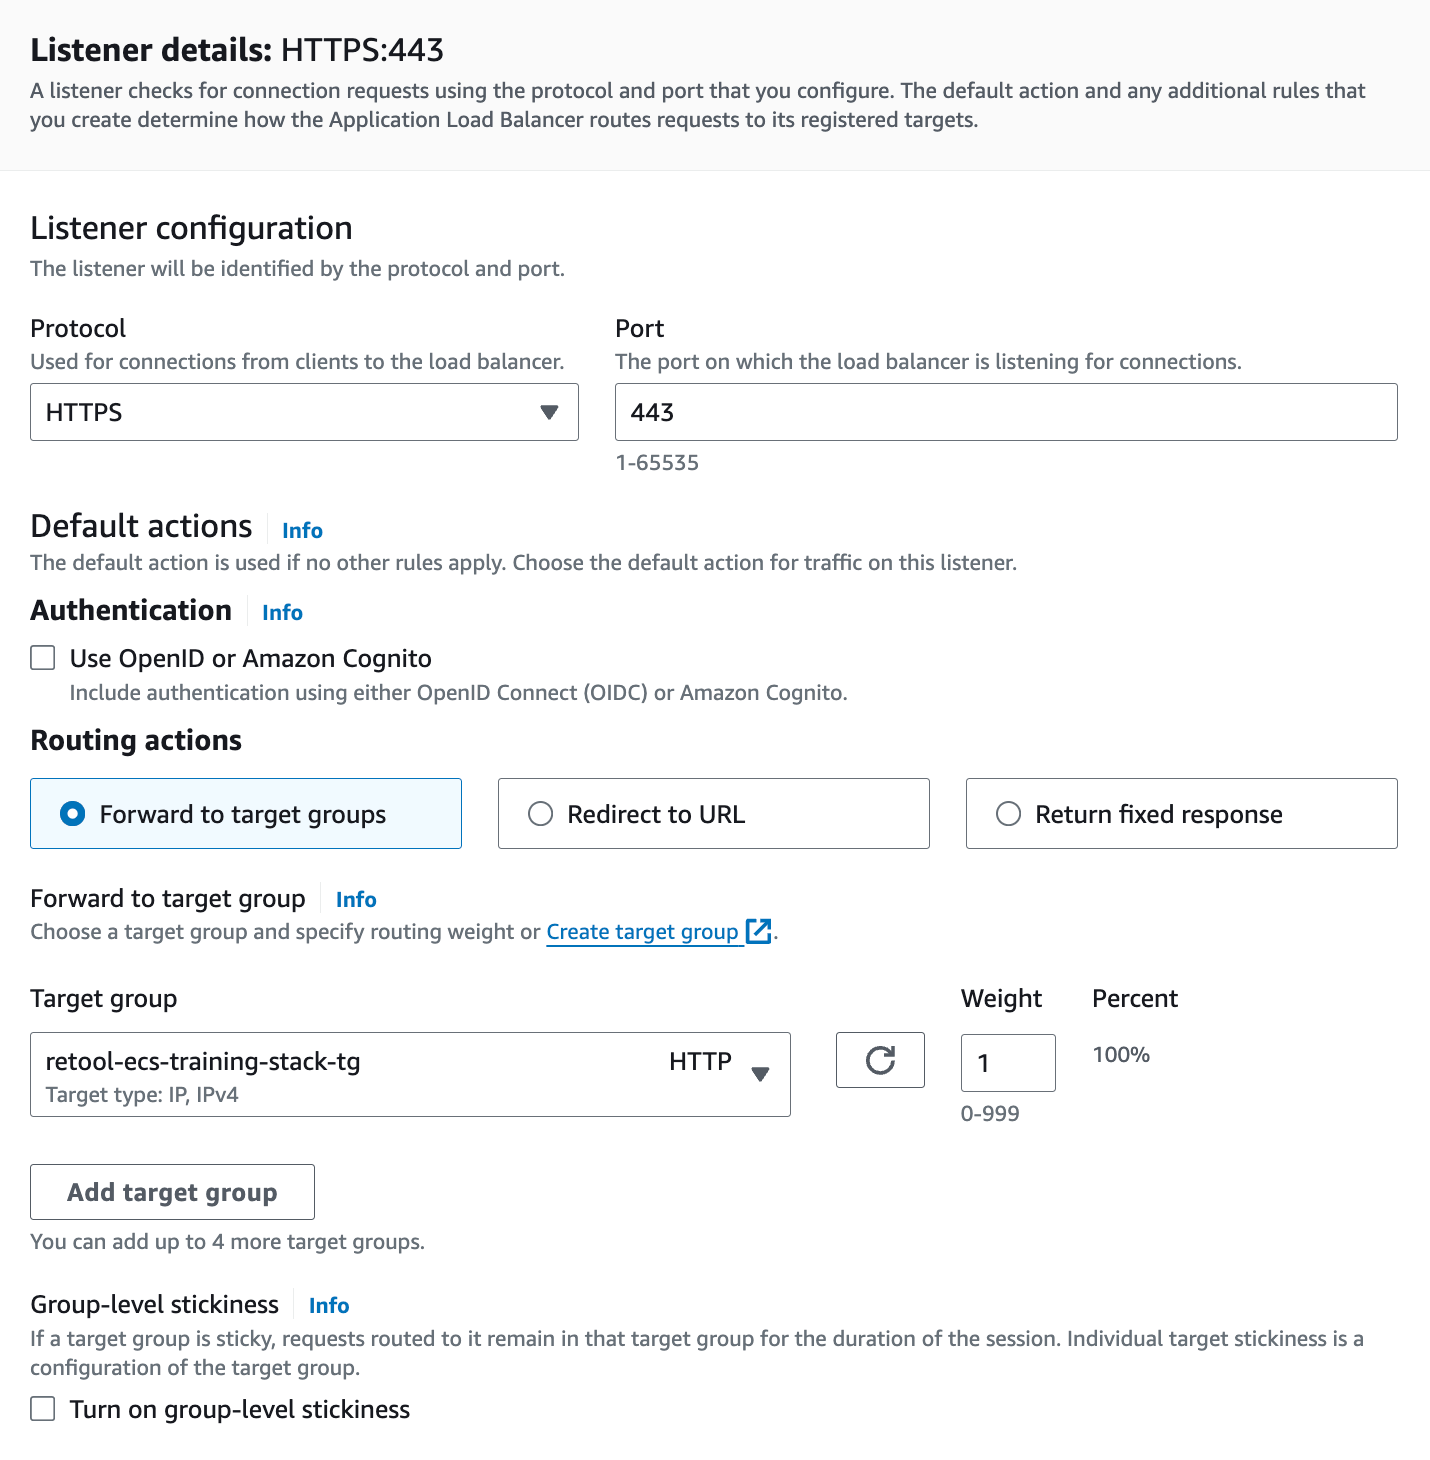
- Select Add listener and change Protocol to HTTPS. This will change the port to 443.
- Select the target group created by the cloud formation template.
- Under Default SSL/TLS server certificate, specify a Target source of From ACM. Select the certificate created by ACM.
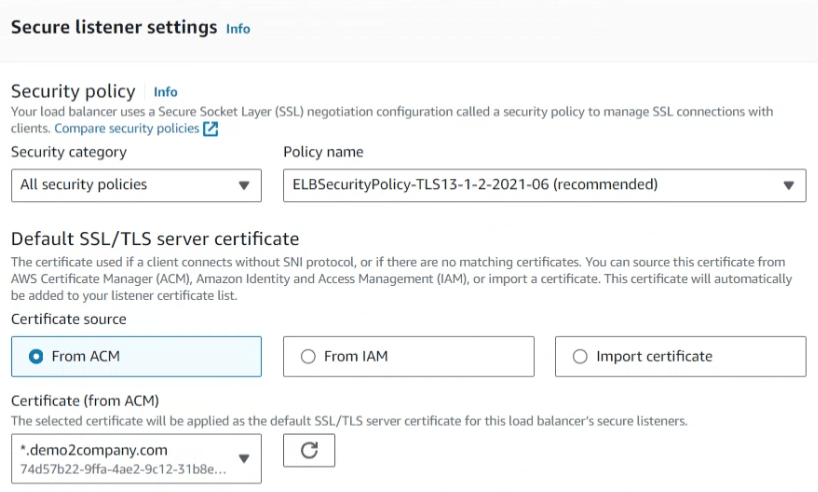
Once completed, the HTTPS listener will be created.
Update Security Group
Finally, to complete the configuration process, we need to update the Application Load Balancer Security Group. Currently only port 3000 traffic is allowed.
- Select the security group and add an inbound rule.
- Specify HTTPS and a Source of Anywhere (0.0.0.0/0).

- Once complete attempt to access Retool by going to:
https://test.YOUR_DOMAIN_HERE
This will test your wildcard definition (should be able to replace test with any subdomain) and that it routes to a secure endpoint using the ACM certificate to enable SSL/TLS.
Cleanup of Retool Installation
For the Amazon ECS CloudFormation installation, the majority of the cleanup activity is left to Amazon CloudFormation and deletion of the stack. Because we manually created an HTTPS Listener, it is necessary to remove that first, to allow for a clean deletion of the stack.
Delete the HTTPS Listener
- Go to Amazon EC2 > Load Balancers.
- Select the Application Load Balancer created by Amazon CloudFormation.
- Select Listeners, select the HTTPS/443 Listener and Actions > Delete listener.
- Confirm and select Delete.
Delete the CloudFormation Stack
- Go to Amazon CloudFormation.
- On the Stacks page, select the Stack you created.
- Select Delete.
- Confirm and select Delete stack.