Retool Mobile quickstart
Learn about the fundamental concepts of Retool Mobile.
This guide serves as an introduction to Retool mobile apps that run natively on iOS and Android. It covers many of the concepts and terminology you would come across as you build mobile apps. After reading this page, you should have a good understanding of the fundamentals for building Retool mobile apps.
Assemble the interface
A Retool Mobile app's user interface is comprised of screens and components. These interface elements function as objects with internal state.
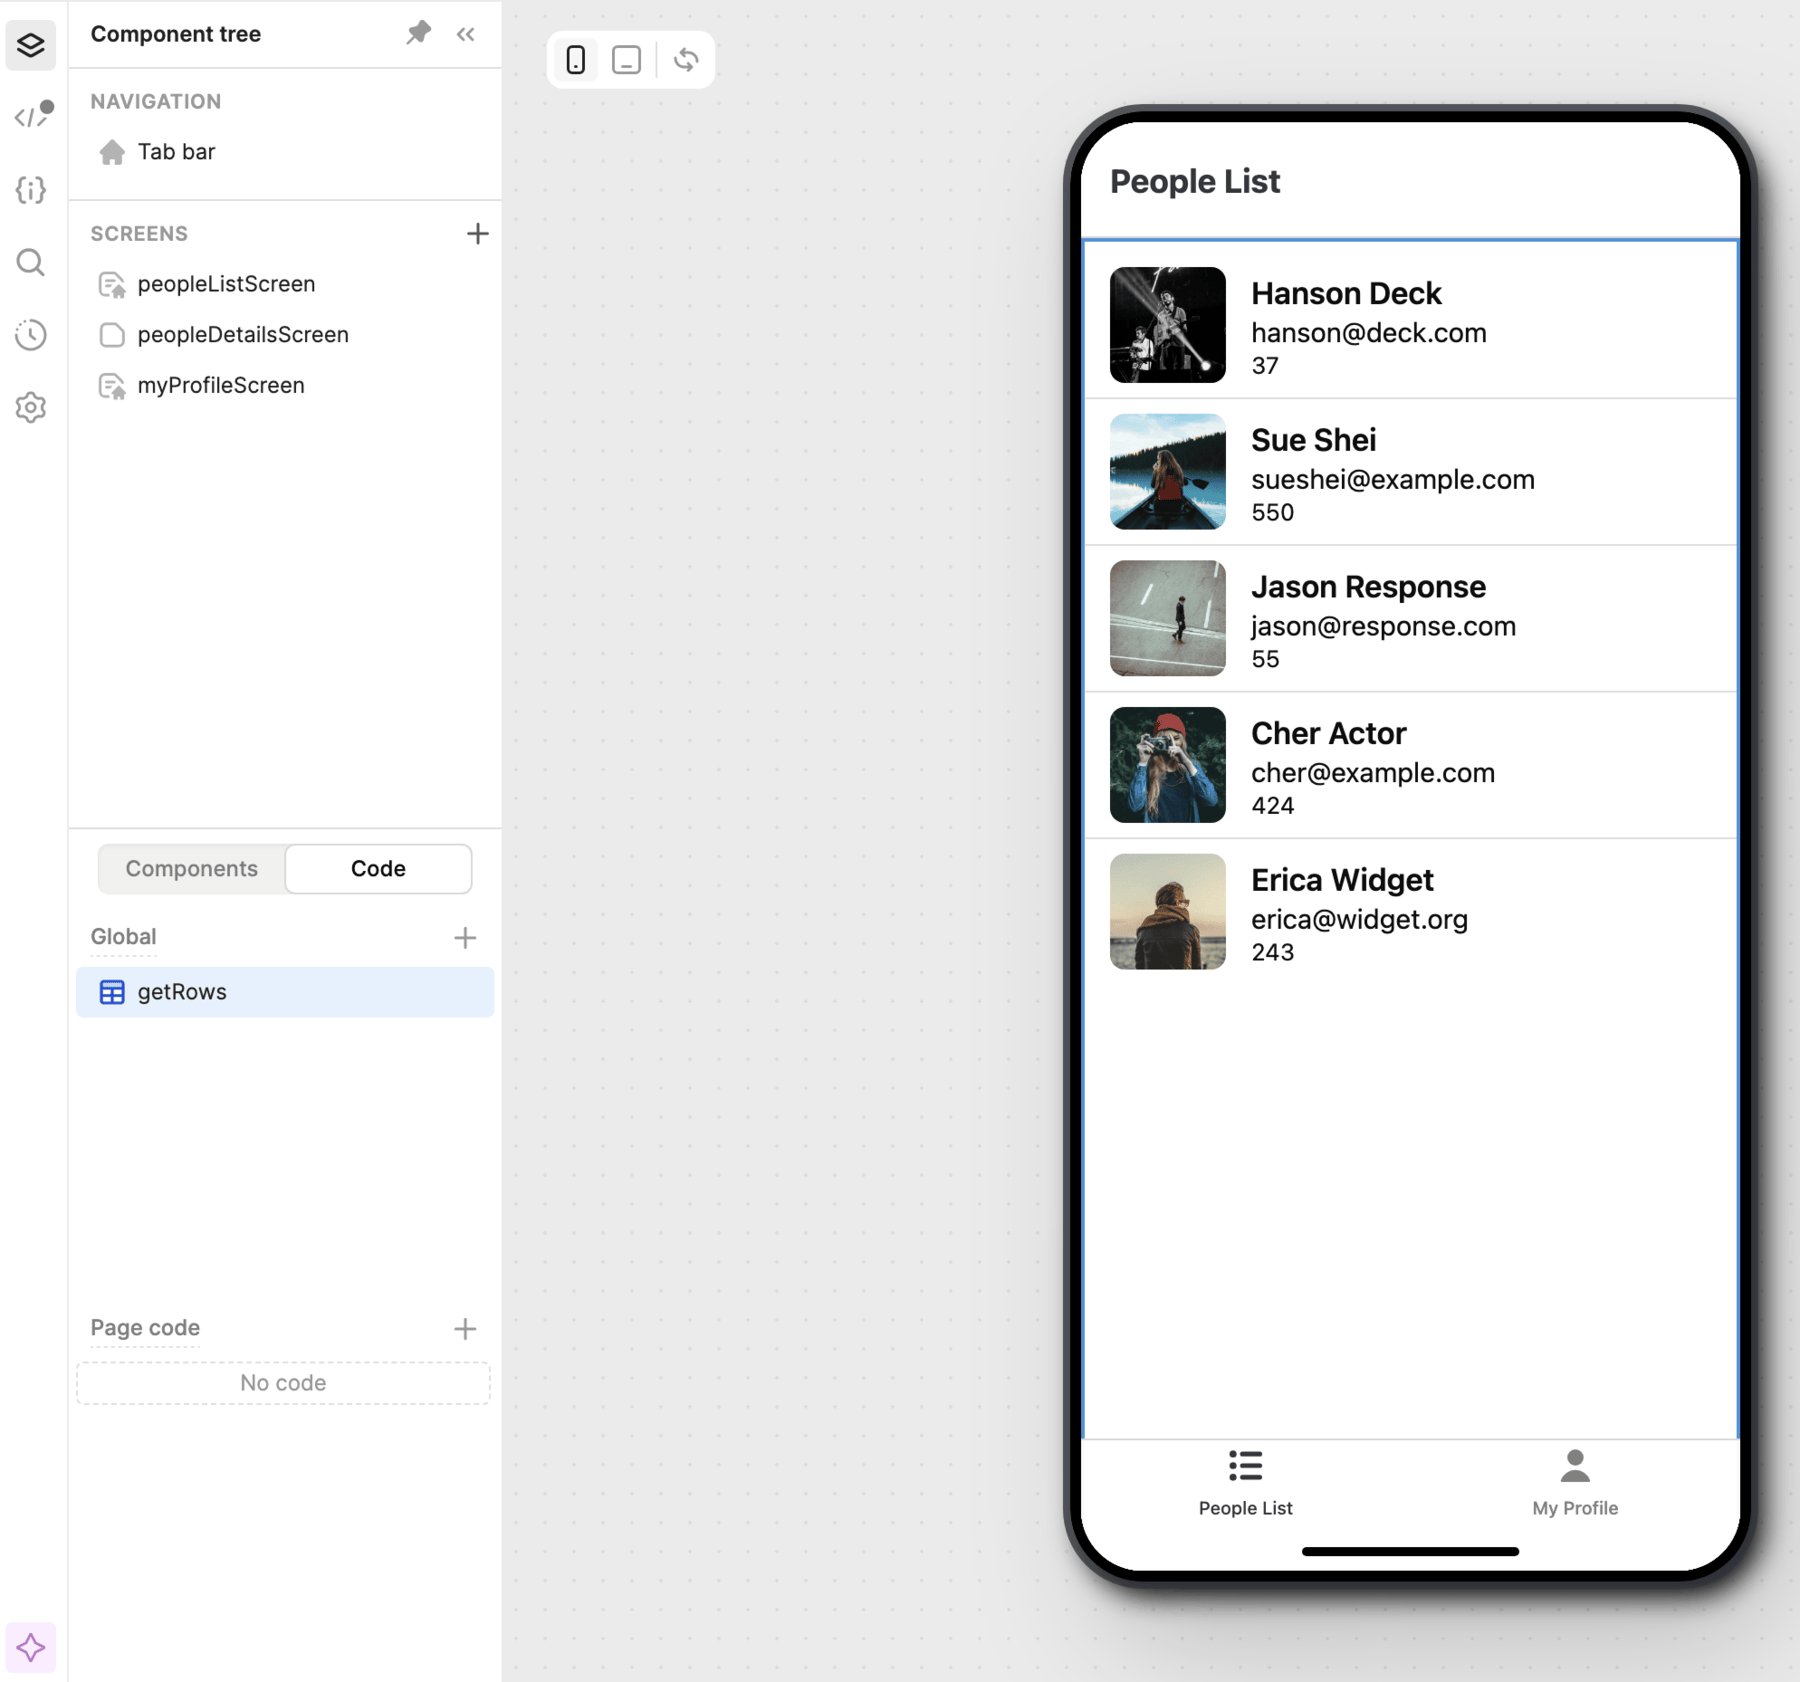
- Screens are separate sections that contain their own code and components. Users navigate between screens, which are often used for distinct use cases. For example, a customer support app might have separate screens to view a list of customers and details of a selected customer.
- Components are interface elements, such as a text input field or a button, with which users interact.
Retool Mobile app screens function in much the same way as pages in Retool apps.
Retool exposes properties, methods, and events with which you can interact. As you interact with components, their properties change. For example, entering text into a Text Input component changes its value property value.
You also write code that interacts with data, transforms values, or control behavior using JavaScript methods. For example, use setValue('Jenny Appleseed') to set the value property value of a Text Input component to Jenny Appleseed.
Components
You build mobile apps using the app IDE for Retool Mobile, Retool's drag-and-drop app building web interface. You use the app IDE to:
- Visually assemble the mobile app interface.
- Write queries to interact with data.
- Configure actions based on user interactions.
- Share apps directly with users.
Screens
Retool only evaluates a screen's objects when the screen is currently in view. This allows for apps to serve multiple functions without impacting performance.
The Screens tab contains a list of screens within the app. The default screen is the one that first loads when launching the app. You can explore and manage all screens, change the default screen, and view more details.
Screens also function as modals and sheets, providing a number of ways for which users can interact. You can optionally configure screens with actions—buttons in the top bar that trigger event handlers
Tab bar
The tab bar is the primary navigation element in mobile apps. You specify which screens to include and they appear as selectable tab items. You can also customize the tab item's label and icon. Users then tap to navigate to each screen.
Global and screen scopes
Apps use global and per-screen scopes for components and code.
- Globally scoped objects can be referenced across multiple screens. Retool continually evaluates globally scoped objects regardless of the screen currently in view.
- Screen-scoped objects can only be referenced within the same screen. Retool only evaluates screen-scoped objects when the screen is currently being viewed.
Globally scoped objects
You can create Global code (e.g., resource queries or variables), which all screens can reference. Each screen can interact with globally scoped code to trigger queries, set variable values, etc. For example, if you were building a customer support app then you could use a single globally scoped query to retrieve customer information rather than duplicate the same query across multiple screens.
You can drag code to either Global or Screen to change its scope. You can also move code across screens using the Move to screen contextual menu action.
All screens and their contents can reference globally scoped objects. Globally scoped objects, however, can only reference other globally scoped objects. For instance, a globally scoped query cannot reference a property for a component in a screen.
Screen-scoped objects
All code and components within a screen are screen-scoped, and cannot be referenced by other screens. If a screen contains code or event handlers that would run on load, these run whenever you navigate to the screen.
Globally scoped and screen-scoped code and components.
Connect interface elements together
Most component properties are editable. You configure them in the IDE with either static values (string, number, boolean, array, and object) or reference other component values using {{ }} embedded expressions, similar to the use of template literals.
You reference property values using dot notation. For instance, you can select an item from the inventory list to get more details. The Image component value is set to {{ itemCollection.selectedItem.image }}, which updates whenever you change the selection.
Use JavaScript expressions for values��
Retool performs string interpolation and evaluates {{ }} embedded expressions as JavaScript. As a result, you can write JavaScript code—that evaluates and returns a value synchronously—almost anywhere. This enables you to dynamically set property values using transformations or conditional logic to build complex apps.
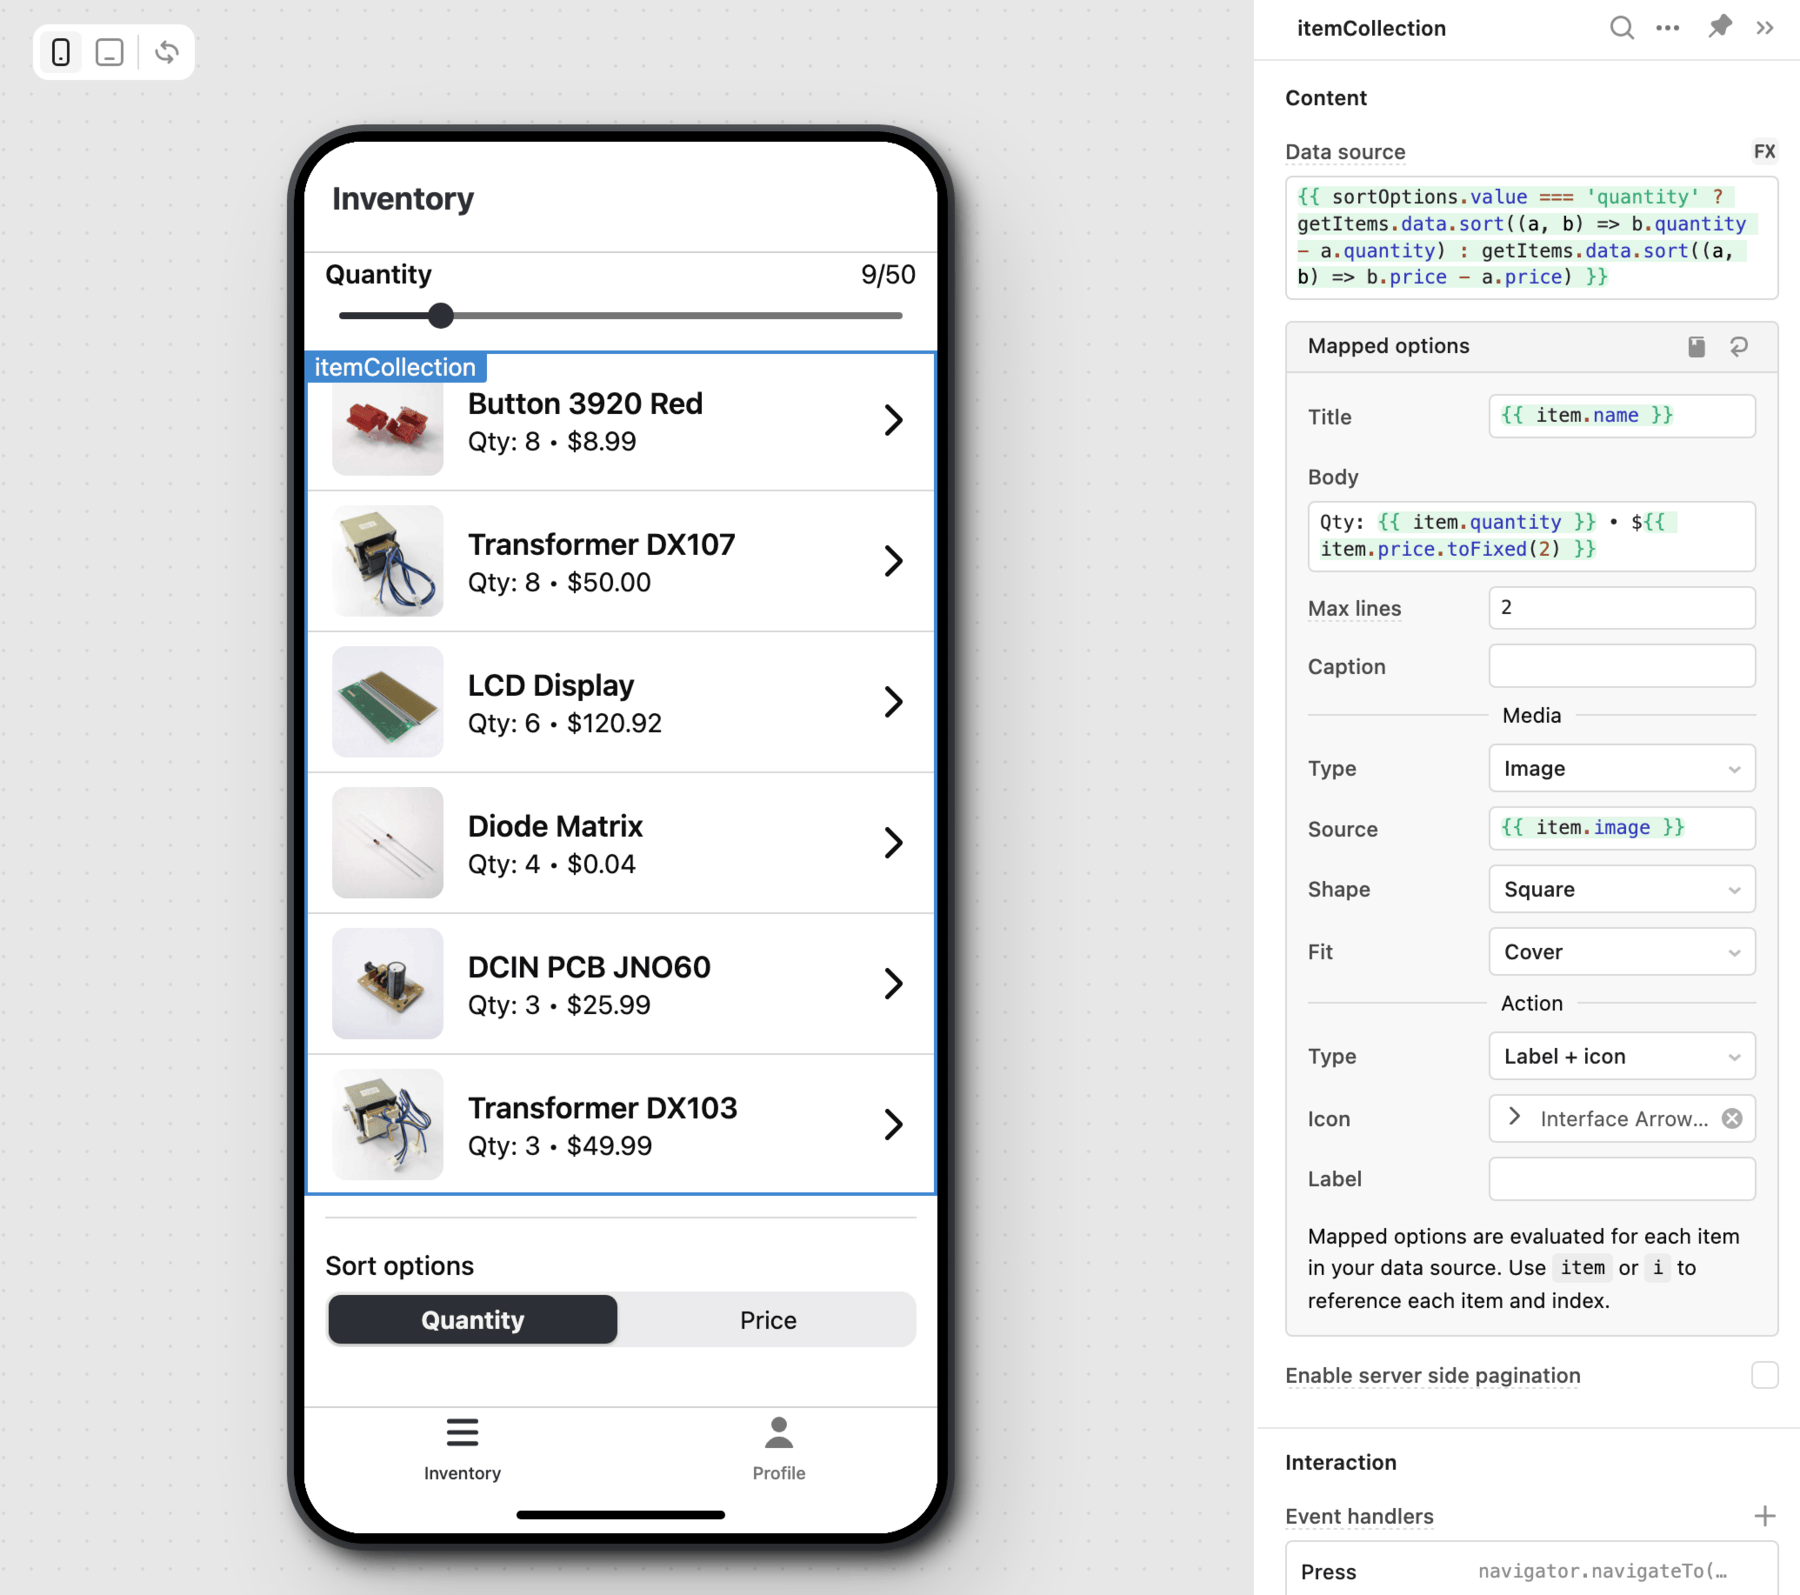
The List Collection component uses a ternary operator and the selected value of the Segmented Control mobile component to toggle sorting the list by quantity or price.
{{
  sortOptions.value === 'quantity'
  ? getItems.data.sort((a, b) => b.quantity - a.quantity)
  : getItems.data.sort((a, b) => b.price - a.price)
}}
Connect your data using resources
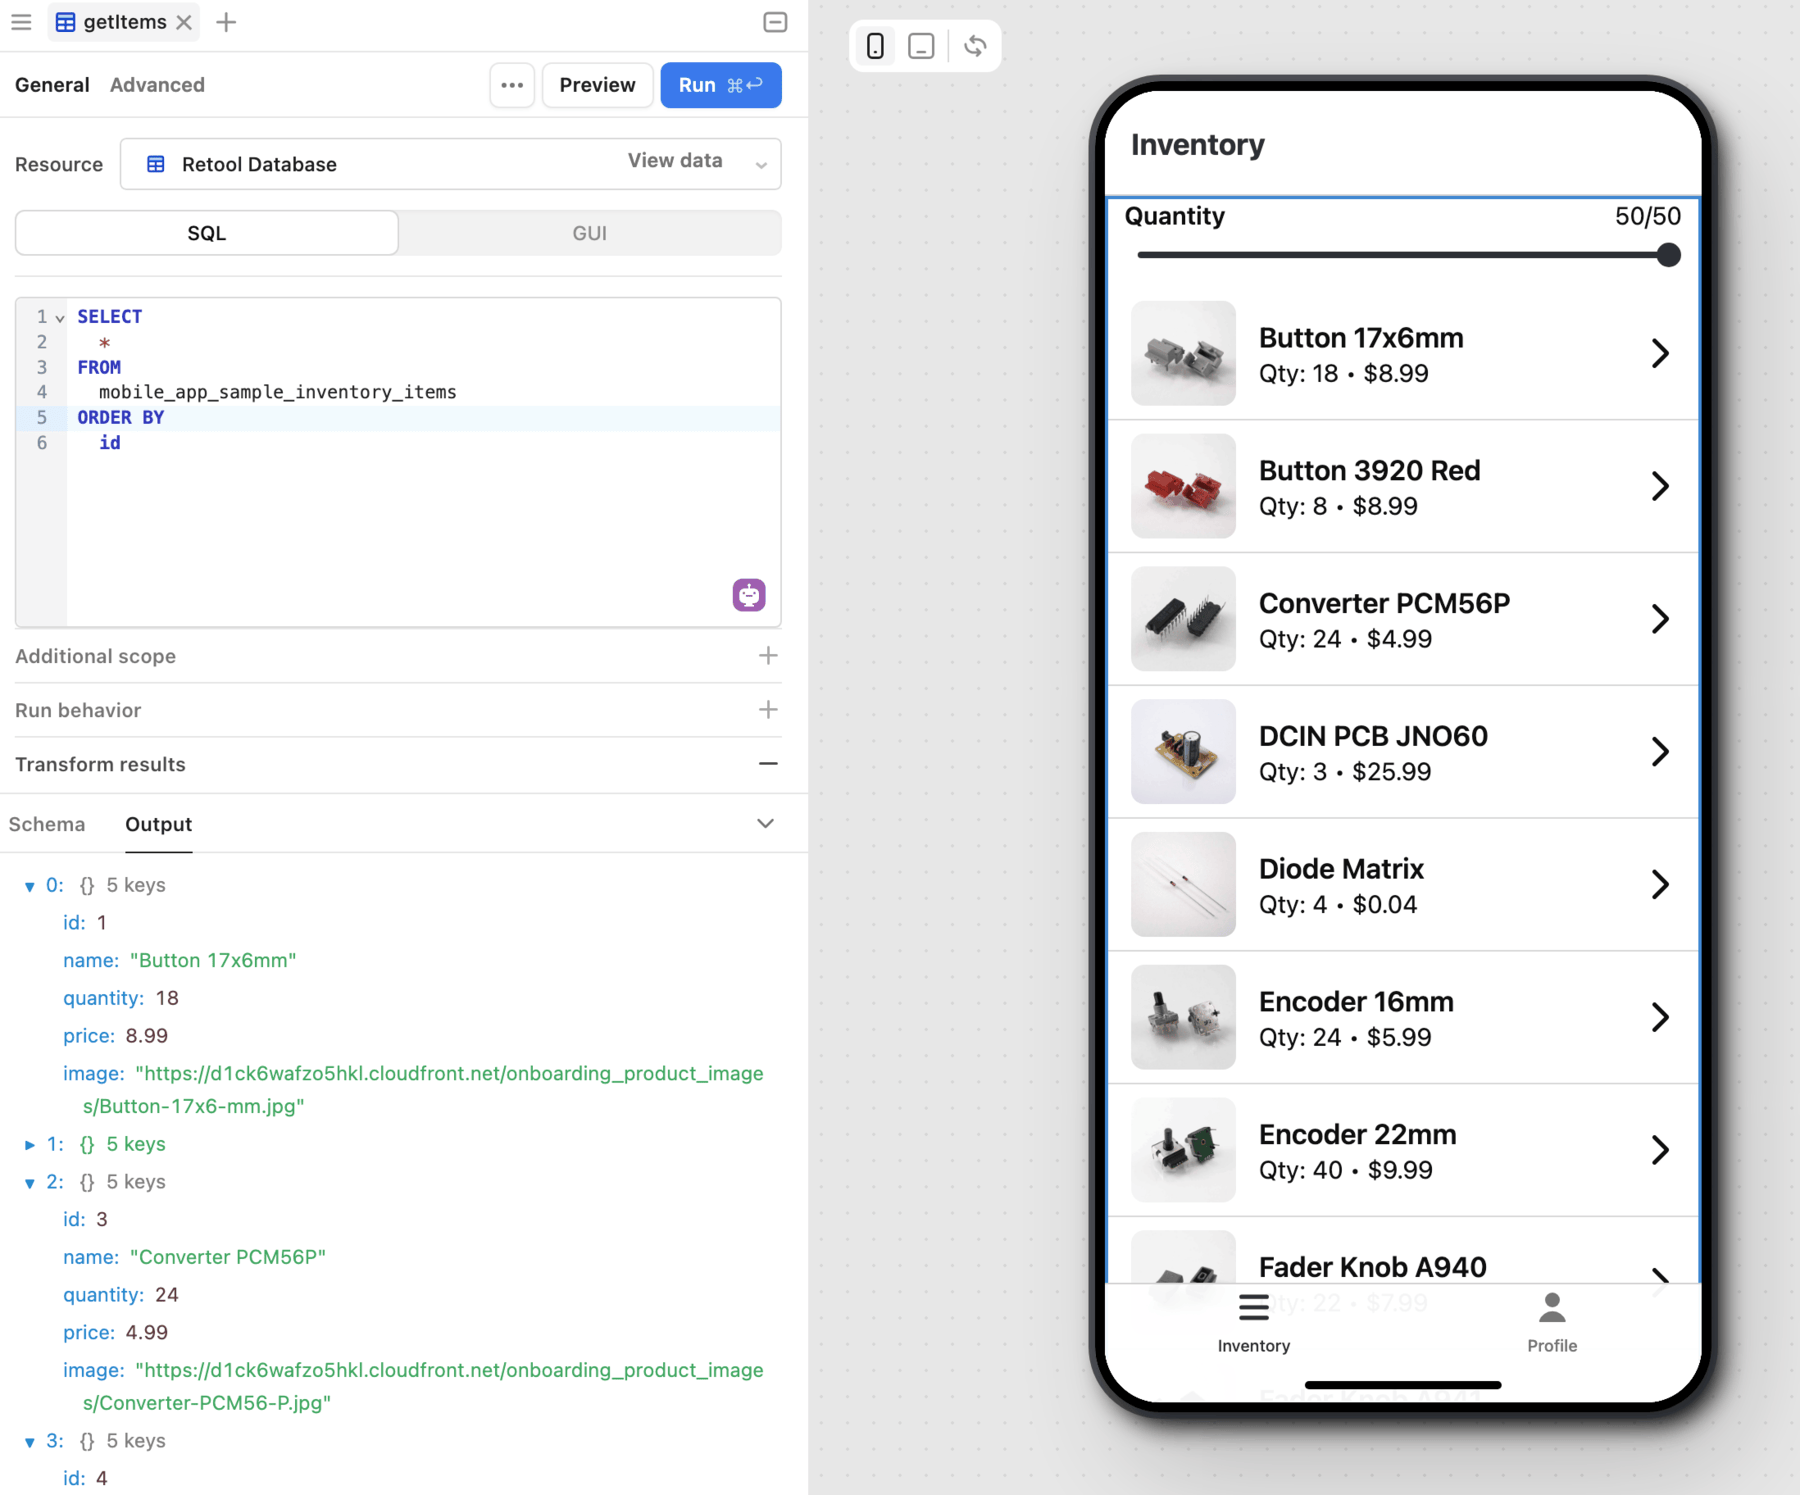
A resource is a saved set of user-configured properties that determines how Retool connects to a data source, such as a PostgreSQL database or REST API. You create a resource for each data source you want to use with Retool, then write queries to interact with them.
Each resource has configuration options that Retool uses when interacting with a data source. This simplifies how you query data sources while ensuring access is secure.
When a resource query runs, Retool proxies the request to the data source, server-side, using the resource's configuration settings. This method ensures only Retool directly connects to a data source, not your users.
Retool abstracts away all of the complexities when connecting to a data source from your users. They only need to select the resource to use when writing a query. The type of data source is also displayed but your users only need to specify the resource. In addition, you can connect different data sources of the same type. For example, you can add multiple Amazon S3 buckets as different resources to distinguish their usage.
With this approach, users don't interact directly with your data sources. Retool avoids any client-side connections to the data source that could expose credentials and ensures all interactions use the same conditions. Resources also make query caching possible, which allows Retool to serve cached data and reduce the number of requests to a data source—potentially reducing costs.
Read and write data using queries
A query is a piece of code you write to interact with a resource and perform CRUD operations. As with components, queries maintain an internal state and expose properties. Queries can also perform asynchronous actions and run simultaneously with other queries.
Queries are not part of an app's user interface. You reference the query's data property to read and display data in components for which users can interact. Queries can also reference component input values and write them back to the data source.
Connect the interface together
Under the hood, Retool maintains a dependency graph for each app. This represents all property values and where they're referenced. Whenever a property changes, all downstream references using embedded expressions automatically update. This is similar to how spreadsheet formulas work when referencing cell values; if a referenced value changes then the formula instantly updates its result.
The Component tree and Code panels contain the Graph pane. This visualizes the dependency graph for a selected component or query. You can use the graph to view the relationship between the selected component or query and its immediate dependents.
Hover the cursor over the connecting points to display a tooltip with a list of dependencies and dependents.
You can chain embedded expressions together by referencing values that also use embedded expressions. Any input value changes automatically propagate through the entire app. This makes it possible to build powerful applications with very few lines of code.
The dependency graph enables Retool to prevent you from creating circular dependencies, where two or more properties rely on each other to function. If you attempt to reference values that rely on one another, the IDE displays a warning.

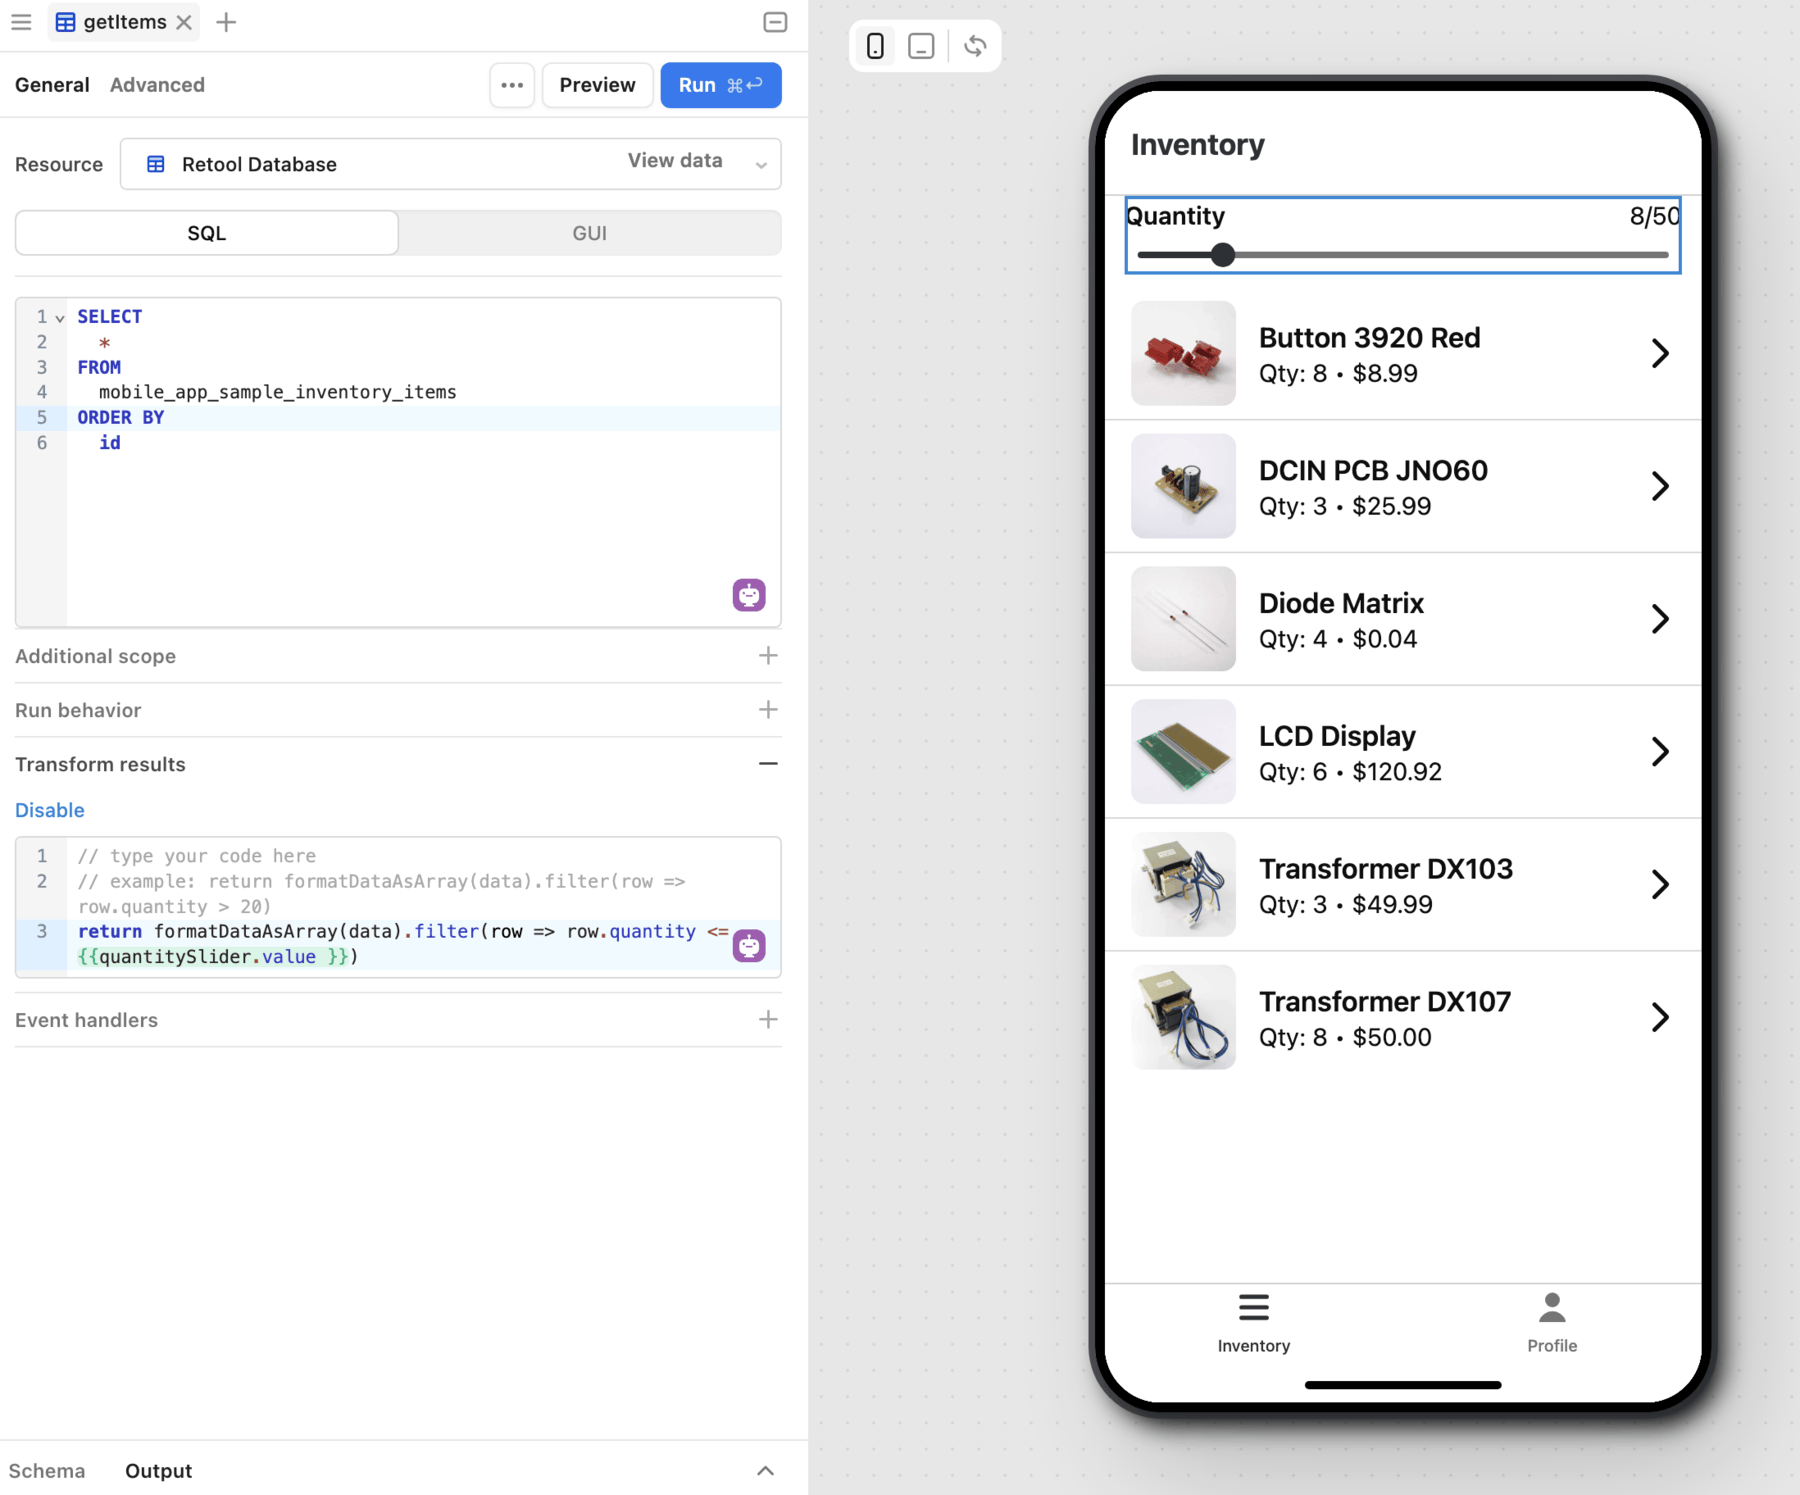
The Inventory mobile app contains a List Collection component to display a list of inventory items. Its data source is set to getItems.data. There is also a slider that filter results based on quantity. This is done using a JavaScript filter() expression that transform the output of the query.
return formatDataAsArray(data).filter(row => row.quantity <= {{quantitySlider.value }})
Control and run queries with event handlers
You configure event handlers to perform actions whenever a specific event occurs, such as a button press or query error. There are numerous actions available, such as setting component values and triggering queries.
The Inventory mobile app uses a number of different event handlers. For instance, an event handler is configured to navigate to the itemDetailsScreen screen when an item is selected from the list. This screen contains components that reference the selected item's properties.
Transform data using transformers
While you can use JavaScript within {{ }} embedded expressions, you may need to manipulate multiple sources of data and implement complex logic to produce values, such as filtering or joining data sets.
A transformer is a reusable block of JavaScript. Unlike the data transformation you can perform directly from a query, transformers operate independently. You reference property values using embedded expressions and the results of the transformation are output on the transformer's value property using a return statement.
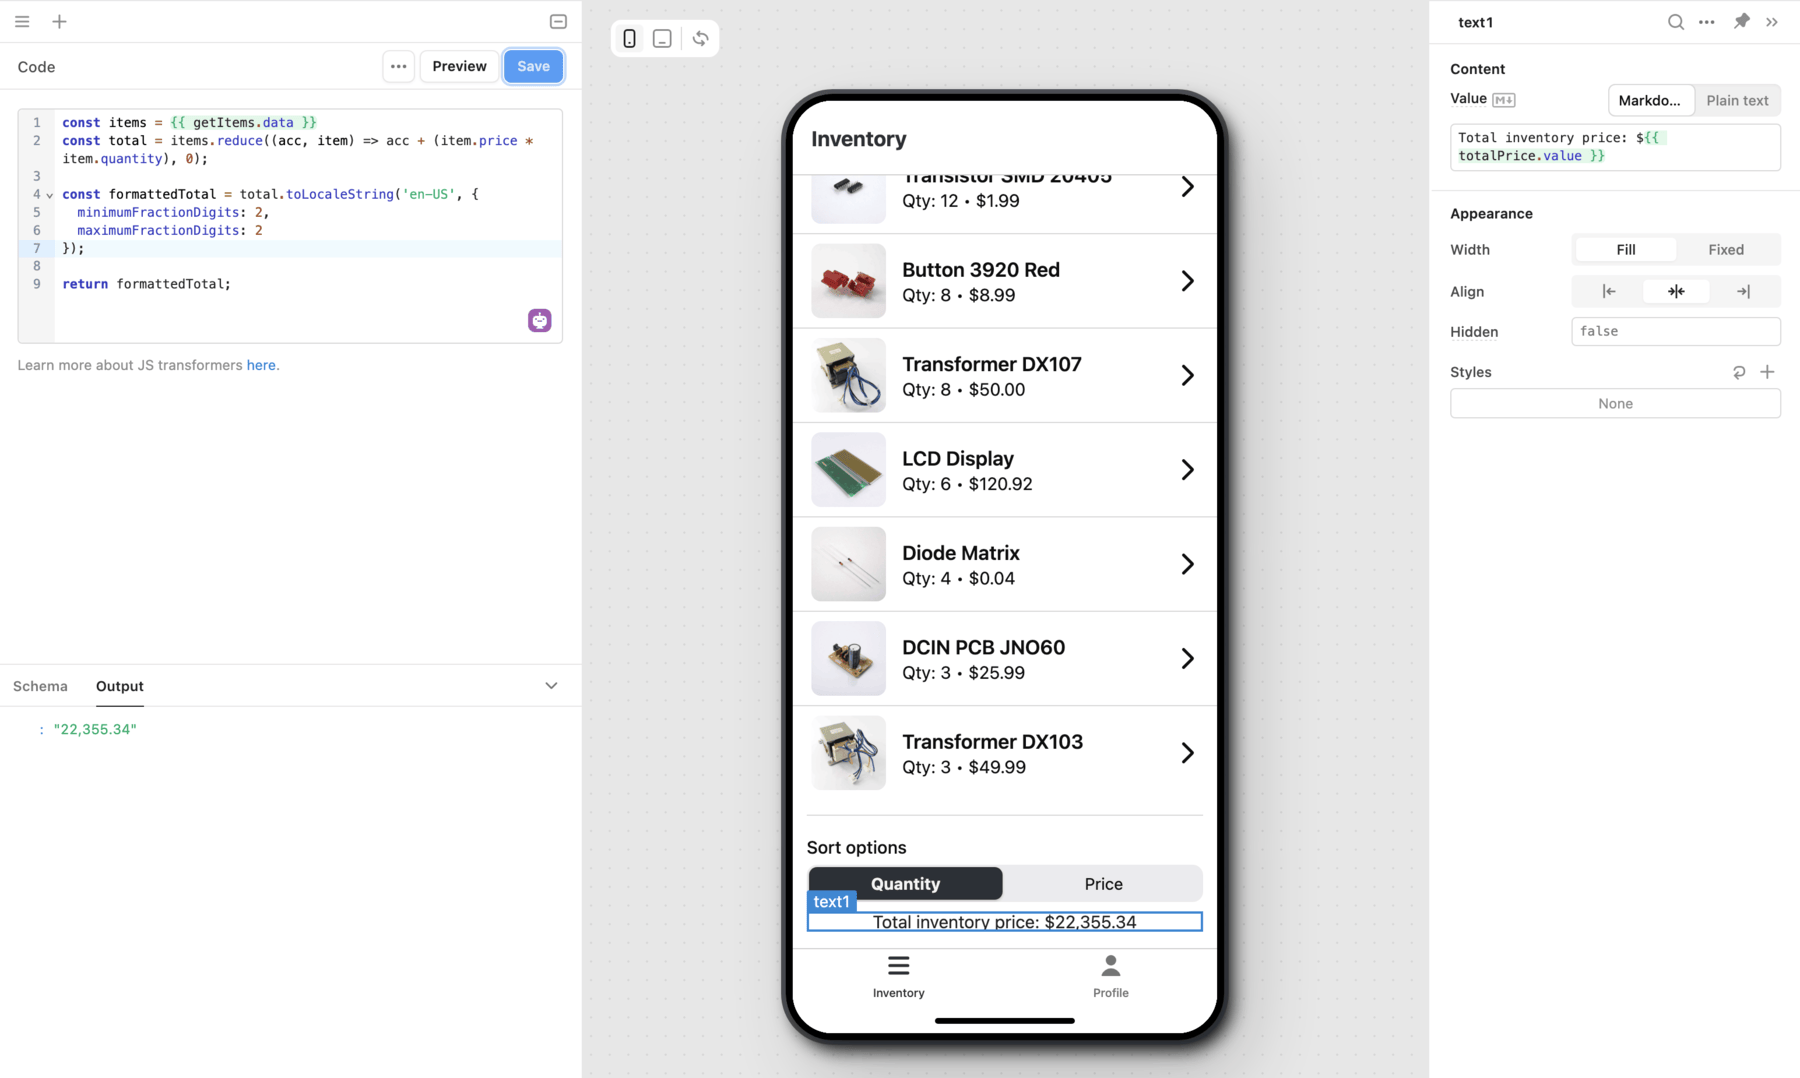
The Inventory mobile app uses a transformer, totalPrice, to calculate the total amount of all visible items. The result is then formatted using toLocaleString() and displayed in a Text mobile component.
const items = {{ getItems.data }}
const total = items.reduce((acc, item) => acc + (item.price * item.quantity), 0);

const formattedTotal = total.toLocaleString('en-US', {
  minimumFractionDigits: 2,
  maximumFractionDigits: 2
});

return formattedTotal;
Transformers are maintained by the dependency graph and continually output a transformed value. If you make changes to any values in the dependency chain, the transformer automatically updates.
Script apps with JavaScript
You can write JavaScript code to control app behavior, set property values, and more. Components and queries are globally scoped and include built-in methods to control their state. These methods can accept supported parameters, such as string or index values. In either case, you only need to use standard JavaScript notation, not {{ }} embedded expressions.
JavaScript queries can output data using a return statement.
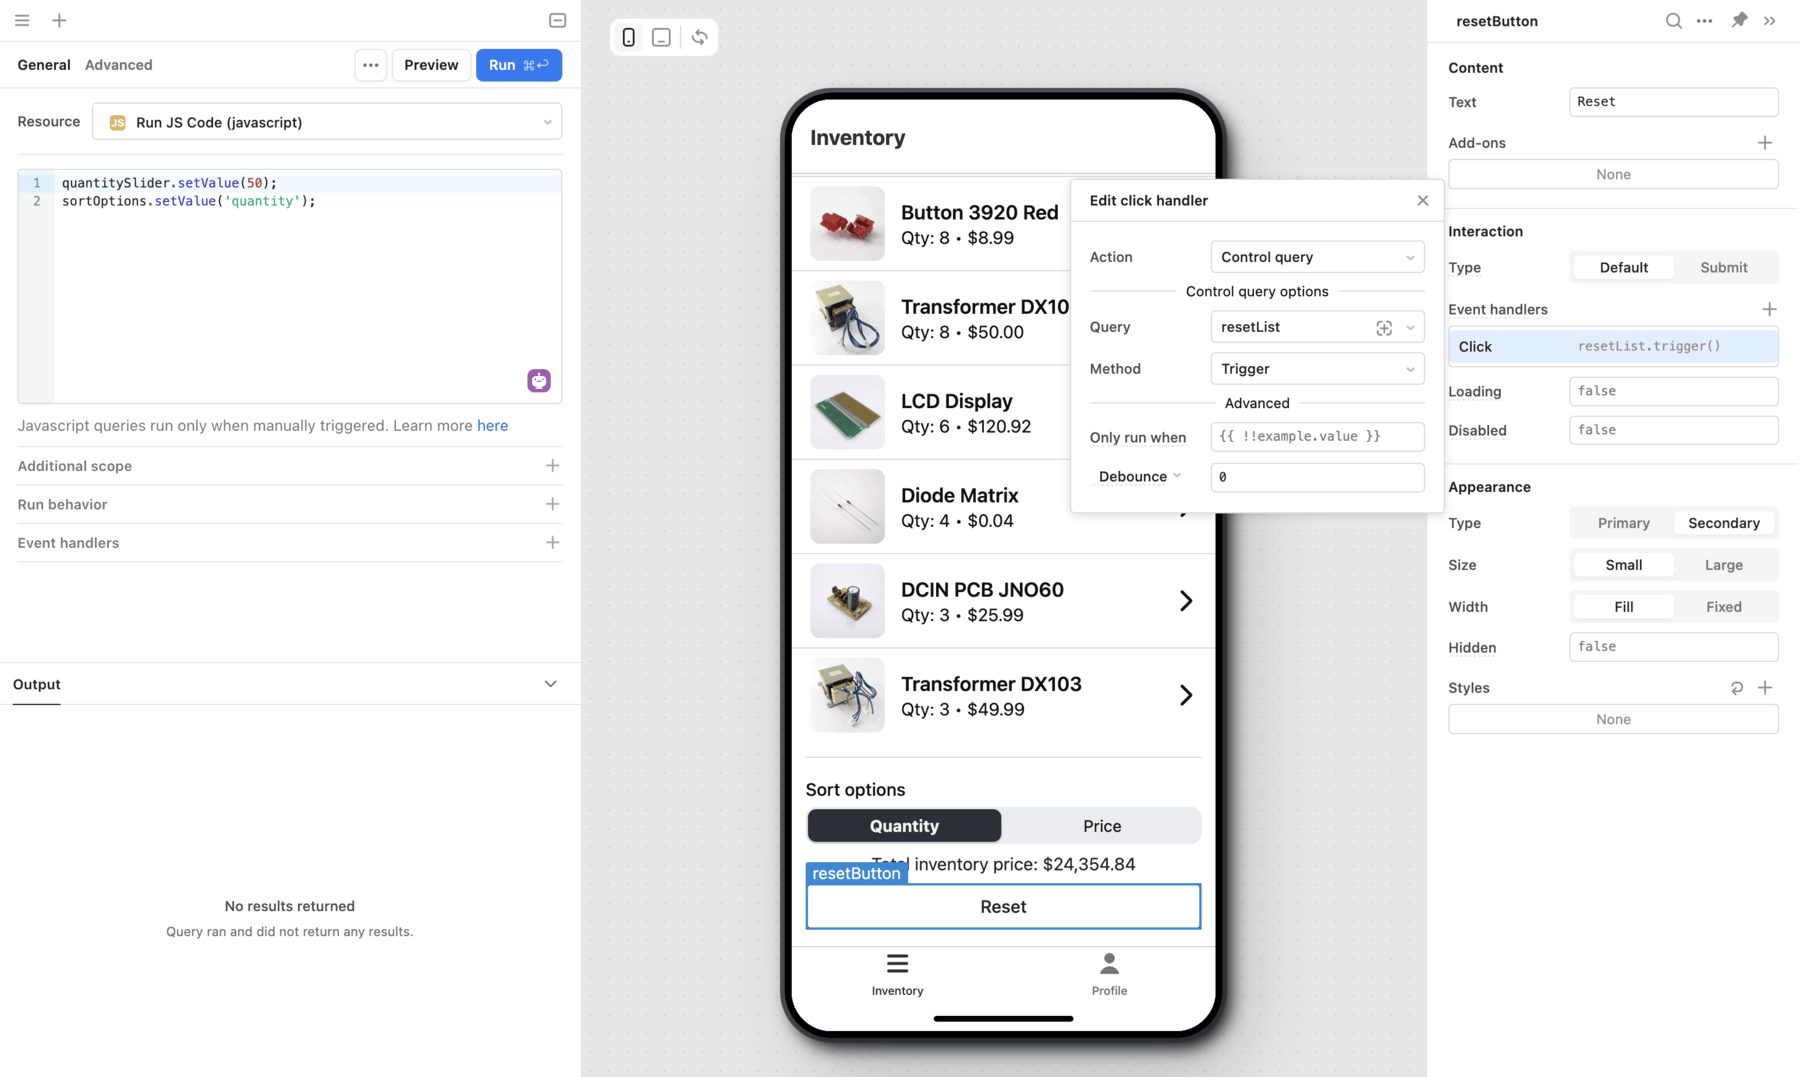
The Reset button below the list triggers a JavaScript query that sets the value of the Slider and Segmented Control mobile components, effectively resetting the results to their defaults.
quantitySlider.setValue(50);
sortOptions.setValue('quantity');
Run apps natively on iOS and Android
You can run mobile apps in the browser as progressive web apps.
Users browse and run mobile apps natively using the Retool Mobile app iOS and Android. This approach simplifies deployment and makes all Retool Mobile apps instantly available. You can share links to apps so users can launch them on their device, or open them in a browser.

The Retool Mobile app for iOS and Android uses React Native to run mobile apps natively. Users can log in to their Retool organization, browse or search for mobile apps, and launch them on their mobile device.
Whenever you add or update an app, it's immediately available within the Retool Mobile app for users.
Leverage mobile device functionality
Retool Mobile enables you to make use of the software and hardware functionality of mobile devices.
- Biometric verification. Use built-in biometric features to provide an extra layer of identity verification, such as fingerprint or face scanning. After users log in, they are prompted to verify their identity using biometrics each time they bring the app to the foreground. Biometric verification does not replace your existing login mechanisms.
- NFC: Use a device's built-in NFC reader to capture data from NDEF-formatted tags.
- Camera: Use the camera to take photos and scan barcodes.
- Zebra: Receive data captured by a Zebra Android device with dedicated hardware.
Send push notifications
The Retool Mobile app includes support for push notifications. You can trigger notifications with queries using the built-in Mobile Push Notifications resource from any app or workflow.
Configuring push notifications is a two-part process:
- Add a query to mobile apps that subscribe users to push notifications and enables them on their device.
- Write queries in Retool apps and workflows to send push notifications to subscribed users.
Push notifications use topics to represent the scope for recipients. Topics are similar in function to mailing lists—users subscribe to them based on what information they want to be notified about. Users subscribe to push notifications using a subscription query in which you specify the topics to use. To send a notification, you use a query that references the relevant topic rather than managing a separate list of users.
Work offline
Offline mode allows natively run mobile apps to continue functioning without a data connection. When enabled, queries that read data can cache the most recent results to make them available offline. Queries that write data are held in a queue and run once the data connection is restored.
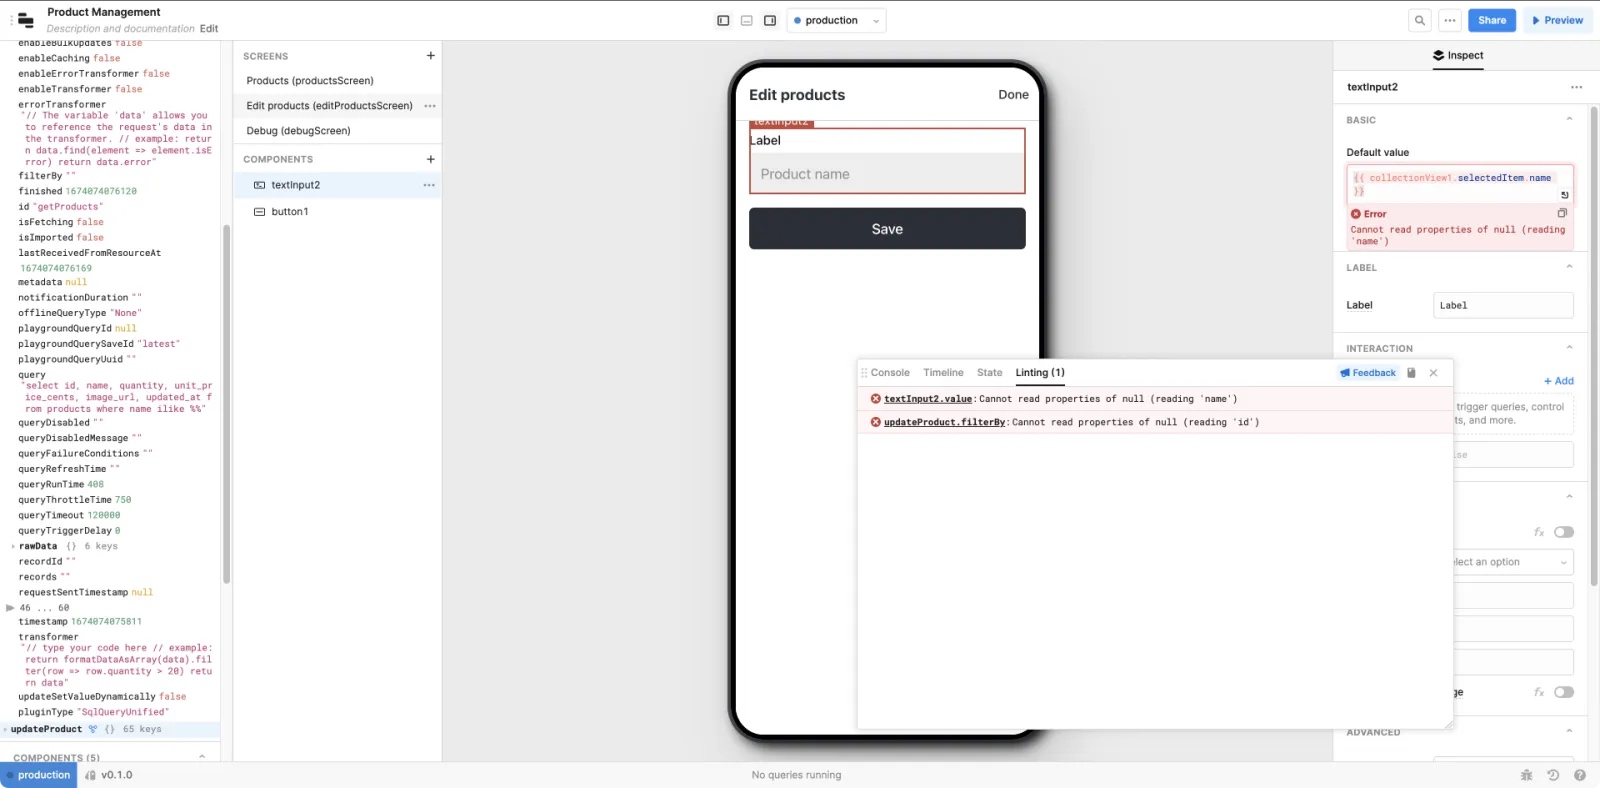
Test and troubleshoot issues
You can use Retool's Debug Tools to explore your Retool Mobile app, review errors, and debug issues during development. You can also use the Model browser in the left panel of the app IDE to explore all component and query properties.
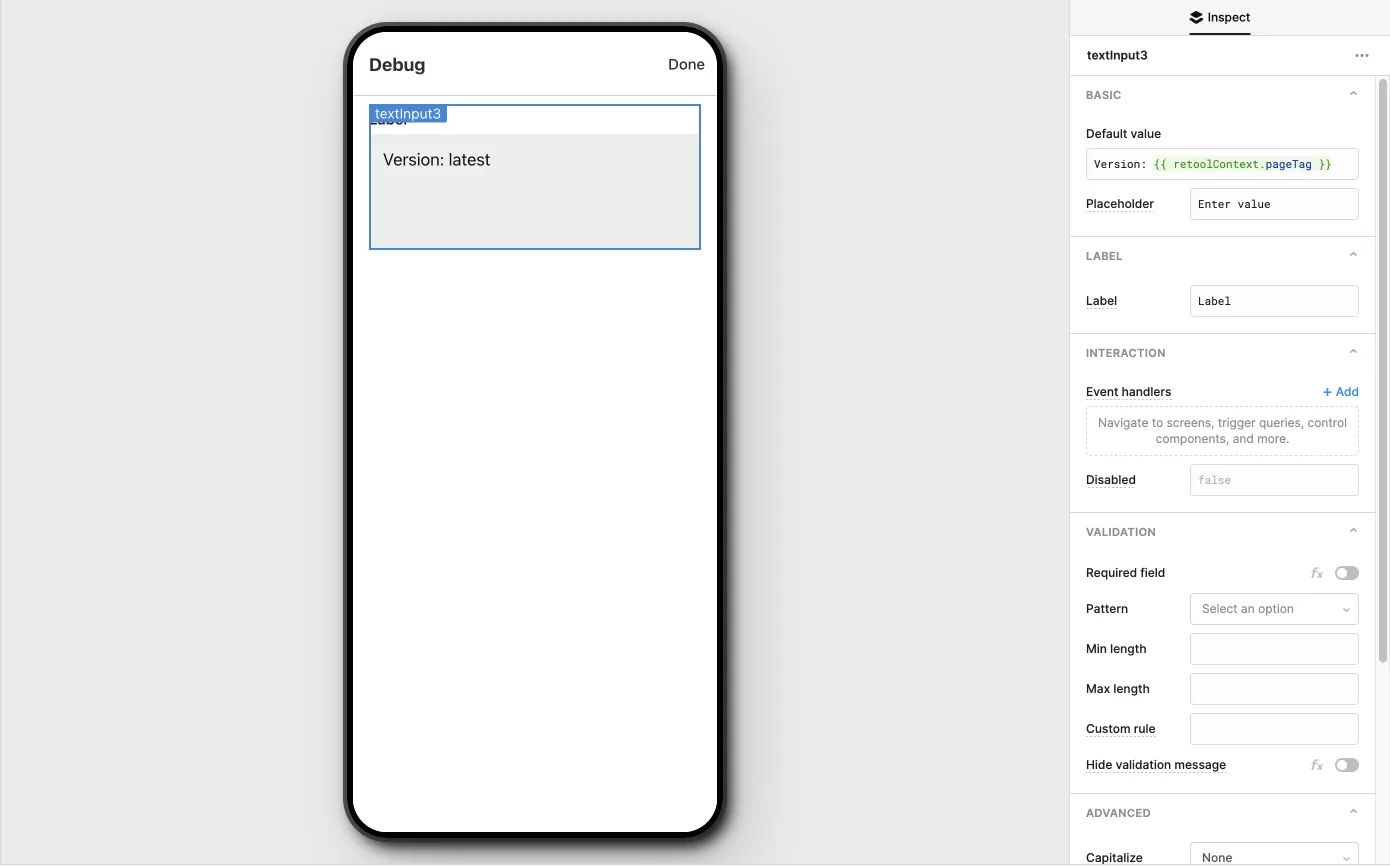
Retool Mobile does not support interactions using the web console. This includes console.log() or running JavaScript using the Console tab of Debug Tools. Instead, you can use components to display output by setting their values (e.g., Text Area) or Run JS Code JavaScript queries to perform certain commands directly in the app IDE.
Wrap up
Using these fundamental concepts, you can build complex mobile apps that:
- Contain polished user interfaces that can adapt to your needs.
- Dynamically reference values anywhere using dependency chains.
- Connect with almost any API and database to interact with your data.
- Perform actions using conditional logic in response to user events or script apps to control behavior.
Next steps
You now have a basic understanding of how to build a Retool app. Check out the mobile app tutorial to build a complete app from start to finish.