Resource query tutorial
A hands-on introduction to querying resources.
This tutorial explains how to create resource queries that interact with connected resources. There are two types of resource query:
- API: Queries that use API requests to interact with API-based resources.
- SQL: Queries that use SQL statements to interact with SQL-based resources such as databases and similar data stores.
Introduction
- API resource query
- SQL resource query
Queries for API resources include relevant options for making API requests. Resources for popular service integrations, (Amazon S3, Google Sheets Twilio, etc.) include a tailored set of options. This abstracts away some of the complexities of working with APIs.
Other resources, such as GraphQL-based integrations or custom APIs, include more generic options and require further knowledge of working with the API.
Queries for databases and similar types of structured data stores use SQL queries, such as PostgreSQL or MySQL databases.
There are two modes from which to select when writing an SQL query. The mode you choose depends on whether you need to read or write data:
- SQL: Read data using an SQL statement.
- GUI: Write data using a graphical query editor.
Prerequisites
- API resource query
- SQL resource query
This tutorial uses a demo REST API with sample customer data. You can use the Sample API generator to create a fully functional REST API for testing purposes that's preloaded with sample data.
Save the base URL for later, then navigate to Apps and click Create new > App.
This tutorial uses sample customer data and Retool Database, a PostgreSQL database that is one of Retool's managed services. To prepare Retool Database:
- Download
sample_customers.csv. - Navigate to Resources and select Retool Database.
- Click Import CSV and select Into a new table.
- Upload
sample_customers.csvand then click Create table.
Once complete, navigate to Apps and then click Create new > App.

1. Add a resource query to read data
- API resource query
- SQL resource query
Click to open the Code tab, then click + to add a new query. Retool can interact with a REST API that is not configured as a resource so you don't need to create one first. Search for REST API in the Resource field and select it.
Click to open the Code tab, then click + to add a new query. Select Retool Database.
2. Write the query code
- API resource query
- SQL resource query
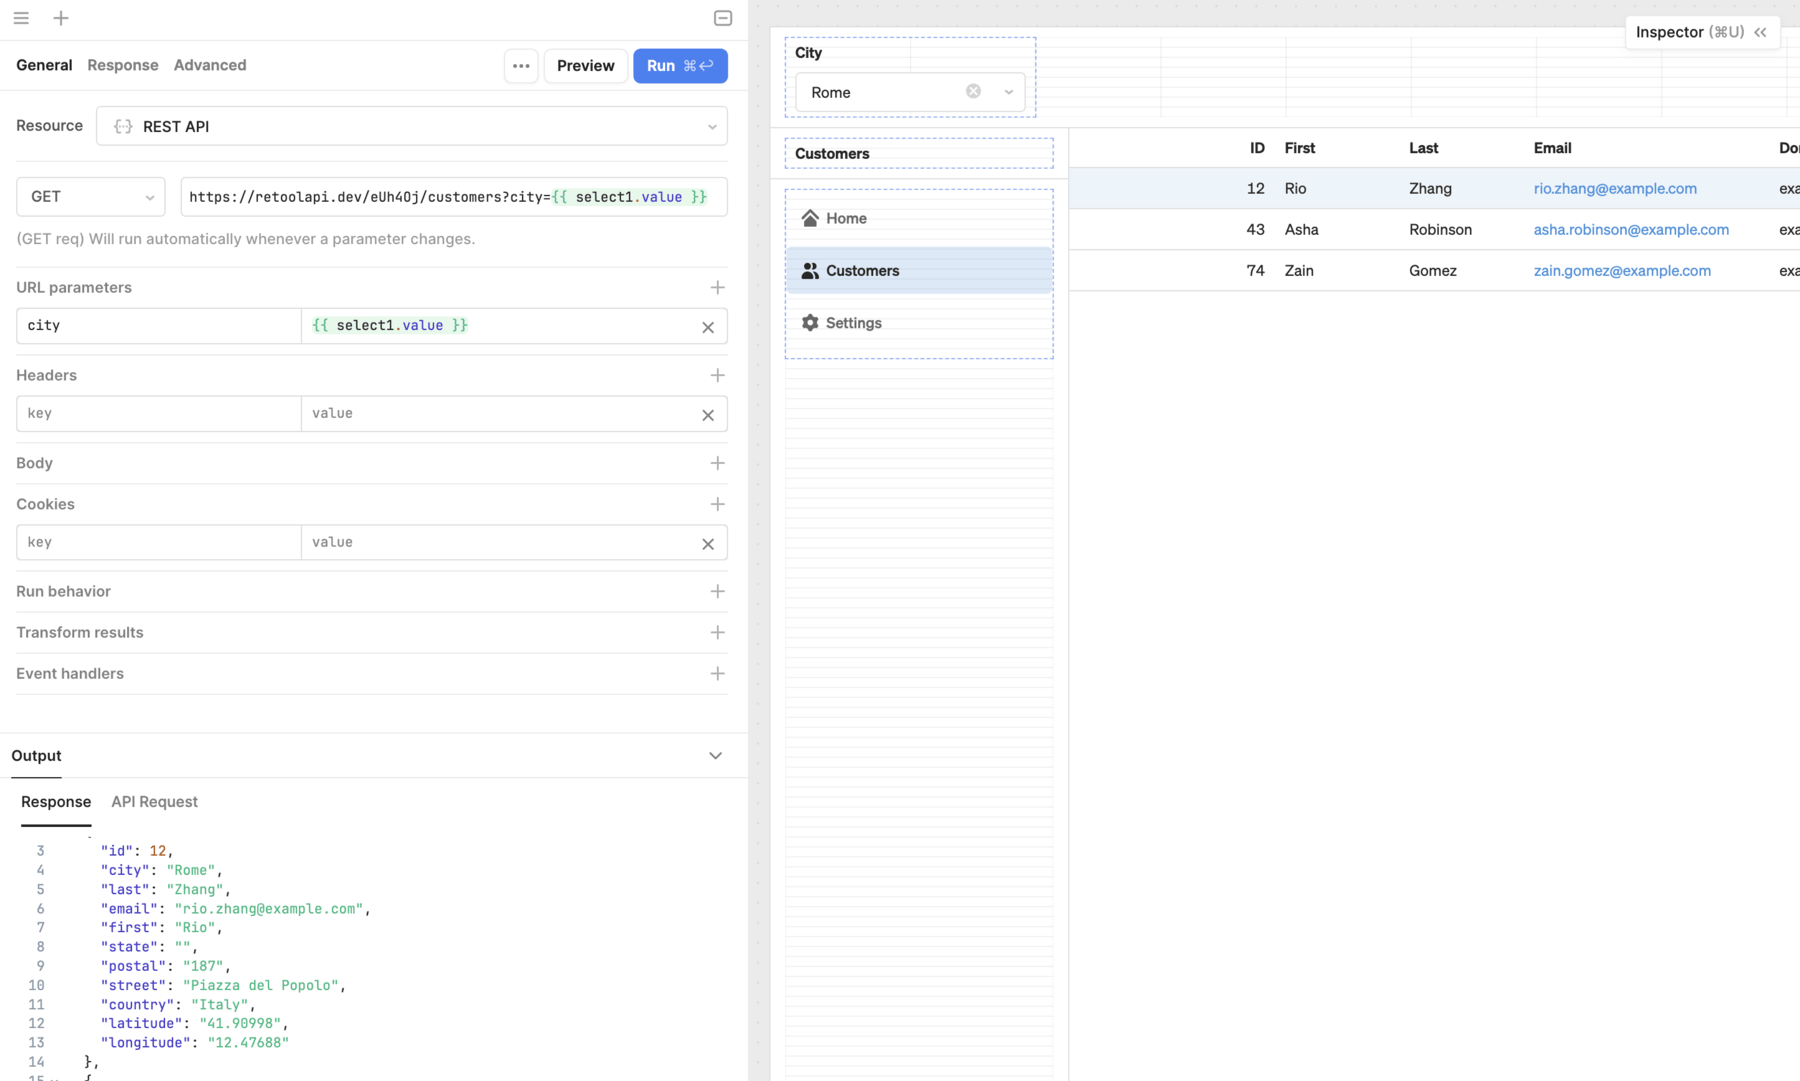
Update the query with the following options.
| Option | Value | Description |
|---|---|---|
| Action type | GET | Perform a GET request that retrieves data. |
| URL | YOUR_API_URL | The URL for the sample API. |
Click Save & Run to save the resource query. The results appear in the Output section below.
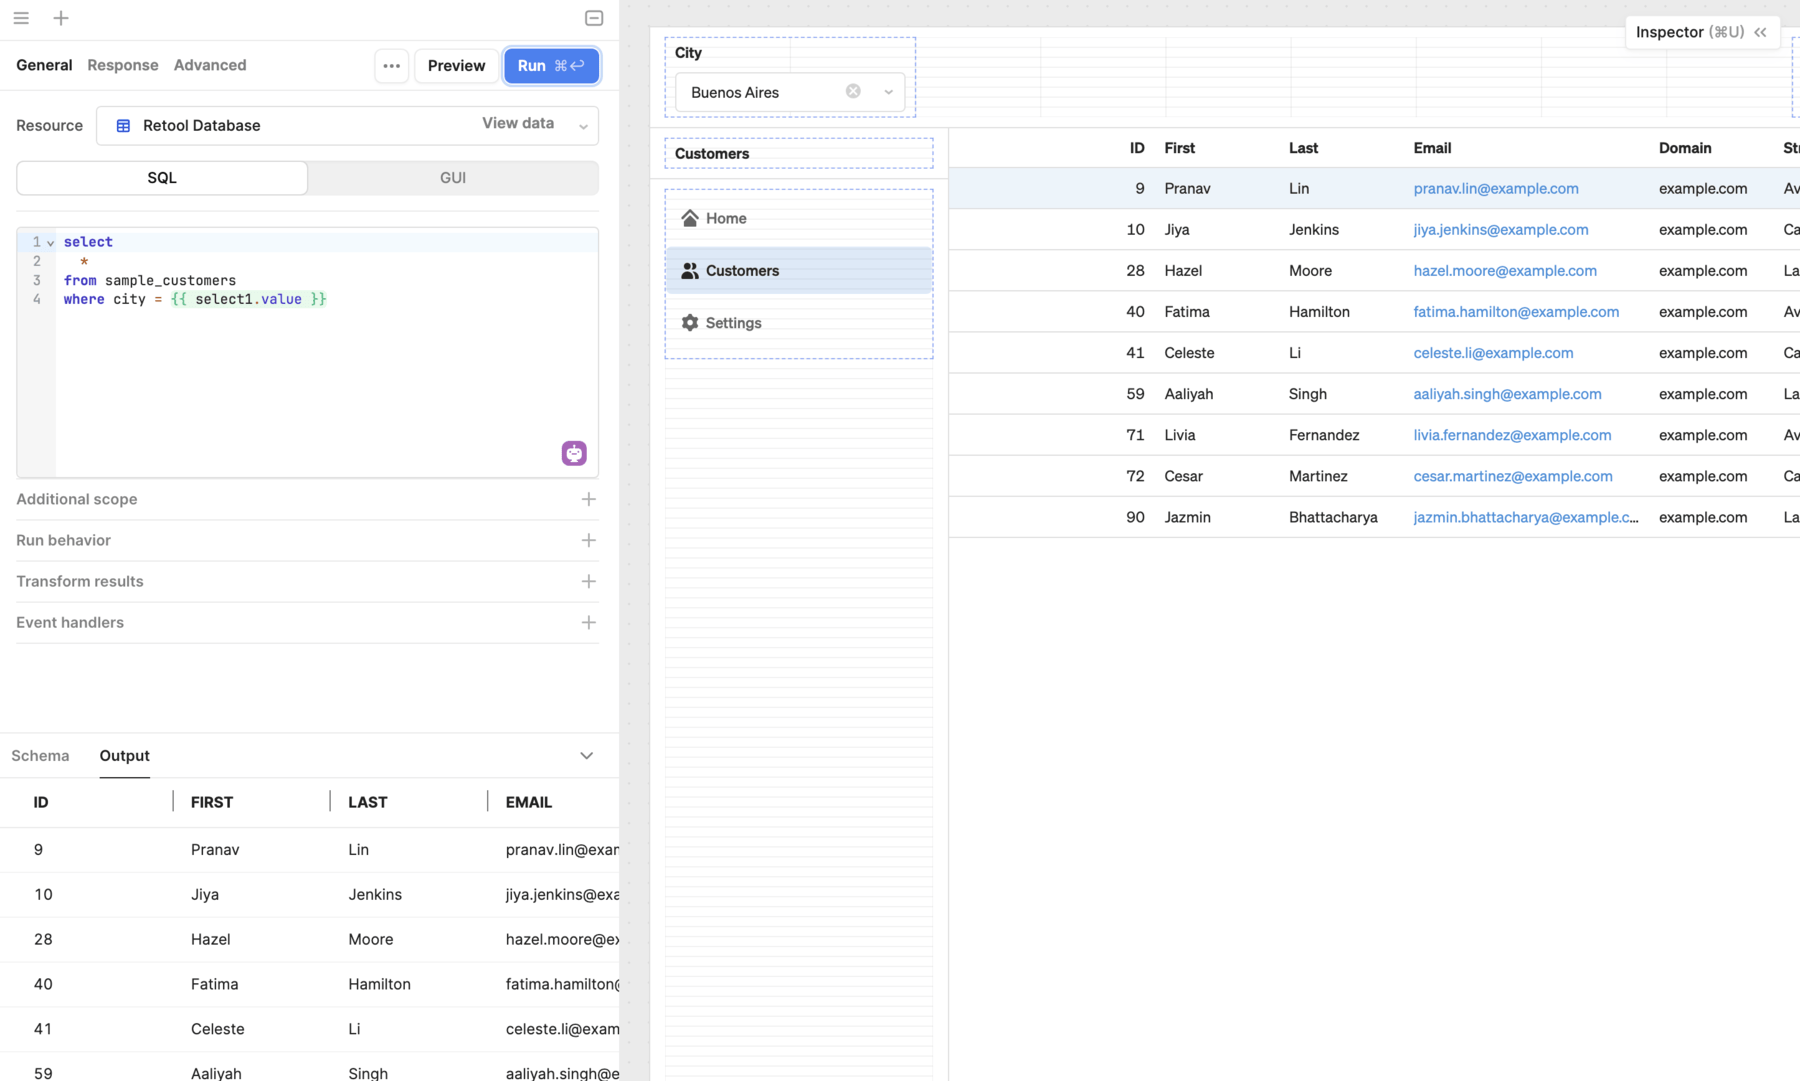
Write an SQL statement to retrieve data from the database. The following example retrieves all data from the newly created sample_customers table.
SELECT
  *
FROM
  sample_customers
Click Save & Run to save the resource query. The results appear in the Output section below.
3. Display results in a table
- API resource query
- SQL resource query
With the query results available, you can now display them using a component. Right-click on the canvas, click Add component, and select the Table component.
You can reference the query output elsewhere in the app using the query's data property. This contains an object with key names that correspond to the column names. Each key contains an array of values.
Tables automatically reference the most recently created query or you can change this in the Data setting of the Inspector.
4. Edit table data
- API resource query
- SQL resource query
Tables are read-only by default but can be configured to allow editing. To do this, you specify which columns should be editable.
Position the cursor over the First table column, click •••, then select Make editable. Repeat this process for the Last table column. Once done, you can click to edit cells in these columns.
Although the table data is editable, there is no query to save the edits back to the database. When you make a table editable, Retool adds a Save action to the table. You configure this with an event handler that triggers a query when changes are saved.
5. Add a resource query to write data
- API resource query
- SQL resource query
Navigate back to the Code tab and click + to add another REST API resource query. The action you use often depends on the API. POST, PUT, and PATCH actions modify data differently. Since this query modifies existing data only, select the PATCH action.
You provide the modified data in the body of the the API request. Retool supports different types of body data, such as JSON and Form Data. Select JSON and set the value to table1.changesetArray.
Each table row corresponds to a customer object in the API. When run, this query updates each object.
Navigate back to the Code tab and click + to add another Resource query for Retool Database. As this query will write back changes, select GUI mode.
GUI mode provides you with a set of inputs to configure a writable query. This is a safer alternative to using raw SQL statements. Update the query with the following options.
| Option | Value | Description |
|---|---|---|
| Table | sample_customers | The database table to update. |
| Action type | Bulk update via primary key | Update multiple records that correspond to the primary keys. |
| Primary key column | id | The primary key column to identify records. |
| Array of records to update | table1.changesetArray | The edited records in the table. |
Each table row corresponds to a database table record. When run, this query updates each record and uses the id to match edited values with the correct table record.
6. Configure the save action
- API resource query
- SQL resource query
The final step is to configure the table's Save action. Select the table to display its settings in the Inspector, then select the Save action.
Event handlers trigger queries and perform actions in response to events or user interactions, such as clicking the Save button. Add an event handler and select the query you just created.
7. Refresh data on save
- API resource query
- SQL resource query
Now that the save action is set up, you can edit table data and then save changes. However, the table does not immediately reflect the changes. This is because the query that retrieves data from the database needs to be run again.
Queries also support event handlers and can perform actions on success or failure. Add an event handler to the write query that triggers the read query on success. Now, whenever changes are successfully saved, the read query runs again and the table reflects the latest changes.