Connect to Snowflake
Connect Snowflake to Retool and read and write data in your data warehouse.
Snowflake is a hosted data platform for storing, processing, and analyzing large datasets.
Refer to the Snowflake Postgres integration guide if you want to connect a Snowflake-managed Postgres instance with Retool.
What you can do with Snowflake in Retool
Once you create a Snowflake resource in Retool, you can:
- Build apps such as admin panels and dashboards, backed by your data warehouse.
- Automate data processes across your Snowflake data with workflows and agents.
Before you begin
To connect Snowflake to Retool, you need the following:
- Cloud
- Self-hosted
- Snowflake account: An accessible Snowflake account with a virtual warehouse available.
- Network access: Your Snowflake account must accept connections from Retool's IP addresses.
- Credentials: A Snowflake user with appropriate permissions, a programmatic access token, or an RSA key pair. To connect with OAuth, you also need a Snowflake role that can create a security integration, such as one with the global
CREATE INTEGRATIONprivilege. - Retool permissions: Ability to create and manage resources in your organization.
- Snowflake account: An accessible Snowflake account with a virtual warehouse available.
- Network access: Your Retool instance must be able to reach your Snowflake account endpoint,
<account_identifier>.snowflakecomputing.com. - Credentials: A Snowflake user with appropriate permissions, a programmatic access token, or an RSA key pair. To connect with OAuth, you also need a Snowflake role that can create a security integration, such as one with the global
CREATE INTEGRATIONprivilege. - Retool permissions: Ability to create and manage resources in your organization.
Create a Snowflake resource
Follow these steps to create a Snowflake resource in your Retool organization.
Create a new resource
In your Retool organization, navigate to Resources in the main navigation and click Create new → Resource. Search for "Snowflake" and click the Snowflake tile to begin configuration.
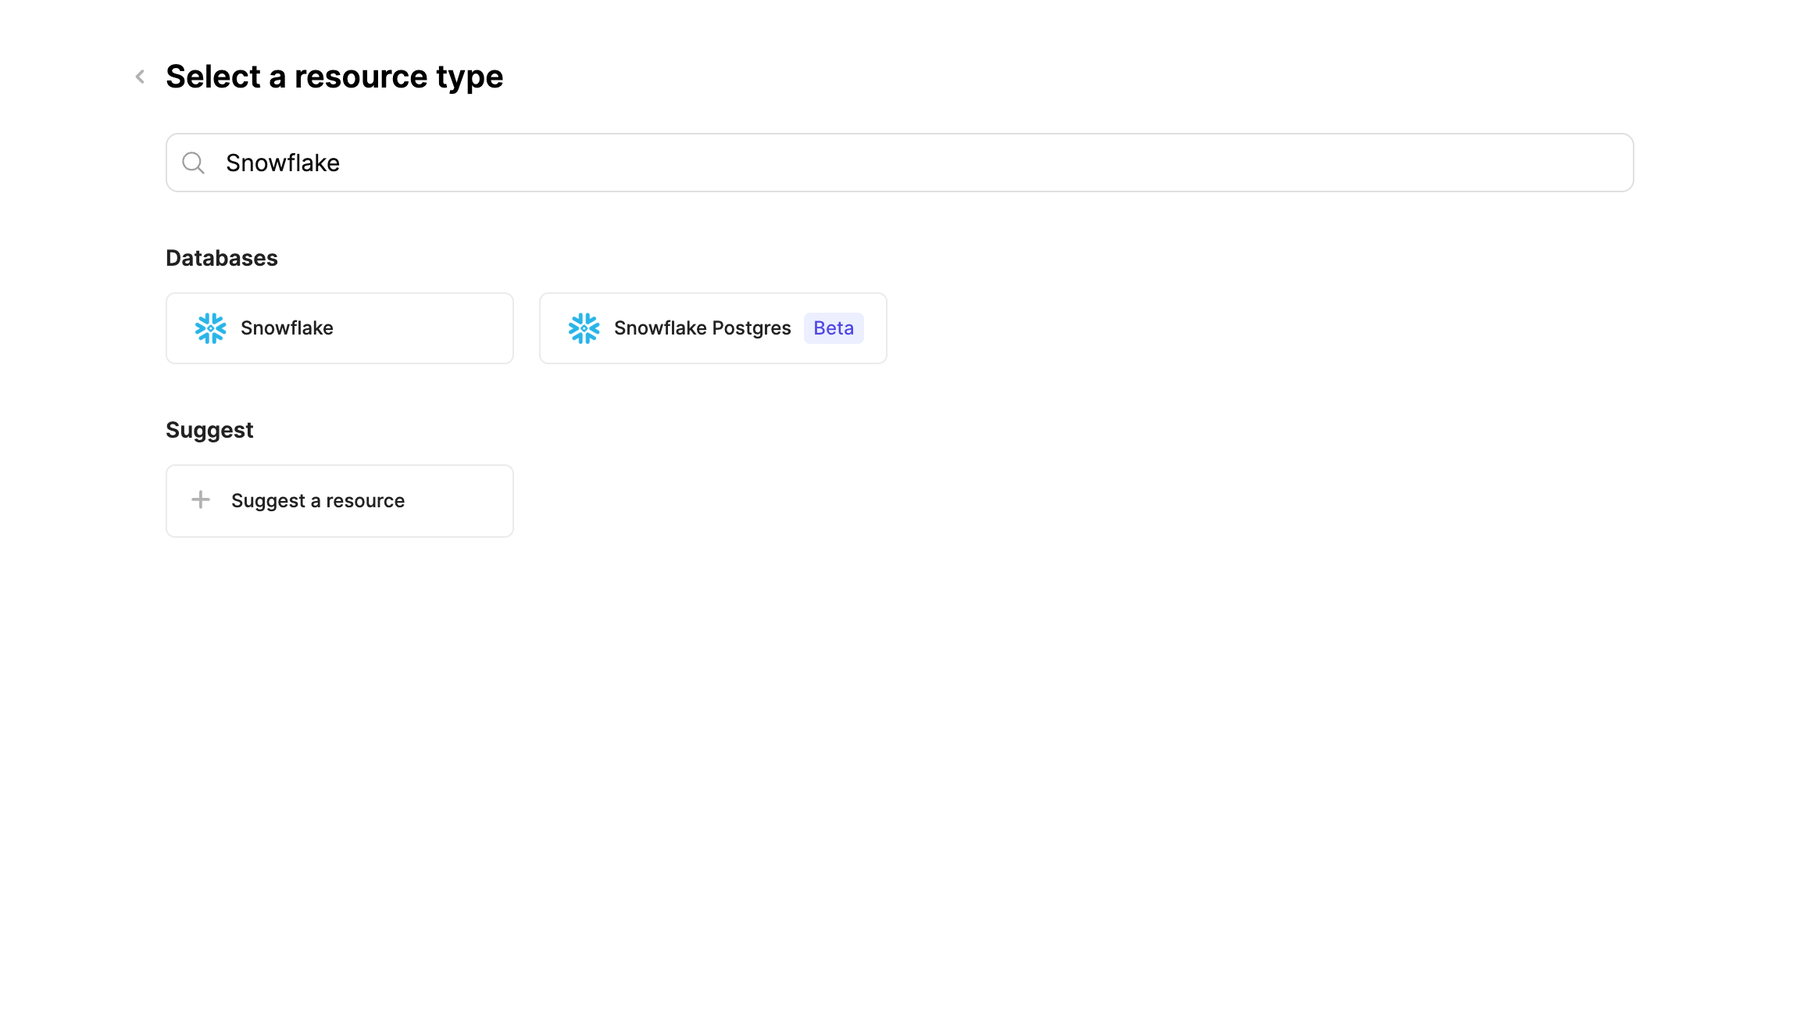
Snowflake resource selection.
Use folders to organize your resources by team, environment, or resource type. This helps keep your resource list manageable as your organization grows.
Configure general settings
Specify a name and description for the resource that indicates which warehouse or database it connects to. The description provides more context to users about how to use the resource.
| Example name | Example description |
|---|---|
| Analytics warehouse | A read-only Snowflake warehouse containing marketing analytics data. |
| Production data warehouse | The main Snowflake warehouse with customer and transaction data. |
Configure resource credentials
Configure the connection settings for your Snowflake resource.
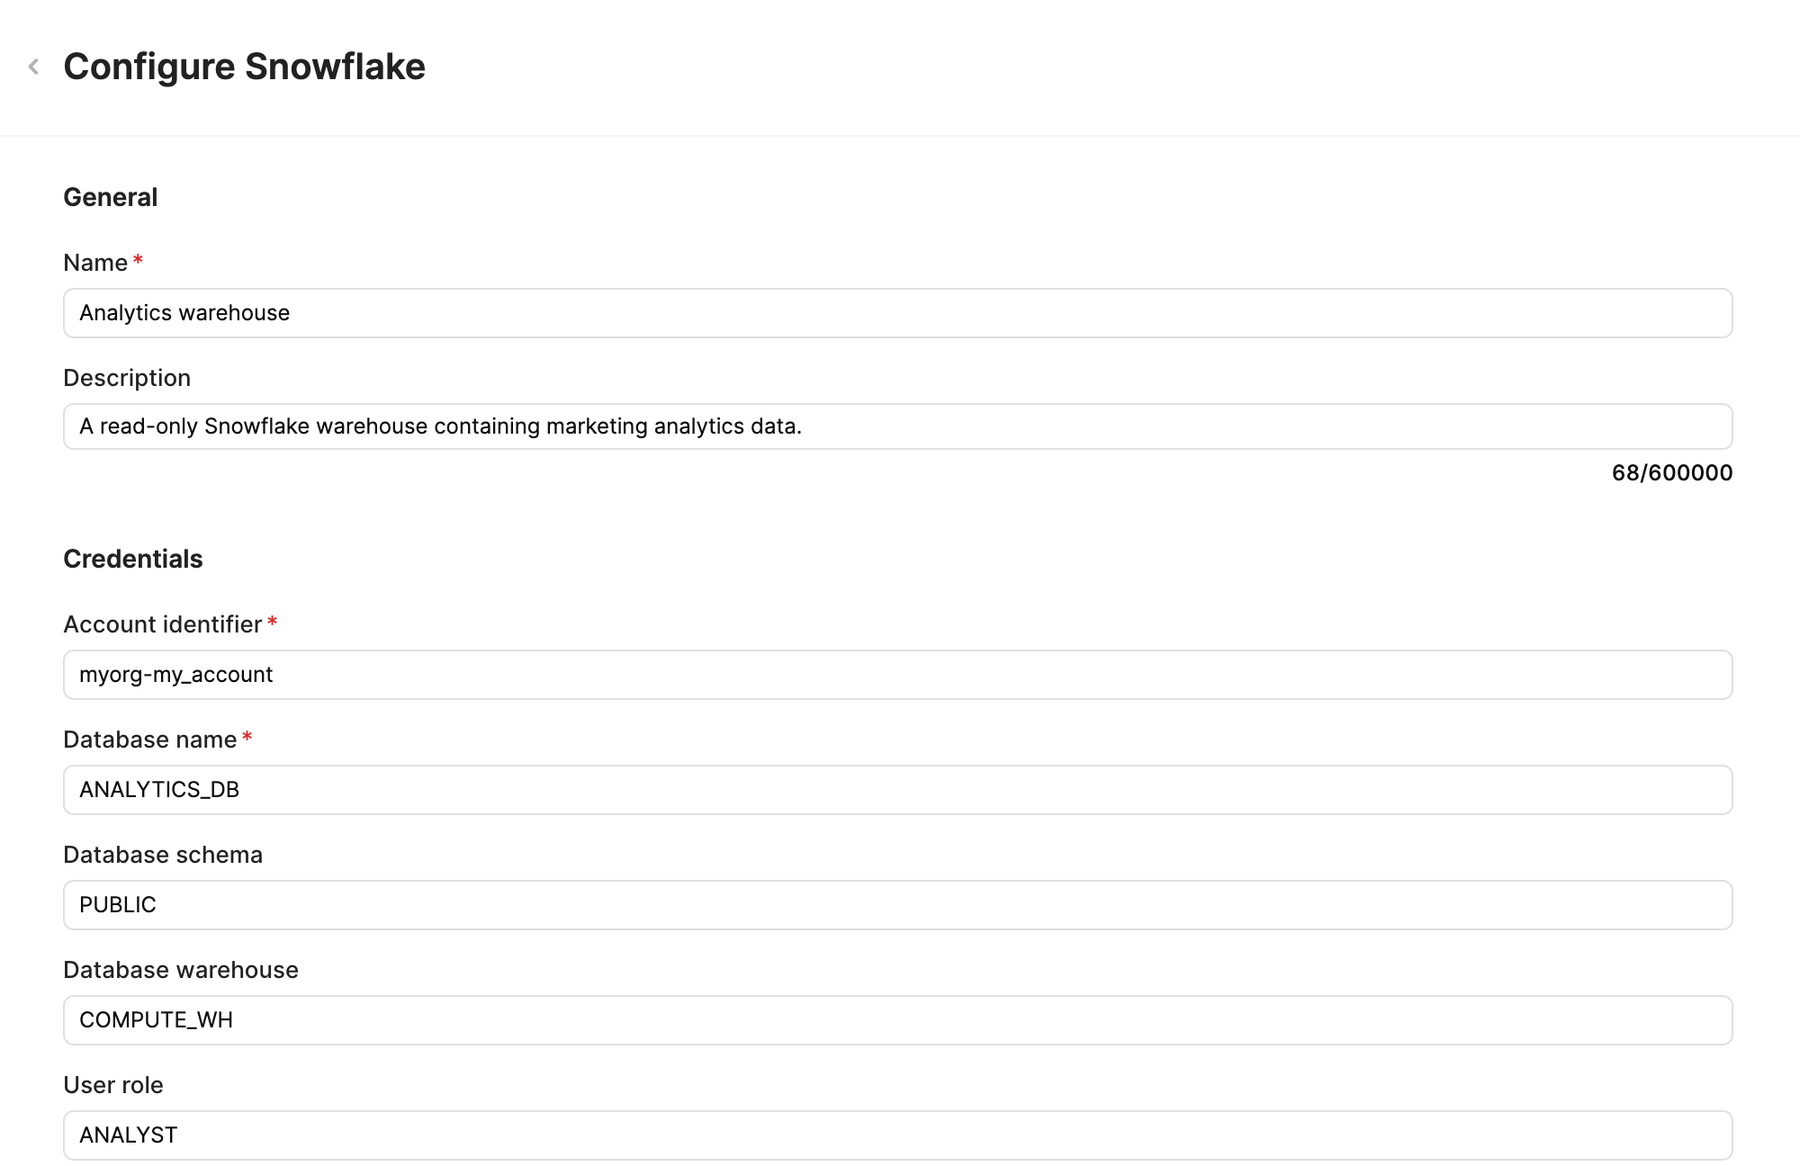
Snowflake connection settings.
Account identifier
The identifier for your Snowflake account. Retool uses it to build the connection endpoint, <account_identifier>.snowflakecomputing.com. Refer to Snowflake's documentation to find your account identifier.
myorg-my_account
xy12345.us-east-1
Snowflake OAuth for partner applications requires the organization and account name form, such as myorg-my_account. Snowflake rejects account locators like xy12345 when Retool authenticates as a partner application.
Database name
The default database to use.
ANALYTICS_DB
Database schema
The default schema to use. This field is optional.
PUBLIC
Database warehouse
The default virtual warehouse to use for running queries and loading data. This field is optional.
COMPUTE_WH
ANALYTICS_WH
User role
The default security role to use. Roles control which objects and operations are accessible. This field is optional.
PUBLIC
ANALYST
Configure authentication
Select an authentication method from the Authentication dropdown. Basic Auth is selected by default.
| Authentication method | Use cases |
|---|---|
| Basic Auth | Username and password. Snowflake doesn't recommend this method for service accounts. |
| Bearer Token | A programmatic access token for service account access, without a username and password. |
| OAuth | Per-user authentication, where each user connects with their own Snowflake credentials. GUI mode for classic app and workflow queries isn't available with this method. |
| Key Pair | An RSA key pair for service account access, without a password. |
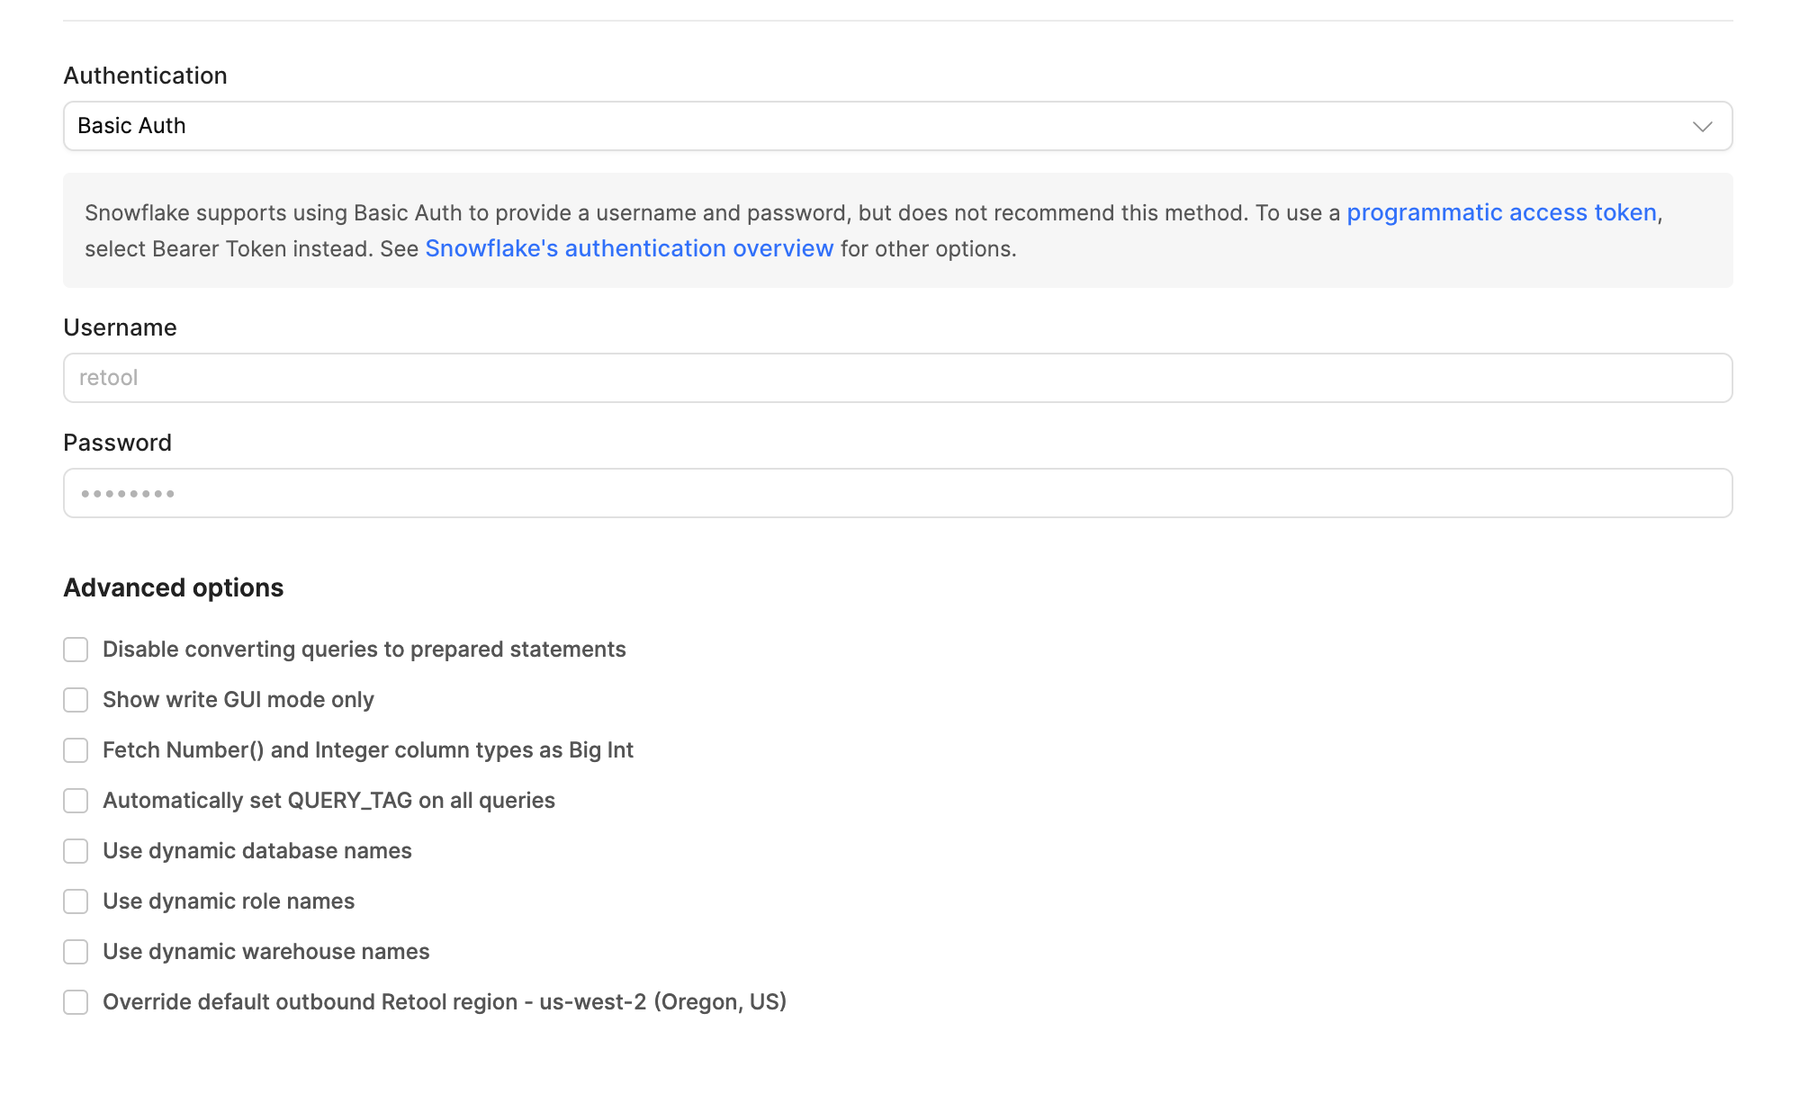
Snowflake authentication settings.
Option A: Basic Auth
Snowflake doesn't recommend Basic Auth for service accounts. To use a programmatic access token instead, select Bearer Token. Refer to Snowflake's authentication overview for other options.
- Select Basic Auth from the Authentication dropdown.
- Enter the Snowflake Username and Password for the user.
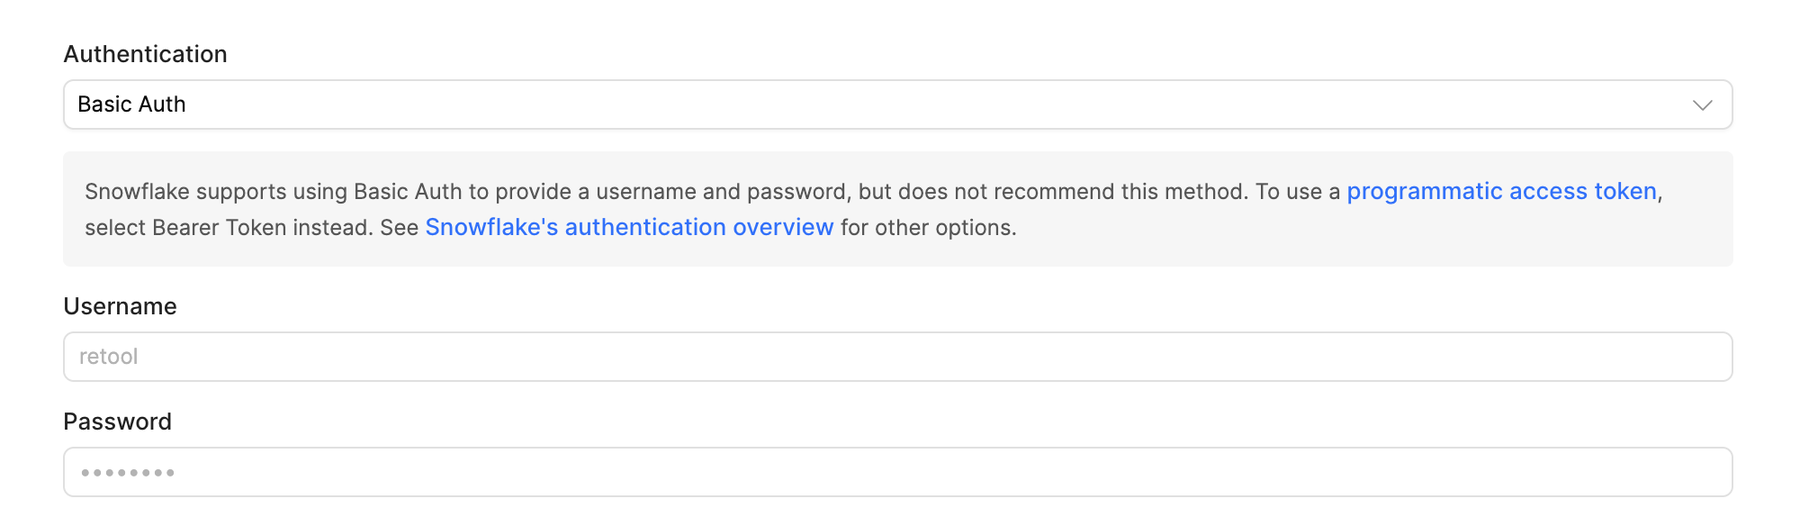
Snowflake Basic Auth settings.
Option B: Bearer Token
- Select Bearer Token from the Authentication dropdown.
- Enter your programmatic access token in the Bearer Token field.
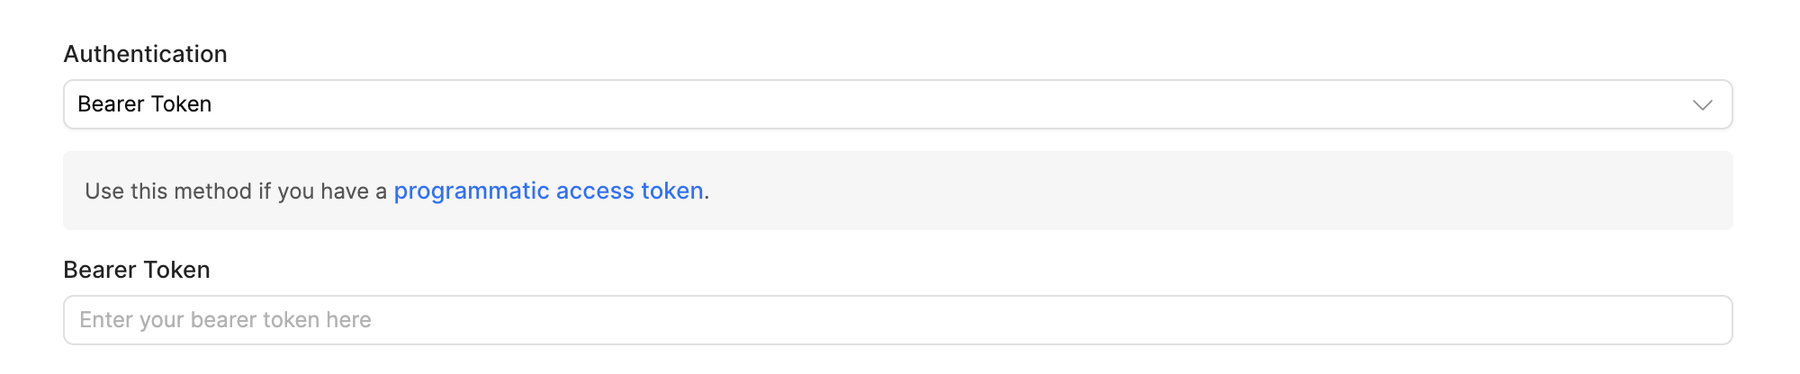
Snowflake Bearer Token settings.
Option C: OAuth
With OAuth, each user authenticates with their own Snowflake credentials. Before you connect, create a security integration in Snowflake. The integration you create depends on your hosting type.
- Cloud
- Self-hosted
For cloud instances, OAuth uses Snowflake OAuth for partner applications, where Retool connects as a partner application. You don't create or enter a client ID, client secret, or redirect URI. Instead, you create a security integration in Snowflake and then provide the required information during resource configuration.
- In Snowflake, create the security integration described in Configure Snowflake OAuth for partner applications.
- In Retool, make sure the Account identifier uses the organization and account name form, such as
myorg-my_account. - Select OAuth from the Authentication dropdown.
- Click Connect with OAuth and sign in to Snowflake to authorize Retool.
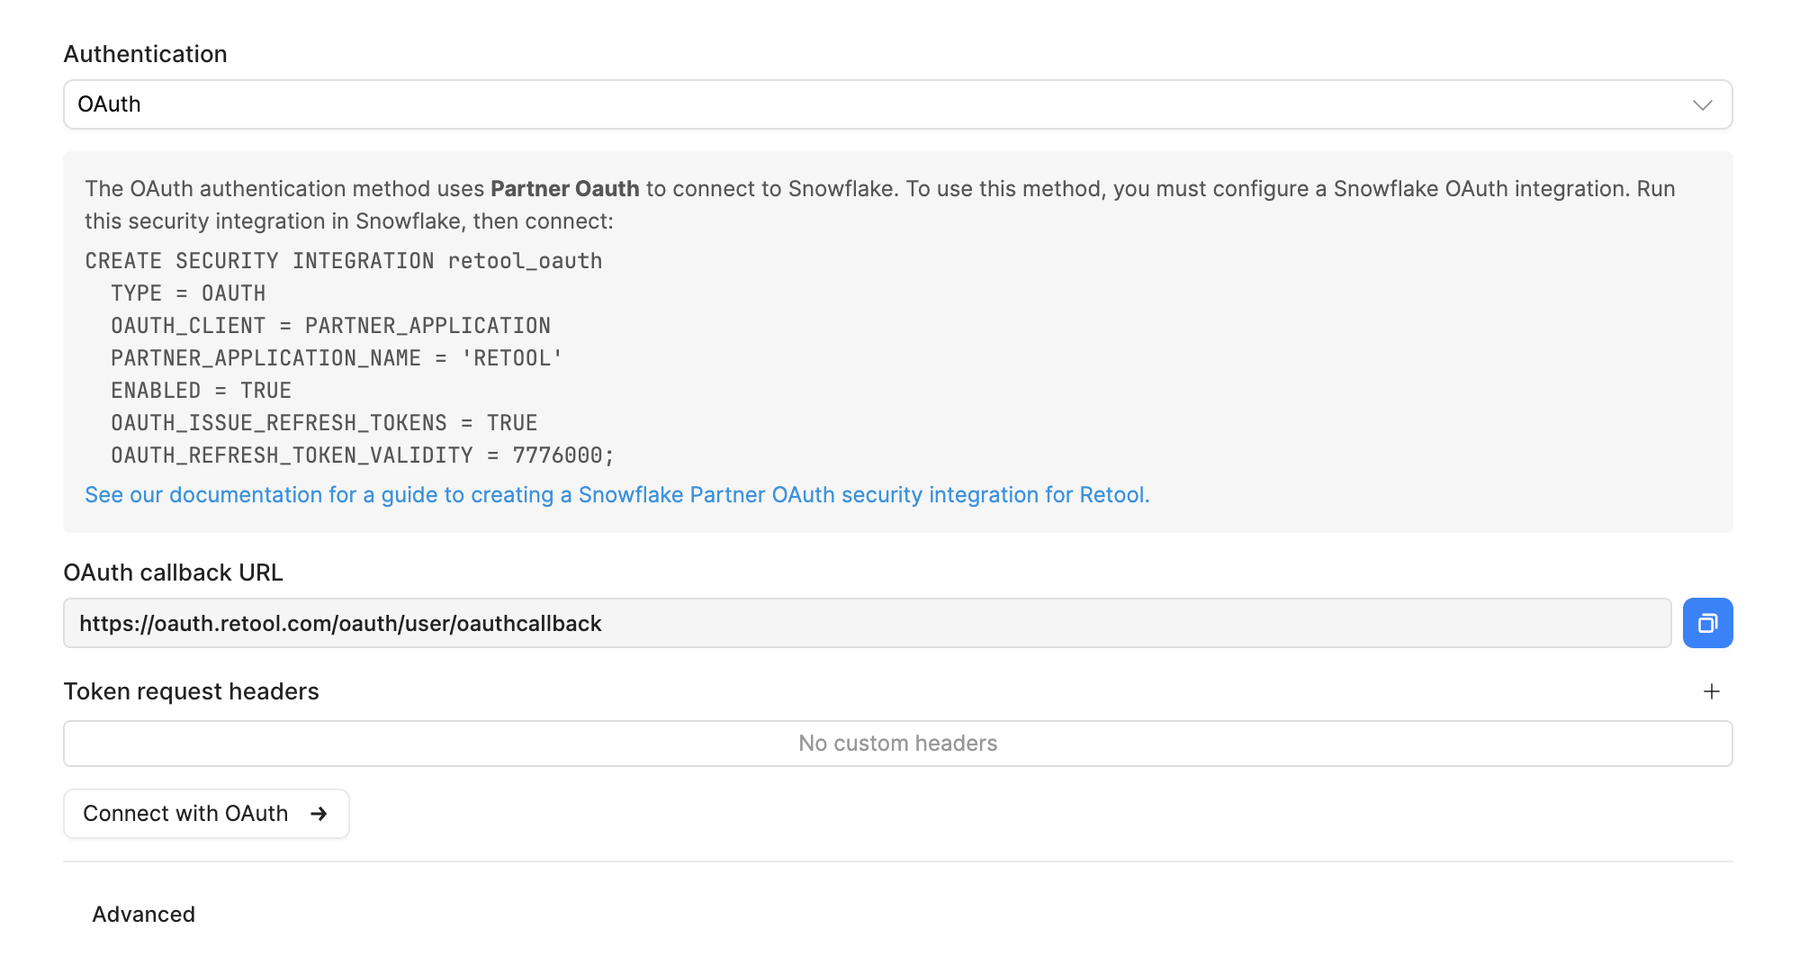
Snowflake OAuth settings on Cloud.
Self-hosted instances connect with your own OAuth client. Retool pre-fills the authorization and token URLs from your account identifier.
- In Snowflake, create the security integration and retrieve the client ID and secret as described in Configure Snowflake OAuth for custom clients.
- Select OAuth from the Authentication dropdown.
- Select an OAuth flow that matches your security integration.
- Enter the Client ID and, for Authorization Code Grant, the Client Secret.
- Click Connect with OAuth and sign in to Snowflake to authorize Retool.
| OAuth flow | When to use |
|---|---|
| Authorization Code Grant | Standard OAuth flow. Requires a client secret. |
| Authorization Code Grant with PKCE | Uses Proof Key for Code Exchange. Doesn't require a client secret. |
OAuth callback URL
A read-only URL that Retool provides for the OAuth redirect, with a button to copy it. With a partner application integration, the URL is fixed and you don't register it in Snowflake. With a custom client, use this value as the OAUTH_REDIRECT_URI in your security integration.
Token request headers
Optional custom headers that Retool sends with OAuth token requests to Snowflake, entered as key-value pairs. Leave this empty unless your Snowflake setup requires extra headers.
Access token lifespan
Under Advanced, which is collapsed by default, you can set the lifespan of the access token in seconds. When the lifespan ends, Retool tries to refresh the token. If the refresh fails, users authorize again. This field is optional.
GUI mode for classic app and workflow queries isn't available when you use OAuth. Only SQL mode queries are supported, and the Show write GUI mode only option doesn't appear.
Option D: Key Pair
Key pair authentication requires an RSA key pair, with the public key assigned to your Snowflake user. Refer to Snowflake's key pair authentication documentation for steps to generate and configure keys. The Username and Private key fields are required.
- Select Key Pair from the Authentication dropdown.
- Enter the Snowflake Username.
- Paste the Private key in PEM format, including the start and end lines.
- If the private key is encrypted, enter the Private key passphrase.
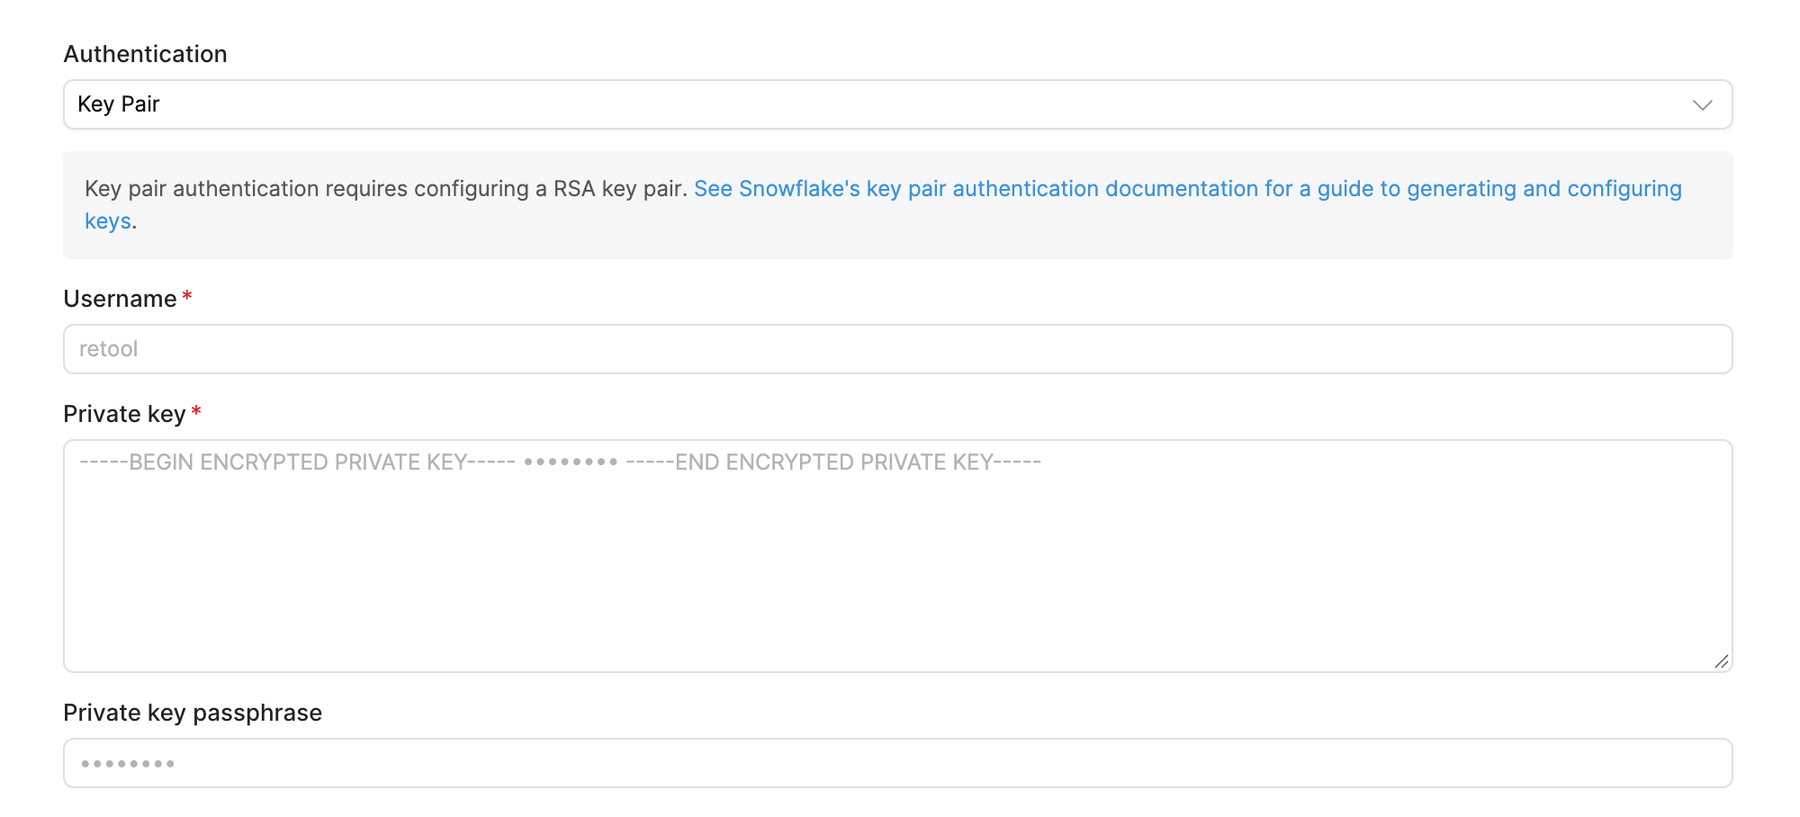
Snowflake Key Pair settings.
Configure advanced options
Configure optional settings available under the Advanced options section of the resource configuration form.
Disable converting queries to prepared statements
Retool converts queries to prepared statements by default to improve performance and prevent SQL injection. Enable this option only if your use case requires dynamically generated SQL.
Show write GUI mode in classic apps and workflows
Enable this to hide SQL mode from query writers, restricting them to GUI mode for write operations. Use this to reduce the risk of unintended data modifications. This option doesn't appear when you authenticate with OAuth.
Fetch Number() and Integer column types as Big Int
Enable this to fetch NUMBER and INTEGER columns as big integers. Use this when columns contain values larger than JavaScript's Number.MAX_SAFE_INTEGER (2^53 - 1), such as large IDs.
Automatically set QUERY_TAG on all queries
Enable this to set a QUERY_TAG on every query with context about its source (app, Query Library, or workflow) and the resource ID. The tag helps with query monitoring and cost attribution in Snowflake's query history.
Use dynamic database names
Enable this to let query writers override the configured database name with a dynamically generated value for each query. Use this when your data is spread across multiple databases.
Use dynamic role names
Enable this to let query writers override the configured role with a dynamically generated value for each query.
Use dynamic warehouse names
Enable this to let query writers override the configured warehouse with a dynamically generated value for each query. Use this when you need to run queries on several different warehouses.
- Cloud
Outbound region
If your organization uses outbound regions, select the region that Retool uses for requests to Snowflake. This controls which geographic region your requests originate from.
Test the connection
Click Test connection to verify Retool can connect to your Snowflake account. If the test succeeds, you see a success message. If the test fails, check the following:
- Network access: Ensure your Snowflake account accepts connections from Retool's IP addresses (Cloud) or your Retool instance's network (self-hosted).
- Network policy: Confirm your Snowflake network policy permits connections from Retool.
- Account identifier: Verify the format, such as
myorg-my_accountormyaccount.us-east-1.aws. - Credentials: Verify your token, key pair, or username and password are correct and haven't expired.
- Private key: For Key Pair authentication, include the start and end lines of the key file, such as
-----BEGIN ENCRYPTED PRIVATE KEY-----and-----END ENCRYPTED PRIVATE KEY-----. If the key is encrypted, make sure the Private key passphrase matches it. - Warehouse: Ensure the specified warehouse exists and the user's role can use it.
Resources that use OAuth don't show Test connection. Authorizing with Connect with OAuth confirms the connection instead.
After testing the connection, click View in console to open the Debug Tools console. The console displays the test query executed, its response, execution time, and error details if the test fails. This information is helpful for troubleshooting connection issues.
Save the resource
Click Create resource to save your Snowflake resource. You can use it in queries across your Retool apps and automations.
Configure OAuth in Snowflake
Before you connect with OAuth, you must first create a security integration in Snowflake. Run these statements in Snowflake with a role that has sufficient permissions to create security integrations, then return to Retool to connect.
Snowflake OAuth doesn't support switching to secondary roles during a session. Refer to Snowflake's documentation on OAuth for partner applications and OAuth for custom clients for more information.
Configure Snowflake OAuth for partner applications
Cloud instances connect using Snowflake's OAuth for partner applications. Run the following statement in Snowflake:
CREATE SECURITY INTEGRATION retool_oauth
  TYPE = OAUTH
  OAUTH_CLIENT = PARTNER_APPLICATION
  PARTNER_APPLICATION_NAME = 'RETOOL'
  ENABLED = TRUE
  OAUTH_ISSUE_REFRESH_TOKENS = TRUE
  OAUTH_REFRESH_TOKEN_VALIDITY = 7776000;
The statement sets the following:
PARTNER_APPLICATION_NAME: Identifies Retool as the partner application.OAUTH_ISSUE_REFRESH_TOKENS: Issues refresh tokens, so Retool can request new access tokens without prompting users to log in again until the refresh token expires.OAUTH_REFRESH_TOKEN_VALIDITY: Sets how long a refresh token is valid, in seconds.7776000is 90 days. After a refresh token expires, users log in to Snowflake again.
You don't need a client ID, client secret, or redirect URI. Retool provides these for the partner application. In Retool, select OAuth as the authentication method, then click Connect with OAuth.
By default, Snowflake doesn't let users consent to the ACCOUNTADMIN, SECURITYADMIN, GLOBALORGADMIN, or ORGADMIN roles through this type of integration. Choose a different role for the User role field.
Configure Snowflake OAuth for custom clients
Self-hosted instances, and Cloud resources that don't use a partner application integration, connect with a custom OAuth client that you create. You need the ACCOUNTADMIN role or the global CREATE INTEGRATION privilege.
First, create a security integration in Snowflake. Replace <oauth_callback_url> with the OAuth callback URL shown on the Retool resource form.
CREATE SECURITY INTEGRATION RETOOL
  TYPE = OAUTH
  ENABLED = TRUE
  OAUTH_CLIENT = CUSTOM
  OAUTH_CLIENT_TYPE = 'CONFIDENTIAL'
  OAUTH_REDIRECT_URI = '<oauth_callback_url>';
Next, retrieve the client ID and client secret for the integration:
SELECT SYSTEM$SHOW_OAUTH_CLIENT_SECRETS('RETOOL');
The response contains the OAUTH_CLIENT_ID and OAUTH_CLIENT_SECRET. Enter these values in Retool. Refer to Snowflake's documentation on OAuth for custom clients for other client types and options, such as PKCE.
With a custom client, users sign in again when their OAuth tokens expire. Snowflake sets how long tokens are valid.
Interact with Snowflake data
Once you've created a Snowflake resource, you can interact with Snowflake data using Retool.
Retool recommends using the app builder so you can use natural language to build React-based apps using AI.
- To use Snowflake data in the app builder, reference the resource in the prompt with
@, such as@Analytics warehouse. Refer to the data and functions documentation to learn more. - For classic apps, workflows, and agents, refer to the SQL queries documentation to learn how to write a resource query.
Best practices
Follow these best practices to maintain the security of your Snowflake resource.
- Apply least privilege: Grant Snowflake users only the minimum roles and permissions needed. Use read-only roles for resources that only read data.
- Prefer Bearer Token or Key Pair for service accounts: Snowflake doesn't recommend Basic Auth for service accounts. Programmatic access tokens and key pairs avoid password rotation.
- Use OAuth for per-user access: Each user authenticates with their own Snowflake credentials, so Snowflake roles and query history reflect individual users.
- Use configuration variables: Store values referenced in queries, such as schema names or environment-specific identifiers, in configuration variables or Retool secrets rather than hardcoding them.
- Validate user input: Validate and sanitize user input before using it in queries, even when you use embedded expressions or prepared statements.
- Use resource environments: Configure multiple resource environments to maintain separate Snowflake credentials for production, staging, and development.
Related resources
Create a resource
Learn how to create and manage resources in Retool.
Resource environments
Configure separate credentials for production and non-production environments.
Connect to Snowflake Postgres
Connect to a PostgreSQL-compatible database built on Snowflake's platform.
Retool community
Community discussions and solutions for connecting resources to Retool.
Snowflake OAuth documentation
Official Snowflake documentation for OAuth and security integrations.