Connect to REST API
Learn how to connect to REST APIs and make HTTP requests in Retool.
Create a REST API resource to connect Retool to any HTTP-based API. REST API resources are generic integrations that enable you to securely connect to external services and build internal tools, admin panels, and workflows that interact with your APIs.
What you can do with REST API
- Make HTTP requests: Send GET, POST, PUT, PATCH, and DELETE requests to any REST API.
- Multiple auth methods: Authenticate with Bearer tokens, Basic auth, OAuth 2.0, AWS Signature V4, and more.
- Handle responses: Parse JSON, XML, and other response formats.
- Custom headers: Add custom headers, cookies, and request parameters for complete control over API requests.
For quick, one-off API calls that don't require authentication, you can use the built-in REST API query type available from the Resource dropdown in the query editor. This allows you to populate API details (base URL, endpoint, headers) directly in the query without creating a resource. However, if your API requires authentication, create a REST API resource instead—resources securely encrypt credentials and authentication details.
Before you begin
To connect a REST API to Retool, you need the following:
- Cloud-hosted organizations
- Self-hosted instances
- API credentials: API keys, OAuth credentials, or other authentication method required by the API.
- Retool permissions: Edit all permissions for resources in your organization.
- API credentials: API keys, OAuth credentials, or other authentication method required by the API.
- Network access: API must be accessible from your Retool instance's network. For internal APIs, configure an SSH tunnel if needed.
- Retool permissions: Edit all permissions for resources in your organization.
Create a REST API resource
Follow these steps to create a REST API resource in Retool.
1. Create a new resource
In your Retool organization, navigate to Resources in the main navigation and click Create new → Resource. Search for REST API and click the REST API tile to begin configuration.

REST API resource selection.
2. Configure connection settings
Configure the following connection settings for your REST API resource.
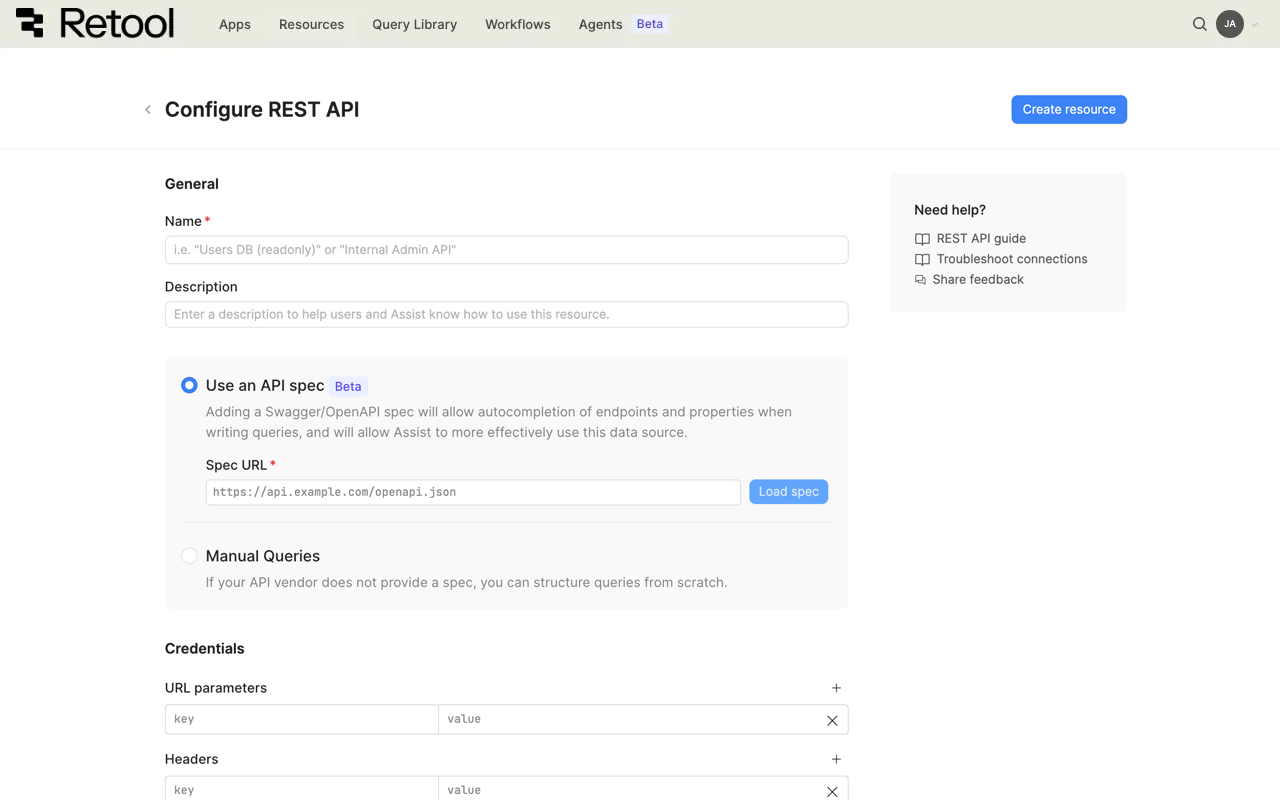
REST API connection settings.
Resource name and description
Specify a name for the resource that indicates which API it connects to. Include a description that can provide more context to users and Assist about how to use the resource.
| Example Name | Example Description |
|---|---|
| OpenWeatherMap API | A REST API resource for the OpenWeatherMap weather data service. |
| Internal customer API | A REST API resource for our internal customer management API. |
Query mode
Choose between two query modes for your REST API resource:
- Use an API spec
- Manual queries
| OpenAPI specifications for the REST API resource Availability | |||
|---|---|---|---|
| Cloud | Public beta | ||
| Self-hosted Edge 3.324 or later | Public beta | ||
| Self-hosted Stable 3.334 or later | Public beta | ||
Spec URL
Import an OpenAPI or Swagger specification to enable guided query creation with endpoint autocompletion and improved Assist integration.
https://api.example.com/openapi.json
https://api.example.com/swagger.yaml
https://petstore.swagger.io/v2/swagger.json
After entering the URL, click Load spec to fetch and validate the specification. Retool will:
- Parse the specification and extract available endpoints.
- Display base URLs from the spec for selection, or auto-populate the base URL if there is only one available.
- Enable guided query creation with endpoint selection and parameter autocompletion.
- Autocomplete: Get endpoint and parameter suggestions when writing queries.
- Validation: Retool validates requests against the specification schema.
- Better Assist: Assist can more effectively generate queries based on the specification.
- Documentation: Endpoint descriptions from the specification appear in the query editor.
When working with resources, users can also manually create endpoints or parameters that aren't included in the specification.
Server URL
If your spec defines multiple server URLs, select the appropriate server for your environment. You can also enter a custom URL if needed.
Base URL
Manually configure the base URL without importing a specification. Use this mode if your API doesn't provide an OpenAPI/Swagger spec or you prefer manual configuration. Query paths are appended to this base URL.
https://api.openweathermap.org/data/2.5
https://api.example.com/v2
https://internal-api.company.com/api
URL parameters
Global URL parameters applied to all requests. Add parameters as key-value pairs.
Headers
Global headers applied to all requests. Add headers as key-value pairs.
3. Configure authentication
REST API supports multiple authentication methods based on your API requirements.
| Authentication method | Use cases |
|---|---|
| Auth0 Client Credentials | Auth0 for identity and access management. Retool handles OAuth flow and token management automatically. |
| AWS Signature V4 | AWS-hosted APIs requiring signed requests (API Gateway). Retool signs each request using AWS Signature Version 4. |
| Azure Identity | Azure-hosted APIs that use Azure Identity credentials. |
| Basic authentication | Username and password credentials sent with each request. Retool encodes credentials as base64 in the Authorization header. Common for simple APIs. |
| Bearer token | Static API token authentication. Retool sends the token as Authorization: Bearer {token}. |
| Custom | Custom authentication logic not covered by standard methods, such as multi-step flows. Add custom headers and authentication workflow using JavaScript. Test connection disabled for custom auth. |
| Digest authentication | Digest authentication (RFC 2617). Uses MD5 hashing for improved security over Basic auth. |
| Google Service Account | Google service account authentication for Google Cloud services. Upload JSON key file for automatic JWT generation and token refresh. |
| None | Public endpoints or custom authentication via headers. Add authentication tokens as custom headers. |
| OAuth 1.0 | Legacy OAuth 1.0 authentication (older services). Retool signs requests using OAuth 1.0a signature method. |
| OAuth 2.0 | User authentication via OAuth 2.0. Use Authorization Code flow for user credentials or Client Credentials for server-to-server authentication with automatic token refresh. |
| Session-based Deprecated | Session cookies for authentication. Configure login endpoint and Retool maintains session cookies across requests. |
Select an authentication method from the Authentication dropdown and provide the required credentials. For sensitive values like API keys, tokens, and secrets, use configuration variables or rather than hardcoding them.

REST API authentication settings.
4. Test the connection
Click Test connection to verify Retool can connect to your REST API. A successful test confirms the base URL is accessible and authentication credentials are valid.
If the connection test fails, verify:
- Base URL is correct and accessible from Retool
- Authentication credentials are valid and not expired
- API accepts requests from Retool's IP addresses (for Cloud organizations)
- Custom headers are formatted correctly
5. Save the resource
Click Create resource to save your REST API resource. The resource is now available to use in apps, workflows, and agent tools across your Retool organization.
Query REST API data
Once you've created a REST API resource, you can query it in apps, workflows, and agent tools.
Create a query
You can create a REST API query in a Retool app using Assist to generate queries with natural language, or manually using code.
- Assist
- Code
Use Assist to generate queries from natural language prompts. Assist can create REST API queries to retrieve, send, and manipulate data from your REST API resource.
To create a query with Assist:
- In the Retool app IDE, click the Assist button at the bottom of the left toolbar to open the Assist panel (if not already visible).
- Write a prompt describing the API request you want to make, referencing your resource using
@. - Press Enter to submit the prompt.
- Select your REST API resource when prompted.
- Review the generated query and click Run query to add it to your app.
get current weather data from the weather endpoint using @OpenWeatherMap API
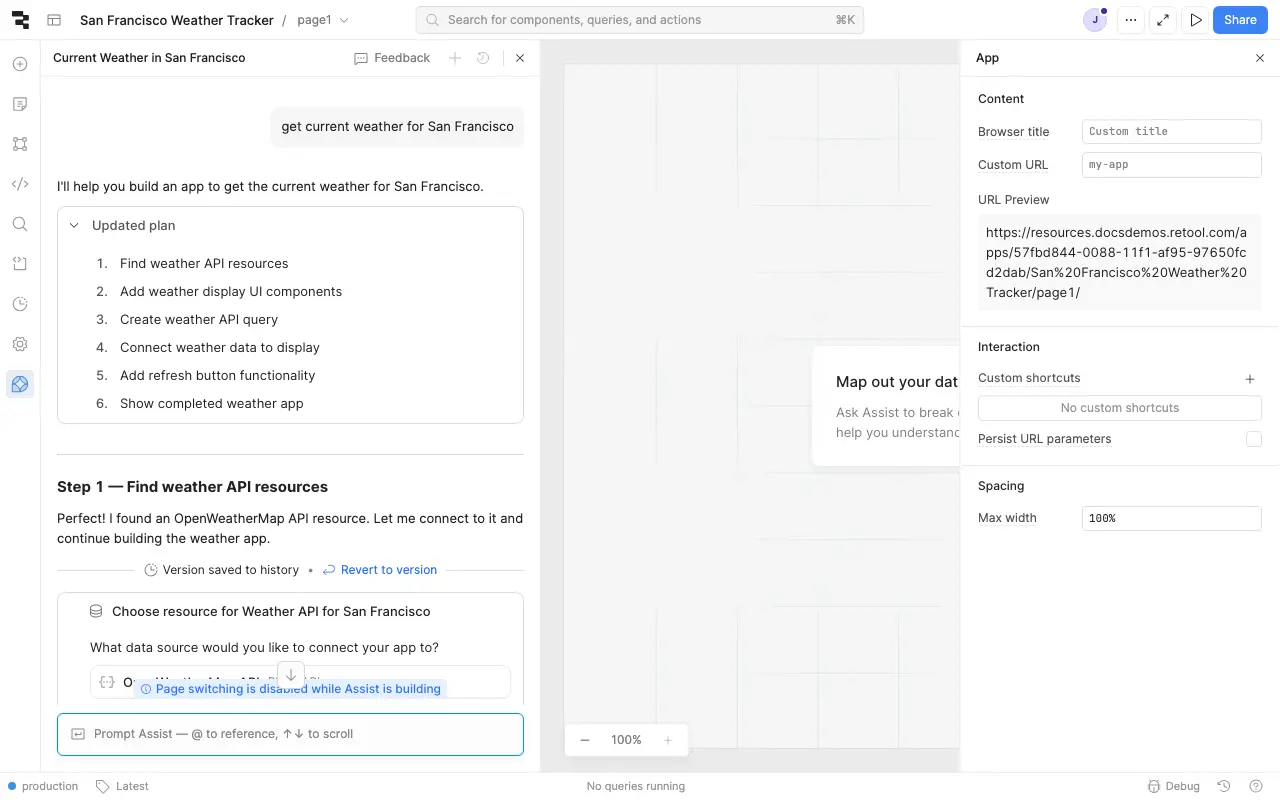
REST API query with Assist.
To manually create a REST API query in a Retool app:
- In the Retool app IDE, open the Code tab, then click + in the page or global scope.
- Select Resource query.
- Choose your REST API resource.
- Configure the HTTP method, URL path, headers, and request body.
Query configuration fields
Each REST API query has the following configuration fields:
HTTP method
The HTTP method for the request.
| Method | Use case |
|---|---|
| GET | Retrieve data from the API. Most common read operation. |
| POST | Create new objects or submit data to the API. |
| PUT | Replace an existing object completely. |
| PATCH | Partially update an existing object. |
| DELETE | Remove an object from the API. |
URL path
The path appended to the resource's base URL. Include dynamic values using embedded expressions.
URL path examples
// Static path
/users

// Dynamic with ID
/users/{{ table1.selectedRow.data.id }}

// With query parameters
/search?q={{ searchInput.value }}&limit=20

// Multiple path segments
/customers/{{ customerId.value }}/orders
URL parameters
Query parameters appended to the URL. Add parameters as key-value pairs to build the query string.
Headers
Request-specific headers that override or extend the resource's global headers.
Body
The request body for POST, PUT, and PATCH requests. Use embedded expressions to include dynamic data.
Body example
{
  "name": {{ nameInput.value }},
  "email": {{ emailInput.value }},
  "role": {{ roleSelect.value }},
  "metadata": {
    "created_by": {{ current_user.email }},
    "created_at": {{ new Date().toISOString() }}
  }
}
Body type
The format of the request body.
| Body type | Description | Content-Type header |
|---|---|---|
| JSON | JavaScript object serialized to JSON. | application/json |
| Raw | Plain text or custom format. | Custom or none |
| None | No request body. | None |
Common use cases
The following examples demonstrate typical REST API operations in Retool apps using a sample REST API.
Use the mock API generator below to generate a fully functional temporary REST API with sample data that you can use.
- Select the sample data set.
- Specify the number of Items that the data set should include.
- Click Generate API to generate the API with sample data.
- Click Copy URL to copy the API URL to your clipboard.
The mock API is for testing purposes only and does not require authentication. Do not attempt to use it for production purposes or with any type of sensitive information.
fetch data from an API
First, create a REST API resource with the base URL from the mock API generator, for example: https://retoolapi.dev/SPq6yI.
Next, create a query to fetch customer data:
| Field | Value |
|---|---|
| HTTP method | GET |
| URL path | /customers |
Then, add a Table component to the app and set its Data property to {{ getCustomersQuery.data }}.
filter data with query parameters
Query parameters allow you to filter and refine API responses.
Create a query with query parameters:
| Field | Value |
|---|---|
| HTTP method | GET |
| URL path | /customers |
| Query parameters | [["company", {{ companySelect.value }}], ["_limit", "50"]] |
The query sends a request to /customers?company=Acme&_limit=50 and returns filtered results.
fetch a single record by ID
Retrieve a specific customer record using their ID.
Create a query with a dynamic ID in the path:
| Field | Value |
|---|---|
| HTTP method | GET |
| URL path | /customers/{{ table1.selectedRow.data.id }} |
The query fetches the selected customer's details and you can display them in a form or detail view.
create a new record via POST
First, add a Form component (form1) with input fields for the customer data you want to collect.
Next, create a POST query:
| Field | Value |
|---|---|
| HTTP method | POST |
| URL path | /customers |
| Body type | JSON |
Body:
{
  "name": {{ form1.data.name }},
  "email": {{ form1.data.email }},
  "company": {{ form1.data.company }}
}
Then, add an event handler to the form's Submit event that runs the POST query and displays a success notification.
update a record via PATCH
First, add a Form component with fields pre-populated from selected row data.
Next, create a PATCH query:
| Field | Value |
|---|---|
| HTTP method | PATCH |
| URL path | /customers/{{ table1.selectedRow.data.id }} |
| Body type | JSON |
Body:
{
  "name": {{ form1.data.name }},
  "email": {{ form1.data.email }},
  "company": {{ form1.data.company }}
}
Then, add an event handler that runs the PATCH query when the form is submitted and refreshes the data query.
delete a record with confirmation
First, add a Button component in your table's action column.
Next, create a DELETE query:
| Field | Value |
|---|---|
| HTTP method | DELETE |
| URL path | /customers/{{ table1.selectedRow.data.id }} |
Then, add an event handler to the button's Click event:
- Action: Show confirmation modal
- If confirmed, trigger the DELETE query
- Then refresh the data query
handle paginated responses
For APIs that return paginated data, use query parameters to implement pagination.
Create a query with pagination parameters:
| Field | Value |
|---|---|
| HTTP method | GET |
| URL path | /customers |
| Query parameters | [["_page", {{ table1.pagination.pageIndex + 1 }}], ["_limit", "10"]] |
The query sends a request to /customers?_page=2&_limit=10 and returns paginated results. Connect the query to a table component and enable server-side pagination.
Best practices
Follow these best practices to optimize performance, maintain security, and ensure data integrity when working with REST APIs.
Performance
- Cache responses: For data that doesn't change frequently, enable query caching to reduce API calls and improve response times.
- Implement pagination: For endpoints that return large datasets, use query parameters to implement pagination and reduce payload size.
- Batch requests: When available, use batch API endpoints to combine multiple operations into a single request.
- Minimize payload size: Request only the fields you need using query parameters or API-specific field selection features.
- Set appropriate timeouts: Configure query timeouts based on expected API response times to prevent hung requests.
Security
- Use configuration variables: Store API keys and tokens in configuration variables or rather than hardcoding them.
- Use HTTPS only: Always connect to APIs over HTTPS to encrypt data in transit and protect authentication credentials.
- Rotate credentials regularly: Follow your API provider's recommendations for credential rotation and key management.
- Validate SSL certificates: Keep SSL certificate verification enabled unless absolutely necessary for development environments.
- Use resource environments: Organizations on an Enterprise plan can configure multiple resource environments to maintain separate configurations for production, staging, and development.
- Apply least privilege: Use API keys with minimal required permissions. Create separate keys for different environments.
Data integrity
- Validate user input: Sanitize and validate all user input before including it in API requests to prevent injection attacks.
- Handle errors gracefully: Configure error notifications and fallback behavior for failed API calls to improve user experience.
- Use idempotency keys: For APIs that support idempotency keys, include them in POST/PATCH requests to prevent duplicate operations.
- Verify responses: Check response status codes and validate response data structure before using it in your app.
- Implement retry logic: For transient failures, use Retool's automatic retry settings or implement custom retry logic with exponential backoff.
- Log API interactions: Enable query logging to track API requests and responses for debugging and auditing.