Google Sheets query tutorial
Learn how to read and write data to Google Sheets.
You can build Retool apps using your Google Sheets data, reading and writing data to Google Sheets as you would any other data source. This means you can also query Google Sheets using SQL and combine it with other data sources.
This guide explains how to:
- Query Google Sheet data.
- Display the data in a table.
- Use a form to add rows.
- Edit individual cells.
Requirements
To build apps with Google Sheets, you need:
- A Google Sheets resource.
- Edit access to the Google Sheet you want to work with.
Spreadsheet requirements
To make it easier to work with Google Sheet data, your spreadsheet should meet these requirements:
- The first row needs to contain column names that map to the data in each column.
- Column names should only use alphanumeric characters and lowercase letters, and underscores to separate words.
- There should be no empty columns between columns.
- There should be no empty rows between rows.
If your spreadsheet groups data in a different format (e.g., summary data in a standalone cell), you can instead use A1 notation to query data.
Retool queries a maximum of 26 columns (A:Z). If you have more than 26 columns in your data, you need to use A1 notation.
1. Create an app
If you haven't created an app yet, log in to Retool and click Create new -> App. Name the app and then click Create app.
2. Write a query to access your data
To work with Google Sheets, create a query to pull the data into your app. Click + > Resource query in the query editor.
Confirm the following query settings are correct:
- Resource is set to your Google Sheets resource.
- Action type is set to Read data from a spreadsheet.
- Spreadsheet is set to the spreadsheet that contains your data.
- If your data isn't contained on the first sheet, pass the sheet name in the Sheet name field.
Click Save and run to query your data.
If needed, you can set a Data range using Limit and Offset, or A1 notation. Limit caps the number of rows returned, excluding the first row with your column names. Offset sets an integer offset on the rows returned, excluding the first row with your column names.
3. Display your data in a table
To display the data from your query, drag a Table component to the canvas. Retool automatically sets the table's Data source to the query you created. The Primary key should also be set, but verify the value is correct before continuing.
4. Add rows
To create rows and append data to your spreadsheet, you need to make the table columns editable. With the table selected, click ••• in the Columns section and select Make all columns editable.
Next, drag a Form component to the canvas and click Generate form. Use the default Source of table1, verify the column and input types are correct, and click Generate form. This form is used to add rows, so it should be populated with blank values. To remove the currently selected row data, select the form and delete the Data source value in the Inspector.
To add rows, you need a query that writes data from the form back to your spreadsheet. Create another resource query and set:
- Action type to Append data to spreadsheet.
- Values to append to
{{ form1.data }}.
Scroll to the bottom of the query editor and add a success Event handler. Set Query to the query that pulls data from your spreadsheet. This way, when you add a row, the table data in your app updates automatically.
Make sure to save the query.
The last step to add rows is to create an event handler on the form's Submit button. Select the button and click + in the Event handlers section. Make sure Query is set to the query you just created.
Test out the form by filling out the data and clicking Submit.
5. Update existing rows
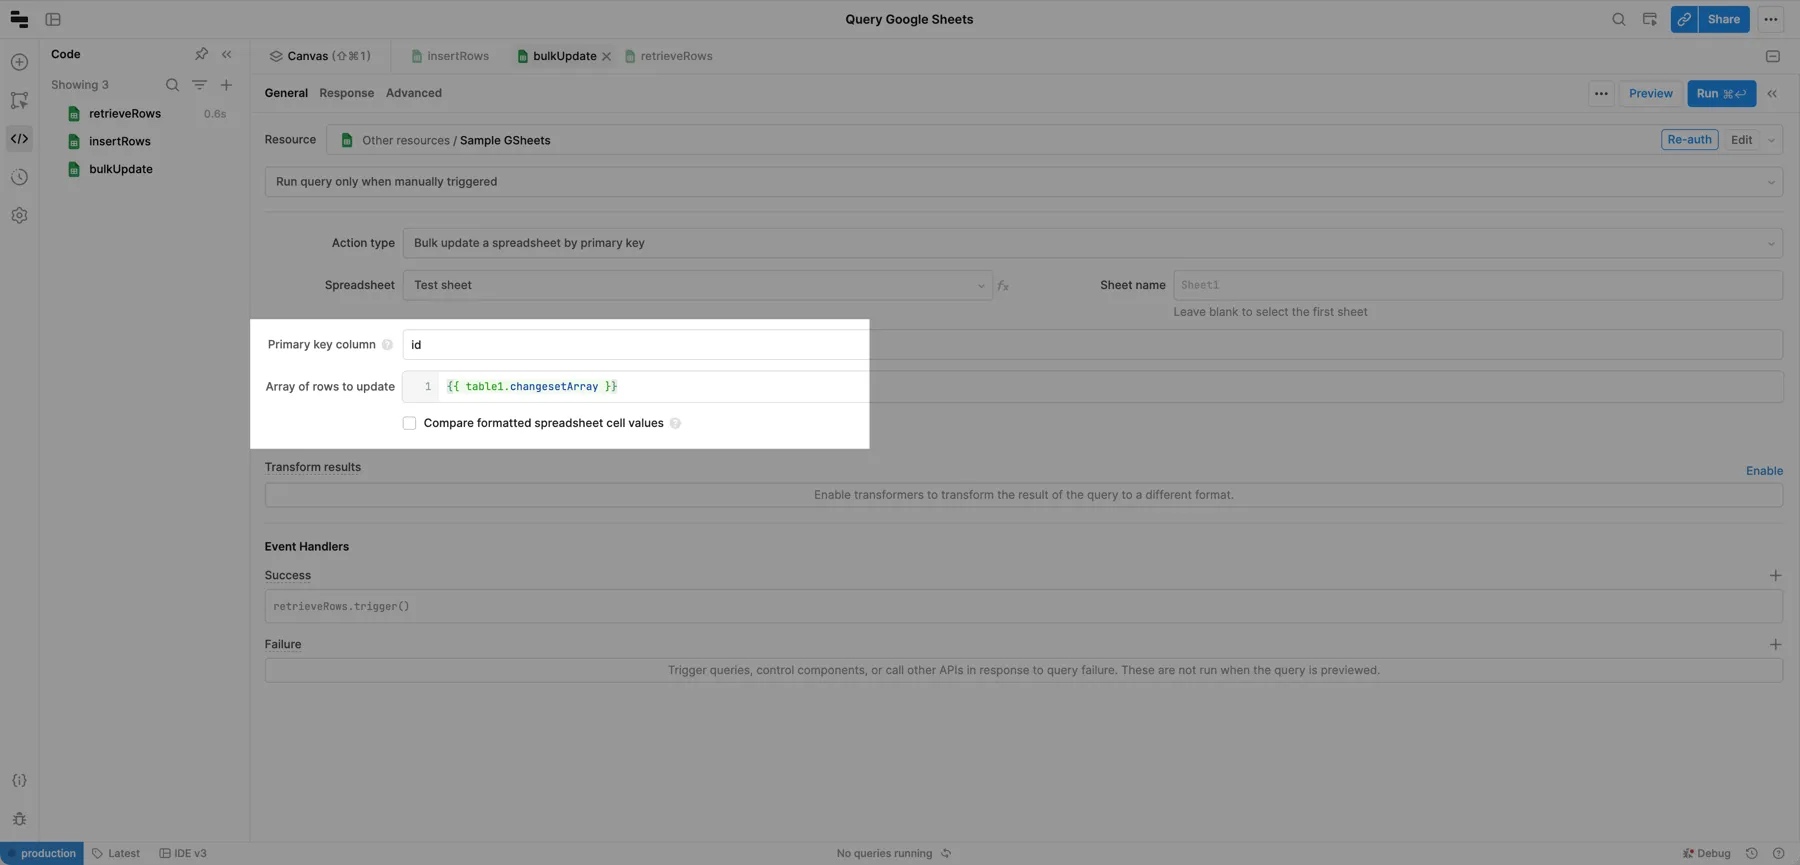
When you made columns editable, it made it possible to click individual cells and edit them. To save these edits back to your spreadsheet, create another resource query and set:
- Action type to Bulk update a spreadsheet by primary key.
- Primary key column to the column you use as the primary key.
- Array of rows to update to
{{ table_name.changesetArray }}. - A success event handler that runs the query that reads data from your spreadsheet.z
Save the query and then select your table. Click Save actions under Add-ons in the Inspect tab. Create an event handler that runs the bulk update query.
Edit a few cells and click Save to test the edit functionality.
If the bulk update query doesn't work for your use case, you can also write a JavaScript query to iterate through rows and update them individually.
// Get list of changes
const updates = table1.changesetArray.map((d, i) => {
  // Trigger the query that updates an individual row
  update_row.trigger({
    // Use additional scope and the i variable to pass updates to
    // for each change to the query that updates individual rows
    additionalScope: { i: i },
    onSuccess: function (data) {
      if (i == table1.changesetArray.length - 1) {
        // Refresh table data after updating
        // the last row
        getTableData.trigger();
      }
    },
  });
});

return Promise.all(updates);
Data type options
By default, Retool reads Google Sheets data as formatted strings (e.g., "$1.25" or "TRUE"). This means table sorting is string-based, and column types might not match your spreadsheet exactly. You can optionally configure queries to read data as typed values instead. To enable this option, select Read data as typed values in the Data types section of the query editor.
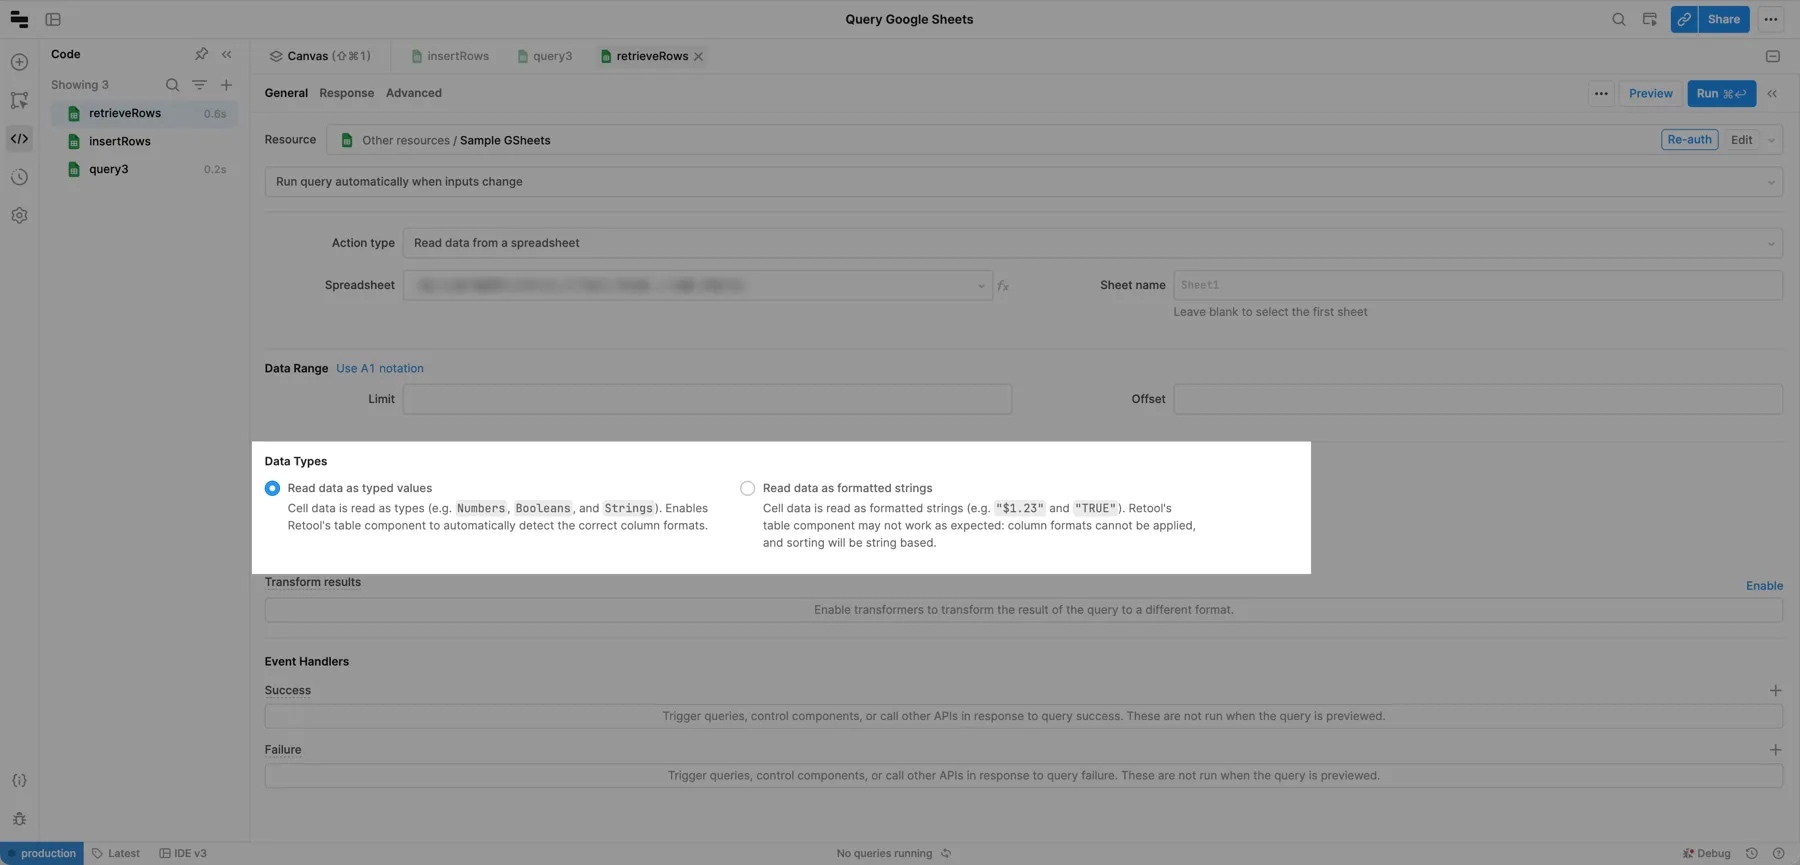
Formatted strings work well when you:
- Display data in a table exactly as it appears in Google Sheets, and you don’t need to use any table sorting or formatting features.
- Use column formats supported by Google Sheets that are not supported by Retool.
Formatted strings do not work well when you try to apply Retool’s column formats to them. For example, a formatted boolean from Google Sheets is "TRUE" or "FALSE", which if you used with the Boolean column type, would always evaluate to true.
If you decide to read data as typed values, uncheck Compare formatted spreadsheet values in queries that write data back to your spreadsheet so rows are updated correctly.