Customize app URLs
Learn how to customize app and page URLs.
You can customize the URL of apps and their pages to create more discoverable links for users. Apps also support query strings and hash properties to sync property values and control behavior.
Configure a custom URL
Cloud instances use the domain {organization}.retool.com by default. Organizations on a Business or an Enterprise plan can optionally configure a custom domain.
Apps include a unique identifier in their URL by default. You can specify a custom URL path and access an app at {domain}/app/{custom-url} instead. If you're embedding the app as an IFRAME, the app can be accessed at {domain}/p/{custom-url}.
Open the App Inspector. Enter a custom URL path to use for the app, and preview the full URL.
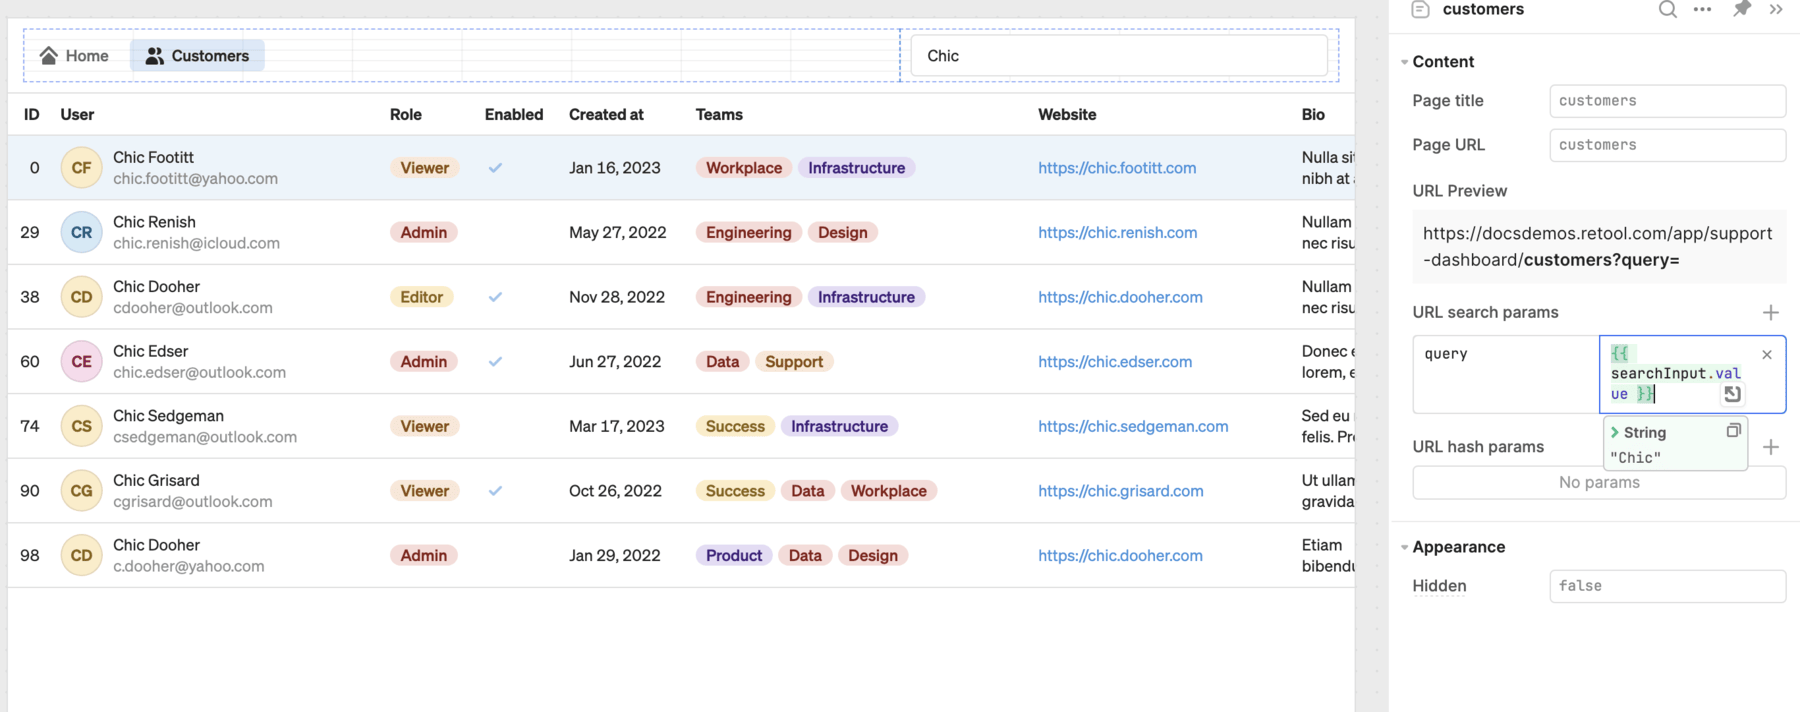
Configure page URLs
Each app page has a title and URL that you configure from the Inspector. The page URL is appended to the app URL and allows for deep-linking to specific pages. For example, a page with the URL of customers would be available at https://example.retool.com/app/support-dashboard/customers.
Open the Pages pane and select a page to view its settings in the Inspector. Enter a custom page URL path to use. The Inspector displays a preview of the URL to the current page.
Configure page settings.
Disabling a custom URL makes all prior references invalid. You can disable a custom URL in App Settings > Page Settings.
Accessing apps with a custom URL
Apps with custom URLs always display the custom URL in the browser's address bar unless you're editing the app or using the mobile view. Even if you access the app from another app, publicly, or from the original link, the custom URL is displayed.
If you have a custom domain, short links are accessible from both your custom domain and the Retool domain.