Configuring Access via Permission Groups and Access Rules
This laboratory demonstrates using Direct Group Access to assign permissions to Apps, Resources, Workflows, and Agents.
Requirements
- Retool Administrator permission either via Admin permission group or Role.
- The Resources portion of this lab requires that you have completed the Environments lab, in order to have a production and sandbox environment.
- If using Spaces within a Retool Organization, select the appropriate space to perform this work within, or create a new space if appropriate.
Steps
Permission Groups
Best Practice: This lab focuses on the creation of new permission groups, folders with appropriately configured access rules. It is important to not use the default permission groups but rather configure new permission groups that support specific app or role permissions.
- Create three unique users via Settings > Users. Each user will require a unique email address and will need to be invited to the Org.
- Select Invite, to invite each user.
- Once users exist, the next step is to create three custom permission groups called App User, App Developer, App Admin. Select Permissions > Create group.
- Add one user to each group, App User, App Developer and App Admin by selecting the group and then selecting Add new members.

- In the previous image, under the permission group App User, you will see selections for
Members,Apps,Resources,WorkflowsandAdditional. This exposes the option to Define specific app access,Use all,Edit all, orOwn all. While all of these are valid options and provide the ability to select individual items, as teams use, edit and own many apps, resources, and workflows, it is recommended to instead use folders and apply access permissions to those. This reduces the burden on the admin in having to maintain and set access for each item as they are created.
Folders
In order to support users and developers, creating folders to organize Retool Apps and Workflows and Resources helps simplify administrating access by assigning it a folder versus n-number of items individually. To demonstrate this we will create a simple app and workflow that stores its contents in folders. We will then apply permissions to those folders so that future items automatically apply the proper permissions.
- Go to the Retool Home Page.
- Select Apps > Create > Folder and provide a folder name, for example
sample apps.

- This will display an empty folder as shown below.

- Create a simple app by selecting Create > App . This will place the app into the sample apps folder and display the Retool App Editor.
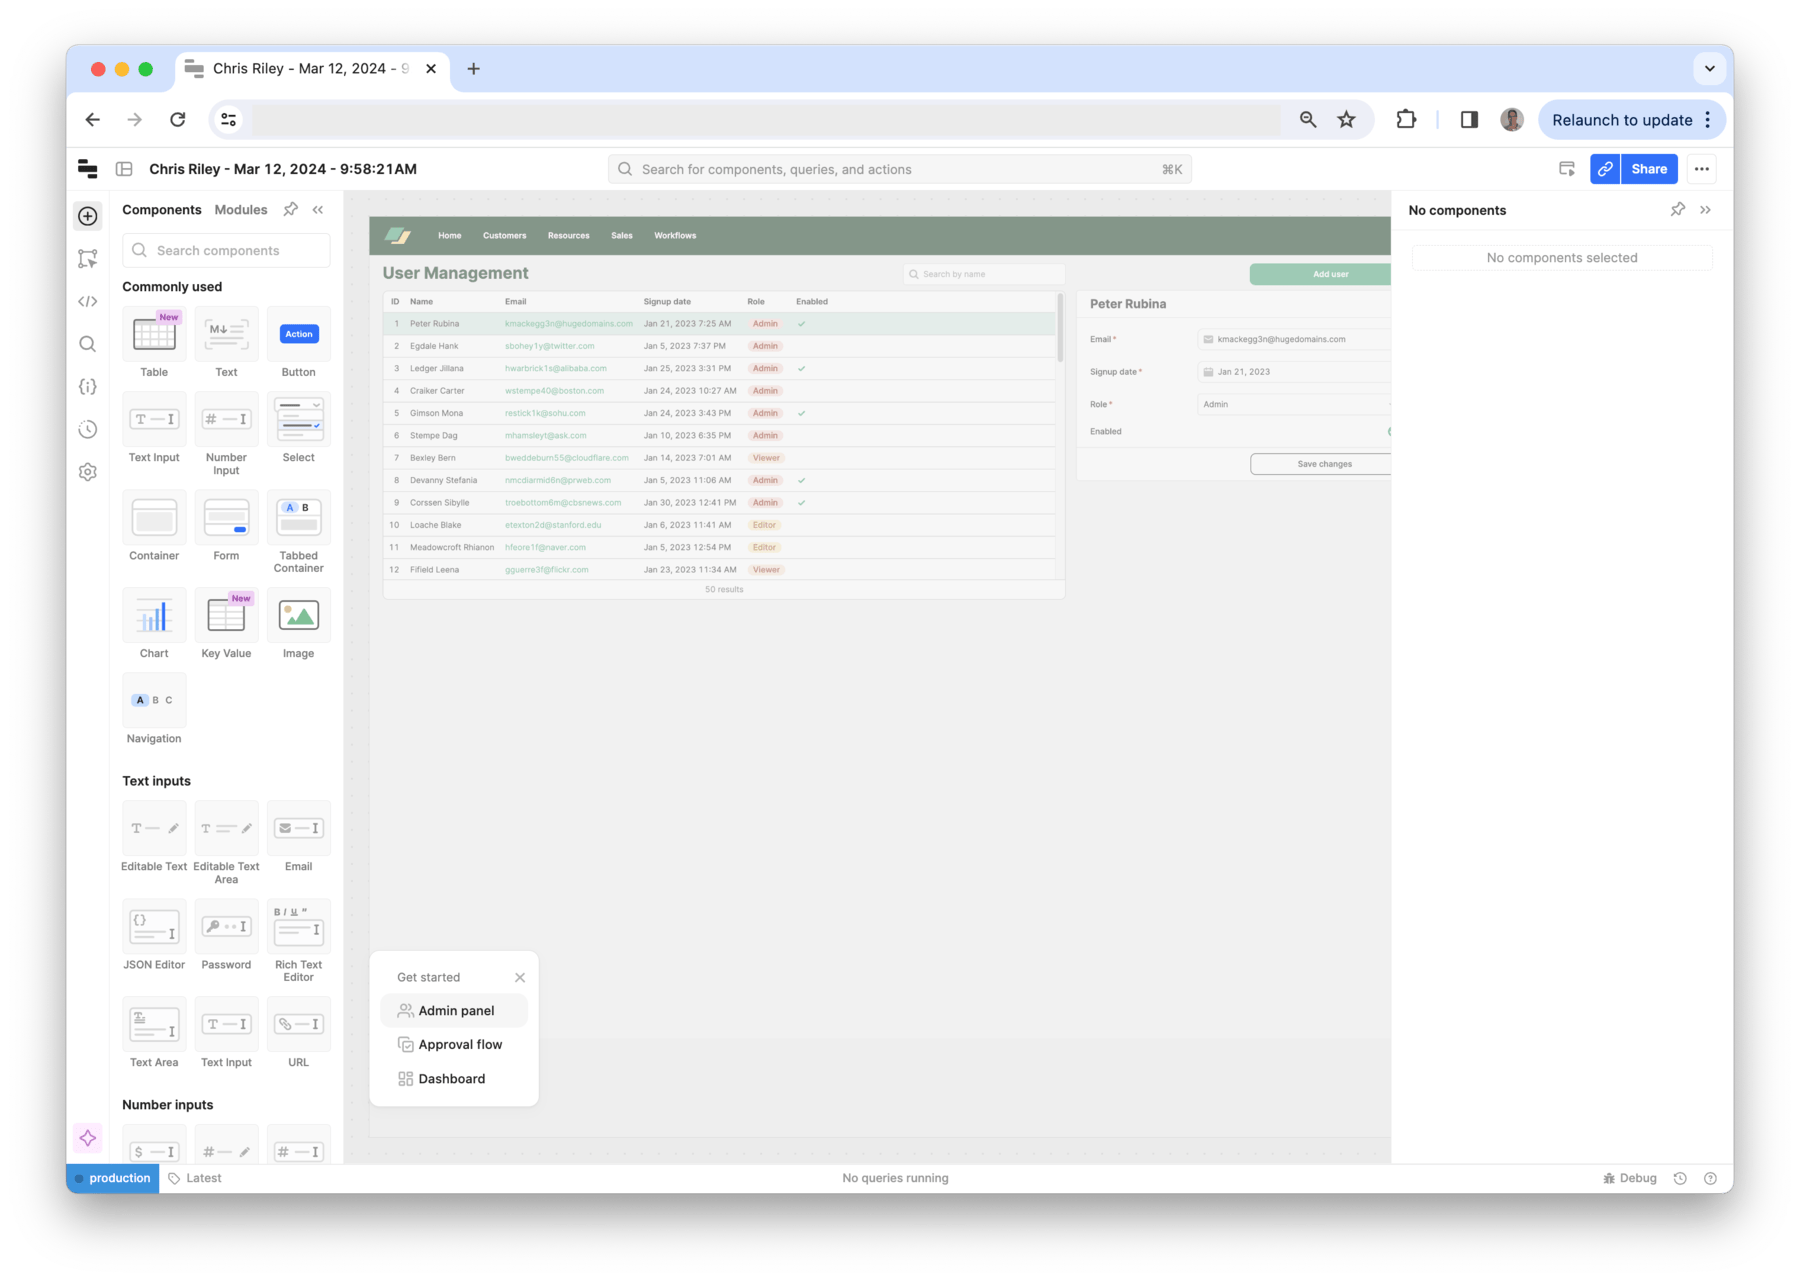
- In the Get started dialog, select the X to create a blank canvas. In the upper left corner, select the App Name and rename it to
simple appand select Save changes.

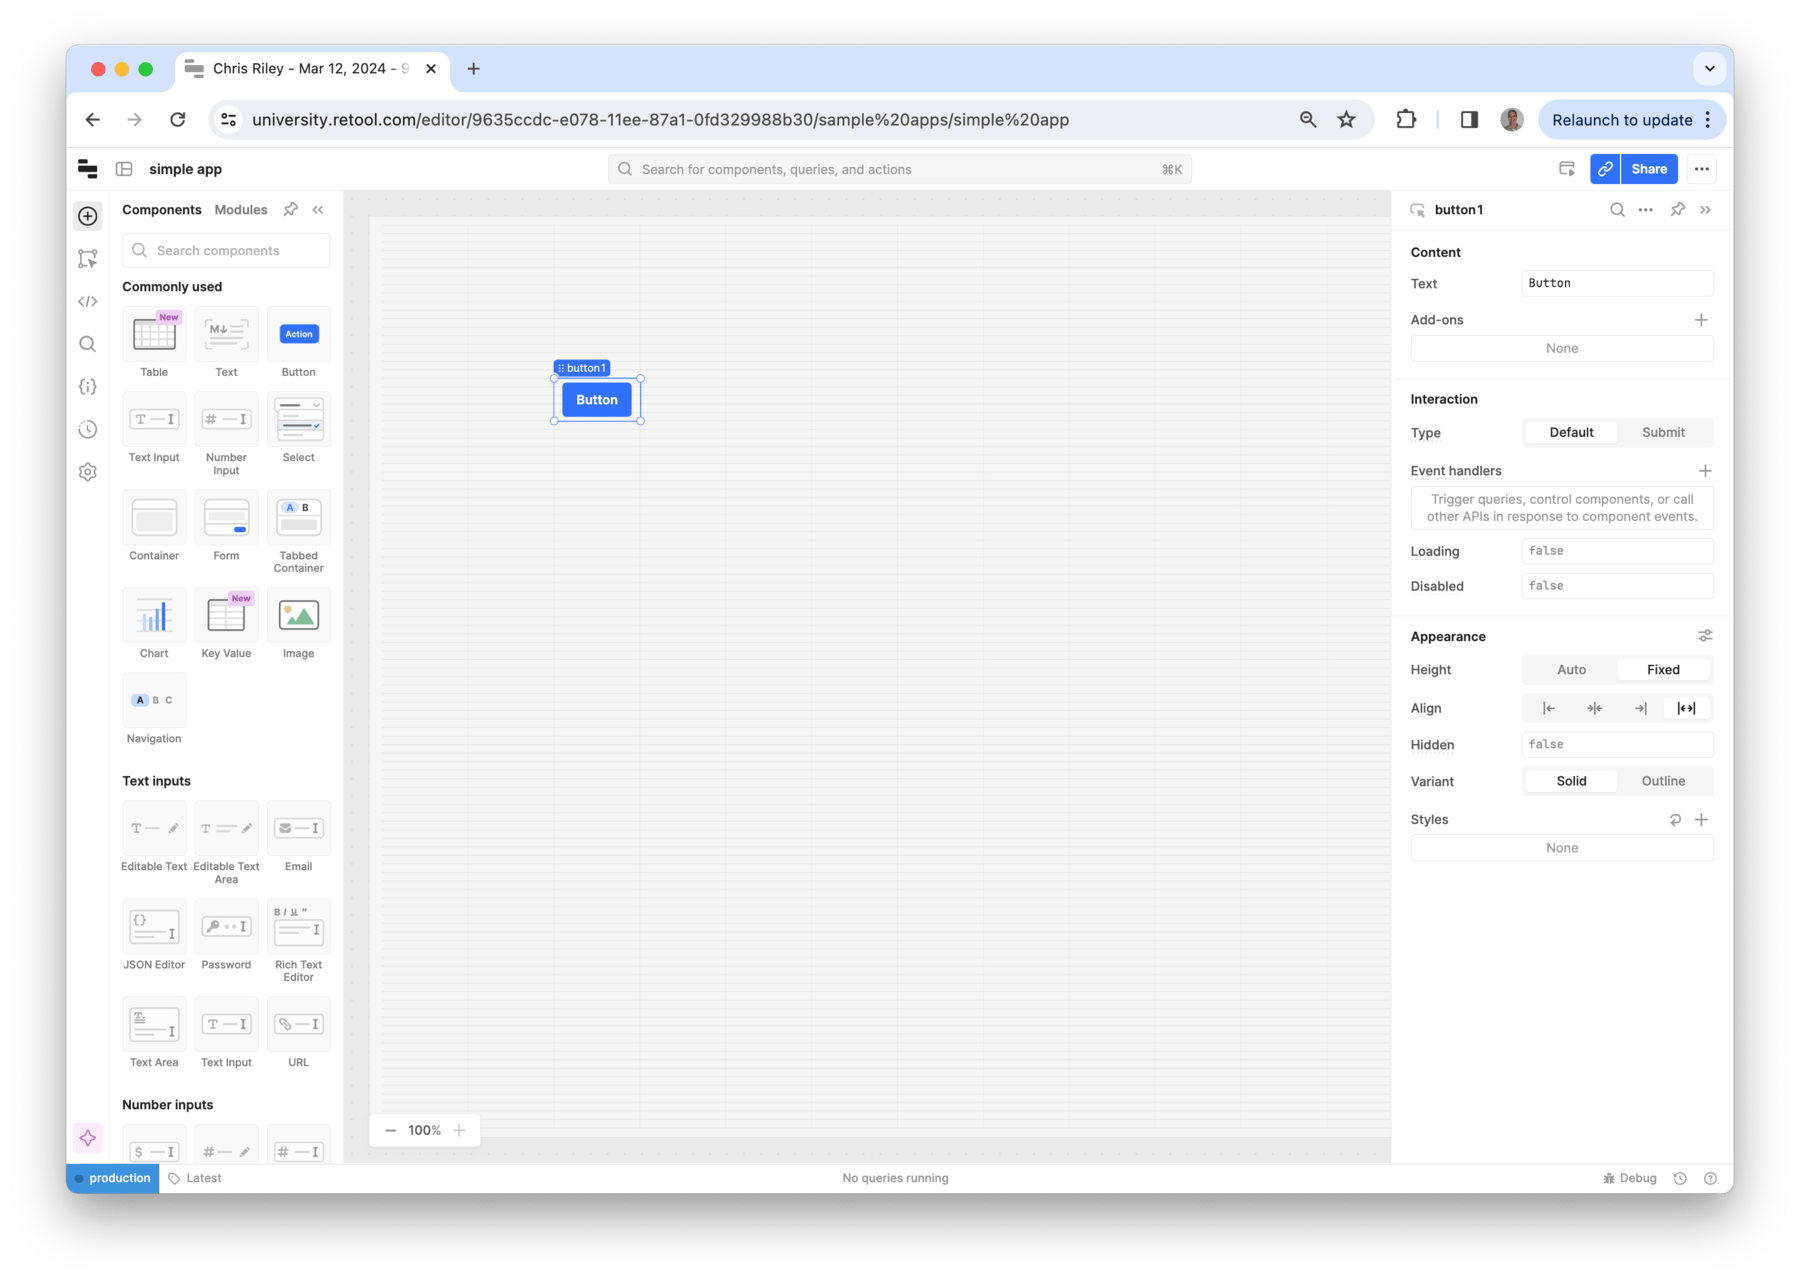
- Now, from the component panel, drag a Button component onto the canvas.
- Select the Retool icon > Back to home to return to the home page. Under the All section at the bottom of the home page, you will see the sample apps folder with one entry. Selecting the sample apps folder you can see the simple app that was just created.

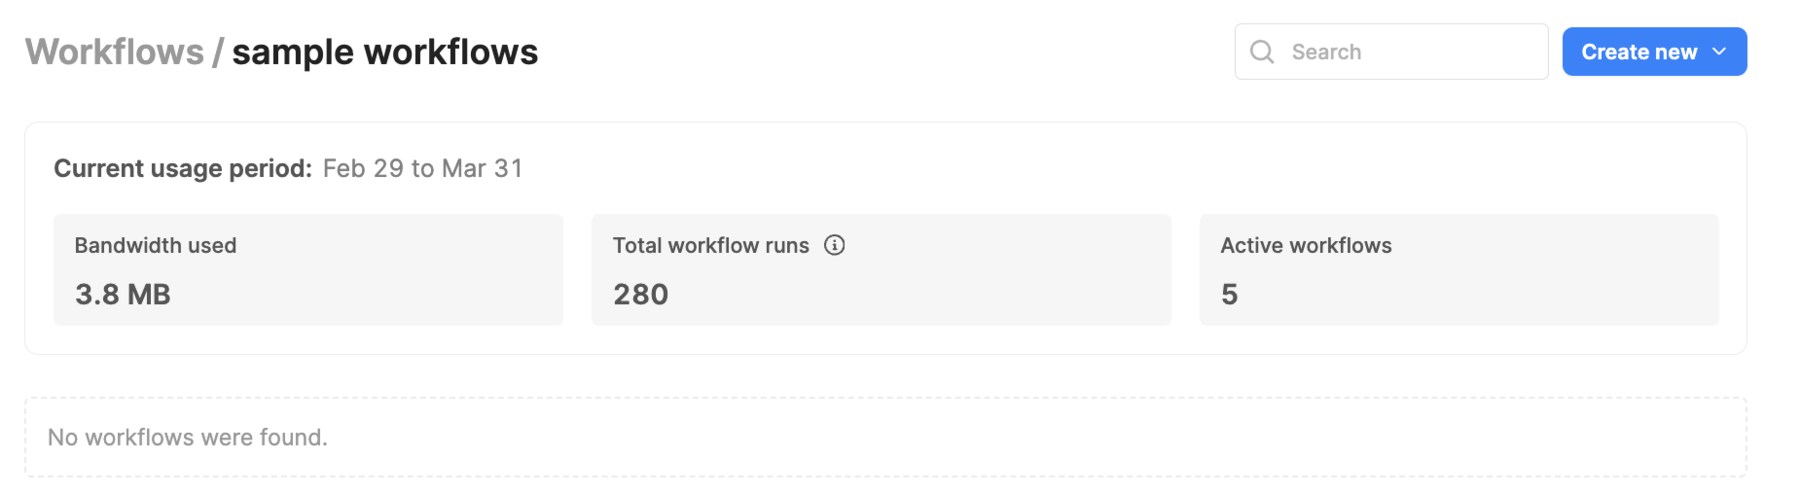
- Next we create a folder under Workflows. Select Workflows > Create new > Folder and provide a folder name, for example
sample workflows.
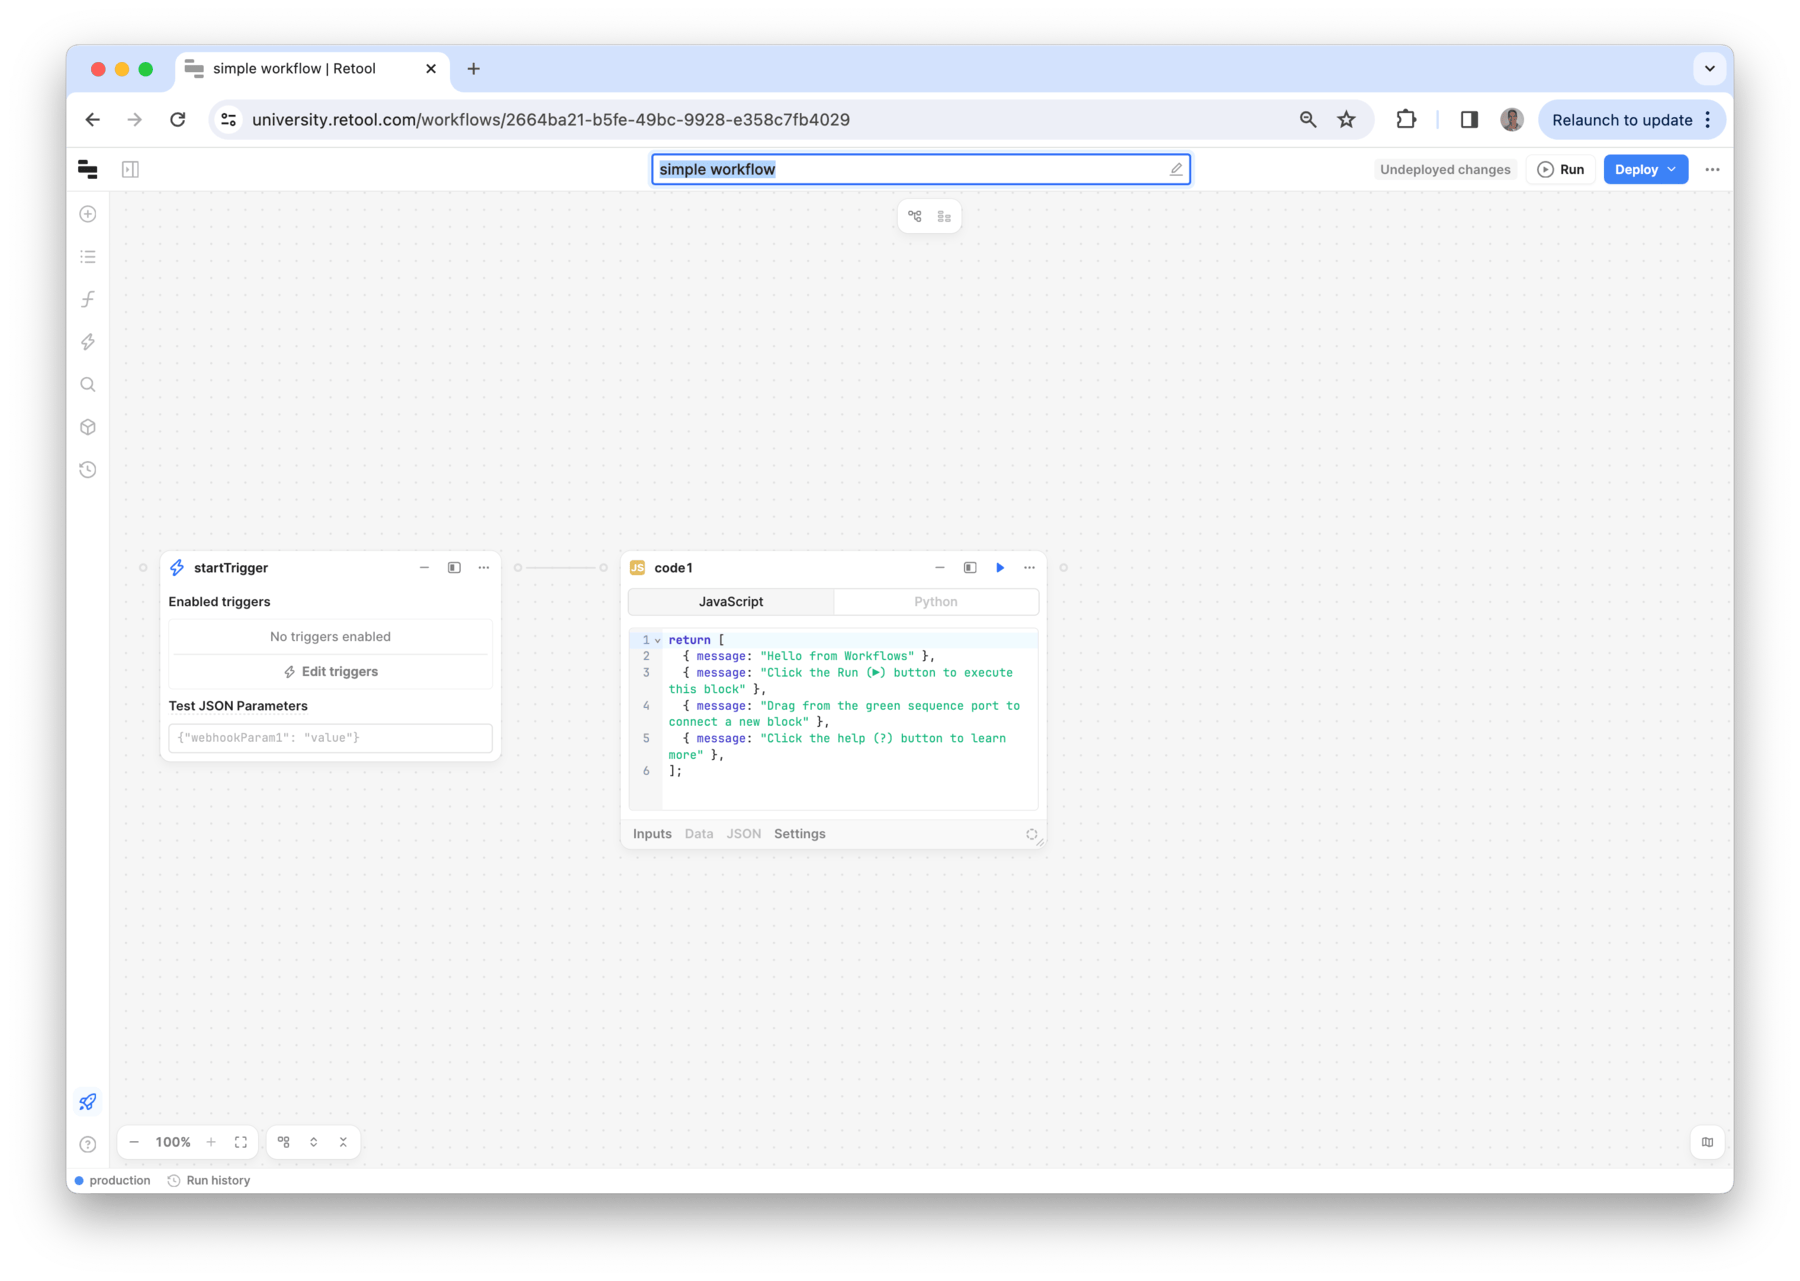
- Next select Create new > Workflow. Click the X to close the
Get started with Workflowsdialog. - Select the name of the workflow at the top middle and rename it to
simple workflow.
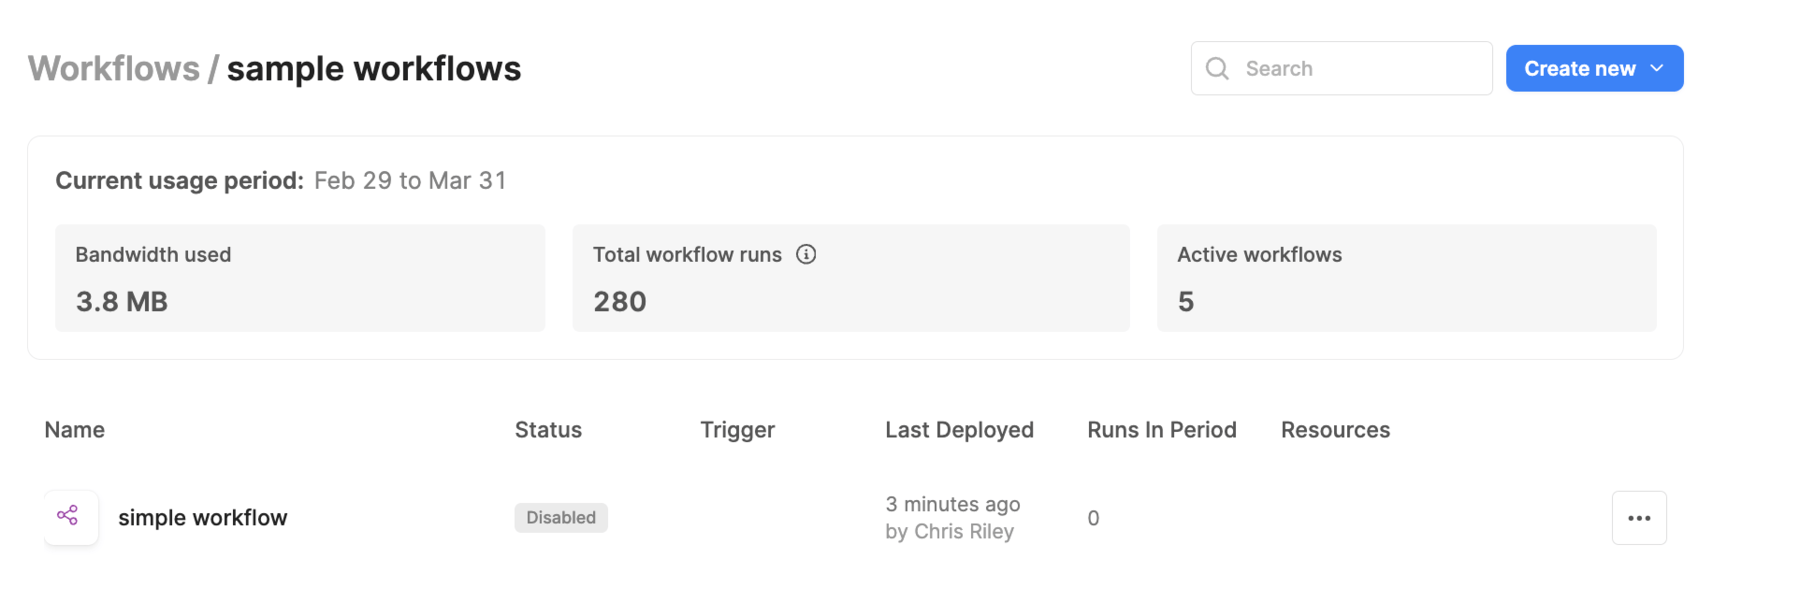
- Select the Retool icon > Back to home. Select the sample workflows folder. The simple workflow will appear.
Apply Access to Folders
With the folders created and populated, we can now assign permissions. The following table provides the desired permissions.
| Permission Group | Access | Description |
|---|---|---|
| App User | Use (apps/workflows/resources) | This group focuses on users that only use Retool Apps, Workflows and Resources. |
| App Developer | Edit (apps/workflows/resources) | This group focuses on developers that create Retool Apps, Workflows and queries to resources. |
| App Admin | Own (apps/workflows/resources) | This group focuses on admins that own Retool Apps, Workflows and Resources. |
- To apply these permissions for the App User, select the App User permission group by selecting Settings > Permissions > App User > Apps and specify Use to the sample apps folder as shown in the following figure. Selecting the folder auto-selects all apps under the folder.
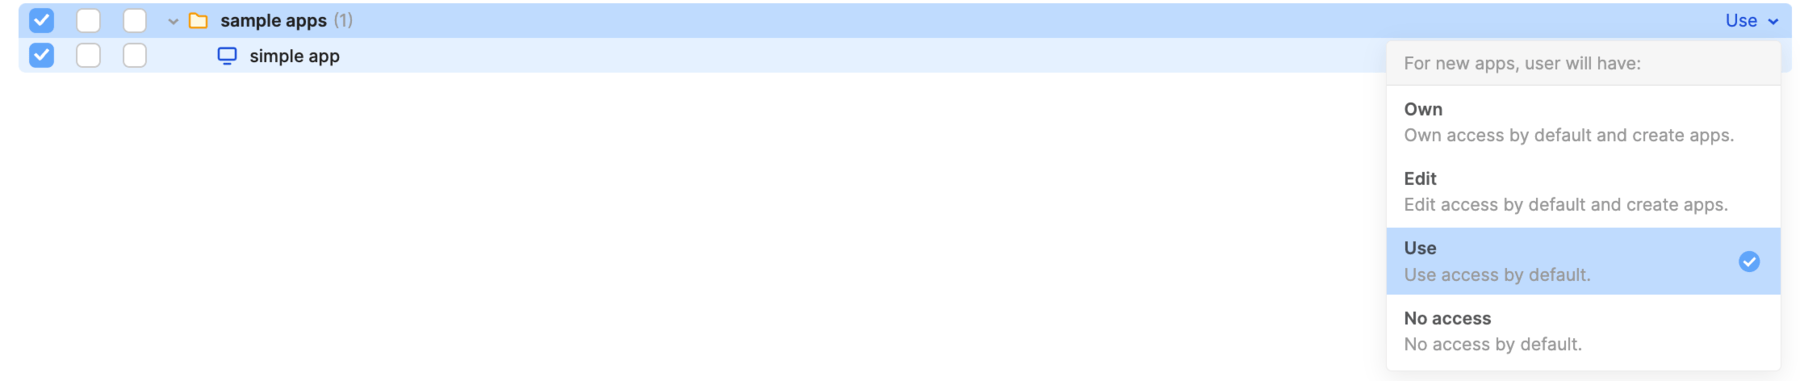
NOTE: On the far right in the figure, a default setting can be set for any apps in the folder and auto-assigns the access based on the far left selection. Any apps that are created in this folder will have Use access enabled by default for this permission group. This eliminates having to manually specify access by the admin.
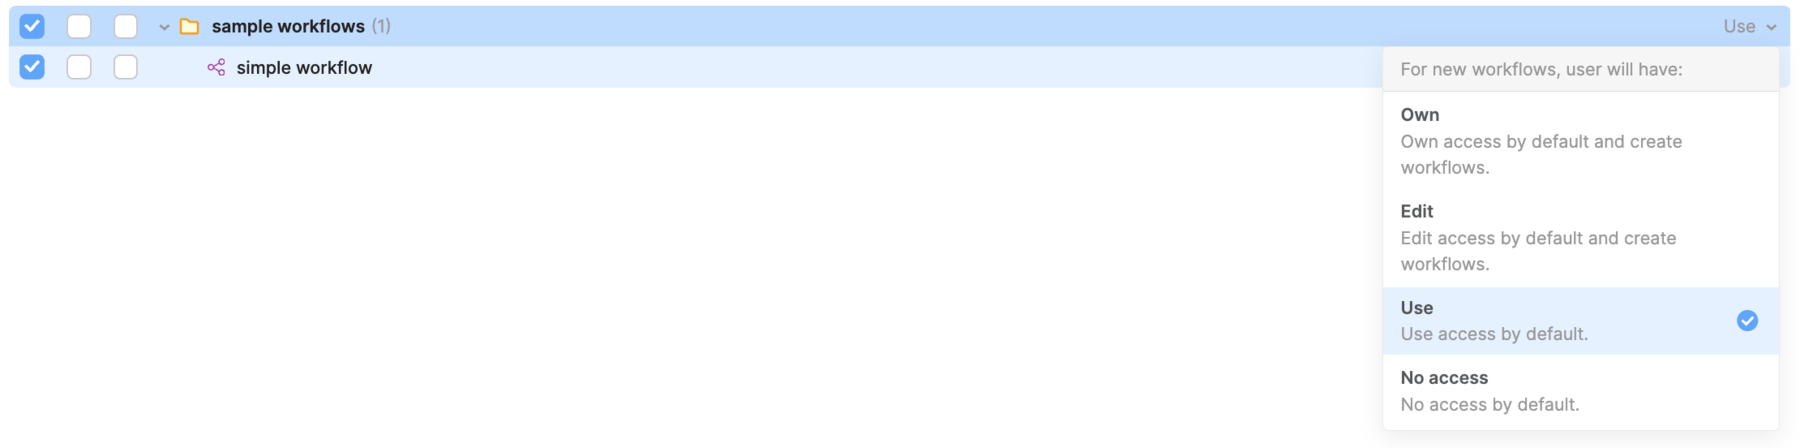
- Next go to Workflows and specify Use to the sample workflows folder. Similar to the apps, the workflows under the folder are selected and the default setting is specified.
- Repeat this process for the App Developer and App Admin permission groups where App Developer get Edit permissions and App Admin get Own permissions.
Resources
With Apps and Workflow permissions defined. The next area of focus is Resources and what permissions are provided for App User, App Developer and App Admin permission groups. Similar to Apps and Workflows, Resources also support folders. For this example we will specify access directly using the Resource and available Environments as described in the table.
| Permission Group | Access / Environment | Description |
|---|---|---|
| App User | Use (production environments) | App users have the ability to use the production environment to power Apps and Workflows. |
| App Developer | Use (Sandbox and production environments) | App developers have the ability to edit queries for the Sandbox and production environments. |
| App Admin | Own (Sandbox, production environments) | App Admin have ownership of Sandbox and production environments and can modify the resources. |
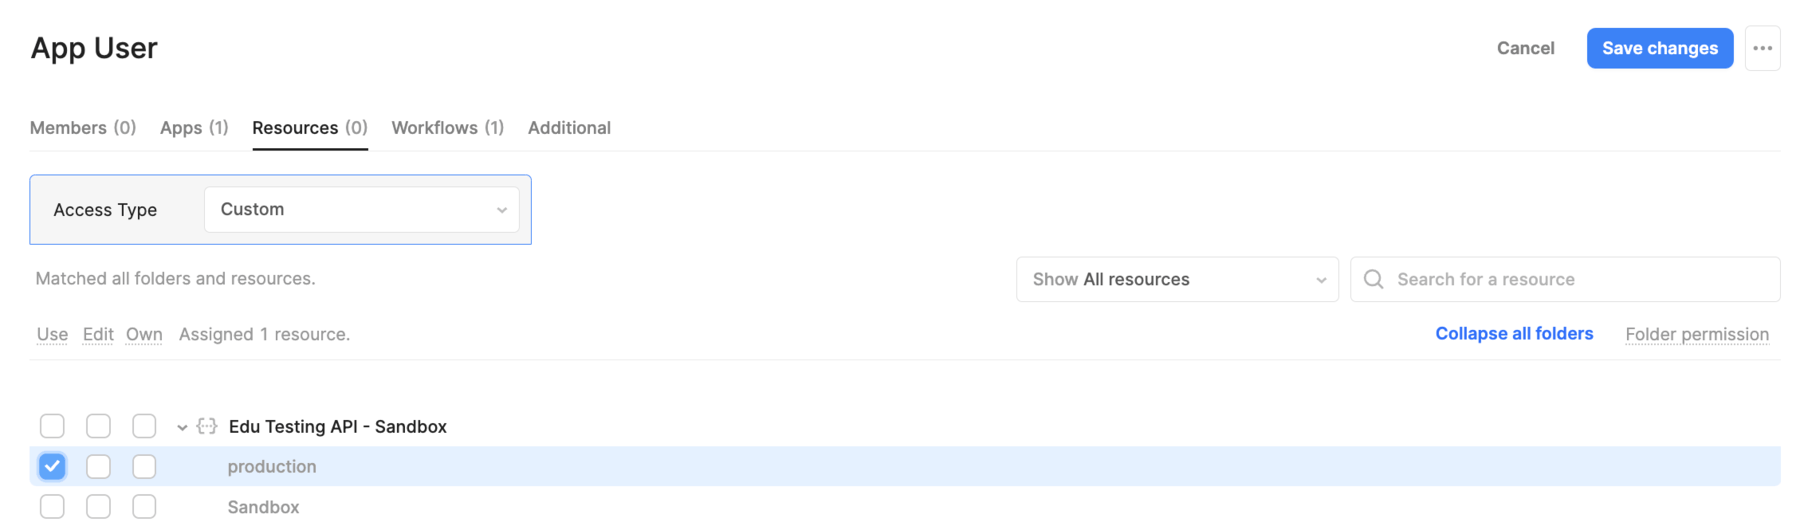
- Select Settings > Permissions > Resource. The following display shows the Edu Testing API and its two environments,
productionandSandbox. App User requires Use access to the production environment only. Select Save changes.
- Repeat this process for the App Developer and App Admin permission groups.