Multi-instance releases
Learn how to create and manage releases across instances
Organizations can manage the releases of protected apps and protected workflows across multiple deployment instances. You can specify which release version of an app or workflow is available on each deployment that's configured with Source Control. This is particularly useful if you want to test a newer version on a staging or development instance before promoting to production.
Multi-instance releases support both apps and workflows by default. To disable this feature, navigate to Settings > Source control, click the Edit settings button, and toggle off Enable multi-instance releases. Then click Save to apply the changes.
You can also programmatically manage multi-instance releases and manifests using the Retool API. Refer to the Source Control section of the Retool API reference for complete API documentation.
Overview
Multi-instance releases makes use of release artifacts and manifests to manage app and workflow releases across instances.
- Each app or workflow release has its own artifact. This represents a snapshot of the element at the time of release. These are stored in the
dist/apps/<app-uuid>/<release-version>.zipordist/workflows/<workflow-uuid>/<release-version>.zipdirectories of the Source Control repository. - Each instance has its own release manifest. Each manifest file contains a list of element UUIDs (apps and workflows) and the release version that is made available for the instance. These are stored in the
manifests/directory of the Source Control repository.
.
├─ .retool/
│   └─ protected-apps.yaml
├─ apps/
│   ├─ app1
|   |   ├─ 0.1.0.zip
|   |   ├─ 0.2.0.zip
|   |   └─ ...
│   ├─ app2
│   └─ ...
├─ workflows/
│   ├─ workflow1
│   └─ ...
├─ dist/
│   ├─ apps/
│   │   ├─ app1-uuid
│   │   ├─ app2-uuid
│   │   └─ ...
│   └─ workflows/
│       ├─ workflow1-uuid
│       └─ ...
└─ manifests/
    ├─ dev.yaml
    └─ prod.yaml
As with protected apps and workflows, you do not directly modify files within the repository. You create and manage multi-instance releases using the Retool UI or, optionally, using the Retool API.
Demo
Watch the following videos that demonstrate how to create and manage manifests and releases.
- Create a manifest
- Create a release
Requirements
To use multi-instance releases:
- You must be using Source Control to protect apps and workflows.
- For cloud instances, multi-instance releases are available on all plans with Source Control enabled.
- For self-hosted instances, each instance must be running version 3.252 or later.
- The Source Control configuration must be the same across all instances, such as source control provider, repository, and branch.
1. Create a manifest
Each instance needs its own manifest file stored in the manifests/ directory of the Source Control repository. The manifest determines the version of apps and workflows that are published on the instance. You create and manage manifests in your organization's Source Control settings.
To create a manifest:
- Navigate to your organization's Settings > Source Control page.
- Click Create manifest in the Releases pane.
- Enter a name to use for the manifest.
- Click Create branch with release manifest. Retool then creates a branch and commits the new manifest to it.
- Click Open pull request to start a new pull request.
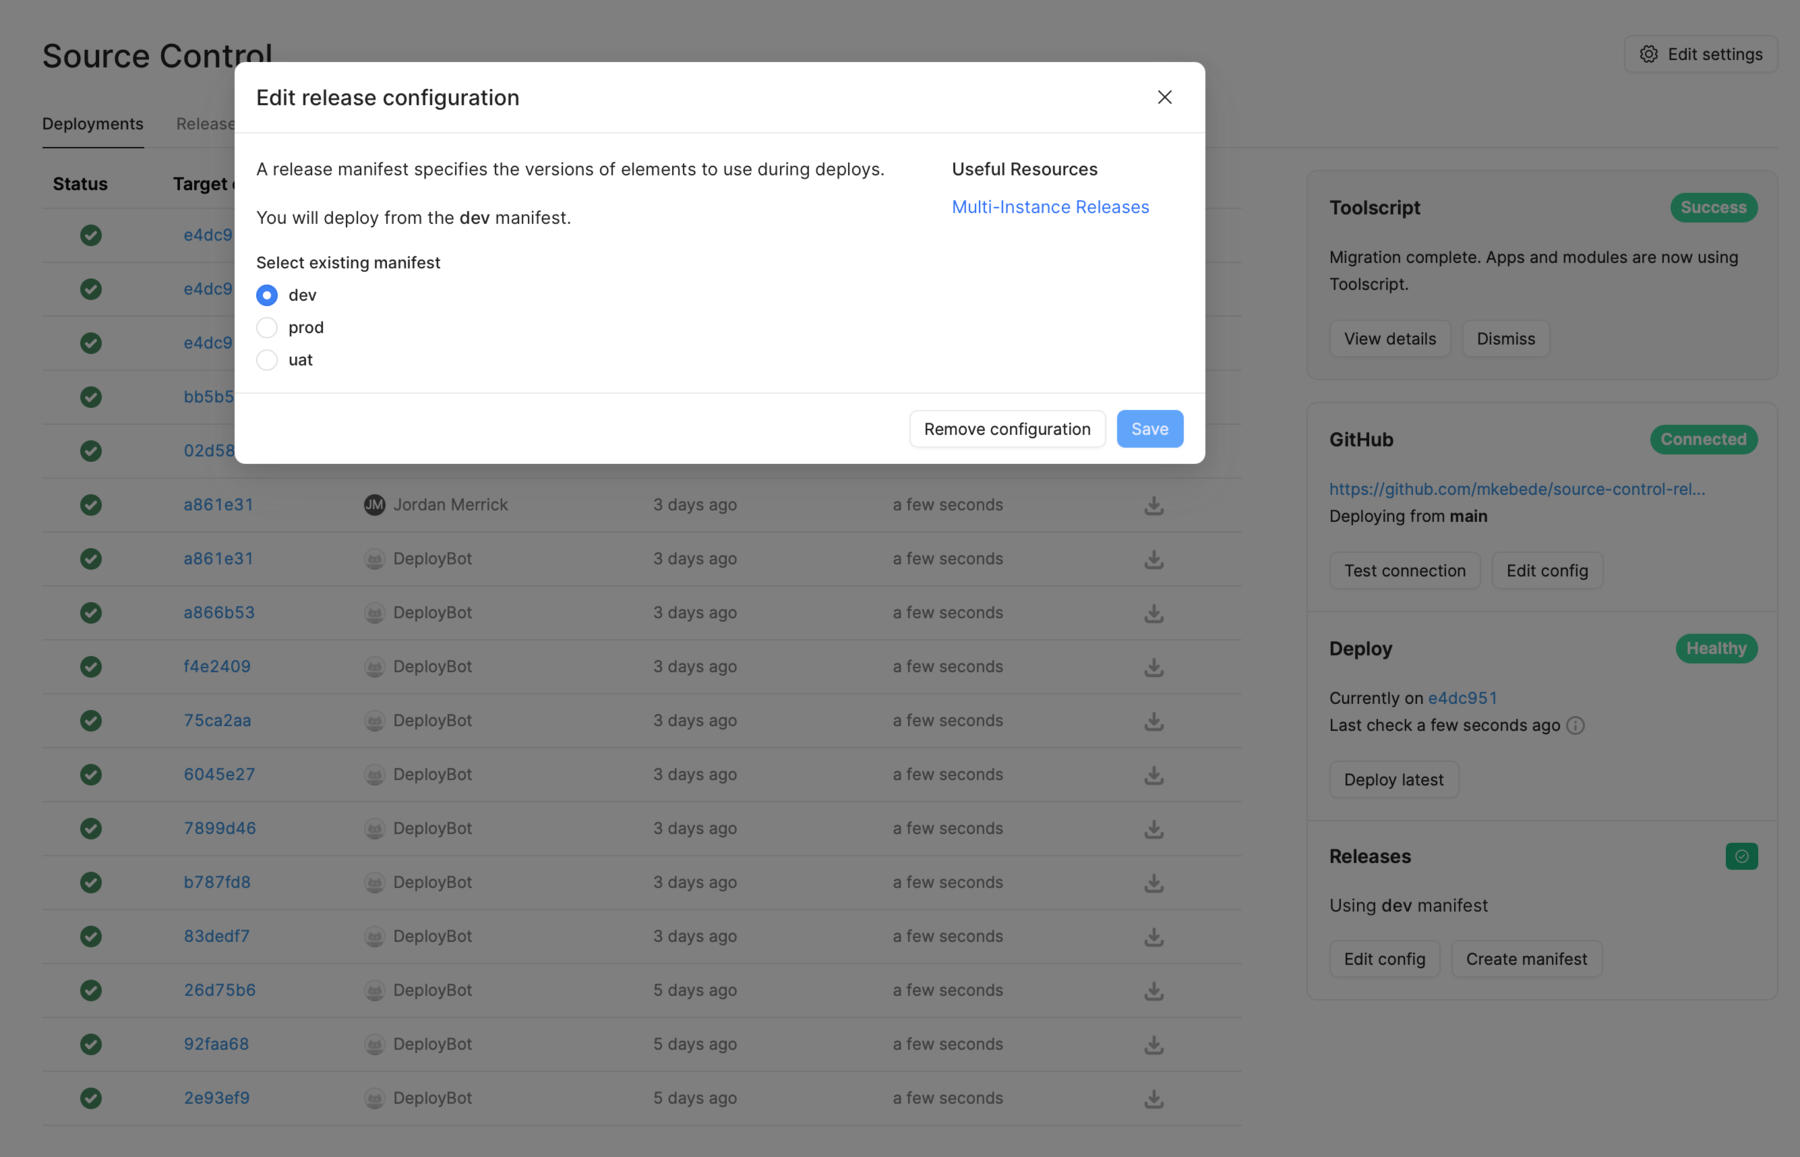
2. Select the manifest for an instance
A manifest determines which app and workflow releases to publish on an instance. You assign each manifest to each instance. To configure an instance to use a specific manifest:
- Sign in to a specific instance (e.g.,
dev). - Navigate to Settings > Source Control.
- Click Edit config in the Releases pane on the right.
- Select the manifest to associate with the instance (e.g.,
dev).
Once complete, the instance will then publish the release versions associated with the manifest. For example:
| Instance | Manifest |
|---|---|
| Development | dev |
| User testing | uat |
| Production | prod |
In the example above, apps and workflows defined in the dev manifest are published accordingly to the Development instance.
3. Create a release
To create a new release for an app, open the app in View mode—you cannot create a release whilst editing an app. For workflows, see Version and publish workflows.
- Click the Releases button in the status bar. Note that the button displays the release version currently open. If there have not been any previous releases, the app uses
latest(current working version). - Click Create new to create a version for release. Retool uses Semantic Versioning and automatically increments the version number based on your selection of Major, Minor, or Patch versioning.
- Click Create release PR to create a branch and pull request for the release.
- Confirm that you want to create a branch and release artifact for the new release. Check that the version and description information is correct, then click Create branch with release artifact.
- Click Open pull request to begin opening a PR with your source control provider.
The new release is only available once the pull request has merged and its changes deployed. Click the Releases button in the status bar once this has been completed to view app releases to see the new release available.
Manage releases
There are two ways with which you can manage releases:
- View and manage the deployment of all app and workflow releases in the Releases tab of the Source Control settings page.
- View and manage the deployment of individual app or workflow releases in the Releases and history modal.
View and manage all apps and workflows
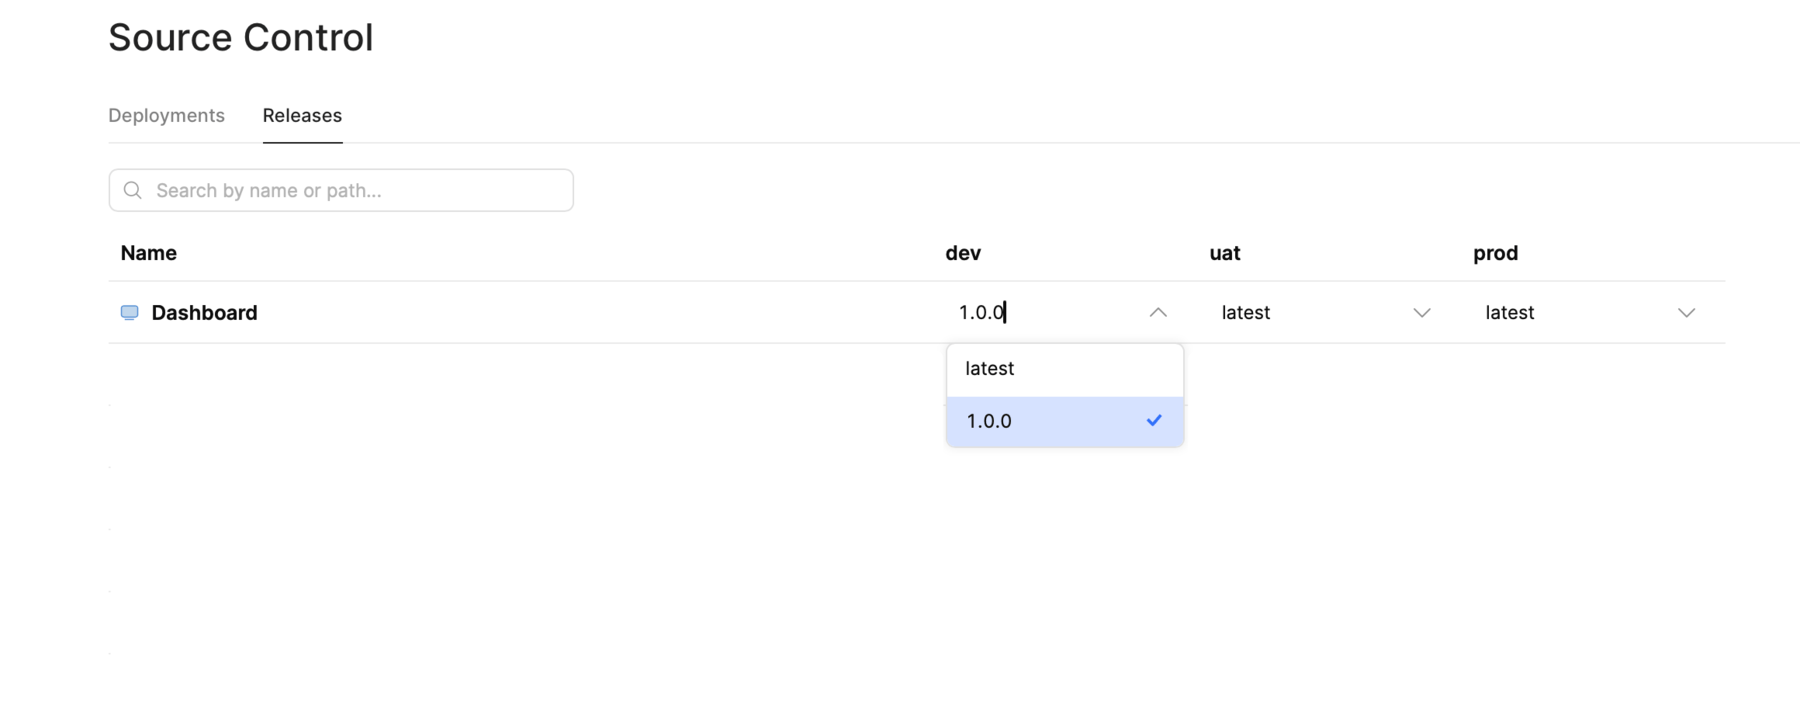
You can manage multi-instance app and workflow releases and manifests from the Source Control settings page. The Releases tab is a graphical interface for managing all release manifests. It contains a list of all protected apps and workflows, and the release version deployed to each instance. Each column corresponds to each instance that uses multi-instance releases.
View and manage all apps and workflows.
To change the deployed release version of an app or workflow for any instance:
- Click on the version number in the column and select the release to use. You can make multiple changes, if required.
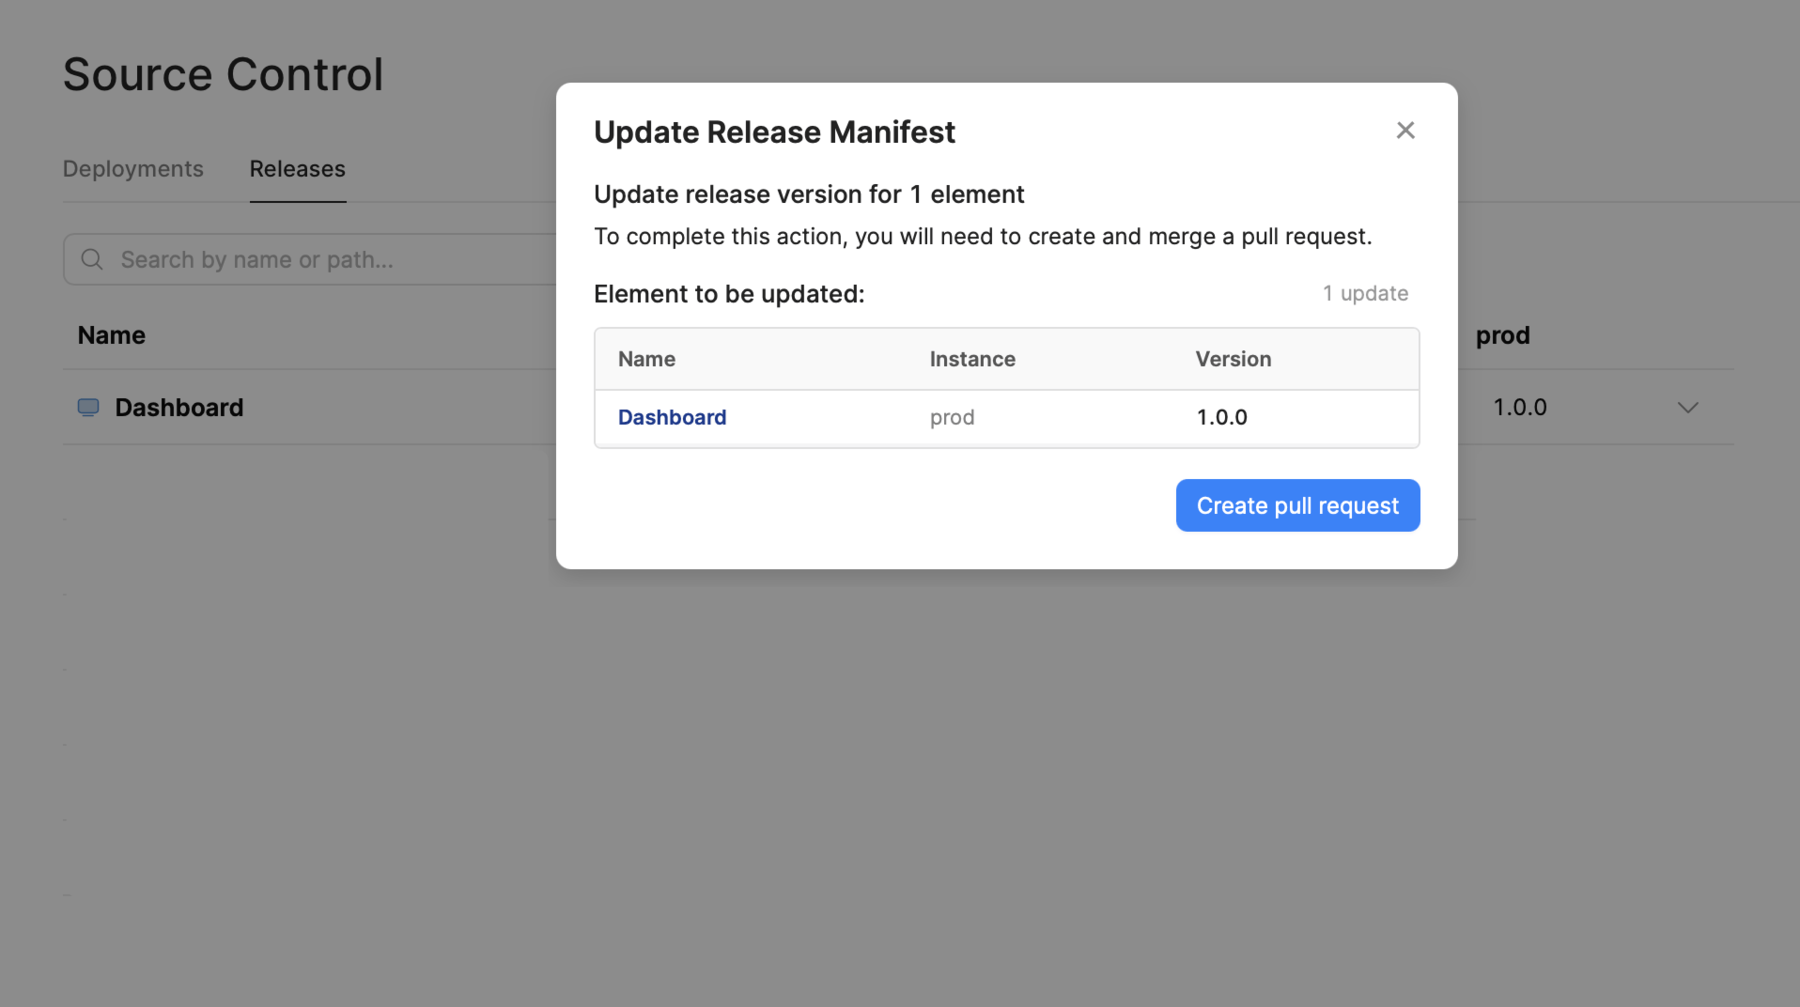
- Click Review to review and confirm the changes.
- Click Create pull request to start a new pull request.
View and manage an individual app or workflow and its releases
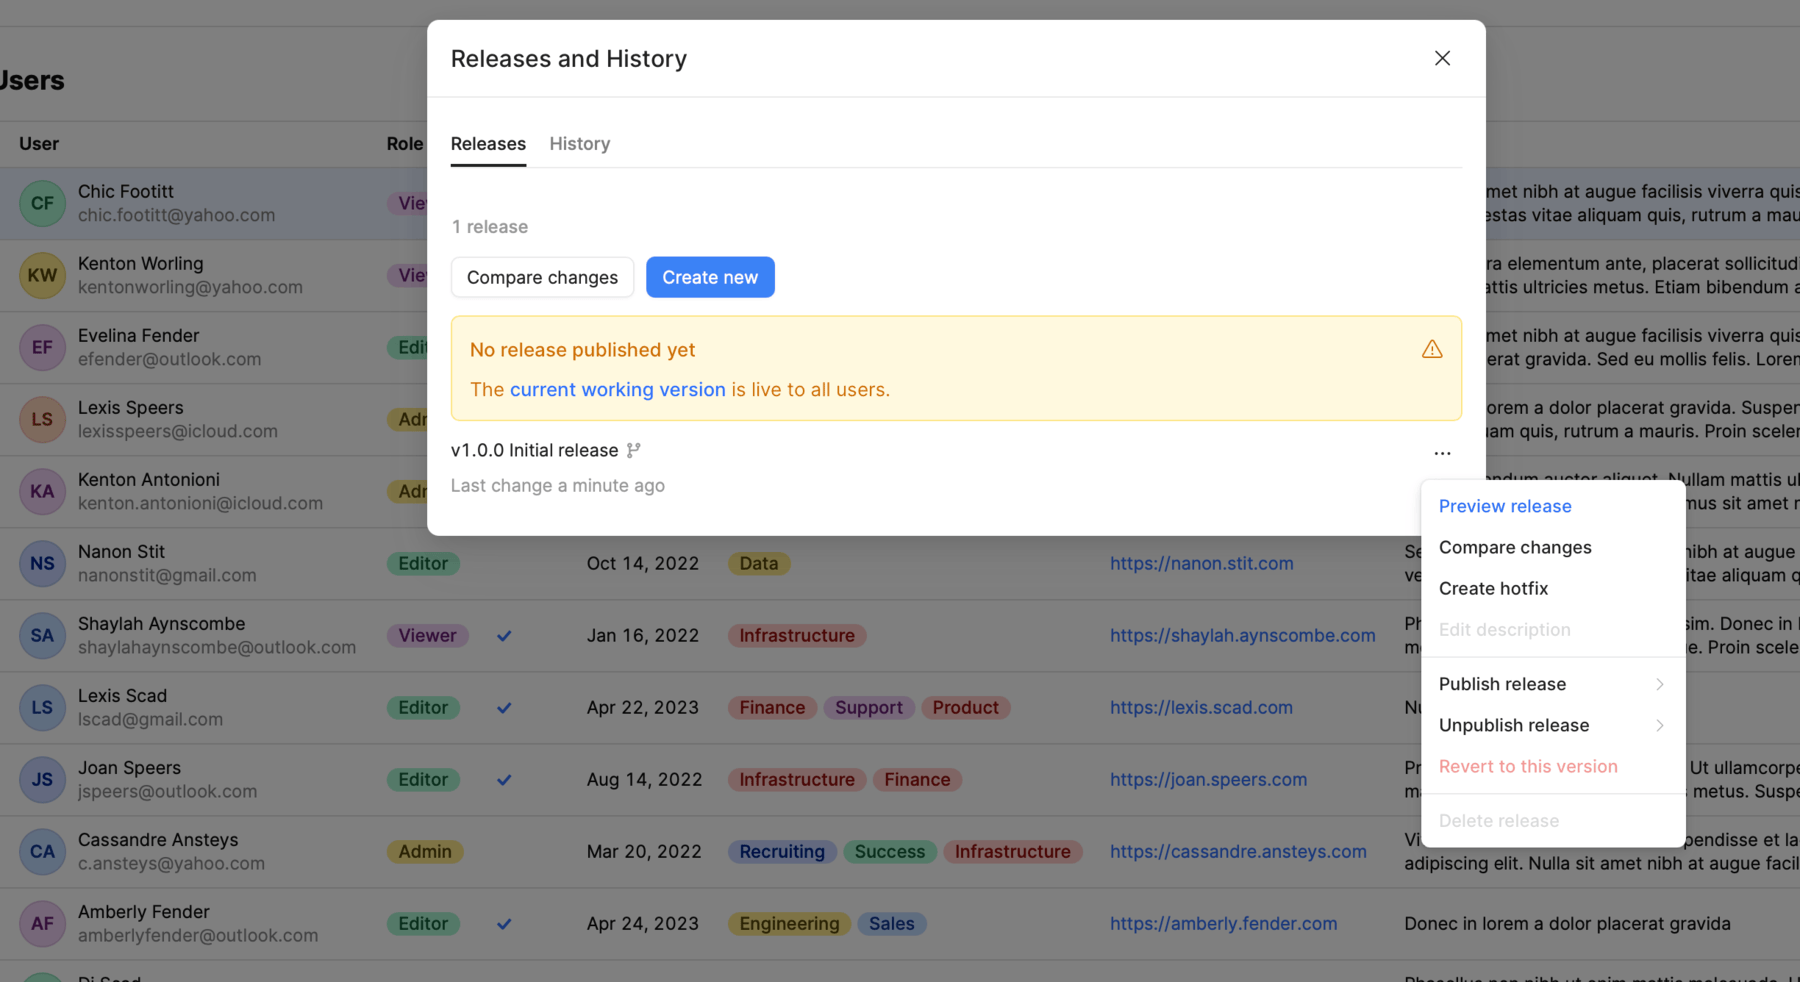
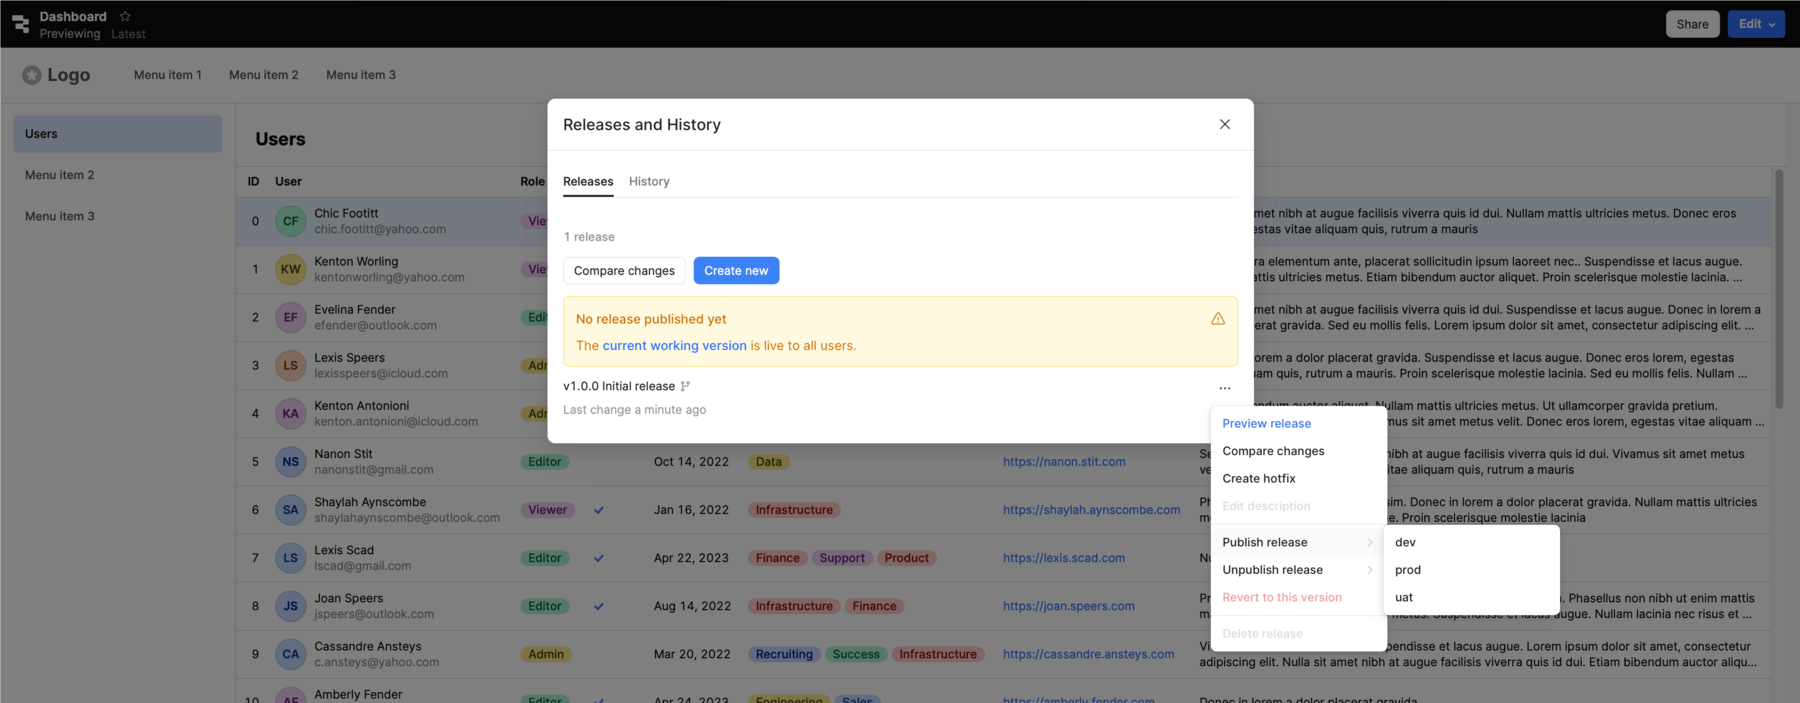
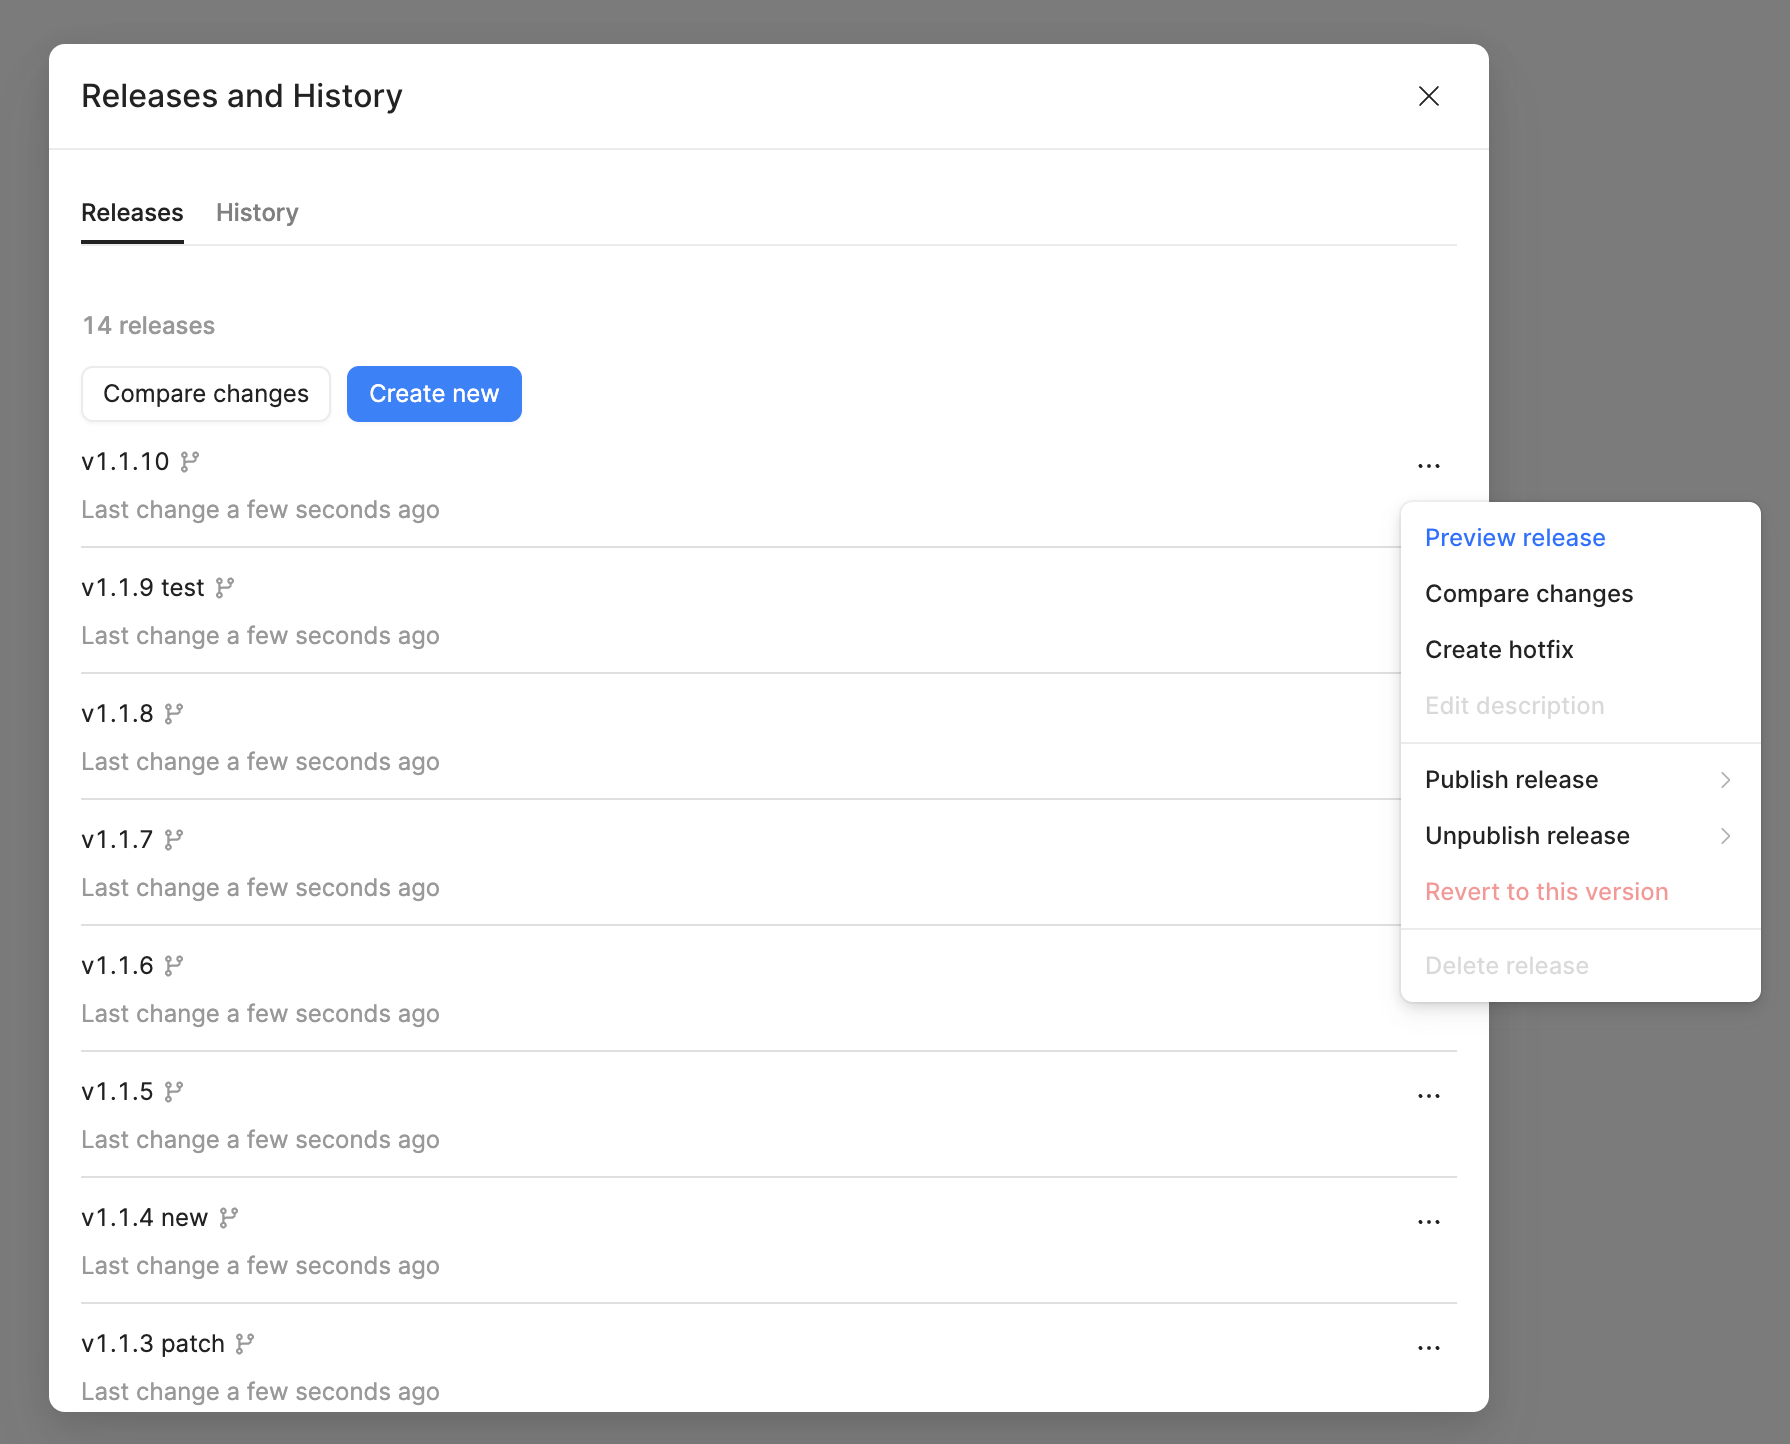
Similar to creating a new release, you can use the Releases and history modal to manage the release deployment across instances for both apps and workflows. To deploy a release:
- Click ••• to open the contextual menu for the release you want to deploy.
- Select the instance in the Publish release sub-menu. All instances with a manifest are automatically listed.
Patch a release with a hotfix
Only one hotfix branch can be created for each major.minor release version at a time.
You can create a hotfix to perform a patch update of an app release. This process creates a collaborative hotfix branch based on the selected release for users to make changes. A hotfix enables you to patch any major.minor release version without needing to unprotect it first.
Once you complete a hotfix, a patch release is created and made available.
To create a hotfix branch:
- Click the Releases button in the status bar.
- Find the release to patch.
- Click ••• to open the contextual menu and select Create hotfix.
After you complete the necessary changes on the hotfix branch, create a new release:
- Open the Releases and History pane in the left toolbar.
- Provide a description of the changes made on the hotfix branch and click Create patch release PR.
- Confirm that you want to create a release artifact for the patch release.