Connect to Azure Blob Storage
Connect Azure Blob Storage to Retool and upload, download, and manage files in your apps and automations.
Azure Blob Storage is a scalable object storage service for storing and retrieving data. With Retool's Azure Blob Storage integration, you can build apps and automations that upload files, download data, generate signed URLs, and manage objects in your Azure Storage Blob containers.
What you can do with Azure Blob Storage
- List and browse files from containers in tables or file browsers.
- Upload files from users and store them in Azure Blob Storage containers.
- Download files from containers for display or processing.
- Generate signed URLs for temporary, secure file access without exposing credentials.
- Copy, delete, and organize files across containers with metadata and tag support.
Before you begin
To connect Azure Blob Storage to Retool, you need the following:
- Cloud-hosted organizations
- Self-hosted instances
- Azure account: Access to an Azure account with Azure Blob Storage containers.
- Azure Blob Storage credentials: A connection string or Entra App Registration (tenant ID, client ID, and client secret) for authentication.
- Azure Blob Storage container: At least one container to connect to.
- CORS configuration: If you plan to use signed URLs, your storage account must have CORS configured to allow browser-direct access.
- Retool permissions: Ability to create and manage resources in your organization.
- Azure account: Access to an Azure account with Azure Blob Storage containers.
- Azure Blob Storage credentials: A connection string, Entra App Registration credentials, or Azure credentials chain support (via workload identity, managed identity, or environment variables).
- Azure Blob Storage container: At least one container to connect to.
- CORS configuration: If you plan to use signed URLs, your storage account must have CORS configured to allow browser-direct access from your Retool instance's domain.
- Retool permissions: Ability to create and manage resources in your organization.
Configure CORS for signed URLs
Retool queries Azure Blob Storage through its backend server, so CORS is not required for most operations. However, when users access signed URLs directly from the browser, the browser enforces same-origin restrictions. Without CORS, signed URL requests will be blocked with a 403 Forbidden error on the preflight.
In the Azure portal, navigate to your storage account and go to Settings → Resource sharing (CORS). Add a rule under the Blob service tab with the following values:
- Cloud-hosted organizations
- Self-hosted instances
CORS configuration for cloud instances
| Setting | Value |
|---|---|
| Allowed origins | https://retool.com, https://*.retool.com |
| Allowed methods | DELETE, GET, HEAD, OPTIONS, POST, PUT |
| Allowed headers | * |
| Exposed headers | x-ms-* |
| Max age | 3600 |
Replace *.retool.com with your organization's custom domain if applicable.
CORS configuration for self-hosted instances
| Setting | Value |
|---|---|
| Allowed origins | https://retool.example.com |
| Allowed methods | DELETE, GET, HEAD, OPTIONS, POST, PUT |
| Allowed headers | * |
| Exposed headers | x-ms-* |
| Max age | 3600 |
Replace retool.example.com with your Retool instance's domain.
Create an Azure Blob Storage resource
Follow these steps to create an Azure Blob Storage resource in your Retool organization.
1. Create a new resource
In your Retool organization, navigate to Resources in the main navigation and click Create new → Resource. Search for Azure Blob Storage and click the Azure Blob Storage tile to begin configuration.
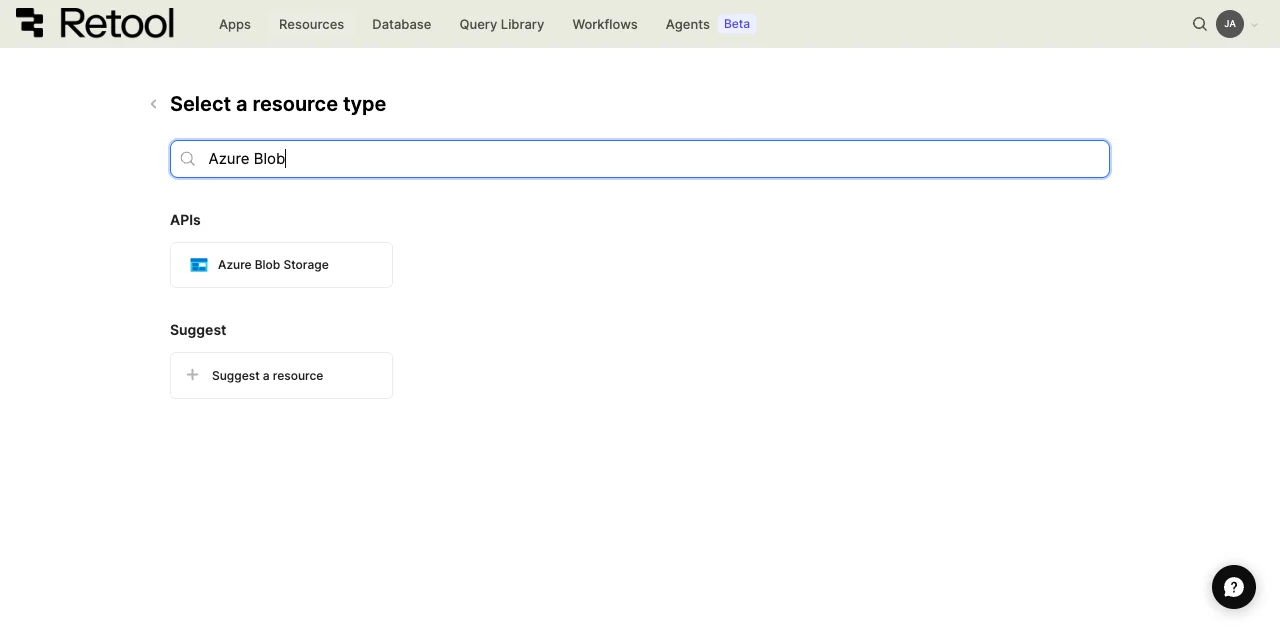
Azure Blob Storage resource selection.
2. Configure connection settings
Configure the following connection settings for your Azure Blob Storage resource.
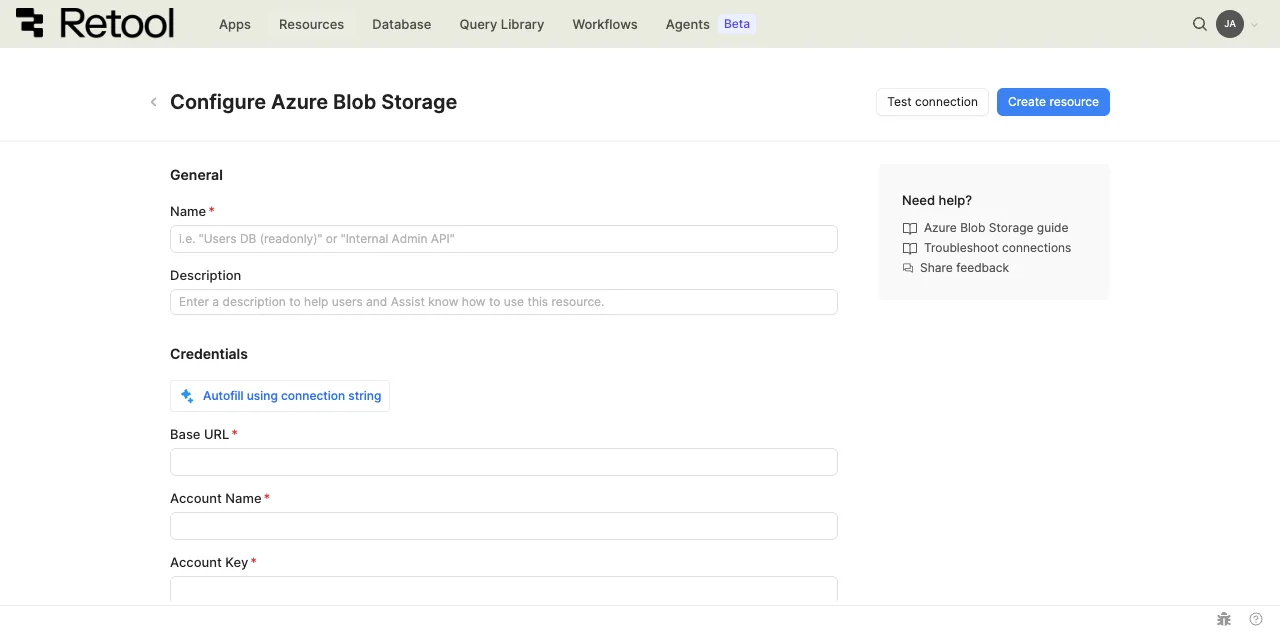
Azure Blob Storage connection settings.
Resource name and description
Specify a name for the resource that indicates which container or environment it connects to. Include a description to provide more context to users and Assist about how to use the resource.
| Example name | Example description |
|---|---|
production_azure_blob | Azure Blob Storage container for production user file uploads. |
user_uploads_container | Container for profile images and user-submitted documents. |
backup_storage_azure_blob | Backup container for archiving important application data. |
marketing_assets_azure_blob | Marketing team container for campaign images and media files. |
Azure Blob Storage container name
Specify the name of the Azure Blob Storage container you want to connect to. You can configure this to connect to a specific container or leave it empty to allow access to any container at query time.
static container name
my-app-uploads
dynamic container with embedded expressions
{{ environment === 'production' ? 'prod-container' : 'dev-container' }}
3. Configure authentication
Choose an authentication method based on your deployment type and security requirements. Azure Blob Storage supports shared key credentials, Azure Identity, and credentials chain for self-hosted instances.
| Authentication method | Use cases |
|---|---|
| Shared Key Credential | Standard authentication with Azure Blob connection string. Use for development environments, when you have static credentials from Azure, or when you need predictable non-expiring credentials. Most common method for initial setup. |
| Microsoft Azure Identity | Authentication using Microsoft Entra Registered App with tenant ID, client ID, and client secret |
| Azure credentials chain (self-hosted only) | Automatic credential discovery from your environment. Use when Retool runs on Azure infrastructure, when you prefer environment-based credential management, or to avoid storing static credentials in Retool. |
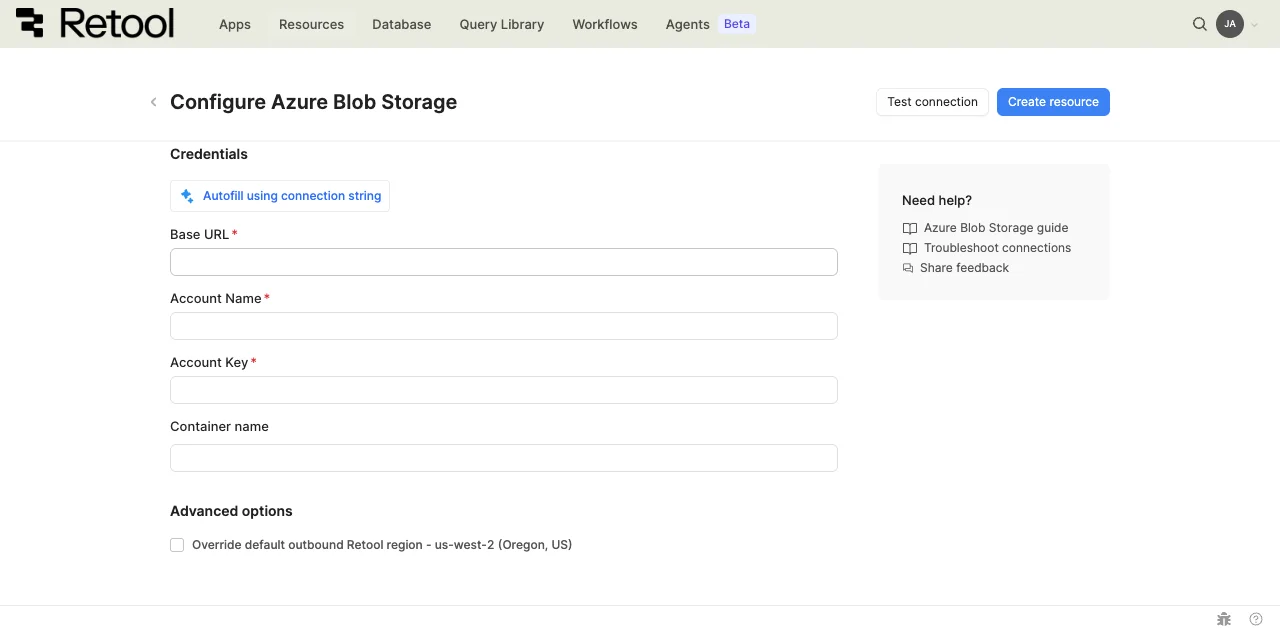
Azure Blob Storage credentials configuration.
- Cloud-hosted organizations
- Self-hosted instances
Cloud organizations can authenticate using Shared Key Credential or Microsoft Azure Identity.
option A: Shared Key Credential (Recommended)
Use Azure Blob Storage credentials to authenticate.
1. Create an Azure Blob Storage account
In the Azure portal, create a Storage account resource. Alternatively, use an existing one.
2. Generate access credentials
Create a connection string for the resource. Store these credentials securely as they provide full access to your Azure Blob Storage containers and objects.
3. Configure authentication in Retool
In the Retool resource configuration, use Autofill using connection string. Alternatively, manually fill in Base URL, Account Name, and Account Key.
4. Store credentials securely
Consider using configuration variables or secrets to store credentials instead of hardcoding them in the resource configuration.
option B: Azure Entra App Registration
Azure ID can be used to give more specific access to your Azure Blob Storage resource.
1. Create an Entra App registration
In the Azure portal, go to Microsoft Entra ID and add an App registration. Note the name of the newly created app.
You'll also need:
- Tenant ID: listed in overview as Directory (tenant) ID
- Client ID: listed in overview as Application (client) ID
- Client secret: generate under Manage > Certificates & secrets
2. Create and configure Azure Blob Storage account
In the Azure portal, create a Storage account resource. Alternatively, use an existing one. Note the account name.
Under Access Control (IAM), add a role assignment. Choose an appropriate role, e.g. Storage Blob Data Contributor.
Assign access to service principal and the previously created app.
3. Configure role in Retool
In the Retool resource configuration, select Microsoft Azure Identity as the authentication method. Fill in Tenant ID, Client ID, Client Secret and Account name.
Self-hosted instances can authenticate using Azure credentials chain, Shared Key Credential or Microsoft Azure Identity.
option A: Azure credentials chain (Recommended for Azure-hosted instances)
Use the Azure credentials chain to automatically discover credentials from your environment. This method follows Azure security best practices by avoiding static credentials.
1. Configure Azure credentials in your environment
Ensure your Retool instance has access to Azure credentials through one of these methods:
- Environment variables: Set
AZURE_TENANT_ID,AZURE_CLIENT_IDandAZURE_CLIENT_SECRETenvironment variables. - Azure workload identity: See Entra Workload identities
- Azure managed identity: See Configure managed identities.
2. Select Azure credentials chain
In the Retool resource configuration, select Microsoft Azure Identity as the authentication method and select Connect using the default credential provider chain.
3. Verify permissions
The credentials chain checks for credentials in this order: environment variables, workload identity, managed identity. Ensure at least one of these methods is configured with appropriate Azure Blob Storage permissions.
option B: Shared Key Credential
Use Azure Blob Storage credentials to authenticate.
1. Create an Azure Blob Storage account
In the Azure portal, create a Storage account resource. Alternatively, use an existing one.
2. Generate access credentials
Create a connection string for the resource. Store these credentials securely as they provide full access to your Azure Blob Storage containers and objects.
3. Configure authentication in Retool
In the Retool resource configuration, use Autofill using connection string. Alternatively, manually fill in Base URL, Account Name, and Account Key.
4. Store credentials securely
Consider using configuration variables or secrets to store credentials instead of hardcoding them in the resource configuration.
option C: Azure Entra App Registration
Azure ID can be used to give more specific access to your Azure Blob Storage resource.
1. Create an Entra App registration
In the Azure portal, go to Microsoft Entra ID and add an App registration. Note the name of the newly created app.
You'll also need:
- Tenant ID: listed in overview as Directory (tenant) ID
- Client ID: listed in overview as Application (client) ID
- Client secret: generate under Manage > Certificates & secrets
2. Create and configure Azure Blob Storage account
In the Azure portal, create a Storage account resource. Alternatively, use an existing one. Note the account name.
Under Access Control (IAM), add a role assignment. Choose an appropriate role, e.g. Storage Blob Data Contributor.
Assign access to service principal and the previously created app.
3. Configure role in Retool
In the Retool resource configuration, select Microsoft Azure Identity as the authentication method. Fill in Tenant ID, Client ID, Client Secret and Account name.
4. Test the connection
Click Test connection to verify Retool can authenticate with Azure Blob Storage. If the test succeeds, a success message appears. If it fails, check the following:
- Authentication: Verify your Azure credentials are correct and not expired.
- Permissions: Ensure the role has the necessary Azure Blob Storage permissions.
- Container name: Check that the container name is correct and accessible with your credentials.
After testing the connection, click View in console to open the Debug Tools console. The console displays detailed information about the test, including request details (URL, method, headers), response (status code, body), execution time, and error details if the test fails. This information is helpful for troubleshooting connection issues.
5. Save the resource
Click Create resource to save your Azure Blob Storage resource. You can now use it in queries across your Retool apps and automations.
Query Azure Blob Storage data
Once you've created an Azure Blob Storage resource, you can query files in your Retool apps and automations.
Create a query
You can create an Azure Blob Storage query in a Retool app using Assist to generate queries with natural language, or manually using code.
- Assist
- Code
Use Assist to generate queries from natural language prompts. Assist can create queries to list files, upload data, and manage objects in your Azure Blob Storage resource.
To create a query with Assist:
- In the Retool app IDE, click the Assist button at the bottom of the left toolbar to open the Assist panel (if not already visible).
- Write a prompt describing what you want to do, referencing your resource using
@. - Press Enter to submit the prompt.
- Select your Azure Blob Storage resource when prompted.
- Review the generated query and click Run query to add it to your app.
list all files in my-container using @Azure Blob Storage
To manually create an Azure Blob Storage query in a Retool app:
- In the Retool app IDE, open the Code tab, then click + in the page or global scope.
- Select Resource query.
- Choose your Azure Blob Storage resource.
- Select an Action type from the dropdown.
You can also create Azure Blob Storage queries in workflows and agent tools using the same resource.
Action types
Azure Blob Storage queries support multiple action types for different file operations:
| Action type | Description | Use case |
|---|---|---|
| List files | List objects in a container with optional prefix filter. | Display files in a table or file browser. |
| Read file | Read file contents into memory as text or base64. | Display or process file data in your app. |
| Download file | Download file with binary data handling. | Allow users to download files to their device. |
| Upload data | Upload file data to Azure Blob Storage with metadata and tags. | Accept file uploads from users and store them. |
| Generate signed URL | Create temporary URL for container or file access. | Share files and perform other operations securely with time-limited access. |
| Copy file | Copy object within or between containers. | Duplicate or move files between locations. |
| Delete file | Remove object from container. | Delete unwanted files. |
| Find by tags | Retrieve objects matching tags. | Filter to specific files. |
| Set tags | Modify tags for an object. | Manage file organization. |
| Set metadata | Modify metadata for an object. | Manage file metadata. |
Query configuration fields
Each query type has specific configuration fields:
Container name
Specify the Azure Blob Storage container to operate on. If configured in the resource, this defaults to the resource's container. You can override it per query to access different containers.
static container name
my-app-uploads
dynamic container with embedded expressions
{{ environment === 'production' ? 'prod-uploads' : 'dev-uploads' }}
container from user selection
{{ containerselect.value }}
File name
The path and filename of the object in Azure Blob Storage. Use forward slashes (/) to specify folders. Azure Blob Storage treats the entire blob name as the object identifier, including any path separators.
simple filename
document.pdf
nested path
uploads/2026/01/document.pdf
dynamic file name with embedded expressions
{{ 'uploads/' + moment().format('YYYY/MM/') + fileInput1.value[0].name }}
user-specific path
{{ 'users/' + currentUser.id + '/avatar.jpg' }}
Prefix
Filter objects by prefix when listing files. This acts like a folder filter, returning only objects whose names start with the specified prefix.
folder path prefix
uploads/documents/
date-based prefix
uploads/2026/01/
user-specific prefix
{{ 'users/' + currentUser.id + '/' }}
Upload data
The data to upload to Azure Blob Storage. Can be file data from a component, base64-encoded data, a string, or serialized JSON.
file from File Input component
{{ fileInput1.value[0] }}
JSON data as file
{{ JSON.stringify(table1.displayedData) }}
image data (base64)
{{ image1.value }}
text content
{{ textEditor1.value }}
File type
MIME type for the uploaded file. Azure Blob Storage uses this for the Content-Type header, which affects how browsers handle the file when accessed directly.
common MIME types
image/jpeg
application/pdf
text/csv
application/json
text/plain
dynamic from file input
{{ fileInput1.value[0].type }}
Signed URL options
Configure the signed URL operation type and expiration time when generating signed URLs. Signed URLs provide temporary access to private Azure Blob Storage objects without requiring Azure credentials.
download (read)
// Signed operation name
read

// Signed Operation Options
{
  expiresOn: {{ new Date(Date.now() + 1000 * 60 * 60) }} // 1 hour
}
upload (add)
// Signed operation name
add

// Signed Operation Options
{
  expiresOn: {{ new Date(Date.now() + 1000 * 60 * 30) }} // 30 minutes
}
dynamic expiration
{
  expiresOn: {{ new Date(Date.now() + 1000 * 60 * 60 * expirationInput.value) }} // Convert hours to milliseconds
}
Data types and formatting
Azure Blob Storage queries accept and return specific data types. Understanding these formats helps you work with Azure Blob Storage data effectively in Retool.
Request data types
Use embedded expressions ({{ }}) to provide dynamic values to Azure Blob Storage queries.
| Value type | Description | Example |
|---|---|---|
| Strings | container names, file names, prefixes, and MIME types. | 'my-container' or {{ textInput1.value }} |
| File objects | File data from File Input components. | {{ fileInput1.value[0] }} |
| Binary data | Base64-encoded strings for images or files. | {{ image1.value }} |
| Numbers | Expiration times, max page size, and numeric metadata. | 3600 or {{ slider1.value }} |
| JSON strings | Serialized data for upload as JSON files. | {{ JSON.stringify(table1.data) }} |
Response data types
Azure Blob Storage queries return data in formats specific to the action type.
| Action type | Response format | Description |
|---|---|---|
| List files | Array of objects | Each object contains contentLength, contentMD5, contentType, createdOn, etag, lastModified, metadata, name, tags. |
| Find by tags | Array of objects | Each object contains name, tags. |
| Read file | Object | All files return in body as base64. Other fields returned include contentLength, contentMD5, contentType, createdOn, etag, lastModified, metadata, name |
| Download file | Binary download | Triggers browser download. No data returned to app. |
| Upload data | Object | Contains contentLength, contentMD5, contentType, createdOn, etag, lastModified, metadata, name, tags. |
| Generate signed URL | Object | Contains signedUrl (string) with temporary access URL. |
| Copy file | Object | Contains succeeded boolean. Other fields returned include name, etag, createdOn, lastModified. |
| Delete file | Object | Contains succeeded as true if successful. |
| Set metadata | Object | Returns etag |
| Set tags | Object | Contains succeeded as true if successful. |
Working with file data
When working with files in Retool, use these patterns to handle different file types.
display uploaded files in table
{{ AzureBlobStorageListQuery.data }}
Use transformers to format the display:
{{ (item.contentLength / 1024).toFixed(2) + ' KB' }}
{{ moment(item.lastModified).format('YYYY-MM-DD HH:mm:ss') }}
upload and store file metadata
After uploading a file, store the Azure Blob Storage name in your database to reference it later.
// After successful upload
{
  blobName: {{ AzureBlobStorageUploadQuery.data.name }},
  fileName: {{ fileInput1.value[0].name }},
  fileSize: {{ fileInput1.value[0].size }},
  uploadedAt: {{ moment().toISOString() }},
  uploadedBy: {{ currentUser.id }}
}
Common use cases
These examples demonstrate the most common Azure Blob Storage operations in Retool apps.
list and display files in a container
List files from an Azure Blob Storage container and display them in a Table component with formatted columns.
First, create a query to list files from the container:
| Field | Value |
|---|---|
| Action type | List files |
| Container name | my-app-uploads |
| Prefix | uploads/ |
| Max page size | 1000 |
Next, add a Table component and set its Data property to:
{{ AzureBlobStorageListQuery.data }}
Then, add transformers to format file size and dates for readability:
{{ (item.contentLength / 1024 / 1024).toFixed(2) + ' MB' }}
{{ moment(item.lastModified).fromNow() }}
Users can now browse a formatted list of files with human-readable sizes and timestamps.
upload files with organized folder structure
Accept file uploads from users and store them in Azure Blob Storage with an organized folder structure by date and user.
First, add a File Input component to your app and configure it to accept the file types you need (e.g., image/*, .pdf, .csv).
Next, create an upload query that organizes files by user and date:
| Field | Value |
|---|---|
| Action type | Upload data |
| Container name | my-app-uploads |
| File name | {{ 'uploads/' + currentUser.id + '/' + moment().format('YYYY/MM/DD/') + fileInput1.value[0].name }} |
| Upload data | {{ fileInput1.value[0] }} |
| File type | {{ fileInput1.value[0].type }} |
Then, add a Button component with the following event handlers to trigger the upload and refresh the file list on success:
- Run query:
AzureBlobStorageUploadQuery - On success: Show notification with "File uploaded successfully"
- On success: Run query:
AzureBlobStorageListQuery
Finally, store the file reference in your database after a successful upload:
INSERT INTO uploaded_files (user_id, blob_name, file_name, file_size, uploaded_at)
VALUES (
  {{ currentUser.id }},
  {{ AzureBlobStorageUploadQuery.data.name }},
  {{ fileInput1.value[0].name }},
  {{ fileInput1.value[0].size }},
  {{ moment().toISOString() }}
)
Files are organized by user and date, making them easy to locate and manage.
generate signed URLs for secure file sharing
Create temporary URLs that allow users to access files securely without Azure credentials.
First, create a signed URL query for the selected file:
| Field | Value |
|---|---|
| Action type | Generate signed URL |
| Container name | my-app-uploads |
| File name | {{ table1.selectedRow.data.name }} |
| Signed operation name | read |
| Signed operation options | { expiresOn: {{ new Date(Date.now() + 1000 * 60 * 60) }} } |
Next, display the signed URL in a Text component:
{{ AzureBlobStorageSignedUrlQuery.data.signedUrl }}
Then, add Button components so users can copy the URL to clipboard or open it directly in a new tab:
// Action: Copy to clipboard
{{ AzureBlobStorageSignedUrlQuery.data.signedUrl }}
// Action: Open URL
{{ AzureBlobStorageSignedUrlQuery.data.signedUrl }}
Users receive a time-limited URL (valid for 1 hour) to access the file without needing Azure credentials. The URL expires automatically for security.
bulk upload from CSV with progress tracking
Upload multiple files referenced in a CSV and track progress.
First, add a File Input component that accepts CSV files. Use a transformer to parse it into a list of file references:
{{
  fileInput1.parsedValue.map(row => ({
    fileName: row.file_name,
    sourcePath: row.source_path,
    category: row.category
  }))
}}
Next, create a JavaScript query that iterates over the parsed files and uploads each one, collecting results as it goes:
const files = {{ csvParsed.value }};
const results = [];

for (const file of files) {
  try {
    const uploadResult = await AzureBlobStorageUploadQuery.trigger({
      additionalScope: {
        blobName: `uploads/${file.category}/${file.fileName}`,
        uploadData: file.sourcePath
      }
    });
    results.push({ fileName: file.fileName, status: 'success', name: uploadResult.name });
  } catch (error) {
    results.push({ fileName: file.fileName, status: 'failed', error: error.message });
  }
}

return results;
Then, display the results in a Table component with status indicators so users can see which uploads succeeded and which failed.
delete files with confirmation and undo
Delete files from Azure Blob Storage with user confirmation and the ability to restore from a backup container.
First, add an action column to your Table component with a delete button. Configure it to show a confirmation modal before proceeding.
Next, create a backup query that copies the file to a separate container before deleting it:
| Field | Value |
|---|---|
| Action type | Copy file |
| Source container | my-app-uploads |
| Source file name | {{ table1.selectedRow.data.name }} |
| Destination container | backup-container |
| Destination file name | {{ table1.selectedRow.data.name }} |
Then, create a delete query:
| Field | Value |
|---|---|
| Action type | Delete file |
| Container name | my-app-uploads |
| File name | {{ table1.selectedRow.data.name }} |
Finally, chain the event handlers on the delete button so the backup runs first, followed by the deletion and a list refresh:
- Show confirmation: "Are you sure you want to delete this file?"
- If confirmed, run query:
AzureBlobStorageBackupQuery - On success, run query:
AzureBlobStorageDeleteQuery - On success, show notification: "File deleted and backed up"
- On success, run query:
AzureBlobStorageListQuery
Files are safely backed up before deletion, and users must confirm the action. Files can be restored from the backup container if needed.
Best practices
Follow these best practices when working with Azure Blob Storage in Retool.
Performance
- Use pagination: Set max page size to limit the number of objects returned when listing large containers. Use continuation token for pagination.
- Filter with prefixes: Use the prefix field to narrow down results when listing files. This reduces data transfer and improves query performance.
- Cache signed URLs: Generate signed URLs once and reuse them until expiration. Avoid regenerating them on every page load.
- Batch operations: When uploading or deleting multiple files, use JavaScript queries to batch operations rather than triggering individual queries repeatedly.
- Stream large files: For large file downloads, use signed URLs and let users download directly from Azure Blob Storage rather than reading files into memory.
Security
- Use least privilege permissions: Grant only the minimum Azure Blob Storage permissions required for your use case. Avoid using full permissions.
- Rotate credentials: If using access keys, rotate them regularly.
- Encrypt sensitive data: Enable server-side encryption (SSE) on your Azure Blob Storage containers to protect data at rest.
- Limit signed URL expiration: Set short expiration times for signed URLs (e.g., 1 hour) to minimize exposure if URLs are shared.
- Use configuration variables: Store Azure credentials in configuration variables rather than hardcoding them in queries.
- Use resource environments: Organizations on an Enterprise plan can configure multiple resource environments to maintain separate Azure Blob Storage container configurations for production, staging, and development.
- Validate file uploads: Check file types and sizes before uploading to prevent malicious or oversized uploads.
Data organization
- Use consistent naming: Establish a naming convention for file names (e.g.,
user_id/category/date/filename) to keep files organized. - Tag objects: Use Azure Blob Storage object tags to categorize files by project, department, or status. This makes filtering and lifecycle management easier.
- Implement versioning: Enable Azure Blob Storage versioning on containers to protect against accidental deletions and overwrites.
- Archive old files: Use Azure Blob Storage lifecycle policies to automatically move old files to cheaper storage classes or delete them after a retention period.
- Separate environments: Use different containers for development, staging, and production environments to prevent accidental data mixing. Configure different credentials for each environment using Retool environments.
Troubleshooting
If you encounter issues connecting to or querying Azure Blob Storage, use the following guidance to diagnose and resolve common problems.
Connection failures
- Invalid credentials: Verify your connection string, account name, and account key are correct and haven't been rotated. For Microsoft Azure Identity, confirm the tenant ID, client ID, and client secret are accurate.
- Expired client secret: Entra App Registration client secrets have an expiration date. Regenerate the secret in the Azure portal under Manage → Certificates & secrets and update your Retool resource.
- Container not found: Check that the container name in the resource configuration matches exactly (container names are case-sensitive). Ensure the container exists in the correct storage account.
- Network access: If your Retool instance is self-hosted and your storage account has network restrictions, add Retool's IP addresses to your storage account's firewall rules. See Retool's IP allowlist for the addresses to allowlist.
Permission errors
- Insufficient permissions: Ensure the identity or credentials used have the appropriate Azure RBAC role assigned. Use Storage Blob Data Contributor for read/write access or Storage Blob Data Reader for read-only access.
- Signed URL generation fails: Generating signed URLs requires the Storage Blob Delegator role in addition to data access roles. Assign this role to the identity in the storage account's Access Control (IAM) settings.
- Credentials chain not resolving: For self-hosted instances using Azure credentials chain, verify that at least one credential source is configured — environment variables (
AZURE_TENANT_ID,AZURE_CLIENT_ID,AZURE_CLIENT_SECRET), workload identity, or managed identity.
Query errors
- Large file timeouts: For large file uploads or downloads, increase the query timeout in your Retool app's query settings. For very large files, use signed URLs to let users upload or download directly from Azure Blob Storage rather than routing through Retool.
- CORS errors for signed URLs: If signed URLs fail in the browser, check that CORS is configured on your storage account. In the Azure portal, go to your storage account → Resource sharing (CORS) and add the appropriate allowed origins.
- Base64 encoding issues: When reading files with the Read file action, the response body is base64-encoded. Use
atob()to decode text content or referencebodydirectly for display in Image components.