Connect to Salesforce
Learn how to connect to Salesforce and query CRM data, manage records, and execute custom Apex logic in Retool.
Salesforce is a customer relationship management (CRM) platform. Connect Salesforce to Retool to build customer dashboards, sales tools, support interfaces, and custom CRM applications.
What you can do with Salesforce
- Query CRM data: Retrieve accounts, contacts, leads, opportunities, and custom objects using SOQL queries.
- Manage records: Create, update, and delete Salesforce records with automatic validation and error handling.
- Execute Apex: Call custom Apex REST endpoints for complex business logic and custom functionality.
- Bulk operations: Perform bulk create, update, and upsert operations for efficient data management.
- Custom objects: Work with standard and custom Salesforce objects in your organization.
Before you begin
To connect Salesforce to Retool, you need the following:
- Cloud-hosted organizations
- Self-hosted instances
- Salesforce OAuth app: Connected App configured in Salesforce with OAuth settings. Cloud organizations can use Retool's pre-configured OAuth app or create a custom OAuth app.
- Salesforce permissions: User account with appropriate permissions to access and manage the data you need.
- Retool permissions: Edit all permissions for resources in your organization.
- Salesforce OAuth app: Connected App configured in Salesforce with OAuth settings. Self-hosted instances must create a custom OAuth app.
- OAuth callback URL: Your Retool instance's OAuth callback URL configured in the Salesforce Connected App.
- Salesforce permissions: User account with appropriate permissions to access and manage the data you need.
- Retool permissions: Edit all permissions for resources in your organization.
Create a Salesforce resource
Follow these steps to create a Salesforce resource in Retool.
1. Create a new resource
In your Retool organization, navigate to Resources in the main navigation and click Create new → Resource. Search for Salesforce and click the Salesforce tile to begin configuration.

Salesforce resource selection.
2. Configure connection settings
Configure the following connection settings for your Salesforce resource.
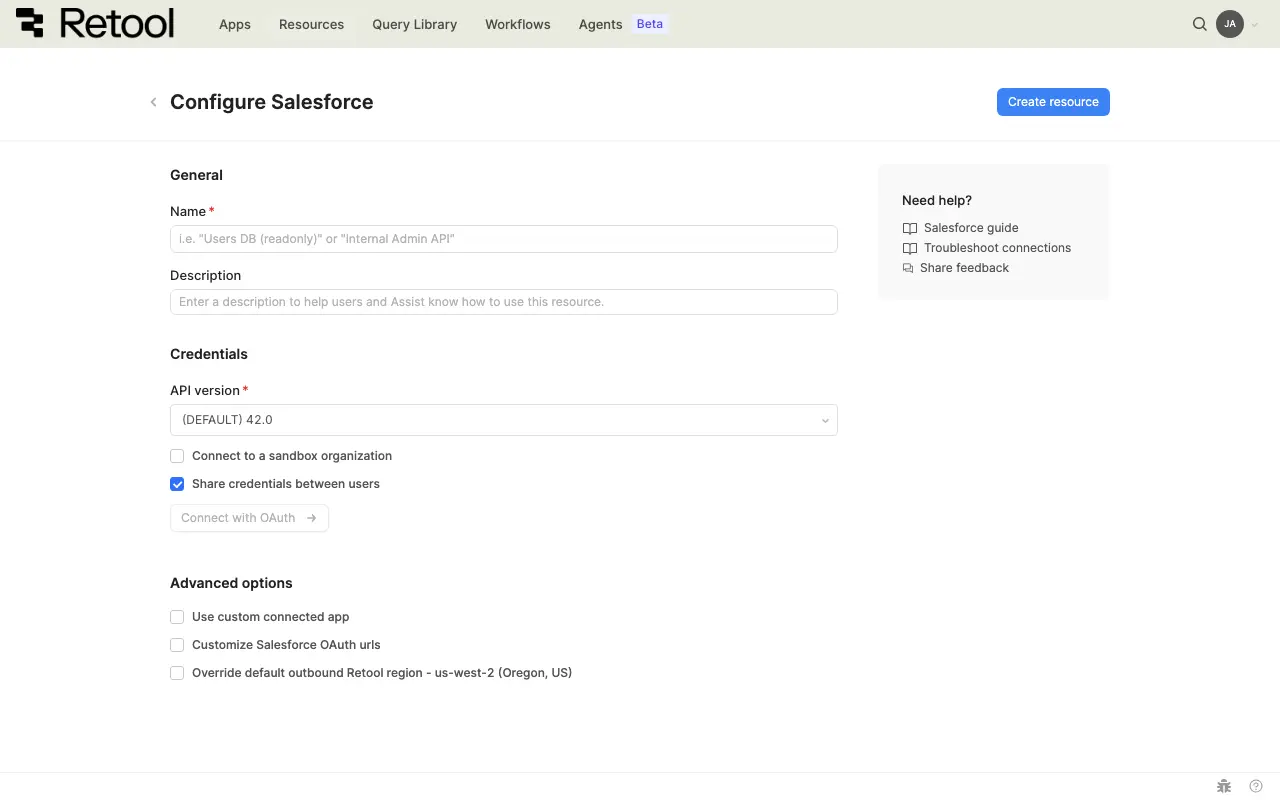
Salesforce connection settings.
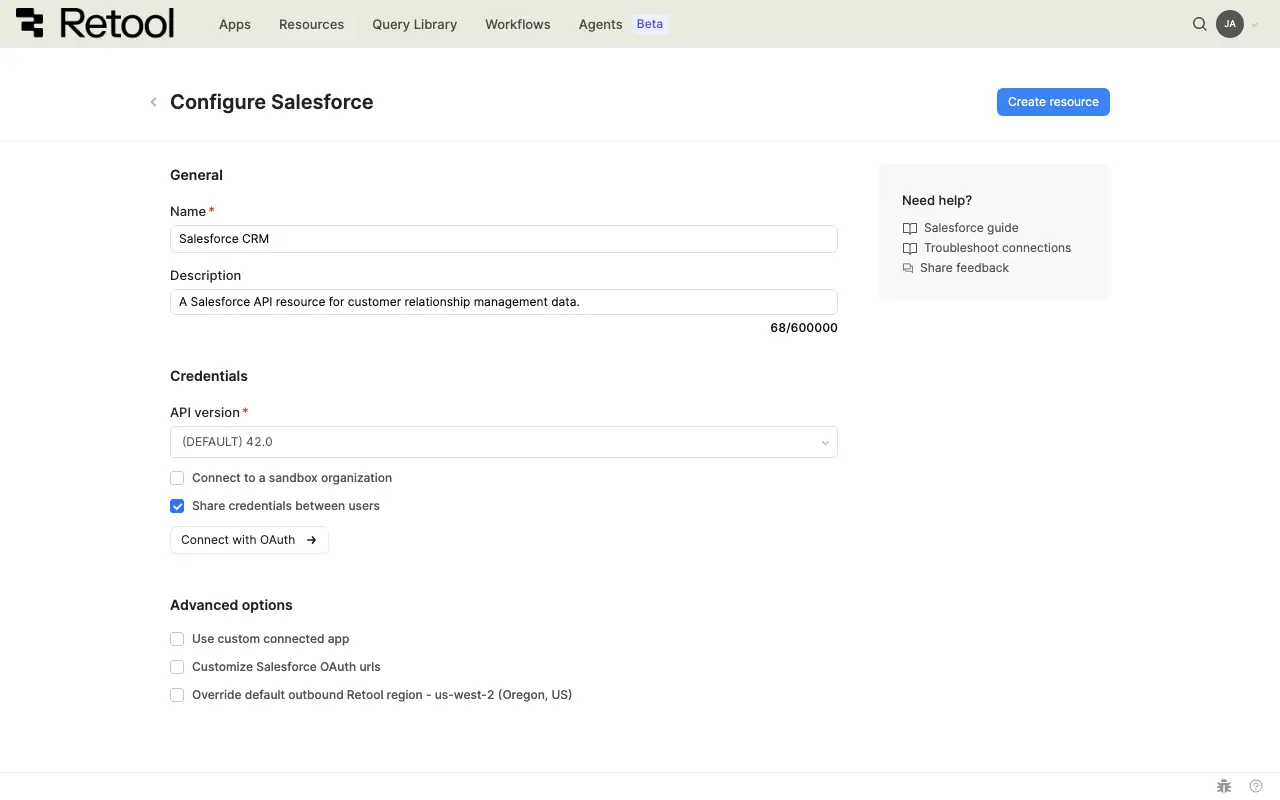
Resource name and description
Specify a name for the resource that indicates which Salesforce instance it connects to. Include a description that can provide more context to users and Assist about how to use the resource.
| Example Name | Example Description |
|---|---|
| Salesforce Sales | Salesforce org for the sales team with customer and opportunity data. |
| Salesforce Support | Salesforce org for the support team with case and ticket data. |
API version
Select the Salesforce API version to use for queries. Retool defaults to the latest stable API version, but you can select a specific version if your organization requires it.
v61.0 (DEFAULT)
Different API versions support different features and objects. If you encounter issues with a specific query, try using a different API version that matches your Salesforce org's configuration.
Sandbox environment
Enable this option if you're connecting to a Salesforce sandbox organization for testing and development.
When enabled, Retool automatically updates the OAuth URLs to use Salesforce's test environment (test.salesforce.com instead of login.salesforce.com).
☐ Connect to a sandbox organization
Always use sandbox environments for development and testing. Production environments should only be used for live applications with real customer data.
3. Configure authentication
Salesforce uses OAuth 2.0 authentication to securely connect user accounts.
- Cloud-hosted organizations
- Self-hosted instances
Cloud organizations can use Retool's pre-configured OAuth app or create a custom OAuth app.
- Retool's OAuth app: Simplest option, requires no Salesforce configuration. Each user authenticates with their own Salesforce account.
- Custom OAuth app: Required for accessing custom Apex endpoints or when you need specific OAuth scopes.
Option A: Retool's OAuth app (Recommended)
Use Retool's pre-configured OAuth app for the simplest setup.
- Select Use Retool's OAuth app in the resource configuration.
- Save the resource.
- Authenticate by clicking the Connect to Salesforce button. Retool redirects you to Salesforce to grant permissions.
- Grant permissions in Salesforce and return to Retool.
Each user who accesses the resource authenticates with their own Salesforce account. No additional configuration is required.
Option B: Custom OAuth app
Create a custom Connected App in Salesforce for advanced OAuth configuration.
Step 1: Create a Connected App in Salesforce
Follow Salesforce's official documentation to create a Connected App with OAuth settings.
When configuring the Connected App, use these Retool-specific values:
- Callback URL:
https://retool.com/oauth/callback - OAuth Scopes: Select the scopes your application needs, typically
api,refresh_token,web
After creating the Connected App, note the Consumer Key and Consumer Secret from Salesforce.
Step 2: Configure the resource in Retool
- Select Use custom OAuth app in the resource configuration.
- Instance URL: Specify your Salesforce instance URL (e.g.,
https://na1.salesforce.com). This field appears when using a custom OAuth app. - Client ID: Paste the Consumer Key from Salesforce.
- Client Secret: Paste the Consumer Secret from Salesforce.
Instance URL: https://na1.salesforce.com
Client ID: 3MVG9...xyz
Client Secret: {{ retoolContext.environment.salesforceSecret }}
Advanced: Custom OAuth URLs
For advanced use cases, you can customize the Salesforce authorization and access token URLs. Enable Customize Salesforce OAuth urls to specify custom endpoints.
This is typically only needed if you're using a custom Salesforce domain or a specialized Salesforce environment.
- Save the resource.
- Authenticate by clicking the Connect to Salesforce button.
Store the Client Secret in configuration variables or rather than hardcoding it in the resource configuration.
Self-hosted instances must create a custom Connected App in Salesforce.
Step 1: Create a Connected App in Salesforce
Follow Salesforce's official documentation to create a Connected App with OAuth settings.
When configuring the Connected App, use these Retool-specific values:
- Callback URL: Your Retool instance's OAuth callback URL, for example:
https://your-retool-domain.com/oauth/callback - OAuth Scopes: Select the scopes your application needs, typically
api,refresh_token,web
After creating the Connected App, note the Consumer Key and Consumer Secret from Salesforce.
Step 2: Configure the resource in Retool
- Instance URL: Specify your Salesforce instance URL (e.g.,
https://na1.salesforce.com). - Client ID: Paste the Consumer Key from Salesforce.
- Client Secret: Paste the Consumer Secret from Salesforce.
- Callback URL: Your Retool instance's OAuth callback URL (e.g.,
https://your-retool-domain.com/oauth/callback).
Instance URL: https://na1.salesforce.com
Client ID: 3MVG9...xyz
Client Secret: {{ retoolContext.environment.salesforceSecret }}
Callback URL: https://retool.company.com/oauth/callback
Advanced: Custom OAuth URLs
For advanced use cases, you can customize the Salesforce authorization and access token URLs. Enable Customize Salesforce OAuth urls to specify custom endpoints.
This is typically only needed if you're using a custom Salesforce domain or a specialized Salesforce environment.
- Save the resource.
- Authenticate by clicking the Connect to Salesforce button.
Store the Client Secret in configuration variables or rather than hardcoding it in the resource configuration.
Salesforce authentication settings.
4. Test the connection
Click Test connection to verify Retool can connect to your Salesforce instance. A successful test confirms OAuth authentication is configured correctly and the user has appropriate permissions.
If the connection test fails, verify:
- OAuth app is configured correctly in Salesforce
- Callback URL matches exactly between Salesforce and Retool
- User has authenticated and granted permissions
- OAuth scopes include necessary permissions for your use case
5. Save the resource
Click Create resource to save your Salesforce resource. The resource is now available to use in apps, workflows, and agent tools across your Retool organization.
Query Salesforce data
Once you've created a Salesforce resource, you can query it in apps, workflows, and agent tools.
Create a query
You can create a Salesforce query in a Retool app using Assist to generate queries with natural language, or manually using code.
- Assist
- Code
Use Assist to generate queries from natural language prompts. Assist can create SOQL queries to retrieve and manipulate data from your Salesforce resource.
To create a query with Assist:
- In the Retool app IDE, click the Assist button at the bottom of the left toolbar to open the Assist panel (if not already visible).
- Write a prompt describing the data you want to retrieve, referencing your resource using
@. - Press Enter to submit the prompt.
- Select your Salesforce resource when prompted.
- Review the generated query and click Run query to add it to your app.
get all accounts with annual revenue over 1 million using @Salesforce
To manually create a Salesforce query in a Retool app:
- In the Retool app IDE, open the Code tab, then click + in the page or global scope.
- Select Resource query.
- Choose your Salesforce resource.
- Select the query type and configure parameters.
Query types
Salesforce queries support multiple operation types for different use cases.
| Query type | Description | Use case |
|---|---|---|
| SOQL | Execute SOQL (Salesforce Object Query Language) queries. | Retrieve and filter records with SQL-like syntax. |
| CRUD Retrieve | Retrieve a single record by ID. | Get full record details for editing or display. |
| CRUD Create | Create a new record. | Insert new accounts, contacts, or custom objects. |
| CRUD Update | Update an existing record by ID. | Modify record fields. |
| CRUD Delete | Delete a record by ID. | Remove records permanently. |
| CRUD Upsert | Create or update records based on an external ID. | Sync data from external systems. |
| Apex REST | Call custom Apex REST endpoints. | Execute custom business logic. |
| Bulk | Perform bulk operations on large datasets. | Import or update thousands of records. |
Query configuration fields
Configuration fields vary based on the query type you select.
SOQL queries
For SOQL query type.
SOQL query
The SOQL query to execute. Use SOQL syntax to retrieve and filter Salesforce records.
SELECT Id, Name, Email, Phone, Account.Name
FROM Contact
WHERE Account.Type = 'Customer'
  AND CreatedDate >= LAST_N_DAYS:30
ORDER BY CreatedDate DESC
LIMIT 100
Use embedded expressions for dynamic queries:
SELECT Id, Name, Email, Status
FROM Lead
WHERE Status = {{ statusSelect.value }}
  AND Email LIKE {{ '%' + searchInput.value + '%' }}
ORDER BY CreatedDate DESC
CRUD operations
For CRUD Retrieve, CRUD Create, CRUD Update, CRUD Delete, and CRUD Upsert query types.
Object type (all CRUD operations)
The Salesforce object type to operate on (e.g., Account, Contact, Opportunity, or custom objects like Custom_Object__c).
// Standard objects
Account
Contact
Lead
Opportunity

// Custom objects (end with __c)
Custom_Product__c
Record ID (CRUD Retrieve, Update, Delete)
The Salesforce record ID to retrieve, update, or delete. Salesforce IDs are 15 or 18 characters.
// Static ID
001xx000003DGb2AAG

// Dynamic from table selection
{{ table1.selectedRow.data.Id }}
Record data (CRUD Create, Update, Upsert)
The field values to create or update. Provide as a JavaScript object with field names and values.
{
  "Name": {{ nameInput.value }},
  "Email": {{ emailInput.value }},
  "Phone": {{ phoneInput.value }},
  "AccountId": {{ accountSelect.value }},
  "LeadSource": "Website"
}
Apex REST
For Apex REST query type.
Apex endpoint
The custom Apex REST endpoint path. Include the path after /services/apexrest/.
// Apex REST endpoint
/CustomEndpoint

// With path parameters
/CustomEndpoint/{{ recordId.value }}
Bulk operations
For Bulk query type.
Object type
The Salesforce object type to perform bulk operations on.
Operation
The bulk operation type (create, update, upsert, or delete).
Records
An array of records to process in the bulk operation. Provide as a JavaScript array of objects.
Common use cases
The following examples demonstrate typical Salesforce operations in Retool apps.
query and display contacts
First, create a SOQL query to retrieve contacts.
SELECT Id, Name, Email, Phone, Account.Name, Title
FROM Contact
WHERE Account.Type = 'Customer'
ORDER BY CreatedDate DESC
LIMIT 100
Next, add a Table component to the app and set its Data property to {{ getContactsQuery.data }}.
create a new account
First, add a Form component (form1) with input fields for account data.
Next, create a CRUD Create query:
- Query type: CRUD Create
- Object type:
Account - Record data:
{
  "Name": {{ form1.data.name }},
  "Type": {{ form1.data.type }},
  "Industry": {{ form1.data.industry }},
  "Phone": {{ form1.data.phone }},
  "Website": {{ form1.data.website }}
}
Then, add an event handler to the form's Submit event that runs the create query and displays a success notification.
update an opportunity
First, add a Form component with fields pre-populated from selected row data.
Next, create a CRUD Update query:
- Query type: CRUD Update
- Object type:
Opportunity - Record ID:
{{ table1.selectedRow.data.Id }} - Record data:
{
  "StageName": {{ stageSelect.value }},
  "Amount": {{ amountInput.value }},
  "CloseDate": {{ closeDatePicker.value }}
}
Then, add an event handler that runs the update query when the form is submitted and refreshes the data query.
delete a record with confirmation
First, add a Button component in your table's action column.
Next, create a CRUD Delete query:
- Query type: CRUD Delete
- Object type:
Lead - Record ID:
{{ table1.selectedRow.data.Id }}
Then, add an event handler to the button's Click event:
- Action: Show confirmation modal
- If confirmed, trigger the delete query
- Then refresh the data query
bulk upsert records
First, add a File Input component that accepts CSV files with parsed data.
Next, create a Bulk operation query:
- Query type: Bulk
- Operation: Upsert
- Object type:
Contact - External ID field:
Email - Records:
{{
  fileInput1.parsedValue.map(row => ({
    Email: row.Email,
    FirstName: row.FirstName,
    LastName: row.LastName,
    Phone: row.Phone
  }))
}}
The query creates new contacts or updates existing contacts based on matching email addresses.
Best practices
Follow these best practices to optimize performance, maintain security, and ensure data integrity when working with Salesforce.
Performance
- Cache responses: For data that doesn't change frequently, enable query caching to reduce API calls and improve response times.
- Use pagination: Implement pagination for endpoints that return large datasets to reduce payload size and improve performance.
- Batch operations: When available, use Salesforce batch endpoints to combine multiple operations into fewer requests.
- Minimize payload size: Request only the fields you need using query parameters or API-specific field selection features.
- Set appropriate timeouts: Configure query timeouts based on expected API response times to prevent hung requests.
Security
- Use configuration variables: Store API keys and tokens in configuration variables or rather than hardcoding them.
- Use HTTPS only: Always connect to APIs over HTTPS to encrypt data in transit and protect authentication credentials.
- Rotate credentials regularly: Follow your API provider's recommendations for credential rotation and key management.
- Validate SSL certificates: Keep SSL certificate verification enabled unless absolutely necessary for development environments.
- Use resource environments: Organizations on an Enterprise plan can configure multiple resource environments to maintain separate configurations for production, staging, and development.
- Apply least privilege: Use API keys with minimal required permissions. Create separate keys for different environments.
Data integrity
- Validate user input: Sanitize and validate all user input before including it in API requests to prevent injection attacks.
- Handle errors gracefully: Configure error notifications and fallback behavior for failed API calls to improve user experience.
- Use idempotency keys: For APIs that support idempotency keys (like Stripe), include them in POST/PATCH requests to prevent duplicate operations.
- Verify responses: Check response status codes and validate response data structure before using it in your app.
- Implement retry logic: For transient failures, use Retool's automatic retry settings or implement custom retry logic with exponential backoff.
- Log API interactions: Enable query logging to track API requests and responses for debugging and auditing.