Use Retool Database with multiple environments
Learn how to use Retool Database with multiple environments.
You can use Retool Database with multiple environments to develop apps and workflows using nonproduction data. You can then use schema migrations to sync table schema changes between environments.
The Retool Database resource is automatically configured for any additional environments in use by your organization. Each environment contains an isolated set of tables—modifications in one environment does not impact other environments.
Select the environment
The Retool Database editor uses table data for the currently selected environment, which is production by default. Use the Environment menu in the lower-left to select which environment data to use.
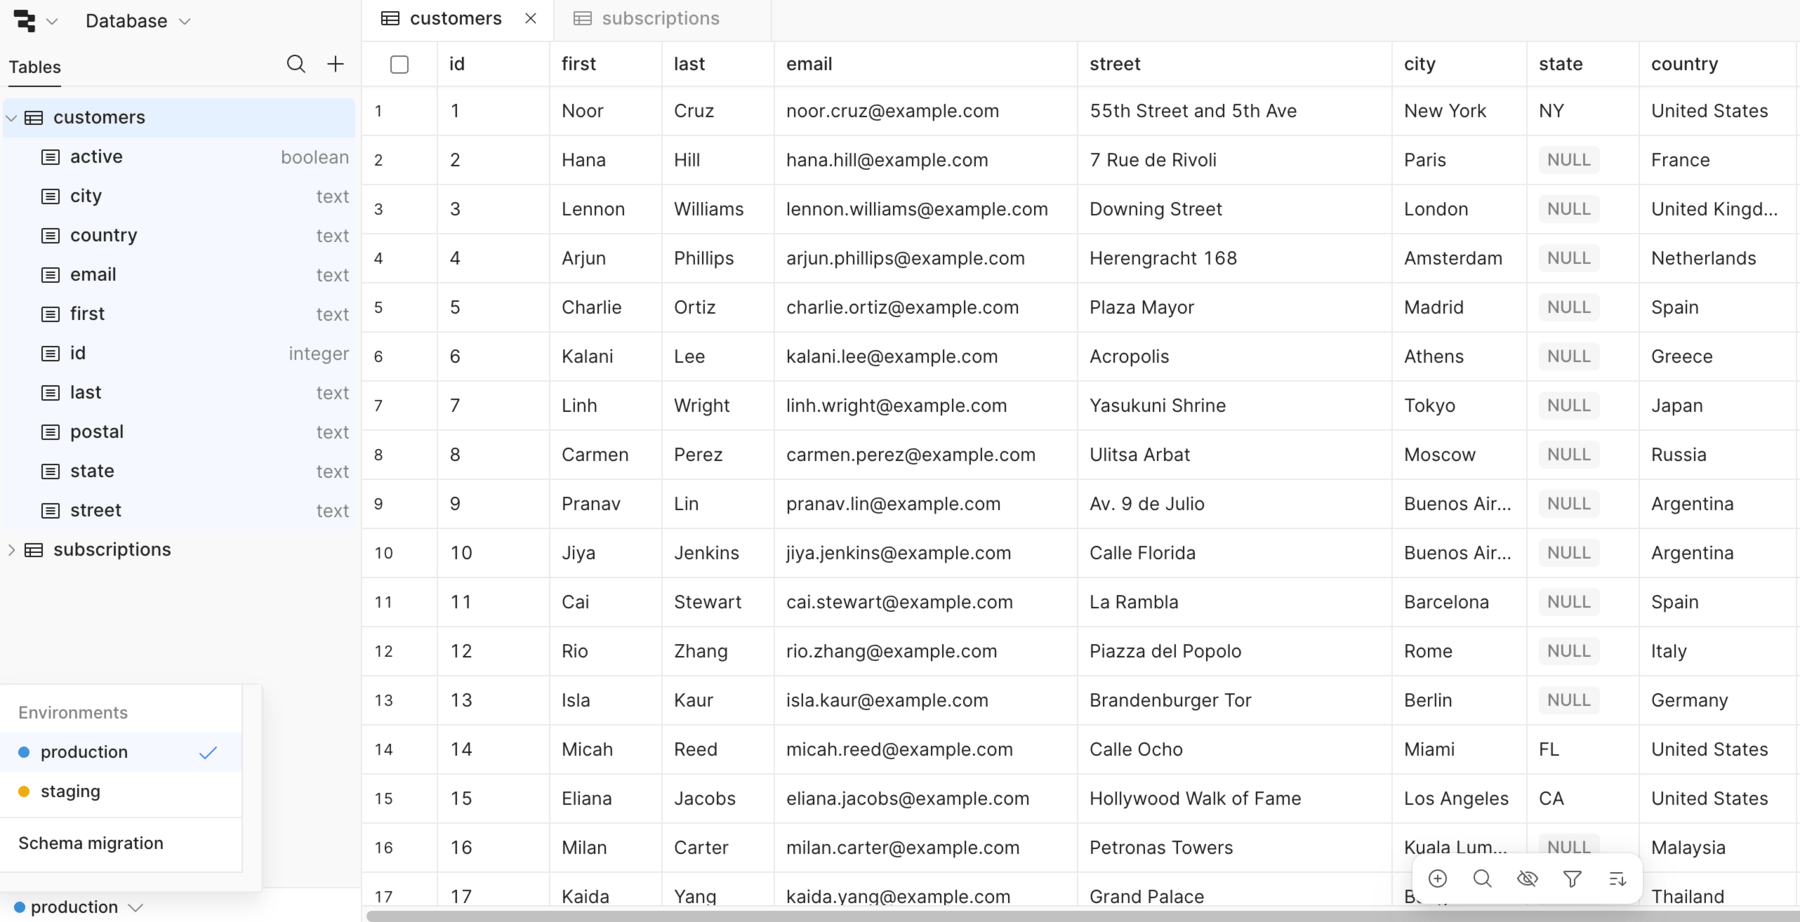
Switch environments in the Retool Database editor.
Migrate table schema between environments
The Retool Database resource is automatically configured for all environments your organization uses. Using schema migrations, you can update Retool Database table schemas in one environment and copy these changes to another environment. This allows you to iterate on your database schema in testing environments and deploy updates to users on production apps only when changes are ready.
Schema migration
You can create a schema migration after creating, updating, or removing any tables or fields in any environment. Click the Environment menu in the lower-left and select Schema migration.
The History view shows past migrations, including the executed SQL and whether the migration completed successfully. Click New migration to start creating a migration.
On the new migration modal, you can choose the source and destination environments using the dropdowns and view the schema differences between the two environments. For example, the following shows the addition of two fields: an integer field named age and a text field named avatar_url. Each are present in the staging environment and not in production.
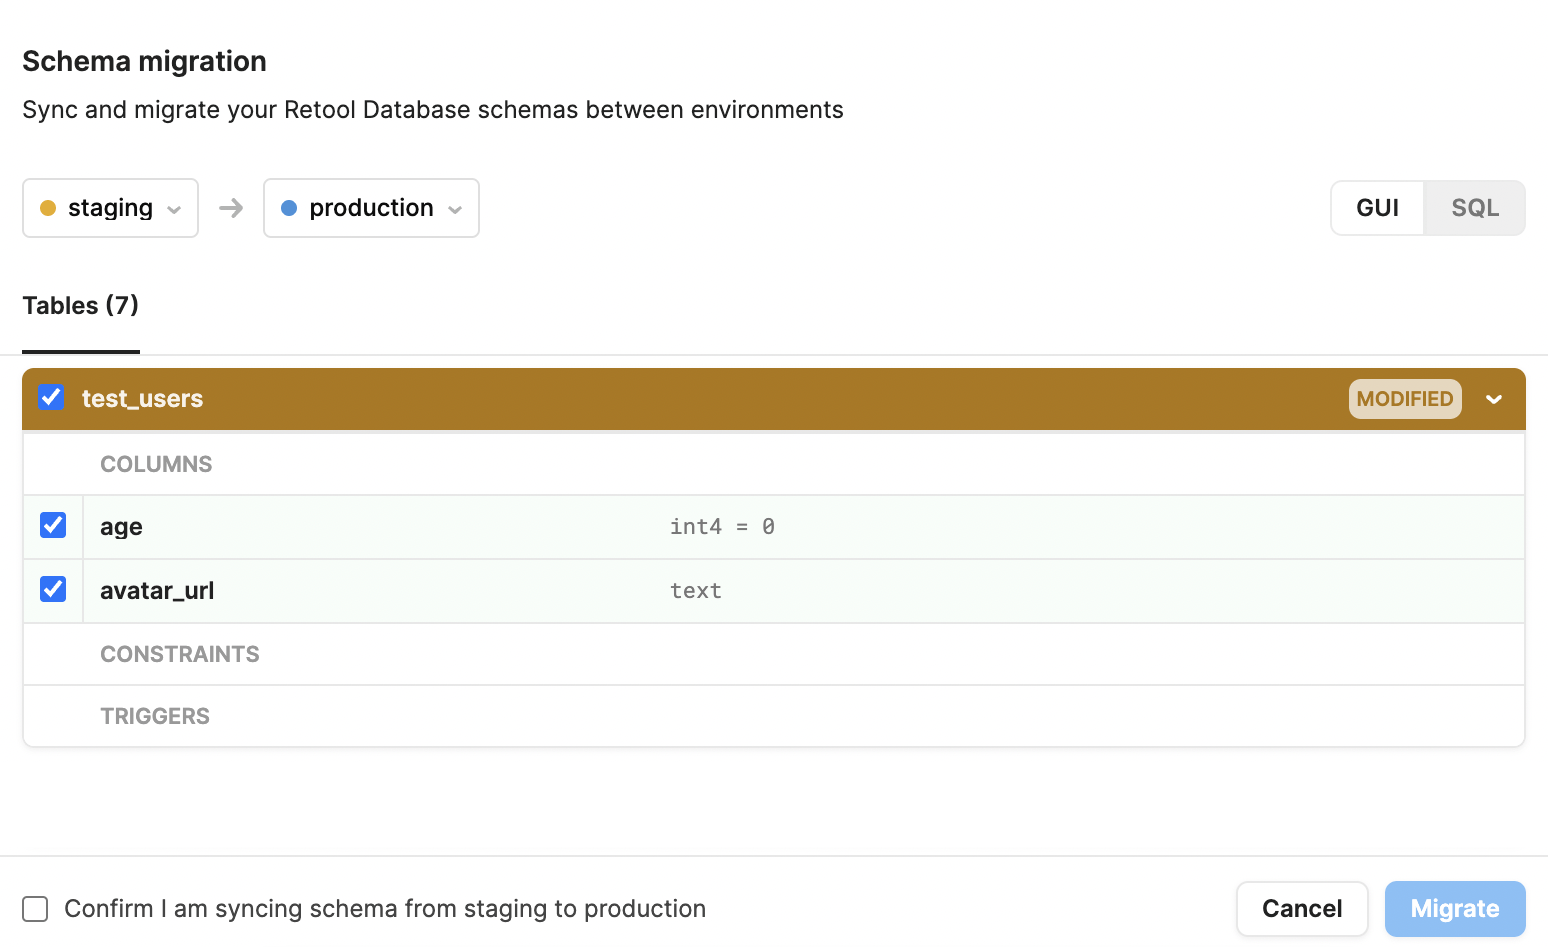
You can click the checkboxes next to the modified tables or fields to exclude changes from the migration.
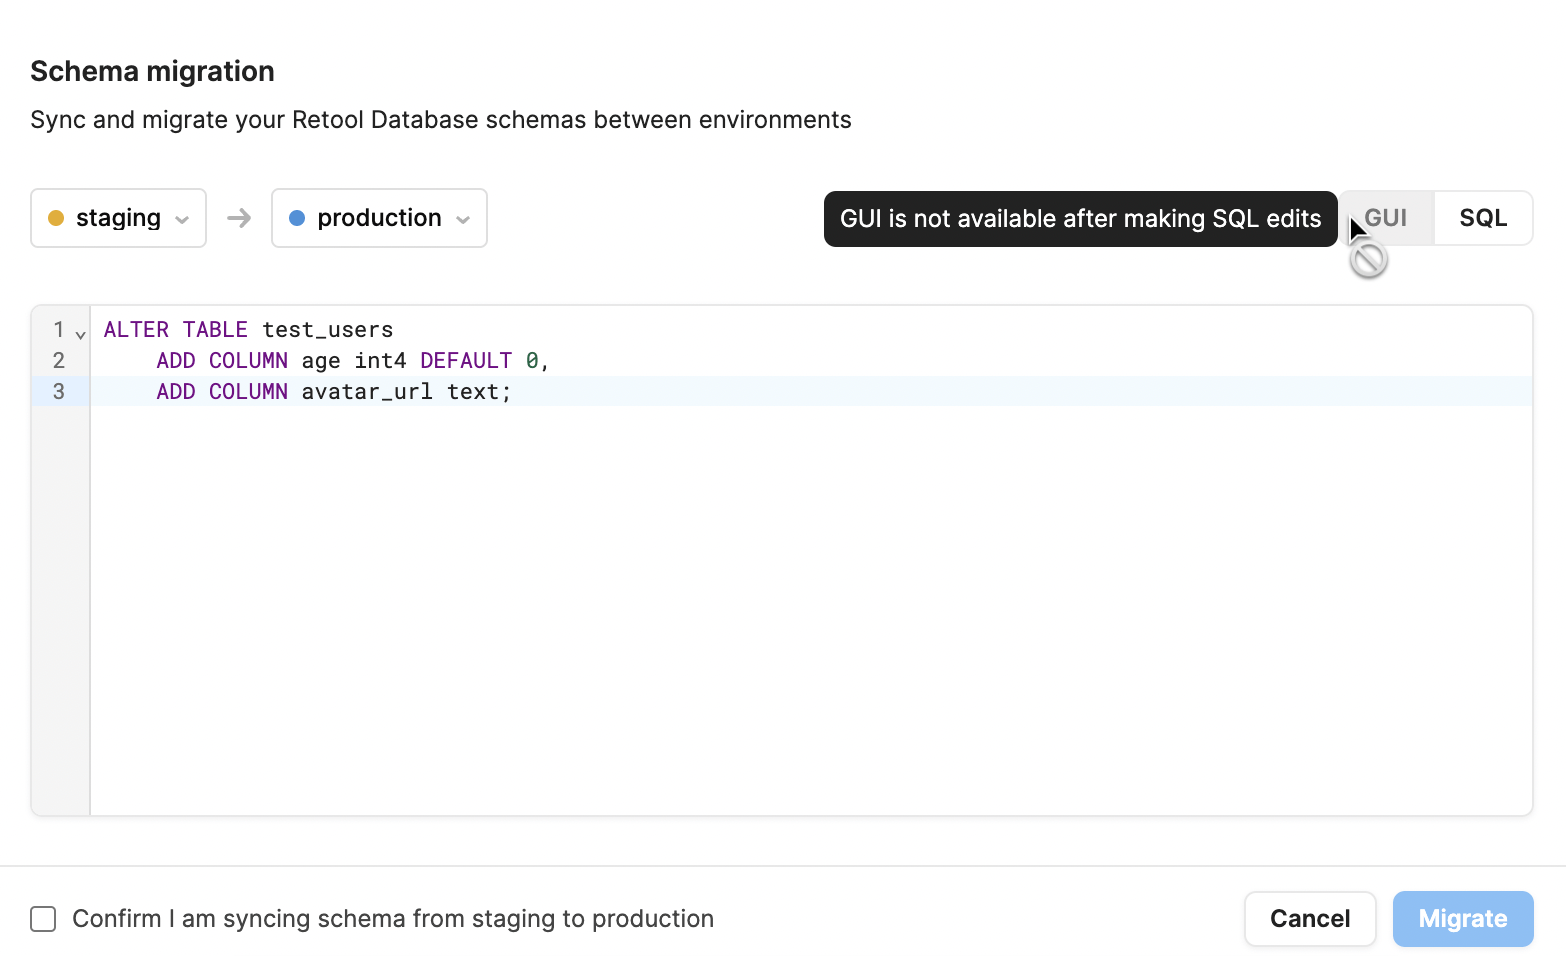
Preview and edit SQL
In the GUI view, the SQL a migration executes is generated automatically. To preview this SQL, click the SQL tab. You can edit this SQL to execute custom migrations, but you cannot return to the GUI view after making changes to the SQL. To return to the GUI view, click the Undo SQL edits button to reset the SQL changes.
Execute migrations
To run schema migrations, select the confirmation checkbox and click Migrate. On the History modal, your migration will display as Running and marked as Completed when it's finished. You can then navigate back to your destination environment to see the changes reflected on that database.
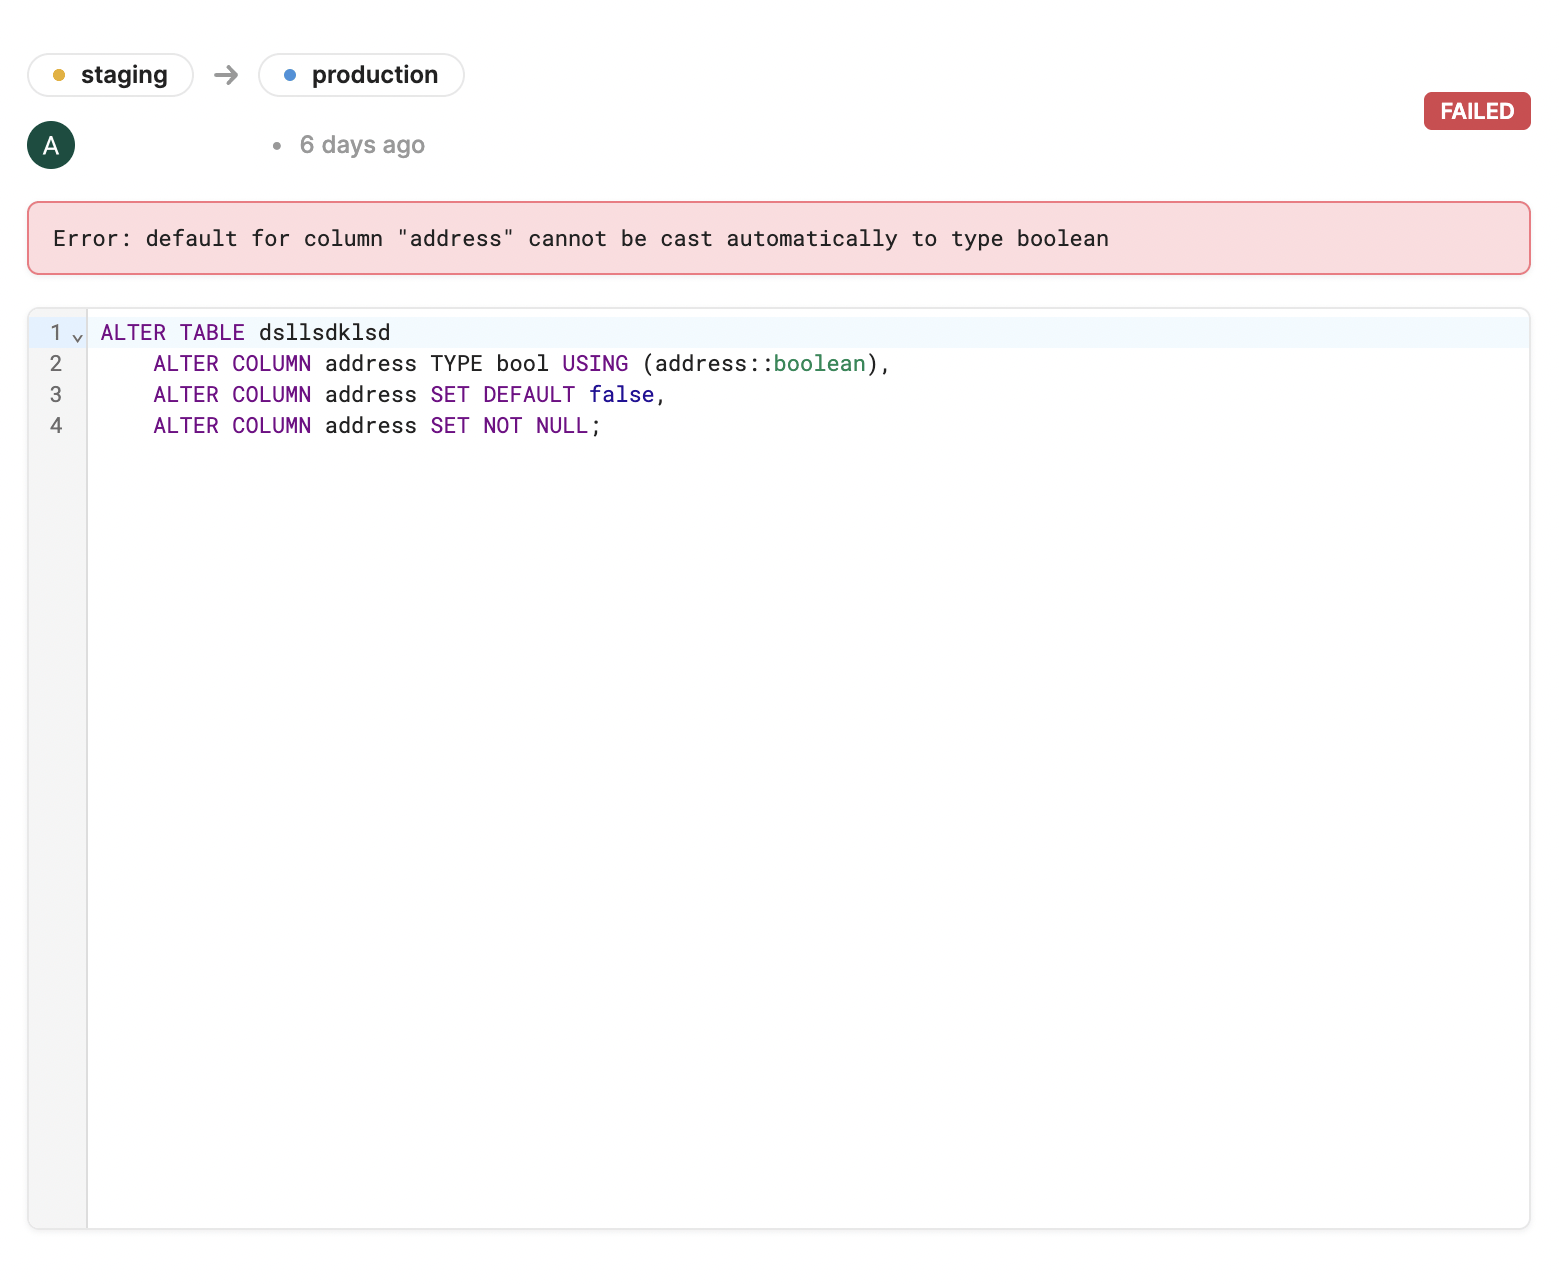
Failed migrations
Migrations with errors show as Failed in the History modal. When a migration fails, none of its changes apply to your database, so after fixing any errors you can run a migration containing the same changes. The detail view for these failed migrations contains the related PostgreSQL error message.