Getting started with the JSON Schema Form component
JSON Schema Form is based on the react-jsonschema-form library. You define which input fields to include and how they are rendered using JSON and UI schemas. JSON Schema Form displays input fields in a single-column layout only, and you cannot add other components to the form.
Compared to the Form component, JSON Schema Form allows for more programmatic flexibility, because you can dynamically change the JSON schema instead of making manual changes. You can also use the Default Form data property of JSON Schema Form to automatically populate inputs using other data, such as a selected table row.
Retool recommends using the Form component as it's more versatile for most use cases. Use the JSON Schema Form component only if your use case requires it. Refer to the comparison of form components for more details.
Try out the demo below to see the form in action (submissions are disabled).
The following guide outlines how to create a JSON Schema Form that enables a user to either edit or create a new entry in a database of sales deals.
Features
Key features of JSON Schema Form include:
- Automatic form generation from a database.
- The ability to make programmatic updates to the form schema.
- Configurable default form data.
- Input validation and event handlers.
- Customizeable title, description, and submission button text.
JSON Schema Form does not support Markdown formatting for labels and captions.
Specify content options
The Content section of the Inspector contains settings that control the content of your form:
- JSON Schema: The JSON schema for the form, which uses react-jsonschema-form.
- UI Schema: The UI schema for the form, which provides information on how the form should be rendered.
- Default Form Data: The default form data, which is displayed inside the input fields.
Generate the inputs
You can create a JSON schema from scratch or by using the Generate schema from a database option. Use this option to select a connected PostgreSQL, MySQL, or MS SQL database and corresponding table, and Retool generates a JSON Schema and UI Schema for your JSON Schema Form. You can then manually edit the schemas.
This example shows how to connect the JSON Schema Form to a deals table in the onboarding_db, a PostgreSQL database.
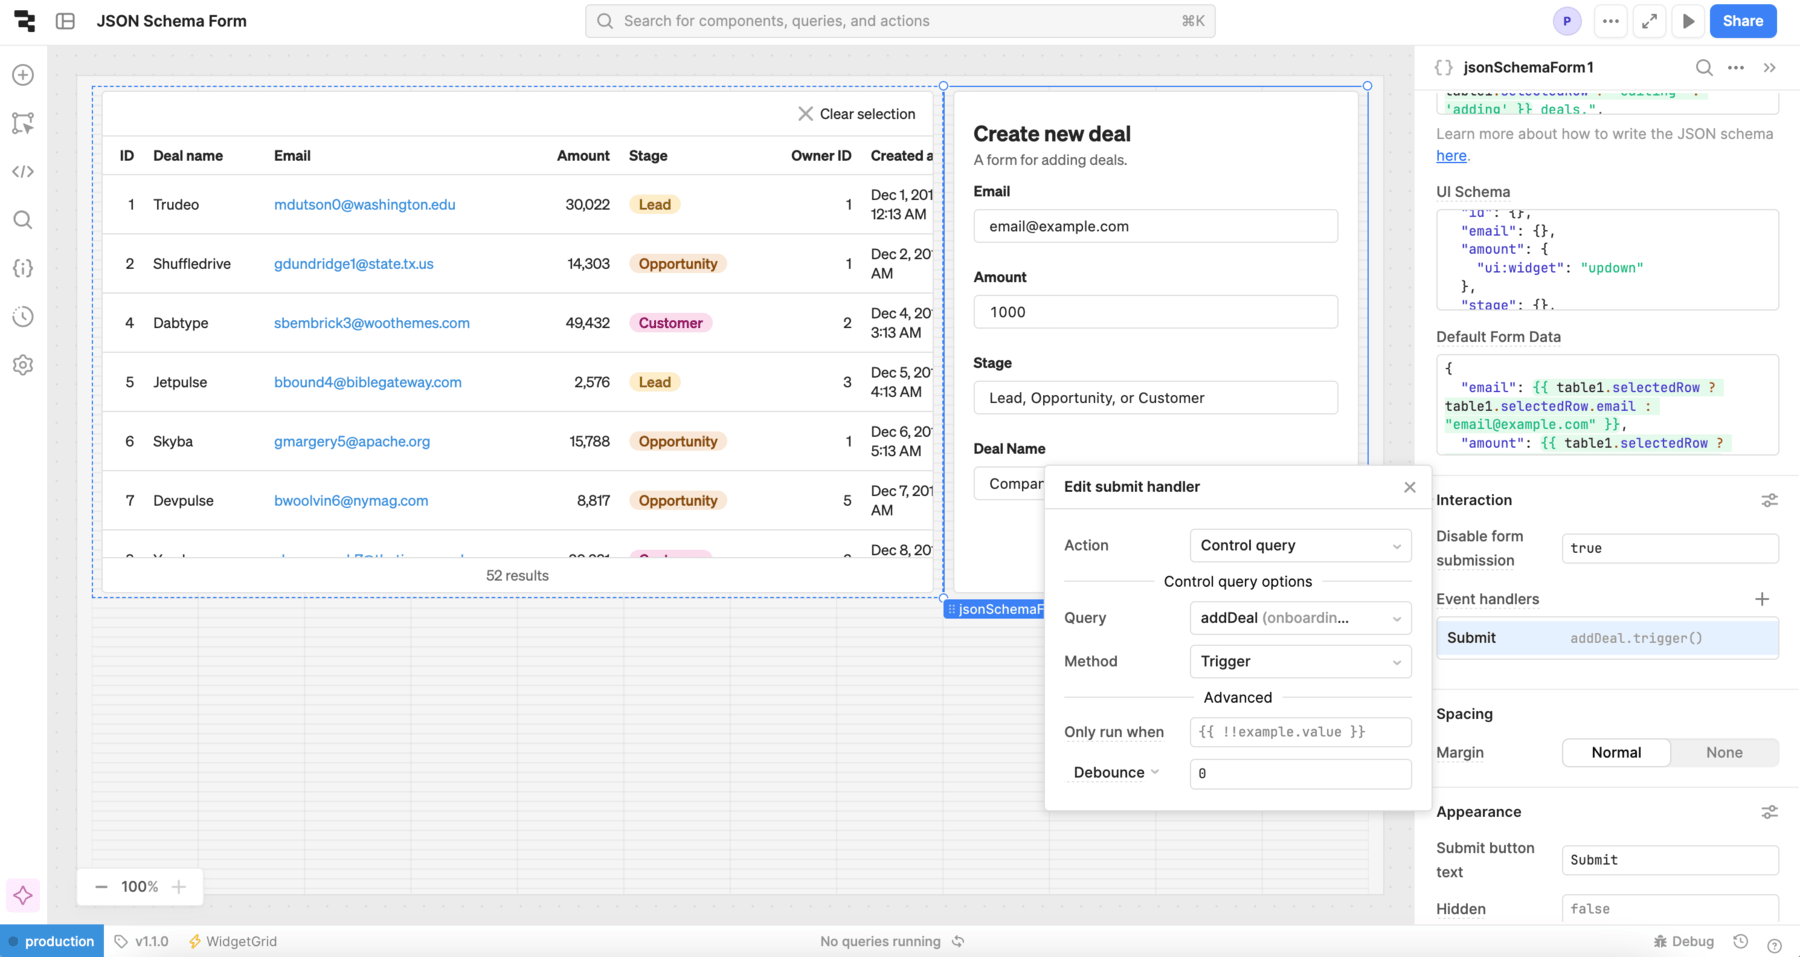
Define default data
Use the Default Form Data setting to display a certain set of default form data. You can set this manually or define it programmatically. For example, you could set the default values to be the values of the currently selected row. The following code snippet shows an example of how you use data from a row if one is selected or provide default values if one is not:
{
  "email": {{ table1.selectedRow ? table1.selectedRow.email : "email@example.com" }},
  "amount": {{ table1.selectedRow ? table1.selectedRow.amount : 1000 }},
  "stage": {{ table1.selectedRow ? table1.selectedRow.stage : "Lead, Opportunity, or Customer" }},
  "deal_name": {{ table1.selectedRow ? table1.selectedRow.deal_name : "Company Name" }}
}
Set the form title
Update the form's title so it's clear to the user if they are creating a record or updating an existing one. In the JSON Schema setting, update the form's title to "title": "{{ table1.selectedRow ? 'Edit' : 'Create new' }} deal".
This displays either Edit deal or Create new deal, depending on whether a table row is selected or not.
Configure user interaction
You can configure the user's interaction with the JSON Schema Form through input validation, event handlers, and other mechanisms in the Interaction section of the Inspector.
Input validation
You can apply validation rules in the JSON schema to limit what values your form can accept and which fields are required. For more information, refer to the Input validation guide.
Add an entry to the database
When the user clicks Submit, you need to add their responses to the database. Create a new query that adds the deal information to the database.
In this example, you can create a SQL query that accesses the deals table in the onboarding_db resource. Set Action type to Update a record, or create a new record if it doesn't exist. Filter by the deal_name.
Add the key-value pairs that you want to include in the new or updated entry. For example, set amount to {{ jsonSchemaForm1.data.amount }} to use the submission details.
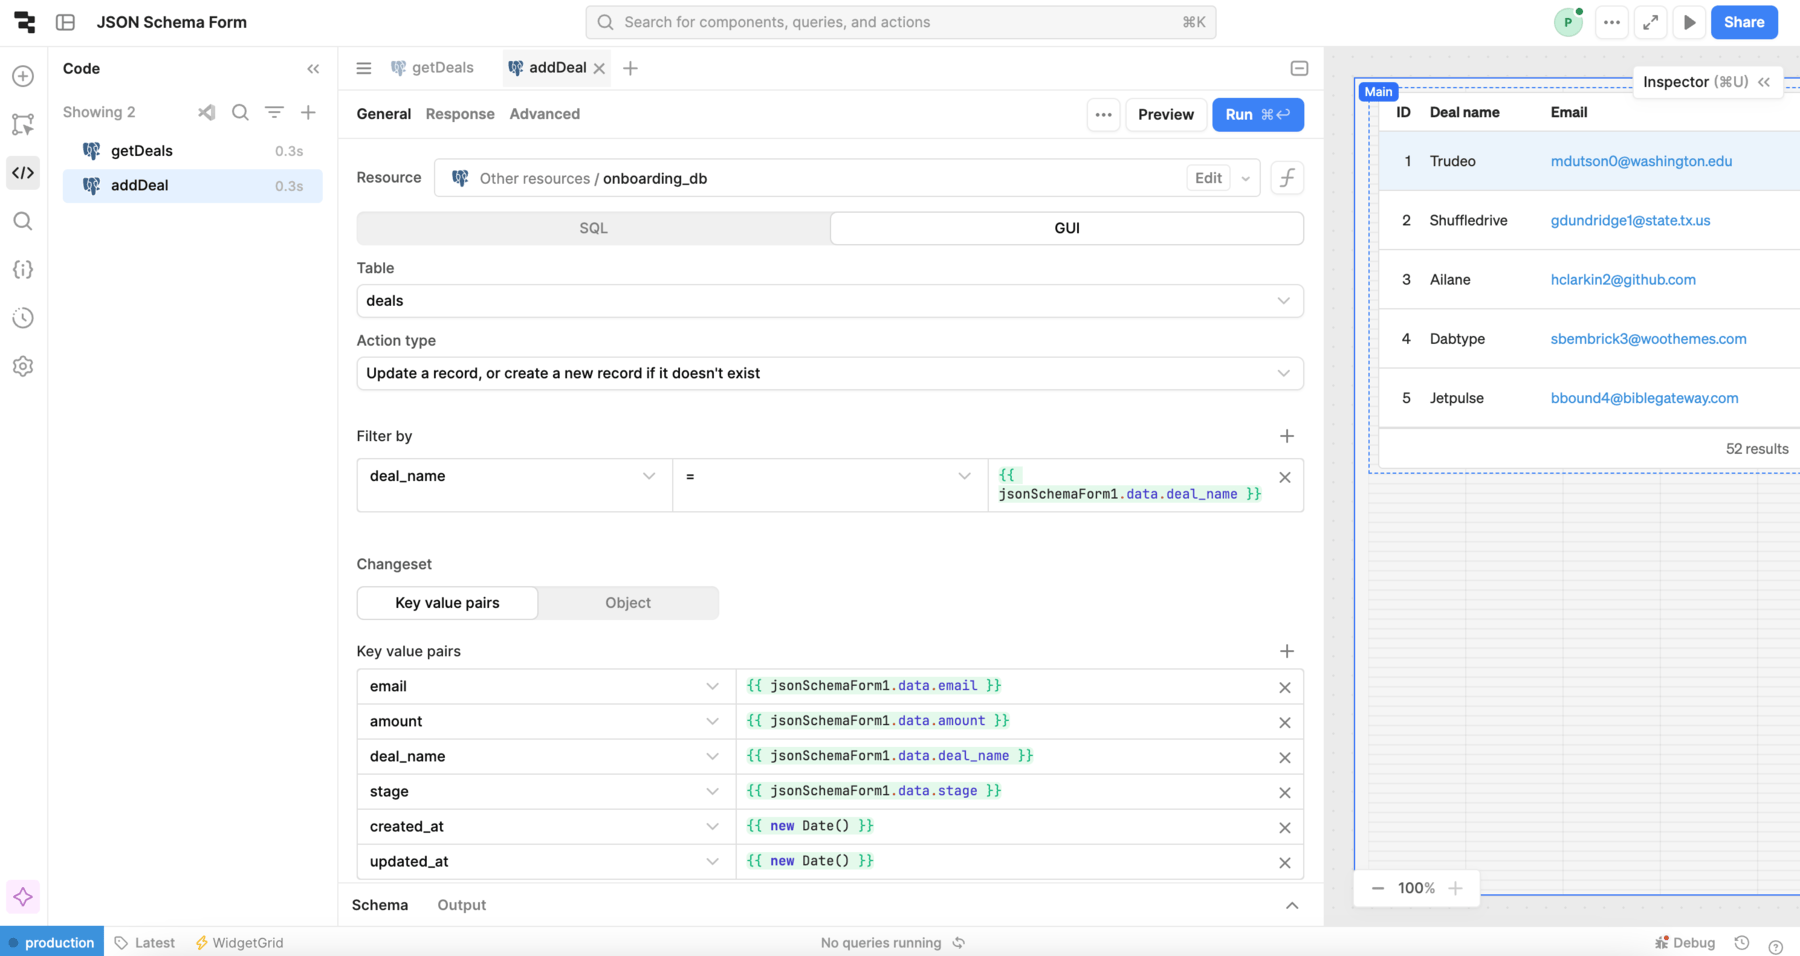
Next, configure the JSON Schema Form's event handler to run this query when the Submit button is pressed.
Refresh the table after submission
You might want to automatically update other components in your app (like a Table) based on the database changes. Create an event handler to refresh the table and show the changes automatically:
- Return to the query you created. Add a new event handler for a Success event.
- Select Trigger query as the action to perform.
- Select getDeals. Triggering this query retrieves the dataset, including your changes, and updates the table.
Customize appearance
Customize the appearance of your form using the UI schema setting. Explore the uiSchema object documentation for more information about the customizations available.
You can also customize the presentation of your component in the Spacing and Appearance sections of the Inspector, although these settings are limited.