Trigger workflows with Retool Events
Learn how to build a workflow that uses Retool Events to send a notification when certain events occur within your organization.
You must be an admin to configure Retool Events. Access to the workflows triggered by Retool Events is determined by existing workflow permissions.
With Retool Events, organization admins can build workflows that run automatically in response to certain events in Retool. When an event is triggered, any associated workflows with pre-defined parameters are triggered.
You can even configure branding options to replace Retool's built-in email notifications with workflows that send custom transactional emails with a reply-to address at your domain. When doing so, you should set up appropriate alerts as error handlers in your workflows.
Configure Retool Event workflows
Navigate to the Retool Events settings in your organization. From here, you can browse available events and add workflows that trigger in response to them.
| Event | Description |
|---|---|
| Password Reset Required | Triggered when a user requests their password reset. |
| Report App Errors | Triggered whenever an app error is reported. |
| User Invited | Triggered whenever a user is invited to your organization. |
| User Created | Triggered whenever a new user is added to your organization. Does not trigger on user invites or access requests, until the user accepts and/or is approved to join the organization. |
| User Requested Access | Triggered whenever a user requests access to your organization. |
| Source Control Deployment Completed | Triggered whenever a source control deployment is completed. |
| Login Attempted | Triggered when users attempt to log in. Runs after a user is authenticated, but before they complete the login process. |
Click Add a workflow to select or create a workflow that runs whenever the respective event is triggered. If you add a new workflow, Retool creates one using a starter template for common use cases related to the event.
Reference event properties
Retool Event-triggered workflows display the related event in the Enabled triggers of the Start block. These triggers are only available when you add workflows from the Retool Events settings page.
Data for the event is made available from the Start block. You can reference this anywhere in the workflow using {{ startTrigger.data }}. This contains different properties depending on the event type.
Refer to the Retool Events reference to learn about the available properties for each event type.
Configure workflow actions
Many Retool lifecycle events are related to organization and user administration, so workflows triggered from Retool Events often involve sending emails. The User Invited template is pre-populated with a Resource query block using Retool Email, but you can configure this to use SendGrid or another email provider.
The sendUserInvite block of the User Invited Template sends an email to the user invited to Retool, using the invitedUserEmail parameter as the To address. The email's body also contains links to the inviteLink parameter. When you construct your email blocks and templates, ensure you use the provided parameters to direct your users to the correct actions.
Login Attempted response structure
When using the Login Attempted event to trigger a workflow, you can use one of the following three redirect variables, which trigger custom redirect behavior upon successful authentication.
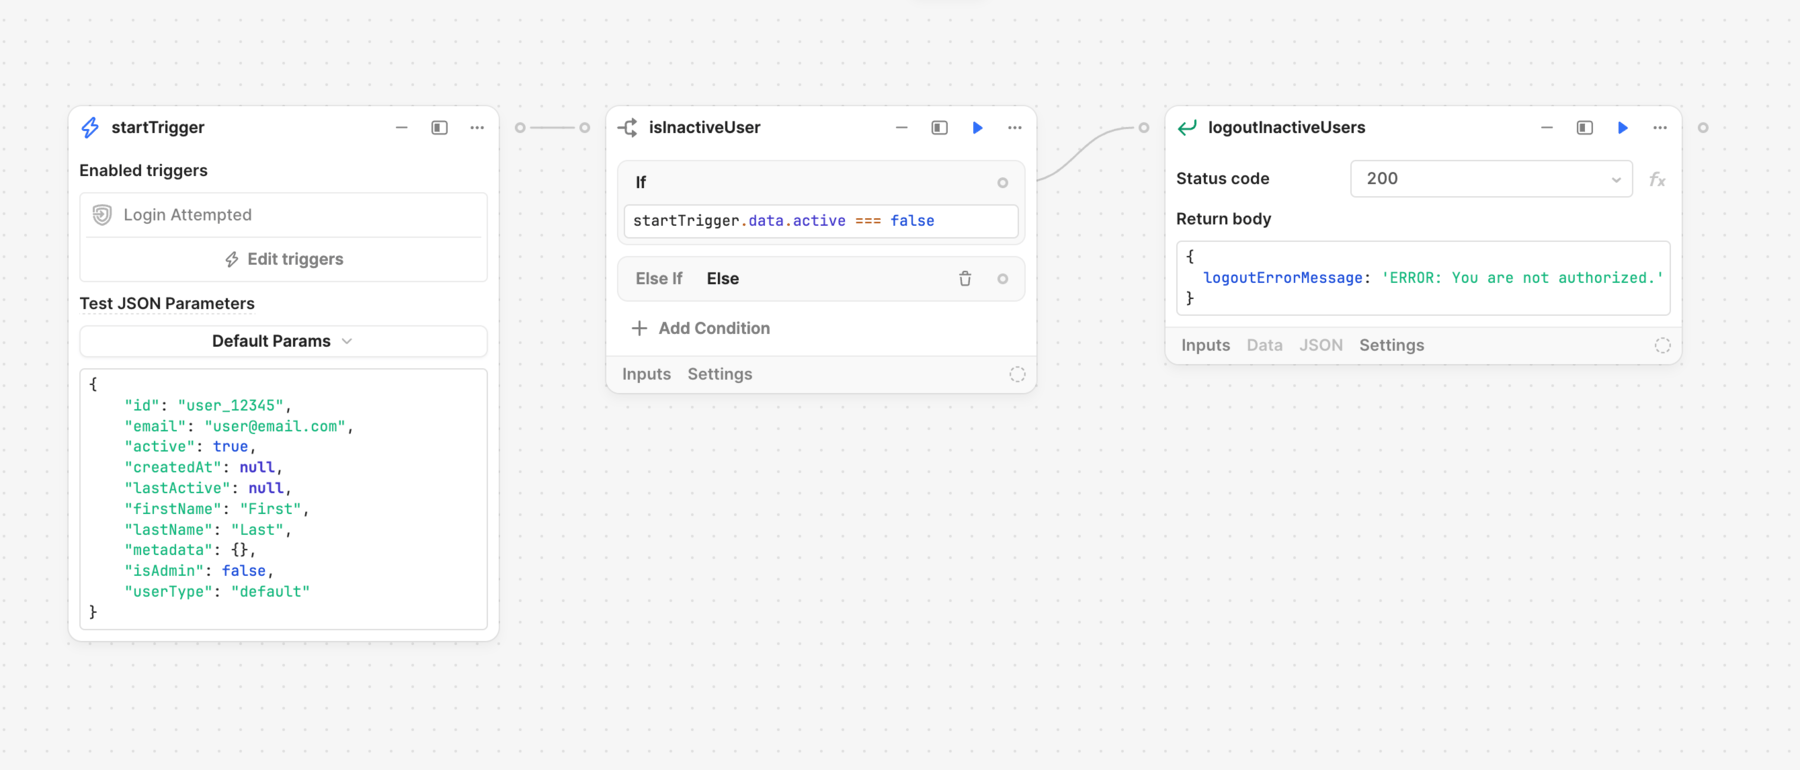
- Logout Error Message
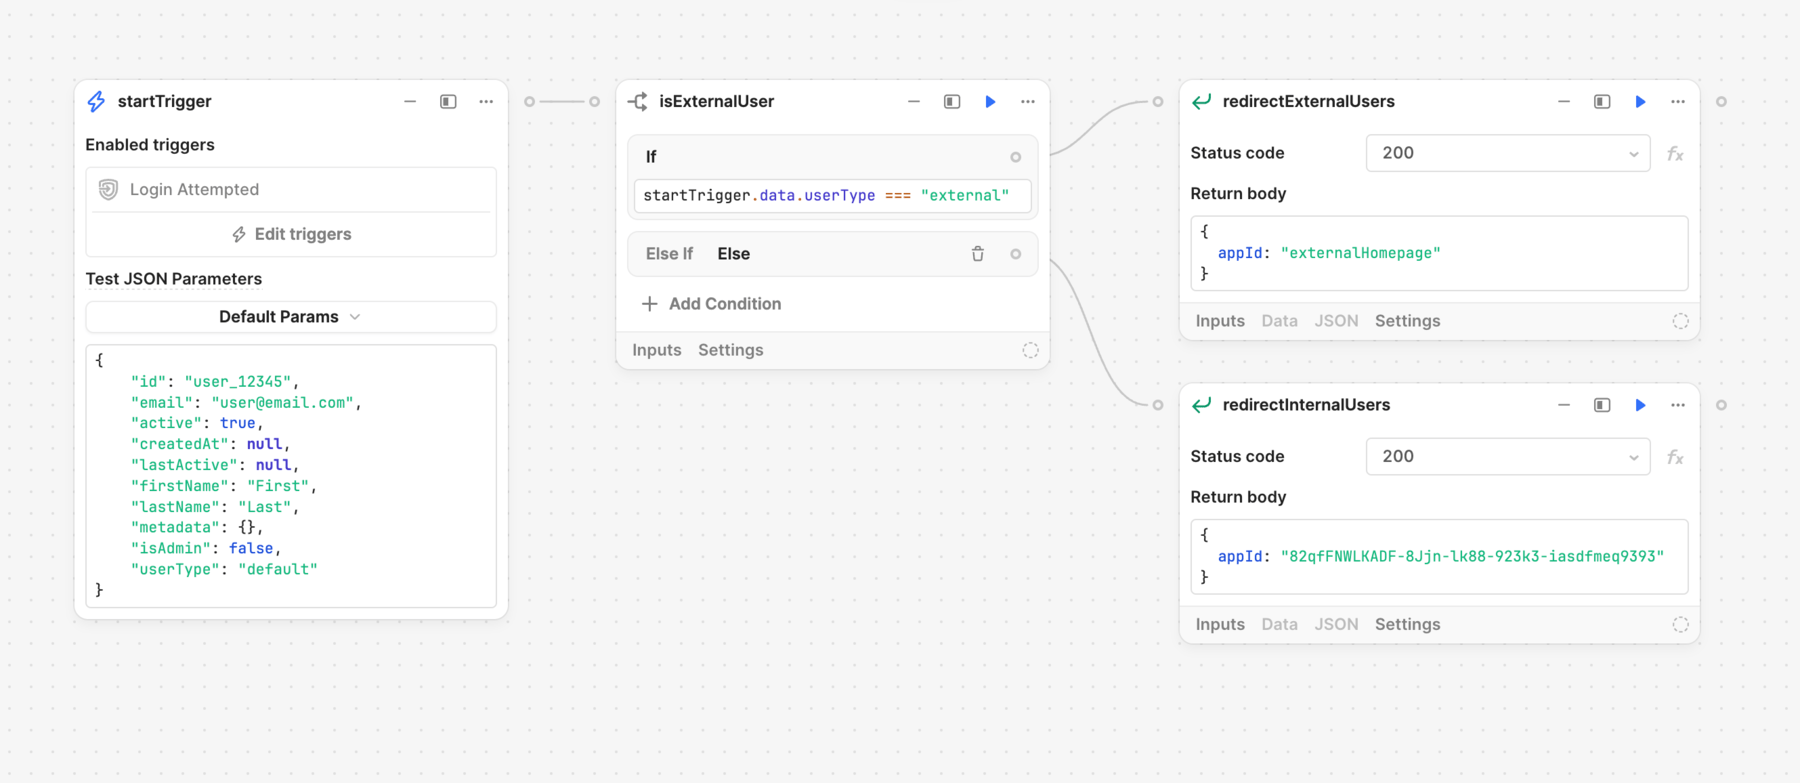
- App ID
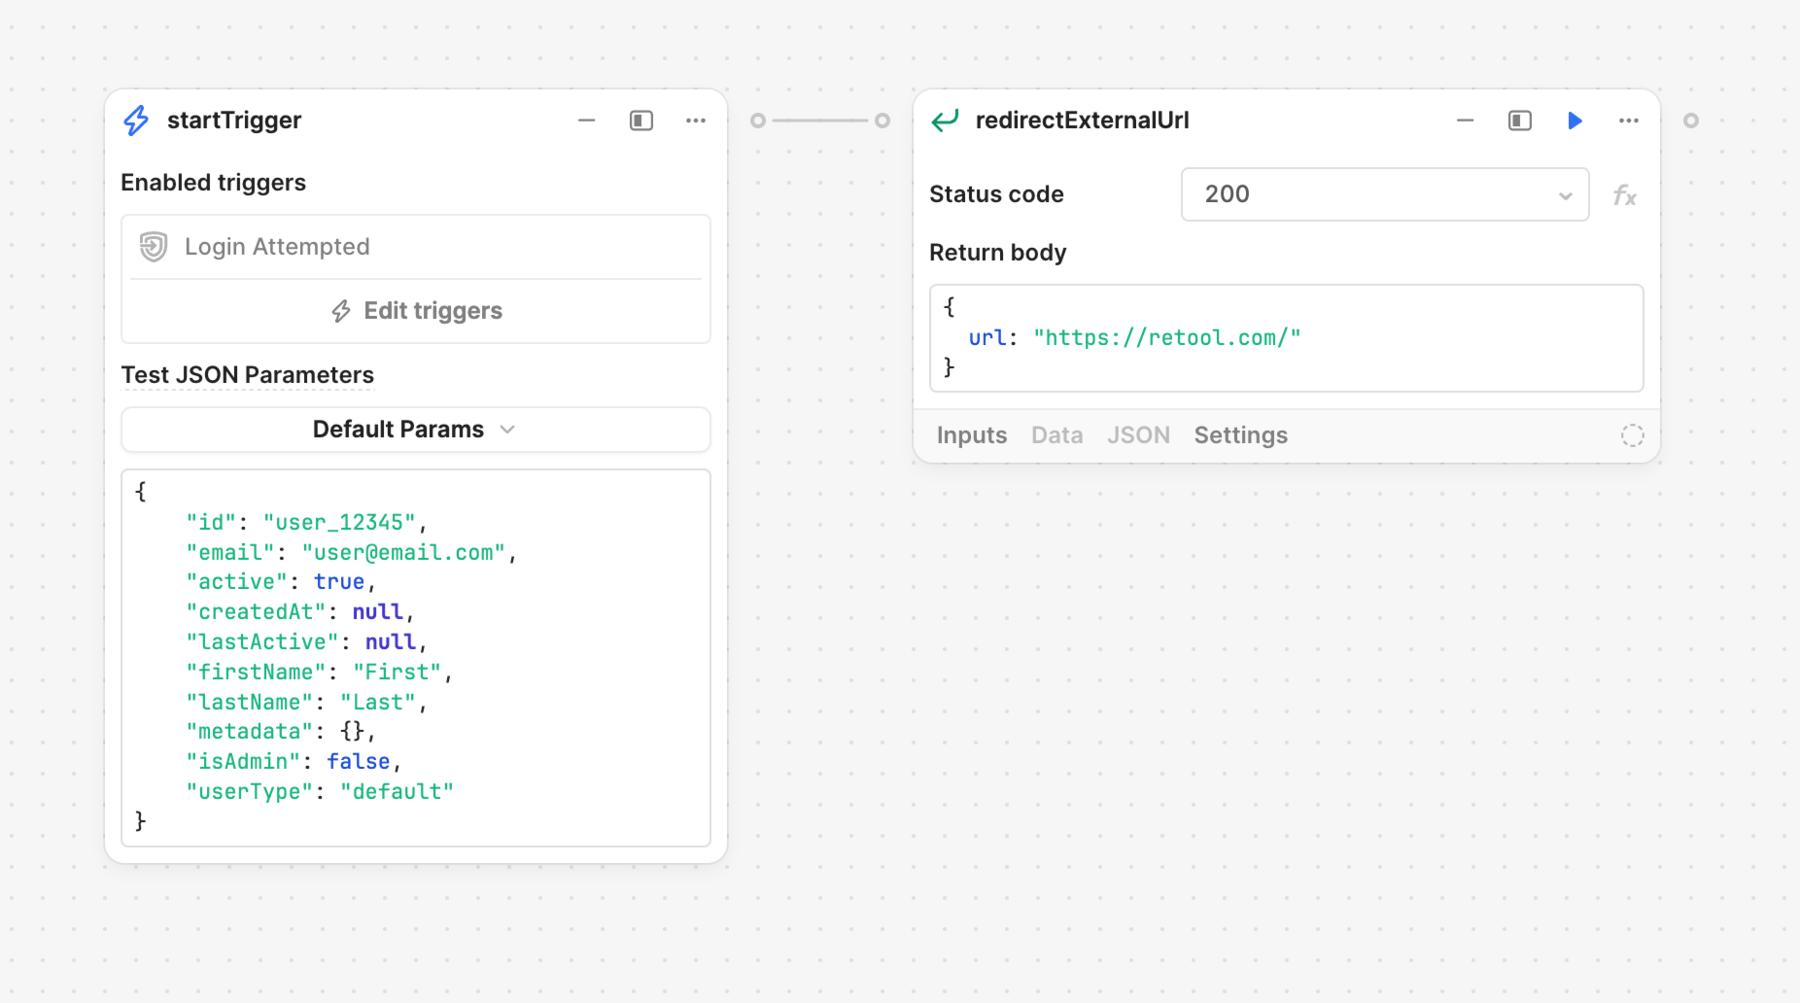
- URL
A response with logoutErrorMessage prevents a user from logging in and navigates the user back to the login page with the given error message displayed.
A response with appId redirects the user to a classic app, identified by either a custom URL slug or the app's ID.
A response with url logs in the user and redirects them to a URL.
Using these redirects overrides any default landing page redirects set for the user’s permissions groups.
If your workflow involves sending emails, remember to disable Retool's default emails. Navigate to Settings > Branding. Select the appropriate email from the dropdown, and click Manage. Check the Disable the Retool-managed email setting.
Configure error handlers for failed events
To ensure workflows run as expected, you can configure error handlers. This enables you to perform additional actions, such as receive a notification, if an error occurs and the workflow could not complete successfully.
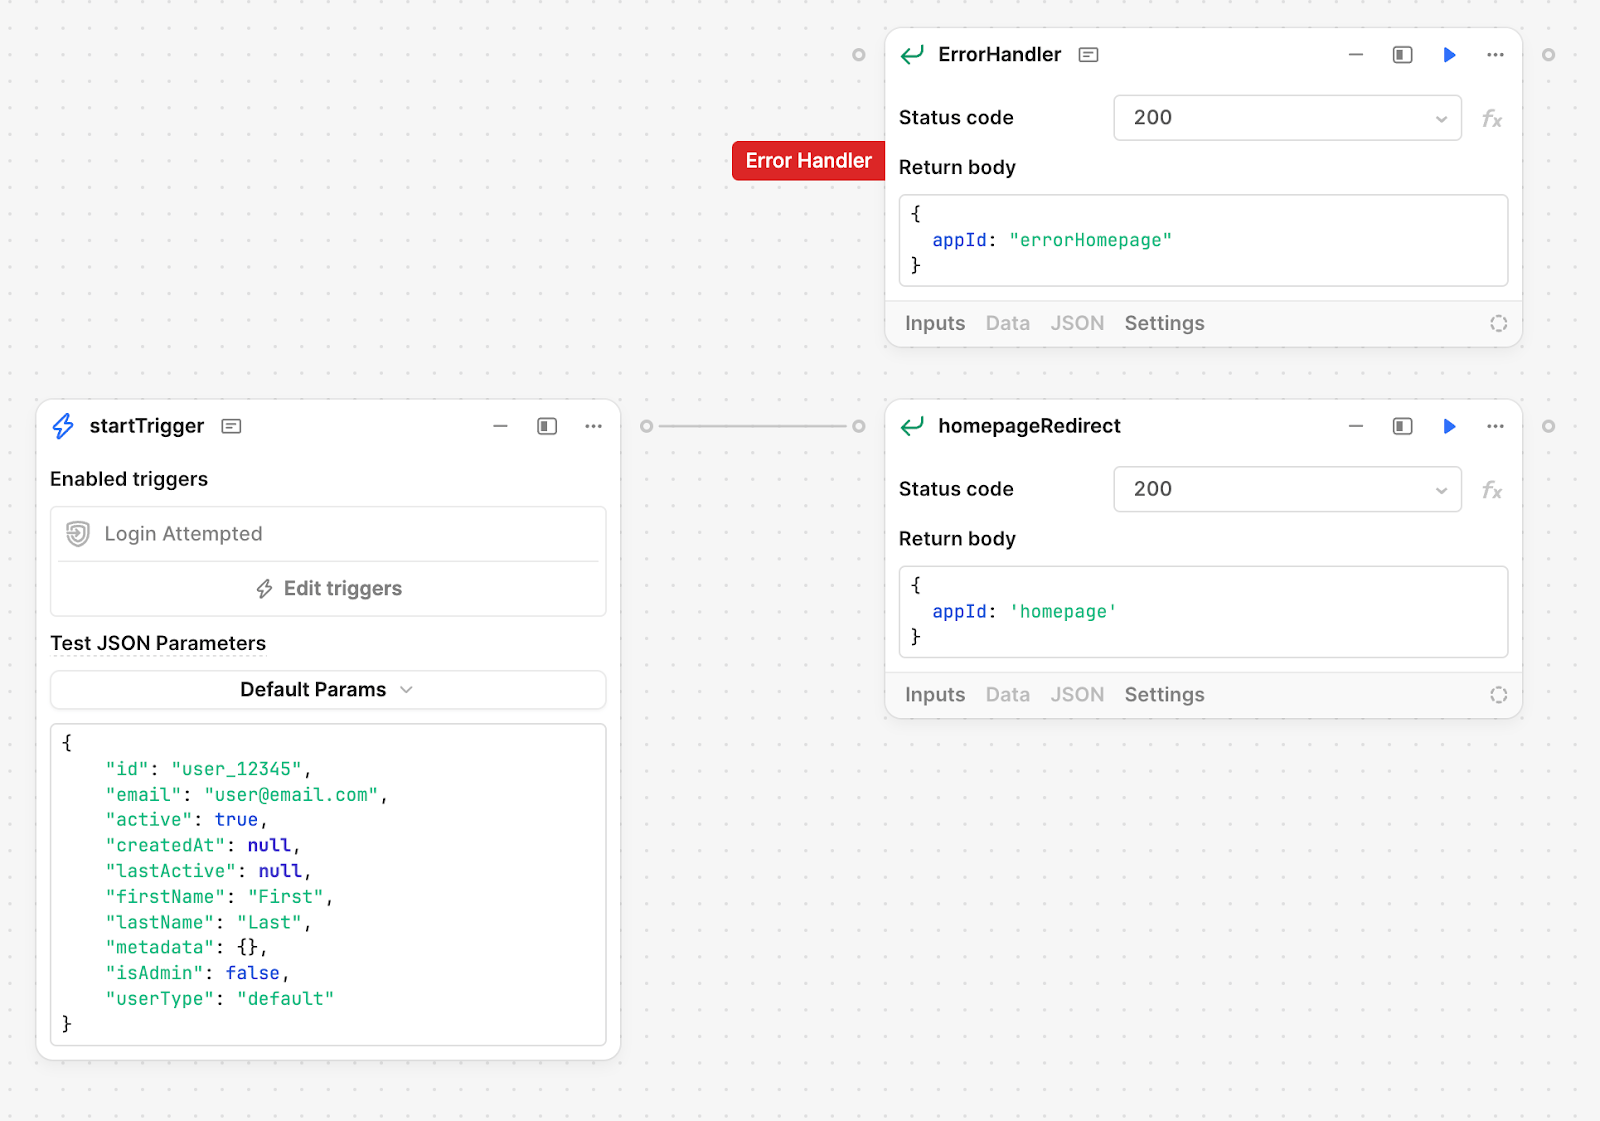
Handling errors for Login Attempted workflows
If a global error handler is not enabled in the login workflow and a failure occurs, users will still be able to log into their Retool accounts, but any configured redirects will not be applied. To ensure proper handling of failures, Retool recommends enabling a global error handler in the login workflow. This handler determines the behavior when a failure occurs.
If the error handler response includes an appId or url, users will still be able to log in, and the error handler’s redirect will be applied.
If it is critical for the workflow to succeed in order for users to log in, you can return a logoutErrorMessage upon failure. This prevents users from logging in if the workflow encounters an error. However, this should only be used if the workflow contains security-critical logic, as it can easily lead to locking out all users.