Custom Authentication
The following examples use custom authentication within Retool resources to support user-defined workflows.
Steps
The following steps focus on integrating with a mock authentication service and destination endpoint.
- The example will use a REST API Resource that is configured with Custom Authentication.
- The fundamentals-customauth app will be imported as a Retool App.
- Each section of the app will be closely examined to understand different HTTP Methods and how Retool components / event handlers interact.
Requirements
To configure a Retool Resource the following is required:
- Retool Administrator permission either via Admin permission group or Role.
Create a Retool account and login
Create a Retool account and login to your account as shown below.
Import fundamentals-customauth app into Retool
Next we will import the Retool fundamentals-customauth app into Retool. This application is meant to provide a working example with components, code and event handlers that demonstrate real-world actions that are commonly used in building Retool Apps.
- Click the Fundamentals Custom Auth App link to download the JSON.
- Once the template has downloaded go to Retool Home Screen, select Apps > Create > From JSON/ZIP. This will display a dialog to provide the downloaded file, the name of the app and the folder.
- Select Upload a file and select the downloaded file
fundamentals-customauth.json. - Specify an App name,
fundamentals-customauth. - Leave Add to folder to
None(root).
Overview of custom authentication process
For this lab, the focus is on integrating with a token service and reuse of the provided token to a REST API that enforces authentication using API tokens. There are many different pemutations that can exist for custom authentication so the purpose of this lab is to provide general exposure to the capability.
Authentication flow
The following steps provide an example authentication flow that a legacy token service and API is employing.
- Step 1: The authentication process begins with Retool authenticate with a token service using Basic Authentication.
Request URL: https://olxwngy8vi.execute-api.us-east-2.amazonaws.com/default/tokenService
HTTP POST
HTTP Headers: Authorization : Basic (base64 encoded (username:password))
- Step 2: The token service will validate the credentials and if authenticated will return a token.
{
  "statusCode": 200,
  "statusMessage": "Authorized",
  "authorization": "header value from Step 1",
  "token": "some token",
  "expiry": "some time"
}
- Step 3: Retool sends a request to the downstream API embedding the token in the HTTP Headers.
Request URL: https://i4nlld2fxh.execute-api.us-east-2.amazonaws.com/default/retrieveToken
HTTP GET
HTTP Headers: Authorization : Bearer <token from step 2>
==================================================
Response Code: 200 OK
Response Body: JSON
Configure Custom Authentication in API Resource
When the authentications process is understood, Custom Authentication can be enabled on a Resource. The following steps will walk through this with the sample described above.
Create Configuration Variable
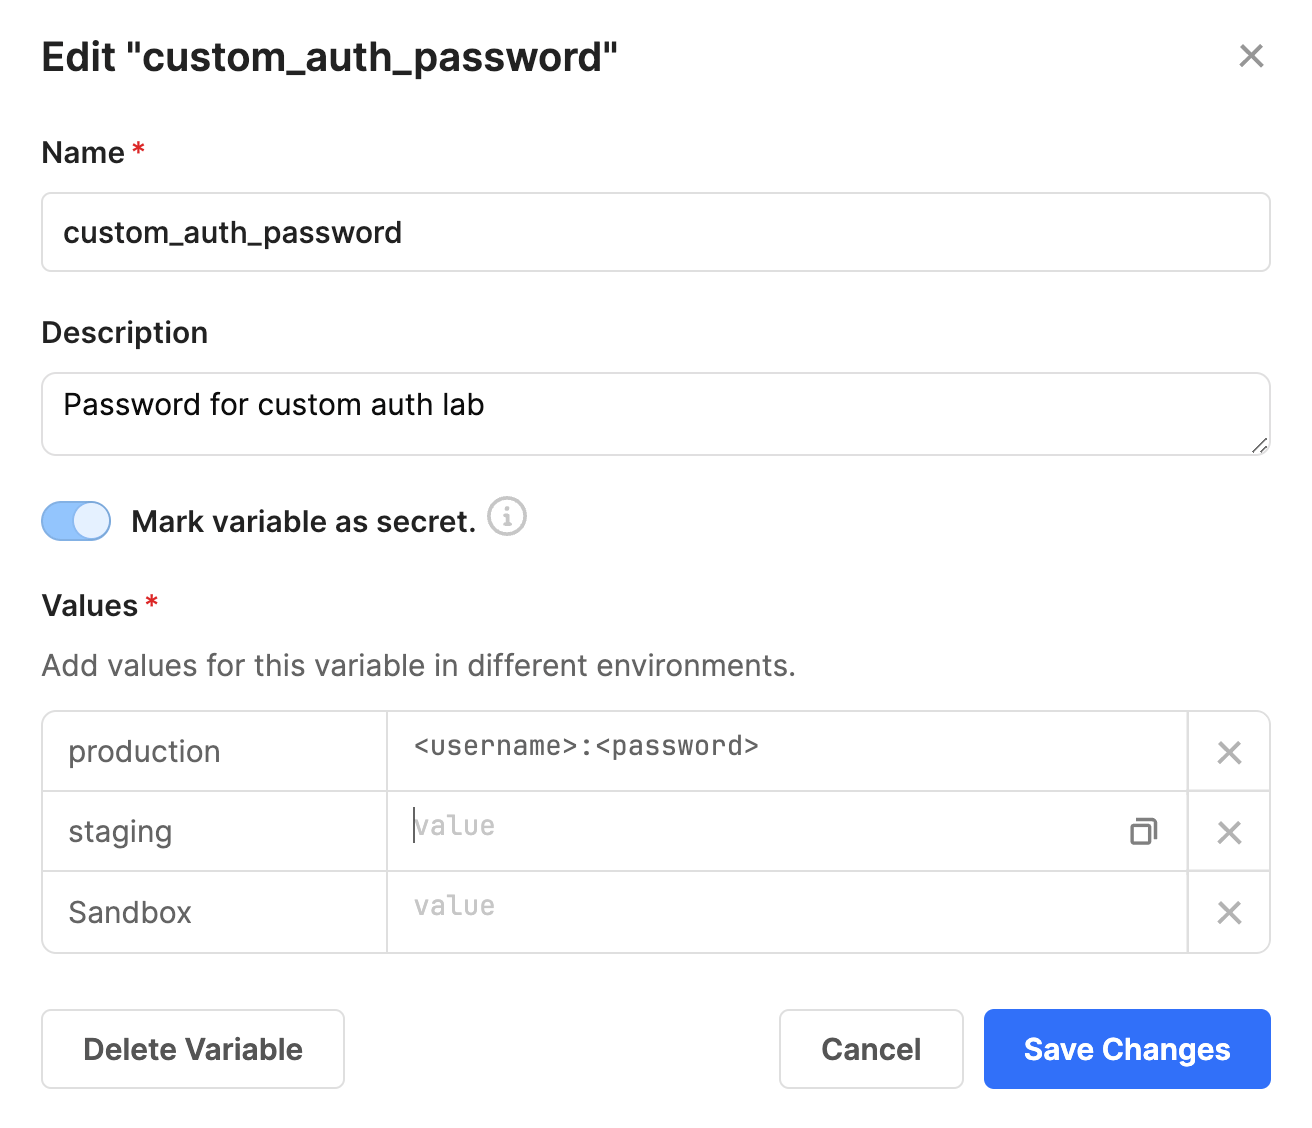
The authorization flow will use a configuration variable for the username/password value. The following image shows the sample configuration variable required for the sample to work, including the variable name, the value and it being identified as a secret, to require encryption within Retool. To create a configuration variable, select Settings > Configuration Variables > Create new. Specify a Name, custom_auth_password, Description, Password for custom auth lab, enable Mark variable as secret. and for production specify a value of <username>:<password>.
Create Resource
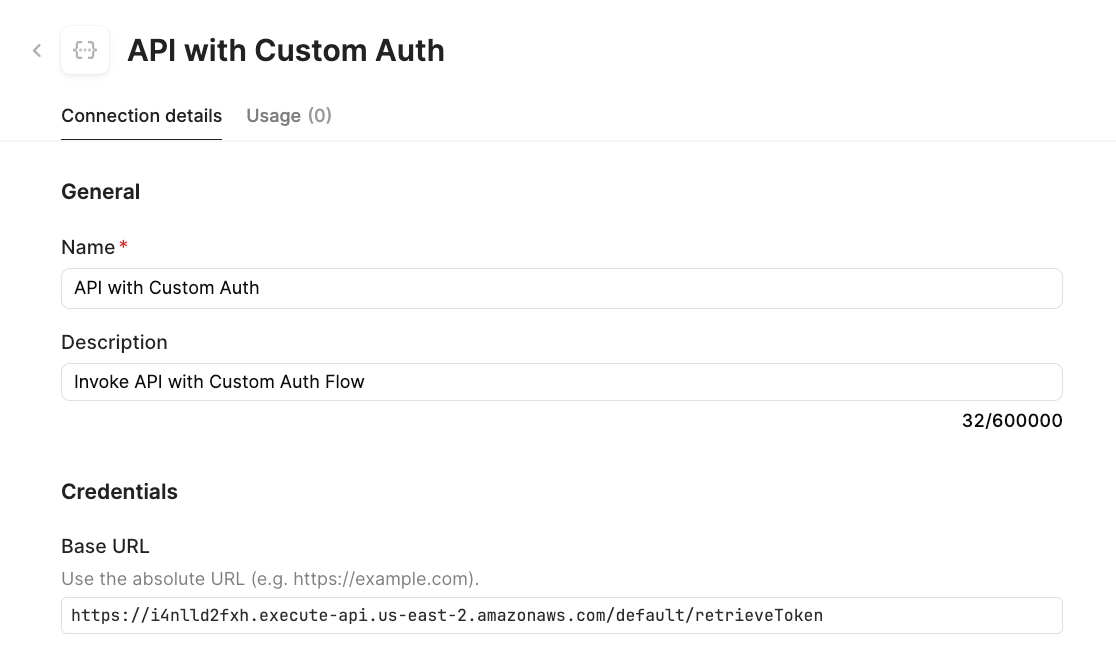
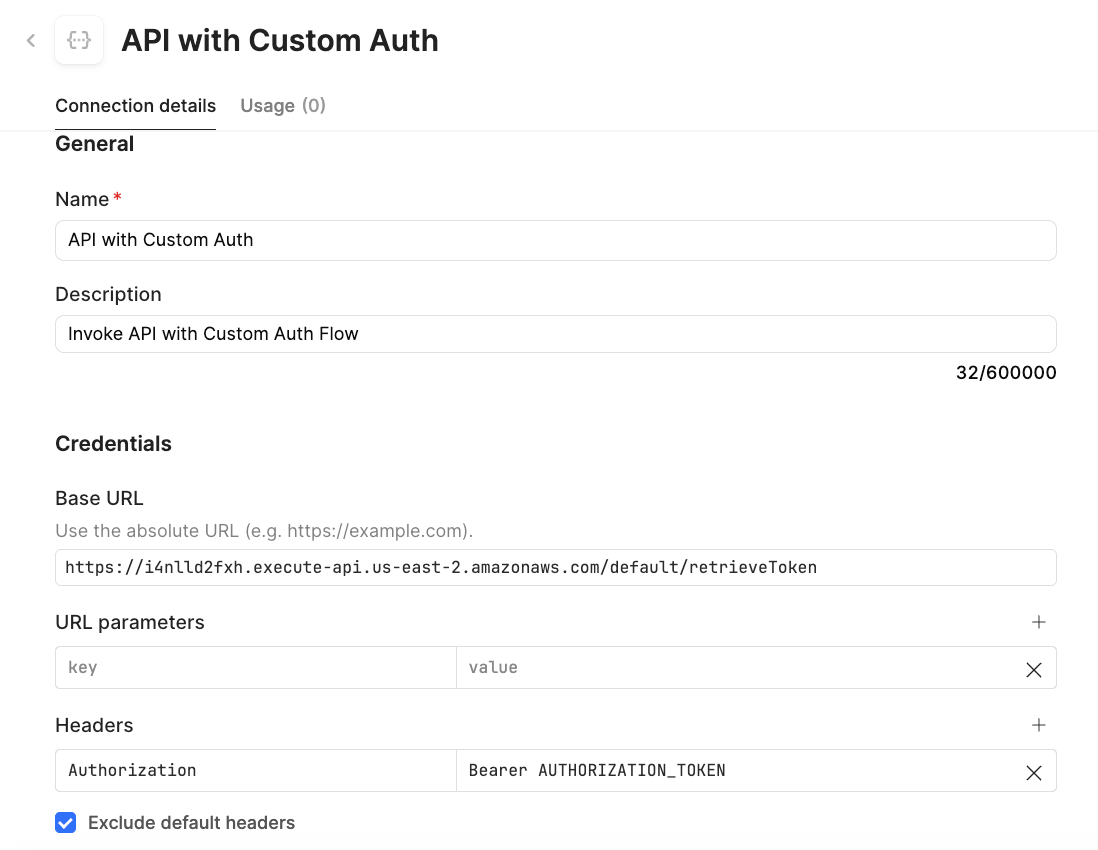
The next step is to create a resource that invokes the target API. Select Resources > Create new > Resource > REST API. For the resource name specify API with Custom Auth and a base URL of: https://i4nlld2fxh.execute-api.us-east-2.amazonaws.com/default/retrieveToken.
Define Custom Auth Workflow
To define a custom auth, select Authentication > Custom Auth. This will expose an Auth Workflow. The following will identify the steps being executed.
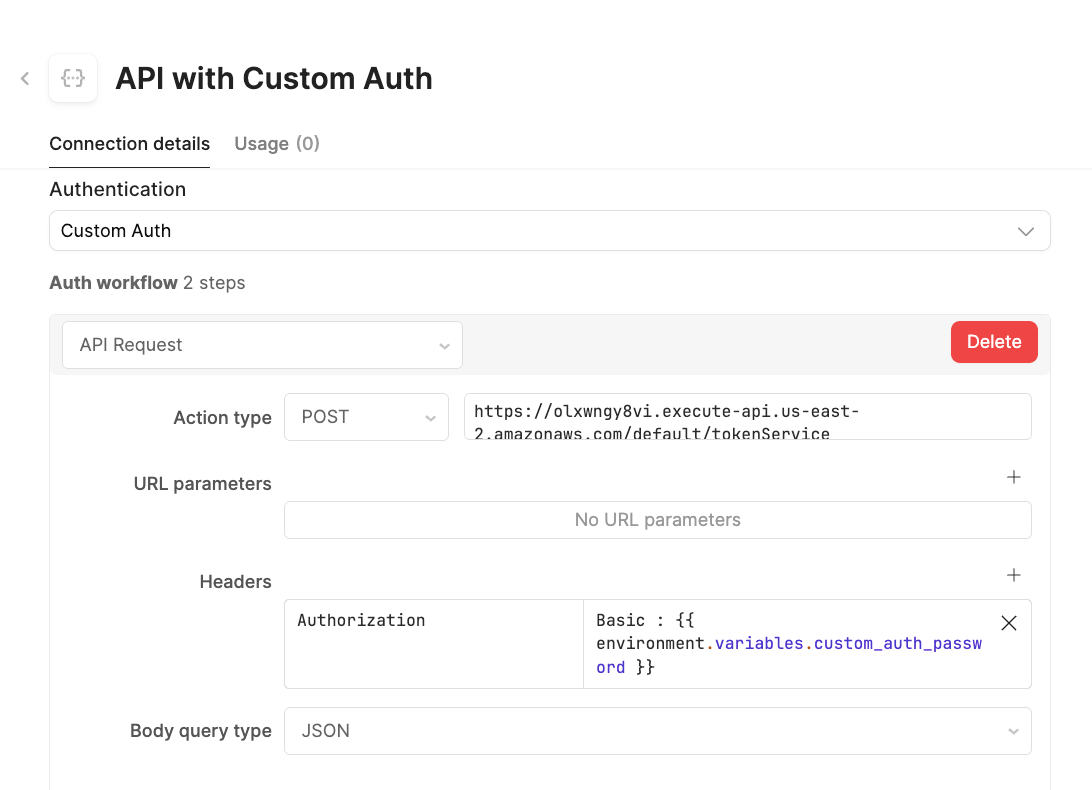
Auth Workflow: REST API Step
This step is an API Request to the token service, passing in a Basic Authentication password that takes the username and password, concatenates them with a colon and base64 encodes the value..
Auth Workflow: Variable
This step stores the token from the previous step by accessing the variable {{ http1.body.token }}. This is stored in an environment variable called AUTHENTICATION_TOKEN. Select Save to update the resource with the changes.

Test Auth Workflow
To validate a workflow, the Test auth workflow button should appear, allowing you to validate the workflow and then examine the response object / attributes. If Test auth workflow is not enabled, try refreshing the page in the browser.
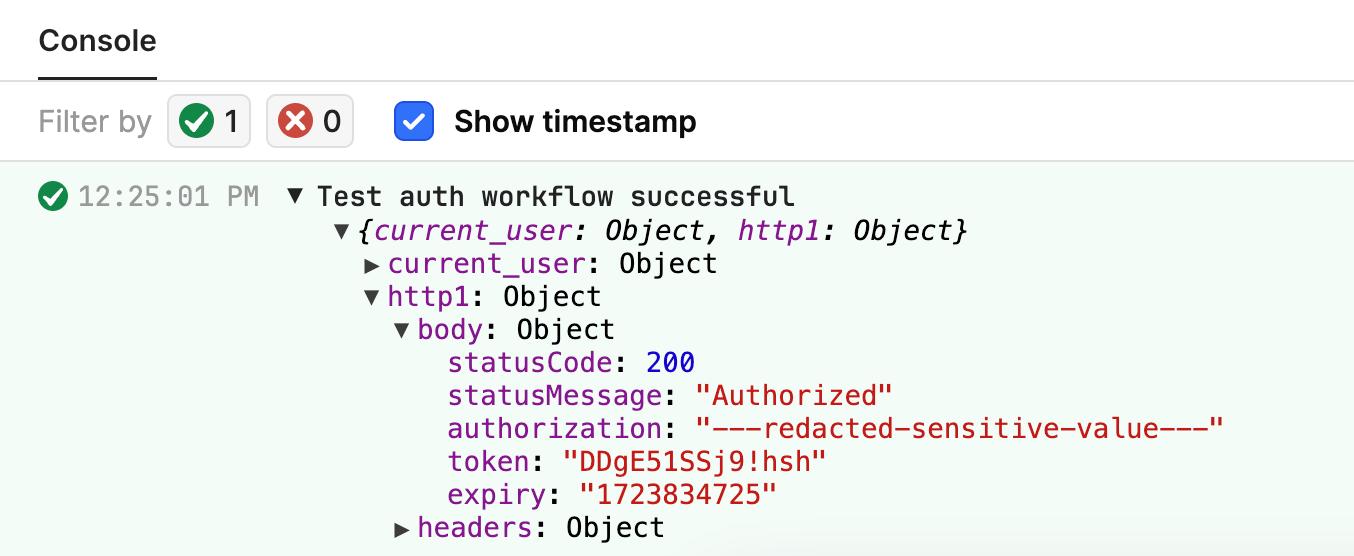
Note the http1 object returned and its contents. This shows the token value that we need to present to the API. This display also provides access to headers and current_user details useful in other auth flows.
Add Environment Variable to Resource
Once the Auth workflow has been validated, the Bearer Token is pointed at the environment variable, AUTHORIZATION_TOKEN. Select Save to update the resource with the changes.
App and Query Overview
The fundamentals-customauth app provides a user-facing example that allows you to interact with the Token Service, the API with generated Token and the packaged Custom Auth Resource.
Token Service Overview
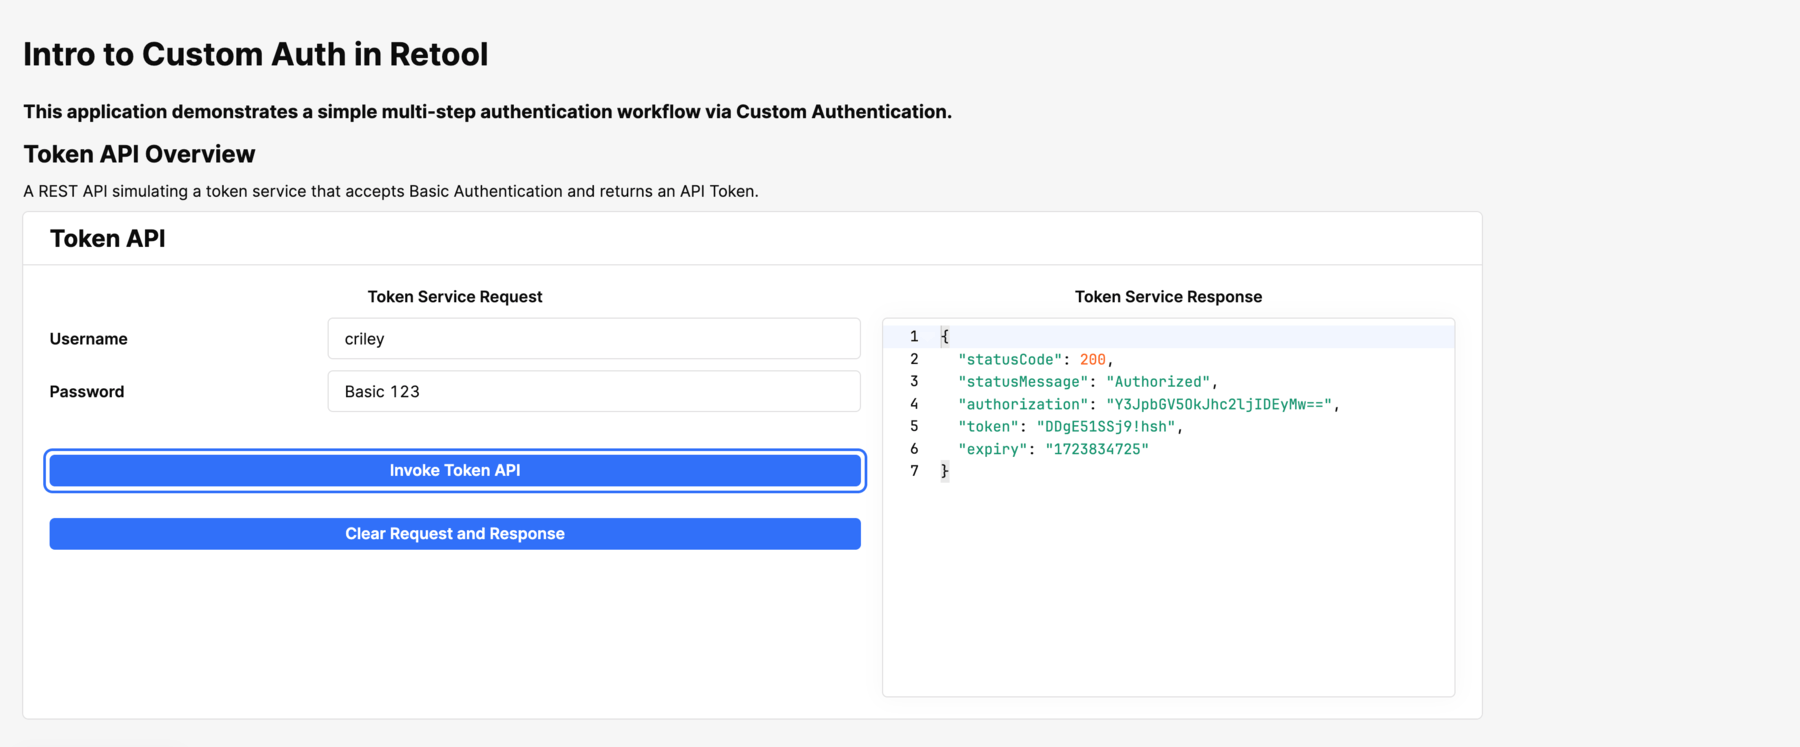
This portion of the app demonstrates integration to a token service that accepts a Basic Authentication request and renders the response in a JSON window.
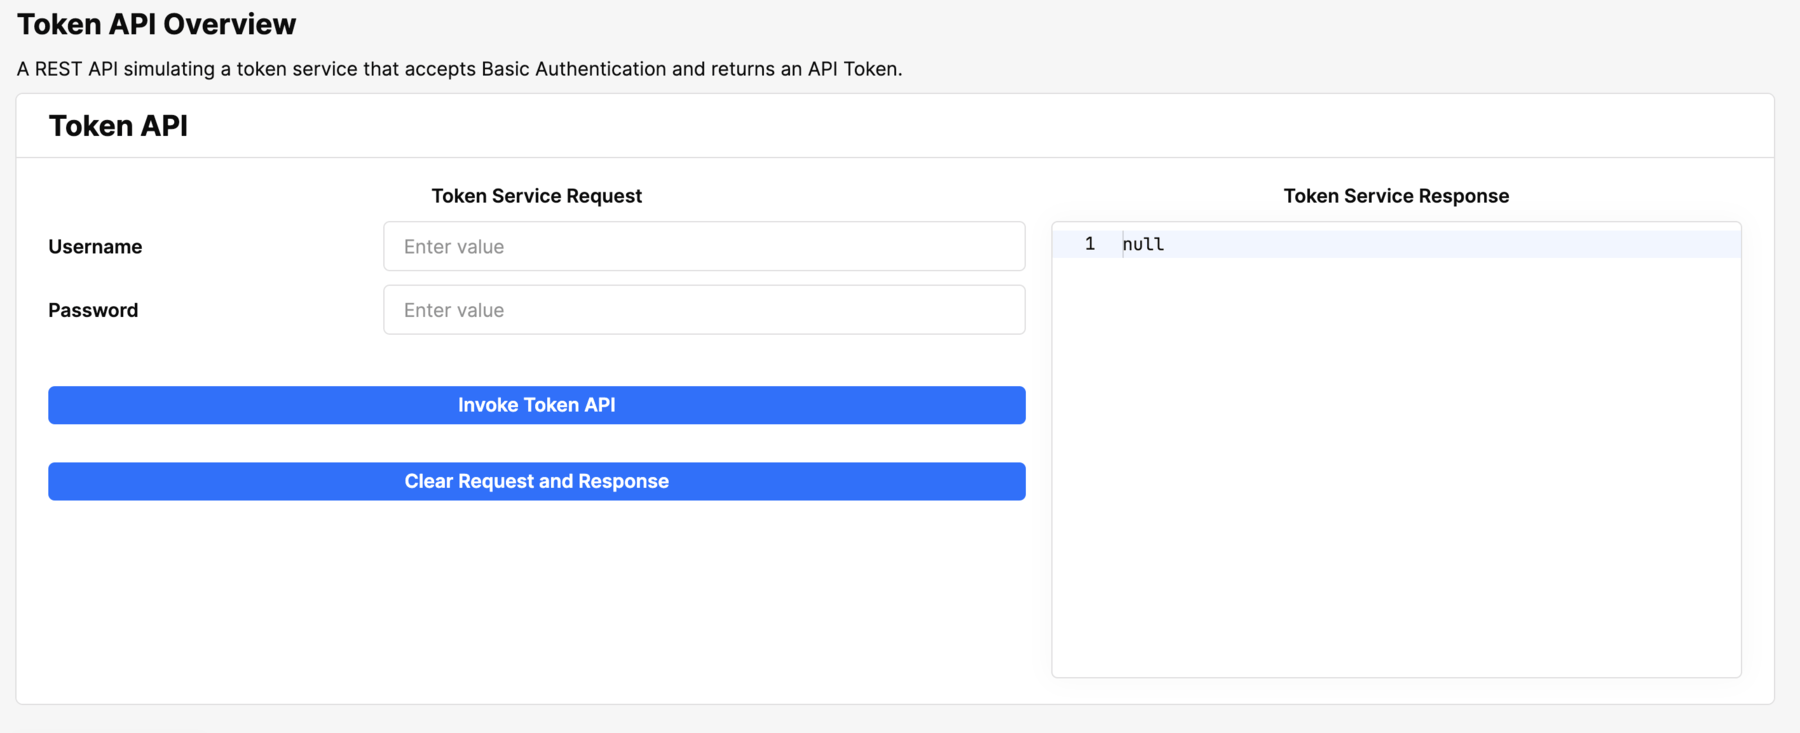
This container is powered by a query, invokeAPIToken, that hits an API with an Authorization header with a Basic Authentication. The username, textInput1, and password, textInput2, values are concatenated and then base64 encoded.
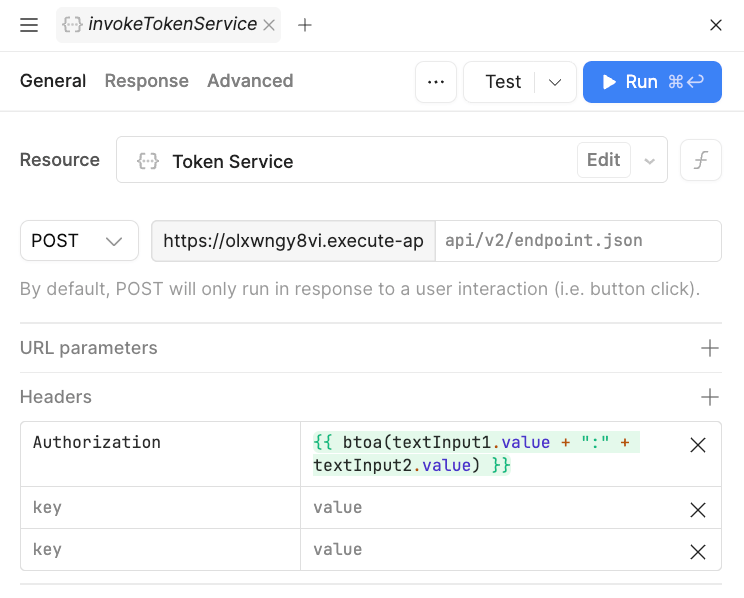
The following arcade walks through invoking the Token Service and copying the response token, so that it can be used in the next example.
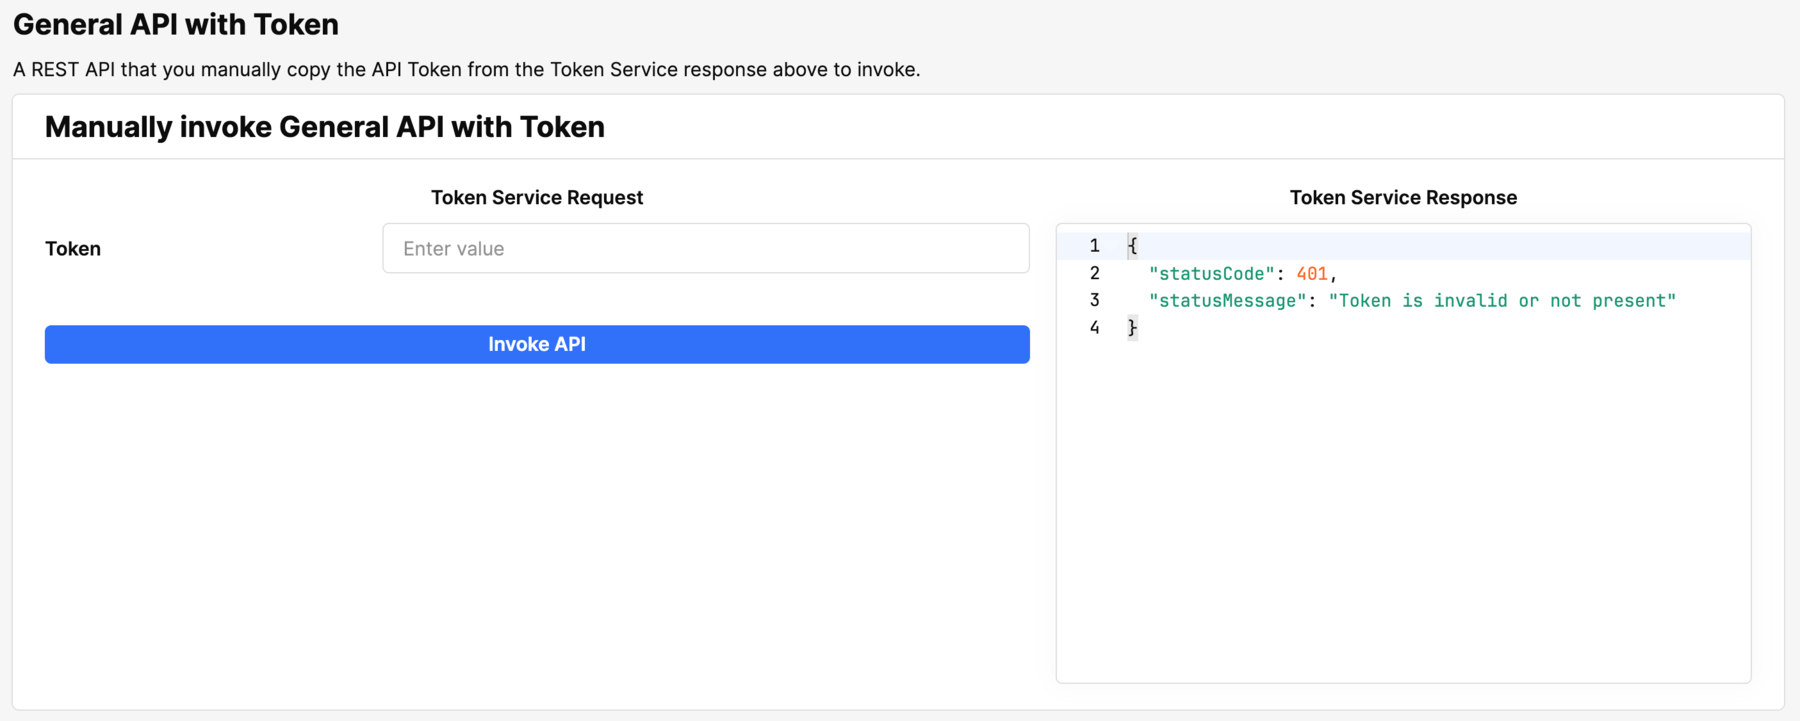
General API with Token
The General API with Token container takes the generated token from the previous step and returns a 200 OK or 401 Not Authorized status code and message, depending on the validity of the token.
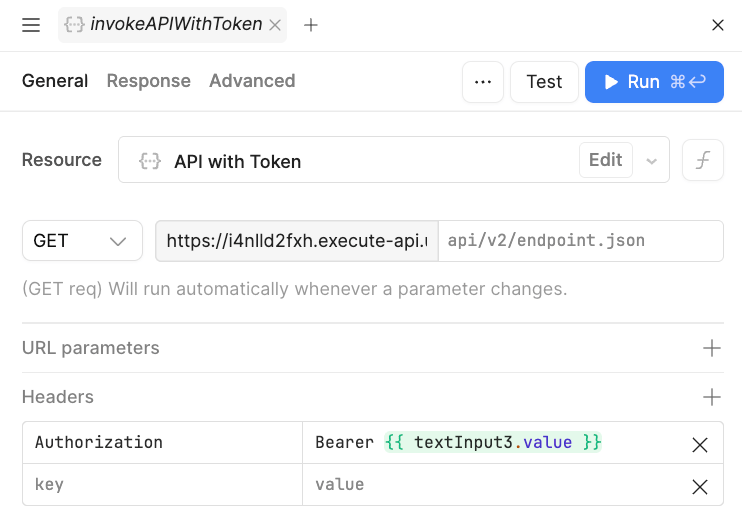
The query, invokeAPIWithToken, powering this container is displayed below. It takes the token value, textInput3, and creates an Authorization header using Bearer token.
In this example we will demonstrate pasting the token in and invoking the API with a valid token.
General API with Custom Auth
The last container demonstrates the use of a resource that has a custom auth flow. Nothing needs to be provided as the entire configuration is within the resource definition.
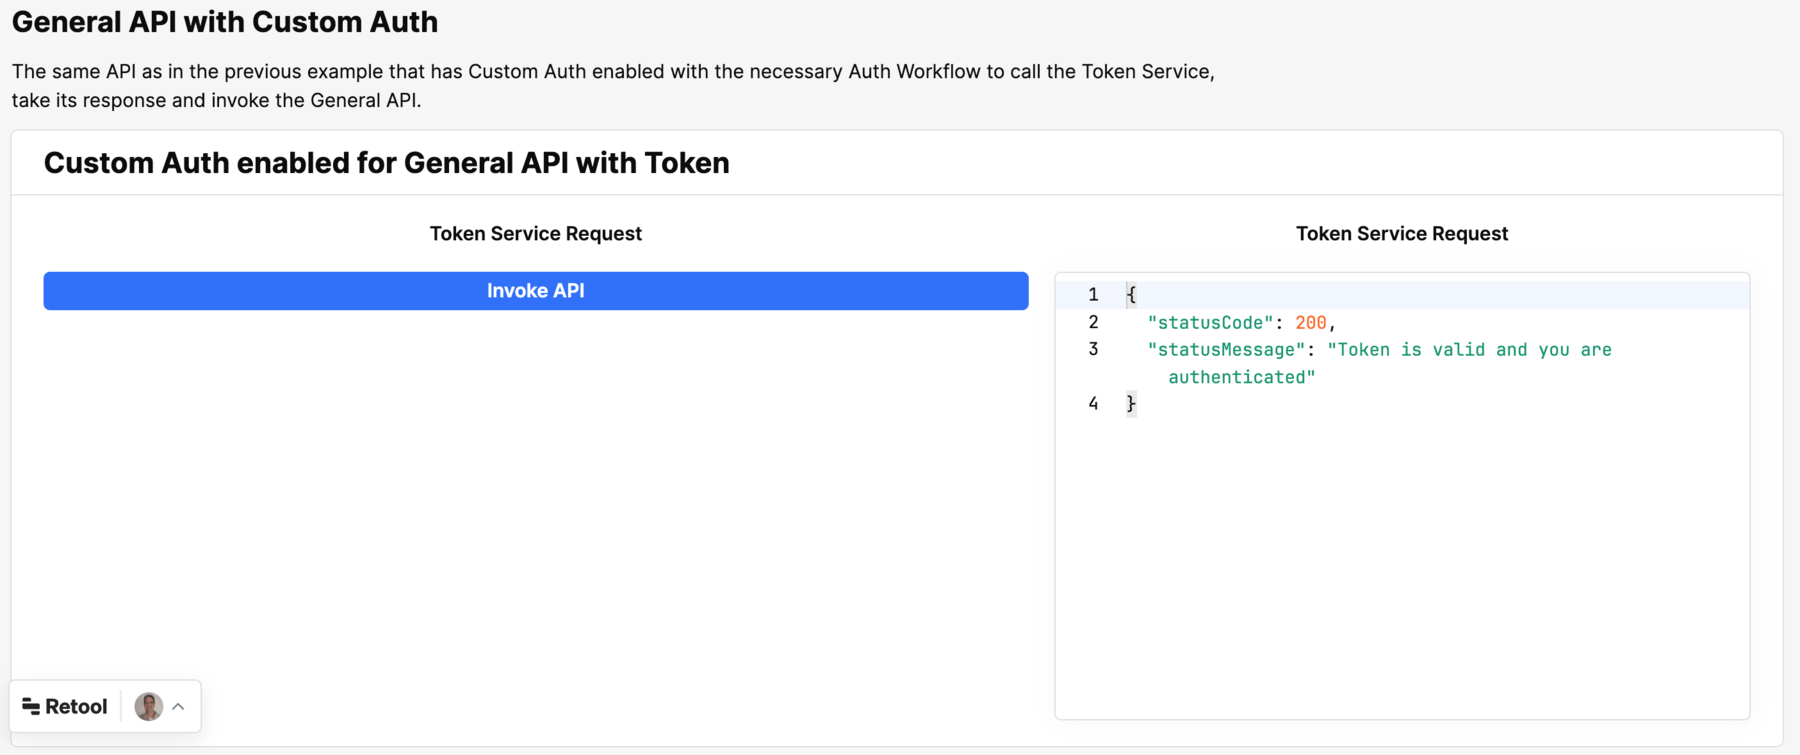
The query, invokeAPIWithCustomAuth, connects to the pre-configured resource that executes the custom auth flow and provides a 200 OK response. Select Reauth to trigger the custom auth flow and then select Invoke API.
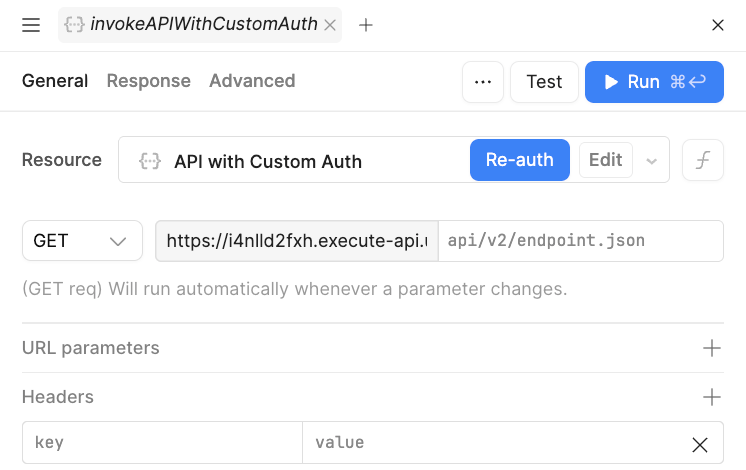
The last demonstration uses the configuration of the resource with custom authentication. It shows how a Reauth can be manually triggered in the query.
Summary
This sample application provides a demonstration of a resource leveraging custom auth and the individual steps of invoking the token service, invoking the API with the generated token and how that is combined into a custom auth workflow.