Lab 0 - Automating Retool
Goal
Enterprises that adopt Retool look to automate as much as they can to create consistent onboarding / offboarding experiences. The following lab will focus on using the Retool API and Workflows to demonstrate one automation option.
Note
The following steps require having Administrator permissions. If you do not have these please work with your admin contact.
Instructor creates Retool API Token
- Go to Settings > Retool API > Create new.
- Create a token with the name
onboarding_class_tokenand scope ofUsers ReadandUsers Write. - Select Create token.

- This will display the token.

- Copy the token and move to the next section.
Instructor creates a configuration variable
- Go to Settings > Configuration Variables.
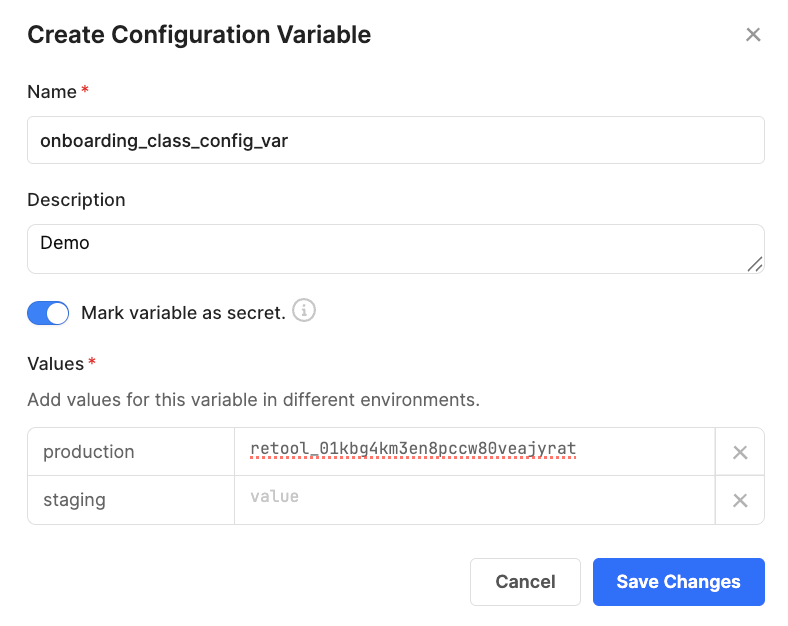
- Specify the name
onboarding_class_config_var, a description, enable Mark variable as secret, and for Values specify a production value equal to the previous access token. - Select Save Changes.
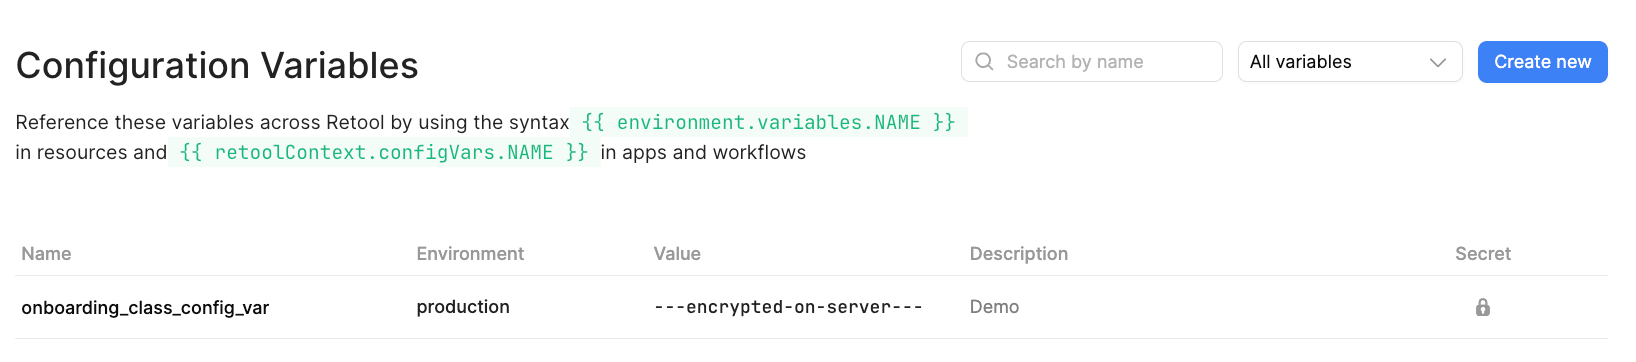
- Configuration variables are then displayed as shown below. To access this configuration variable, we will employ the use of
{{environment.variables.NAME}}.
Instructor creates a Resource using configuration variable
- Go to Resource > Create new > Folder and create a folder called
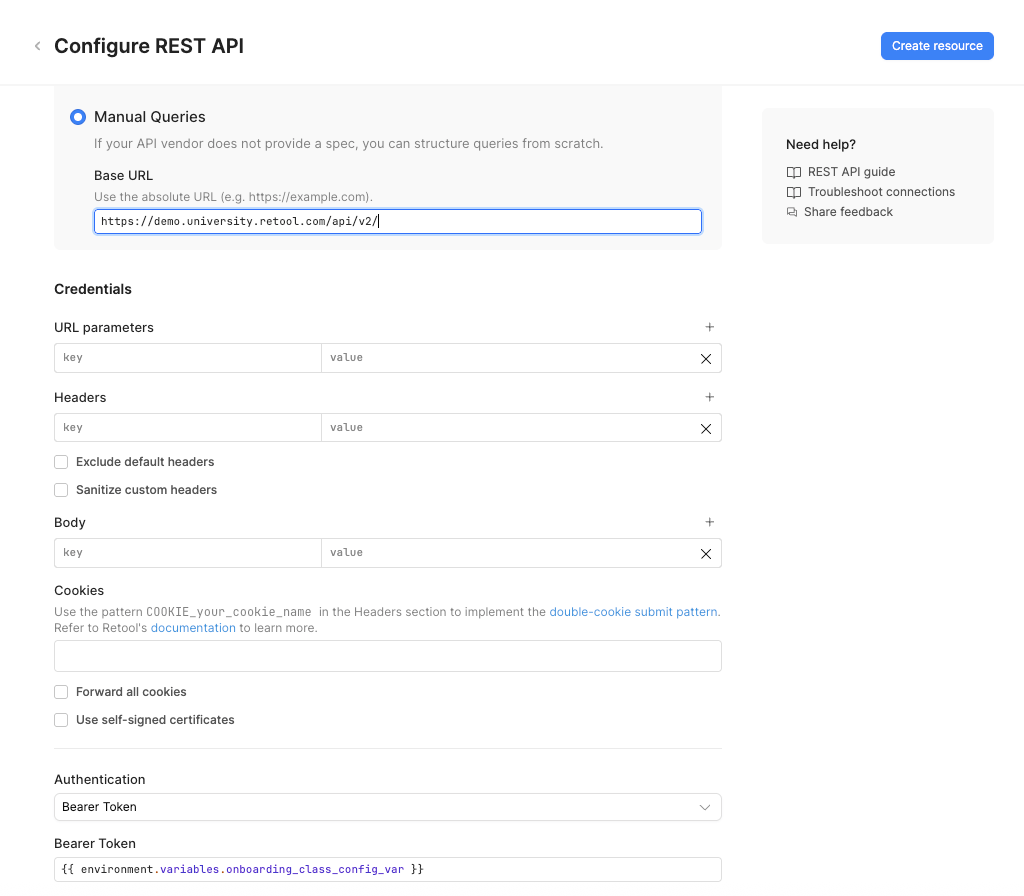
Students. - Create a resource now by selecting Create new > Resource > REST API
- Provide a name of
List Users using Retool API - Update the URL to use the following value (e.g. enablement.retool.com, partners.retool.com):
- https://(your retool domain)/api/v2/
- Update the authentication to use a token and specify the value using the configuration variable.
{{ environment.variables.onboarding_class_config_var }}
Instructor adds Resource to Permission Group
- Go to Settings > Groups
- Create a group called
Students. - Edit the
Student Permission Groupand add the newly created Resource withEdit access.

Note
As the admin you will need to add members/students to the group to provide them these permissions. If testing as the admin, you will have access to the resource by default.
Create User Workflow
- Go to Workflows > Folder > (your_name)_workflows.
- Select the folder by clicking on the card. This will place you in the folder.
- Select Create new > Workflow
- Rename the workflow,
user-mgmt-workflow. - Delete the code block by selecting the ... in the upper-right corner of the code1 block. Select Delete / Delete
- Select the circle on the right-hand side of the startTrigger block to add a block. Select Resource query and place to the right of the startTrigger block
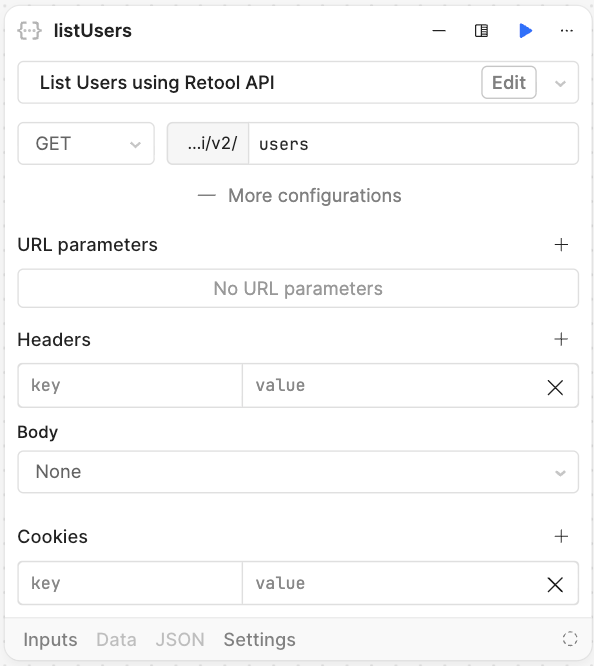
- Rename the block
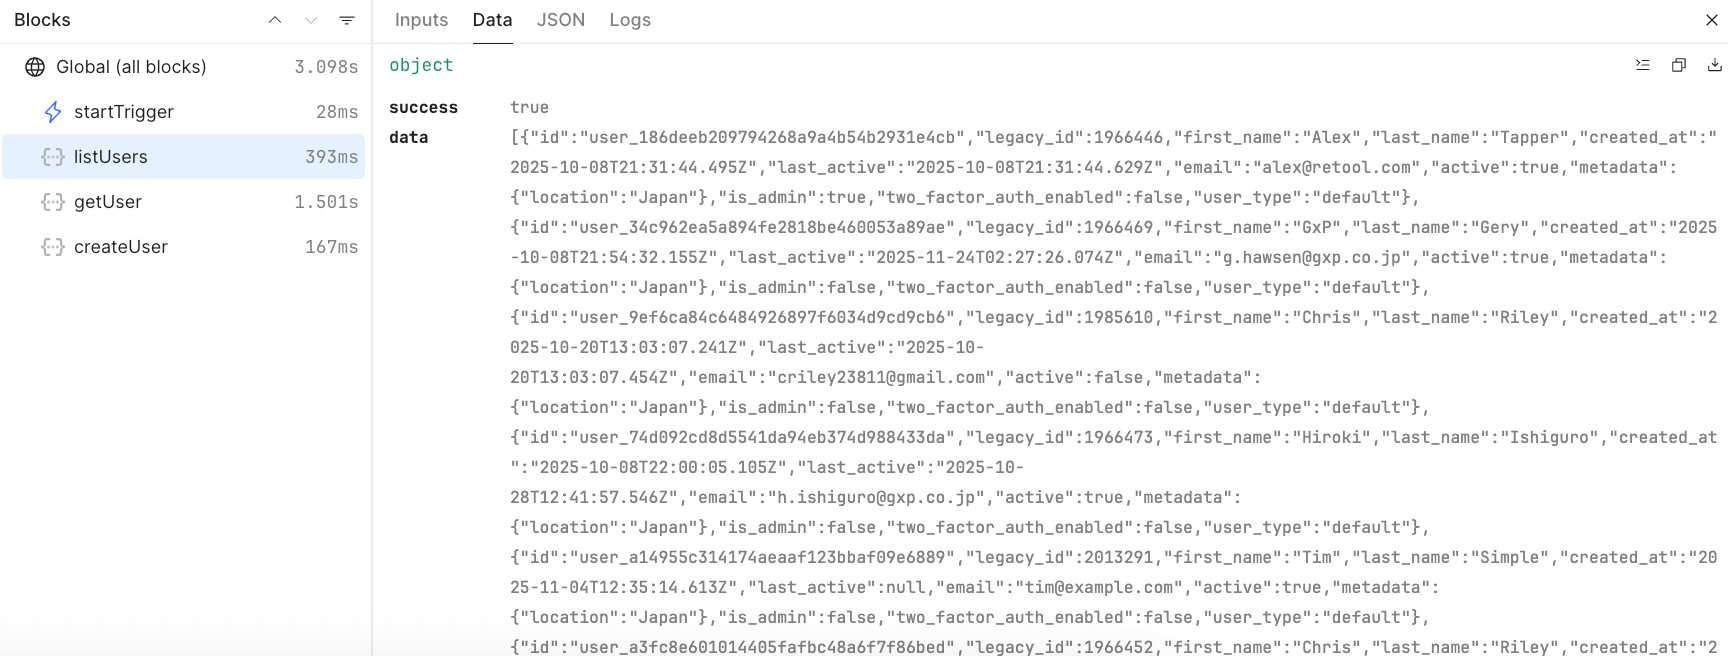
listUsersand select theList Users using Retool APIresource. - Update the path to include
usersto get user details from the Retool API.
- To get a specific user we create another block.
- Name the resource query block,
getUser. - Update the URI portion to identify the user id.
{{ listUsers.data.data[0].id}}

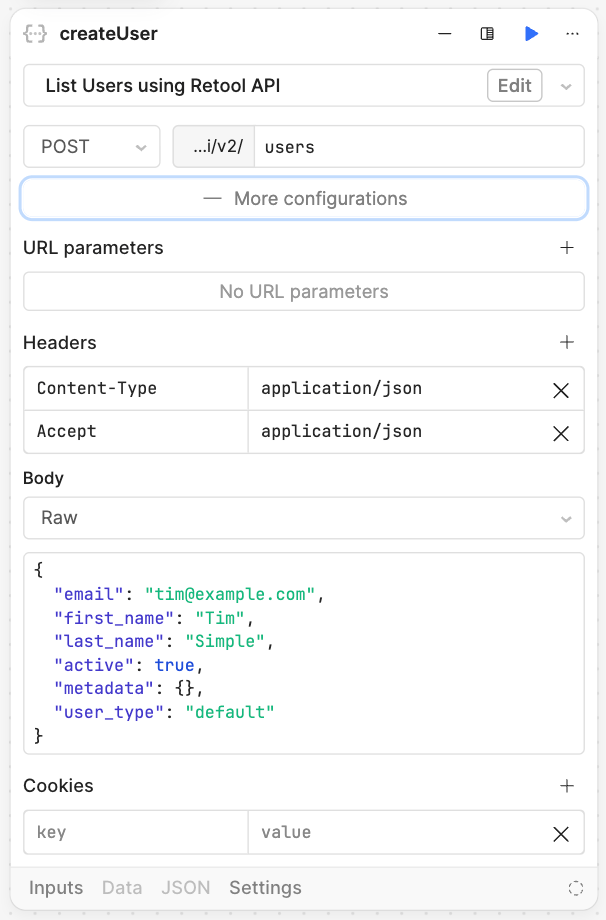
- To create a user, we create another block, named createUser.
- Change the Method to POST
- Update the url to add
users. - Specify Headers
Content-type = application/jsonandAccept = application/json - Specify RAW for the body and copy and paste the following:
{
  "email": "<yourfirstname>@example.com",
  "first_name": "<yourfirstname>",
  "last_name": "Simple",
  "active": true,
  "metadata": {},
  "user_type": "default"
}
Review your configuration with the image below.
Test User Workflow
Now let's test the three blocks running together.
- Select Run to execute the workflow.
- This will display the History panel and identify the tasks that completed.
- Select
listUsers,getUser, andcreateUserto view the output of each of these steps.