Vendor Email Outreach Workflow
This laboratory focuses on creating a vendor email outreach using Loop (New) and a Multi-step function.
Steps
The following steps focus on developing a Retool Workflow using the new Loop (New) and Multi-step function feature to perform vendor outreach with data stored in Retool DB. The workflow will use a vendor database and send appropriately formated email to each to confirm contact information.
Prerequesites
This example requires that you perform the following before you proceed:
- Enable the Beta feature flag under: Settings > Beta > Enables Multi-step functions in workflows.
Create a Retool account and login
Create a Retool account and login to your account as shown below.
Setup of Vendor Database
The vendor database that will be used for this example is shown below and can be downloaded.
Using the following common separate value (CSV) files, the schema can be identified along with sample data into Retool table(s). In this step of the laboratory, a comma separated value file will be used to populate a Retool Database creating a single table. The following files need to be downloaded to your computer, in order to perform the following steps.
Once the file is downloaded, edit the CSV file, vendor.csv to modify the vendor_contact / email address, criley+xxx@retool.com to your email.
Next we can create tables in the database:
- In the Retool Home Screen, select Database.
- In Retool Database, select Import CSV > Into a new table.
- Select file vendor.csv.
- Change the CSV Column
existingfromtexttobool.
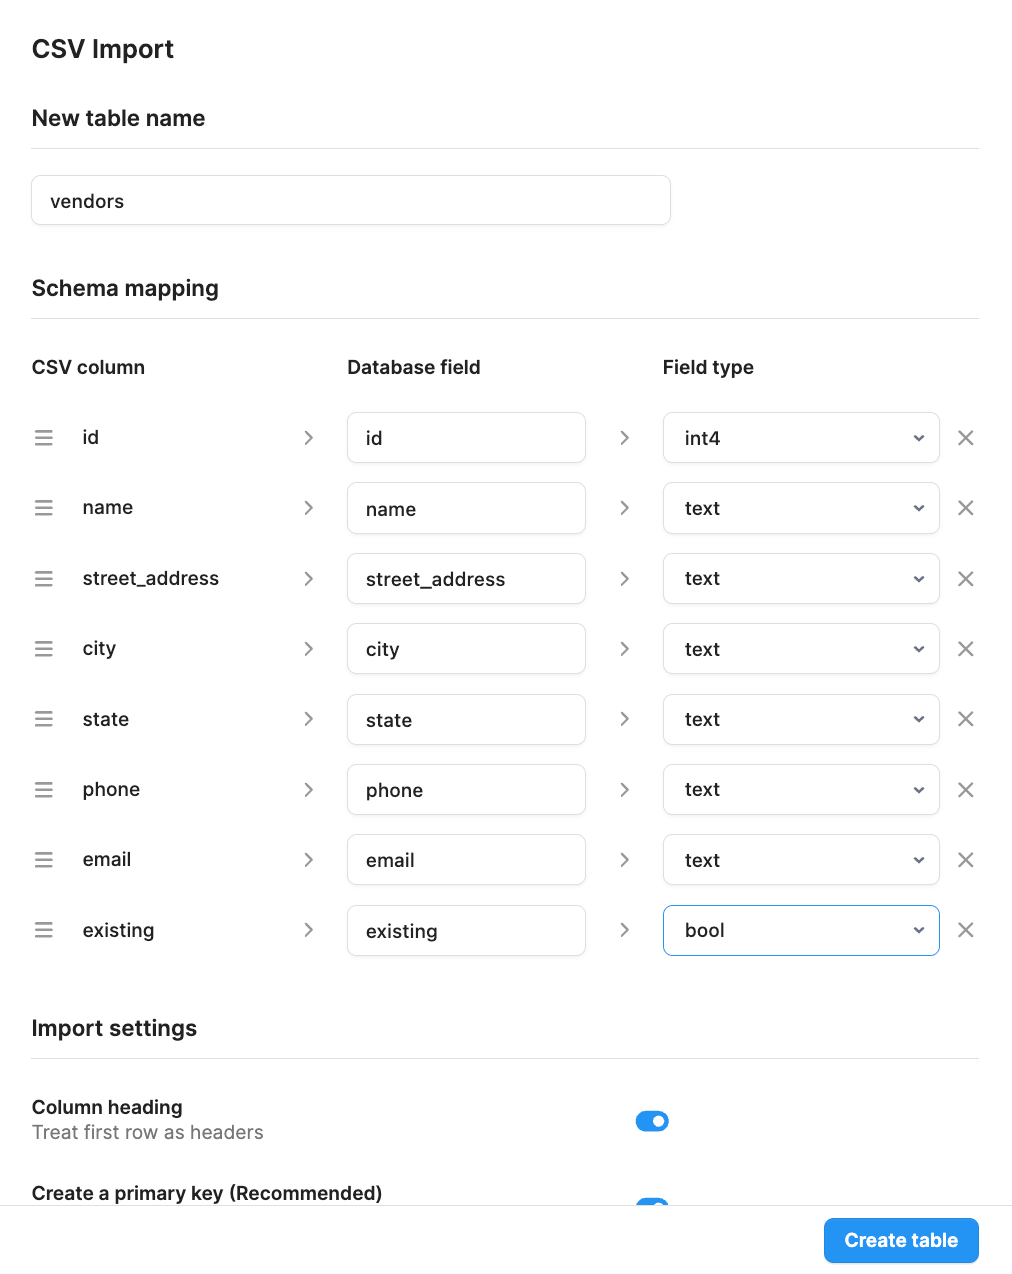
- Select Create table and the table will update as shown in the following figure.

- Update the email values to your email such as
tom+user1@gmail.com,tom+user2@gmail.com.
The following table provides an overview of the columns in this table, which is important to understand prior to building the workflow.
| Column | Description | Value |
|---|---|---|
| id | primary key | Number (int4) |
| name | Vendor name | Text |
| street_address | Street address for vendor | Text |
| city | City for vendor | Text |
| state | State for vendor | Text |
| phone | Phone number for vendor | Text |
| Email for vendor | Text | |
| existing | Existing or new vendor | Boolean |
Vendor Workflow with Loop (New)
The new Loop block in Workflows provides additional capabilities for processing work in parallel, sequential or batch. Create a workflow by select Workflows > Create > Workflow.
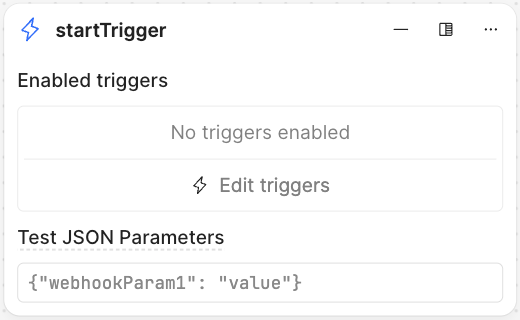
startTrigger Block
Once the workflow is created, delete the Code Block by selecting ... > Delete in the upper-right hand corner of the block. This will leave the startTrigger Block.
getVendorList Block
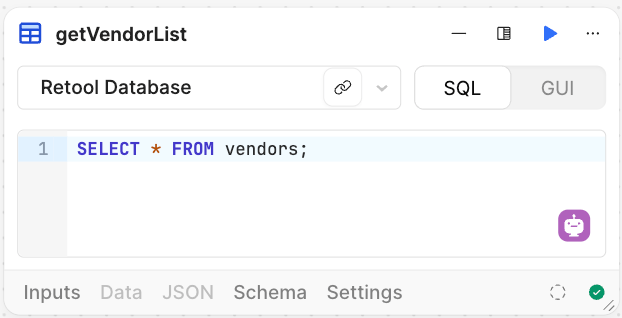
The getVendorList Block will perform a SQL query to the Vendor database to retrieve the list of vendors.
- Select the circle on the startTrigger block and select Resource.
- Edit the Resource block name to
getVendorList. - Select the resource type as
Retool Database. - Enter the following SQL into the SQL window:
SELECT * FROM vendors;
The following image shows the completed block.
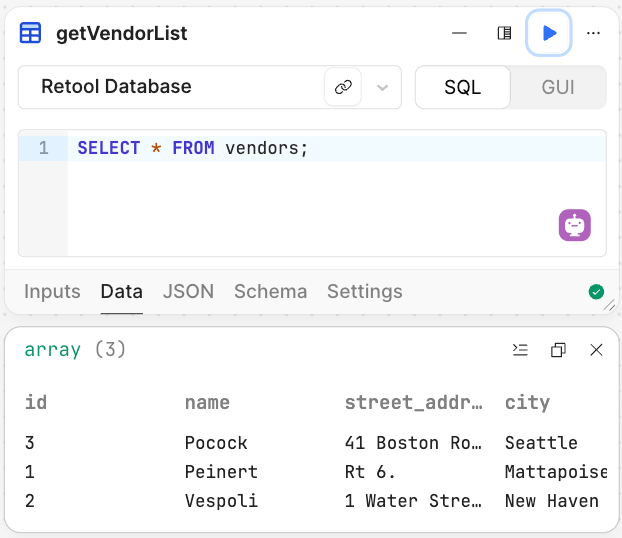
- Select the play symbol to confirm the query loads and returns results as shown below.
- The following image shows the updated workflow with startTrigger and getVendorList blocks connected after completing configuration.

loopOnVendors Block
The next step is to create a Loop Block to process the results of the vendor query.
- Select the circle on the getVendorList block and add a Loop (New) Block and rename to
loopOnVendors. - Specify the Loop input as
getVendorsList, Execution mode asSequentialand Loop runner asCreate multi-step loop.
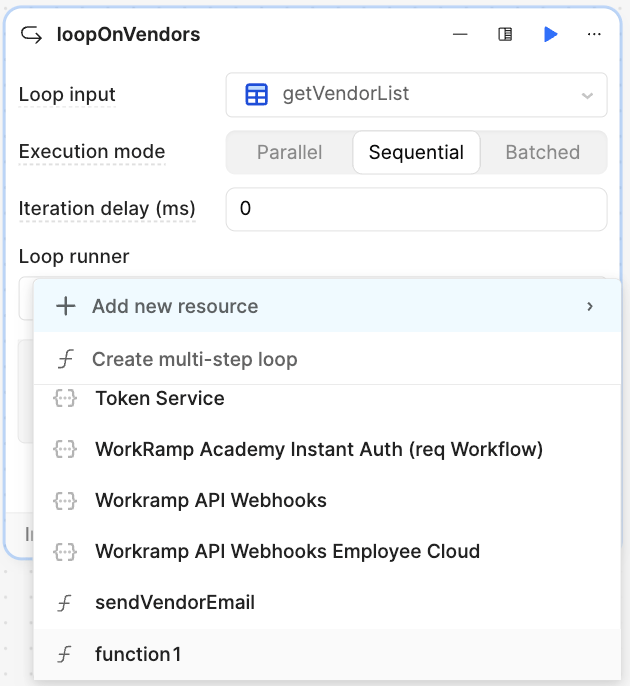
- This will open up the multi-step function editor. Edit the name of the function from
function1tosendVendorEmail.
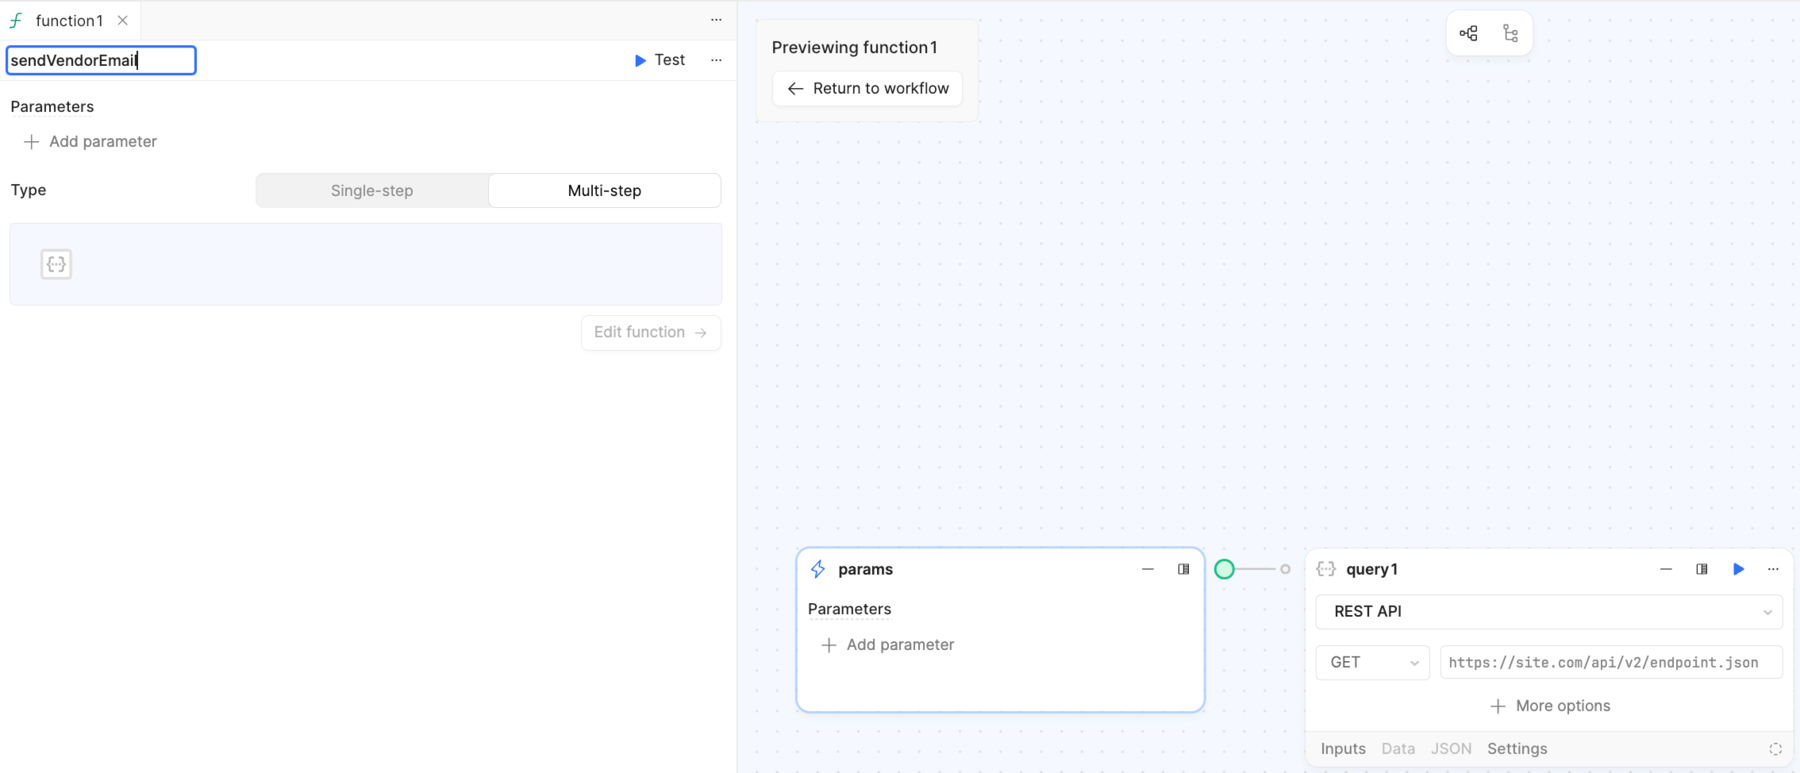
- Once the function has been renamed, the main workflow and loop block will appear as follows:

sendVendorEmail Multi-step function
Multi-step functions provide a new way to create functions that are comprised of multiple blocks similar to a workflow and when combined with a loop, you are able to develop much more complex logic. The following function demonstrates passing in parameters, performing a conditional check with different email notifications.
params Block
The params block is created by default for a function / multi-step function and is where we can identify input parameters. Enter the following parameters as input into the function, email, name, street, city, state, phone, existing. The updated params block will appear as the following.
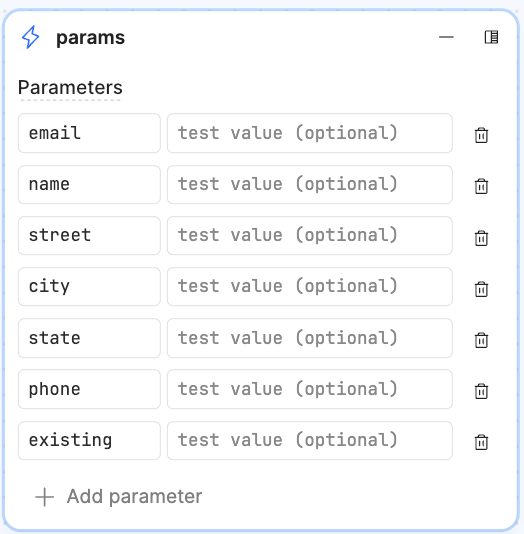
checkVendorType Block
The checkVendorType block performs a check to see if the existing parameter is true or false and directs the flow based on that value. Select the circle on the params block and specify Add block > Filter. In the If section specify the value params.existing === true as shown below.
sendExistingVendorEmail
The sendExistingVendorEmail block sends a formatted email for existing vendors to double check existing contact details.
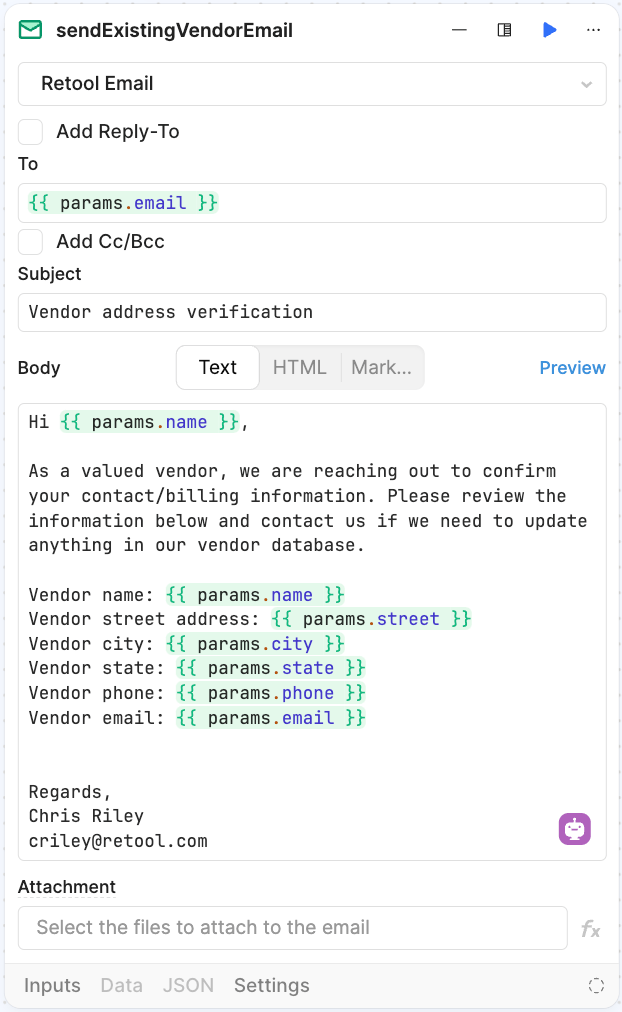
sendNewVendorEmail
The sendNewVendorEmail block sends a formatted email for new vendors to double check the recently entered contact details.
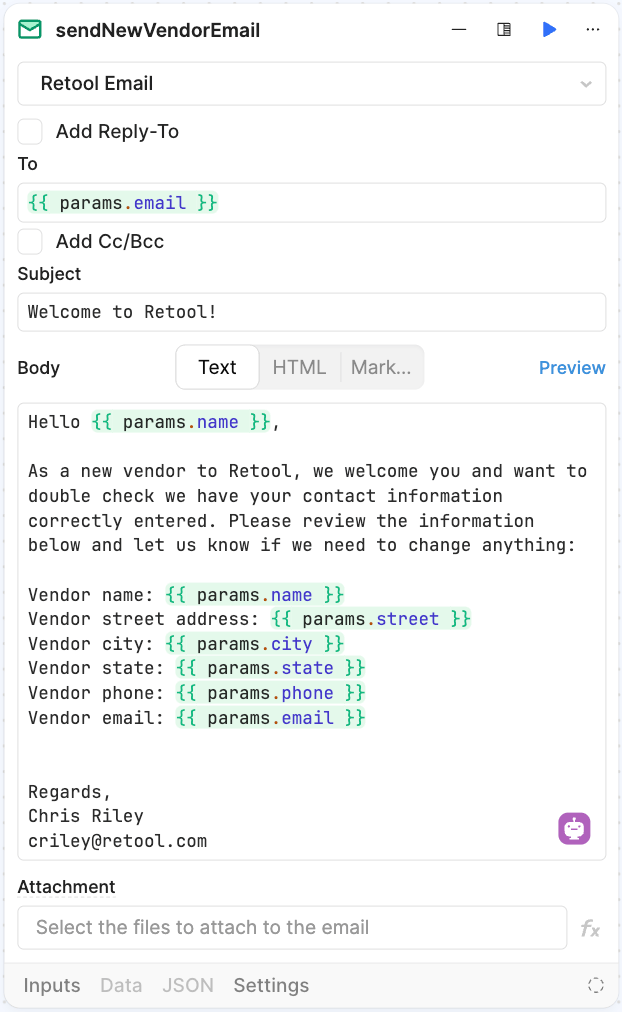
The completed workflow is displayed below with params, checkVendorType, sendExistingVendorEmail and sendNewVendorEmail blocks.

Results
Once the workflow is completed, select Run to see it process the database entries and send three separate emails. The following image shows the execution as it appears for a multi-step function.

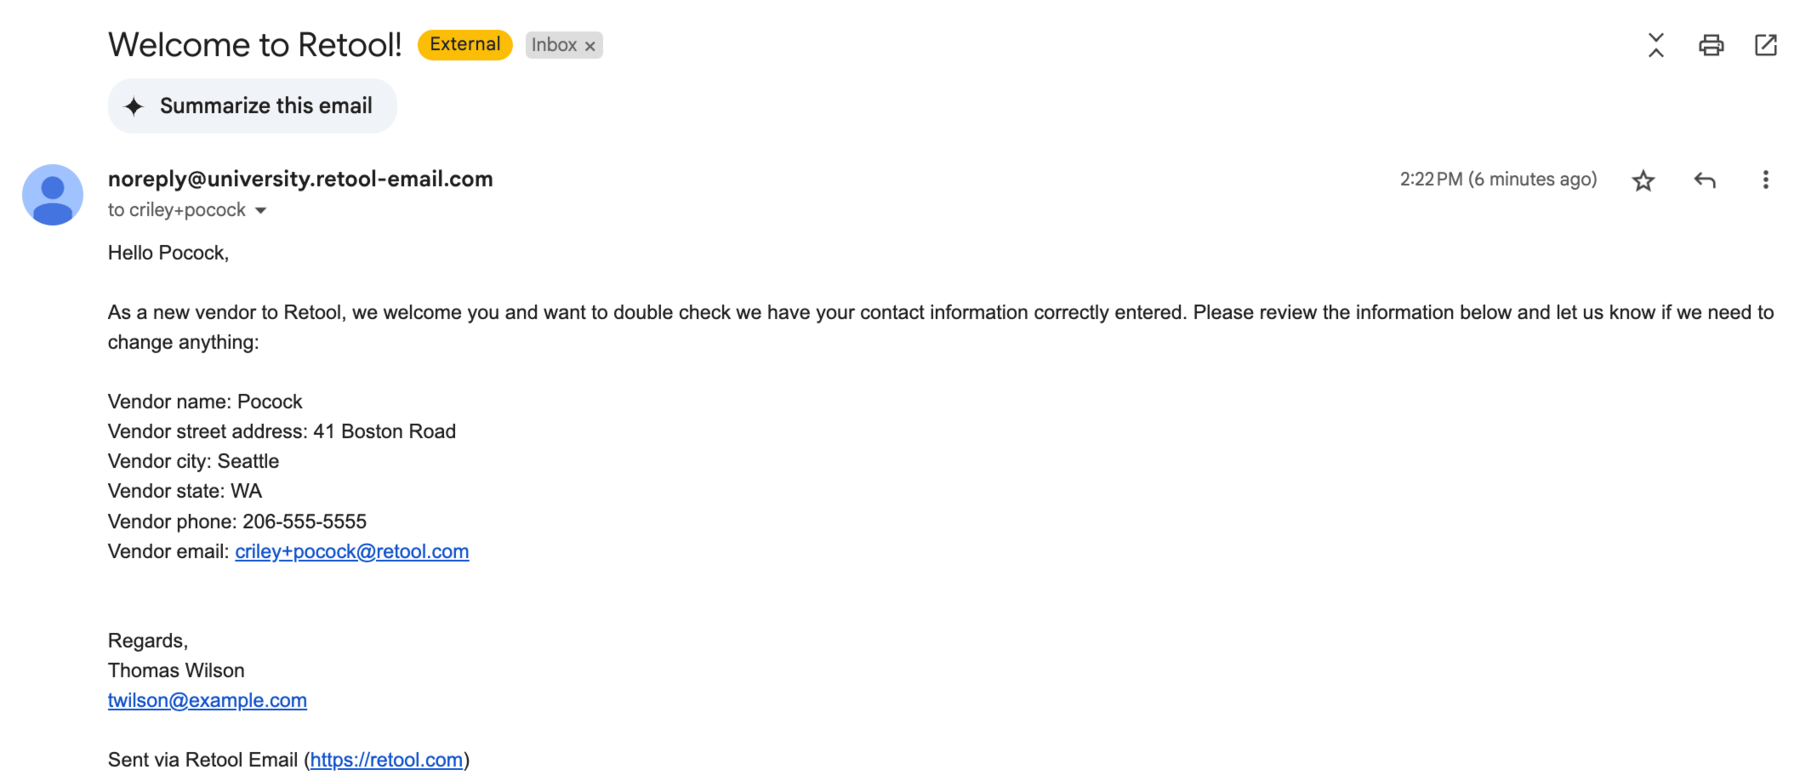
What is of importance here is the multi-step function within a loop will display as Iteration 0, Iteration 1 etc. Within each iteration are the individual steps that the multi-step function executed. Notice that depending on the result in the Branch block, either the sendExistingVendorEmail or sendNewVendorEmail is displayed. Below is the email sent by the sendNewVendorEmail block.
Completed Examples
You can import the following examples and compare with what you have built.
Video Walkthrough
The following video walks through the development process.