Retool Mobile IDE
The Retool Mobile IDE provides the development interface for creating mobile apps. The following lab performs a walkthrough of common functionality a developer will use.
Mobile IDE walkthrough
The following image labels the core features of the IDE.
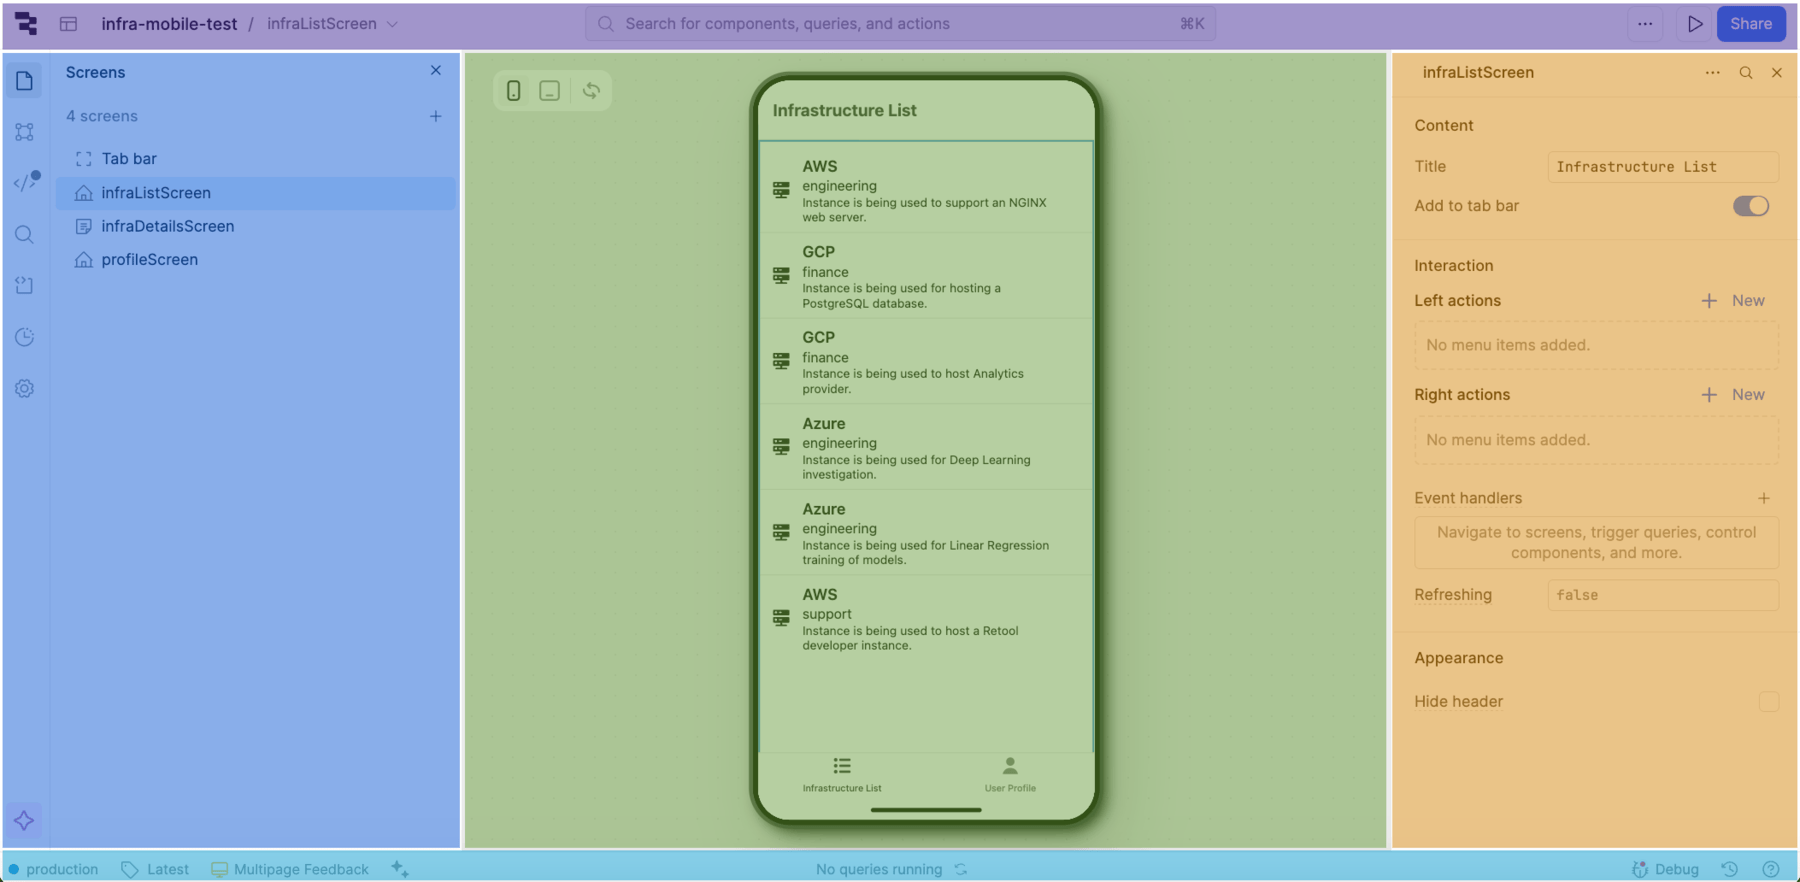
The Mobile IDE is the interface you use to build mobile apps. It is made up of these primary areas:
- Canvas (Green): Arrange components to build your mobile app's interface.
- Navbar (Purple): Configure, preview, share and manage your mobile app.
- Left panel(Dark blue): Explore components, queries, transformers, and constants.
- Right panel (Orange): Create and edit components.
- Status bar (Light blue): Select the app environment, releases, runtime, and debug apps.
Simple example
The following video shows a completed mobile app that will be built using Retool Mobile and Database.
Import data
In this step we will setup a sample table that you can use in the example.
Create schema
The schema we will create is defined in the following table.
| Column name | Description | Value Type |
|---|---|---|
| id | auto-generated primary key | Int |
| vendor | Public Cloud Vendor | Enum (AWS, Azure, GCP) |
| instance_id | VM instance identifier | Text |
| created_at | DateTime the instance was created | Date + Time |
| cpu_count | Number of vCPU | Number |
| ram_count | Amount of RAM | Number |
| network | Network speed | Number |
| cost_center | Owner of the instance | Enum (engineering, operations, finance, support) |
| purpose | Description as to what the instance is being used for. | Text |
| instance_type | Virtual Machine instance type | Text |
| monthly_cost | Public cloud provider monthly charge for instance | Number |
- Select Retool Home > Database
Import CSV
Next we want to populate this table with data. Download this CSV to import into the new table.
- Select Import CSV > Into a new table
- A import window appears showing the column names and types.
- Select Create table.
We want to alter the vendor and cost_center columns to be of type Enum.
- Select the down carrot for the
vendorcolumn and selecting Settings. - Select Field type and change from
TexttoEnumand select Save. - Repeat this process for the
cost_centercolumn.
The following Arcade video will guide through importing the CSV and changing the columns.
Create a Mobile App
- Select Home (Retool icon) to return to the home page. Select App > Create > Mobile App. A dialog will appears, specify a name of
infra-mobile-test, leave the defaults, select Create app. - The Mobile IDE screen will now display a starting app in the canvas (e.g., People List).
Update screen names and titles
Focus Area: Left panel + Right panel
The Left panel provide access to the screens in the mobile app so that we can rename them. This is the comparator to pages in the web app.
- Select Screens in the left panel. You should see
Tab bar,peopleListScreen,peopleDetailsScreen, andmyProfileScreen. - Select each, right-click and Rename to
infraListScreen,infraDetailsScreen, andprofileScreen. - Select the
infraListScreenand in the right panel, change the title toInfrastructure List. - Select the
infraDetailsScreenand in the right panel, change the title toInfrastructure Detail. - Select the
profileScreenand in the right panel, change the title toUser Profile.
Create query
Focus Area: Left panel
The Left panel also provides access to developing queries to pull data from resources. In this step, a query will be created to pull the infrastructure details for various cost centers.
- Select Code
- Change the active screen to
infraListScreen. - Select + > Resource query in the infraListScreen scope.
- In the Resource search box, type
Retool Database. - Change the query name from
query1togetInfra. - Enter the following SQL Query into the text area.
SELECT * FROM "multi-cloud-infrastructure";
Update List screen
Focus Area: Right panel
Next we will update the infraListScreen / collectionView1 component to display the results of the getInfra query.
- Select the collectionView1 component to make it active.
- In the right panel, under Content > Data source change the value to:
{{getInfra.data}}
- Change
Titletoitem.vendor - Change
Bodytoitem.cost_center - Change
Captiontoitem.purpose. - Change Media > Type to
Icon.
Update Details screen
Focus Area: Left panel
Next we will remove an image that is not useful for this example from the infraDetailsScreen page.
- Select Screens and
infraDetailsScreen. - Select the Component tree. This will display
image1andkeyValue1. - Select the
image1component, right-click, and select Delete.
Update Profile screen
Focus Area: Left panel + Right panel
In this final step, we will update the name displayed from First name to Full name.
- Select Screens and
profileScreen. - Select Component tree > Components > container3 > heading1.
- Change the Value from
firstNametofullName. Once edited, the value will appears as the following.
{{ current_user.fullName || 'User' }}