API Application
The following API App provides a sample that demonstrates the use of API queries and how those queries are connected to components and event handlers with Retool.
Steps
The following steps focus on accessing Retool and a mock API to provide a base understanding of the Retool Platform.
- The example will use a REST API Resource.
- The fundamentals-api app will be imported as a Retool App.
- Each section of the app will be closely examined to understand different HTTP Methods and how Retool components / event handlers interact.
- A JavaScript transformer will be used to alter an API response to make it compatible with a Retool Table.
Create a Retool account and login
Create a Retool account and login to your account as shown below.
Import fundamentals-api app into Retool
Next we will import the Retool fundamentals-api app into Retool. This application is meant to provide a working example with components, code and event handlers that demonstrate real-world actions that are commonly used in building Retool Apps.
- Click the Fundamentals API App link to download the ZIP.
- Once the template has downloaded go to Retool Home Screen, select Apps > Create > Classic App.
- The Classic App editor will display, rename the app
fundamentals-api. - In the upper-right, select ... > Replace app with JSON/ZIP.
- Select the downloaded file
fundamentals-api.zip.
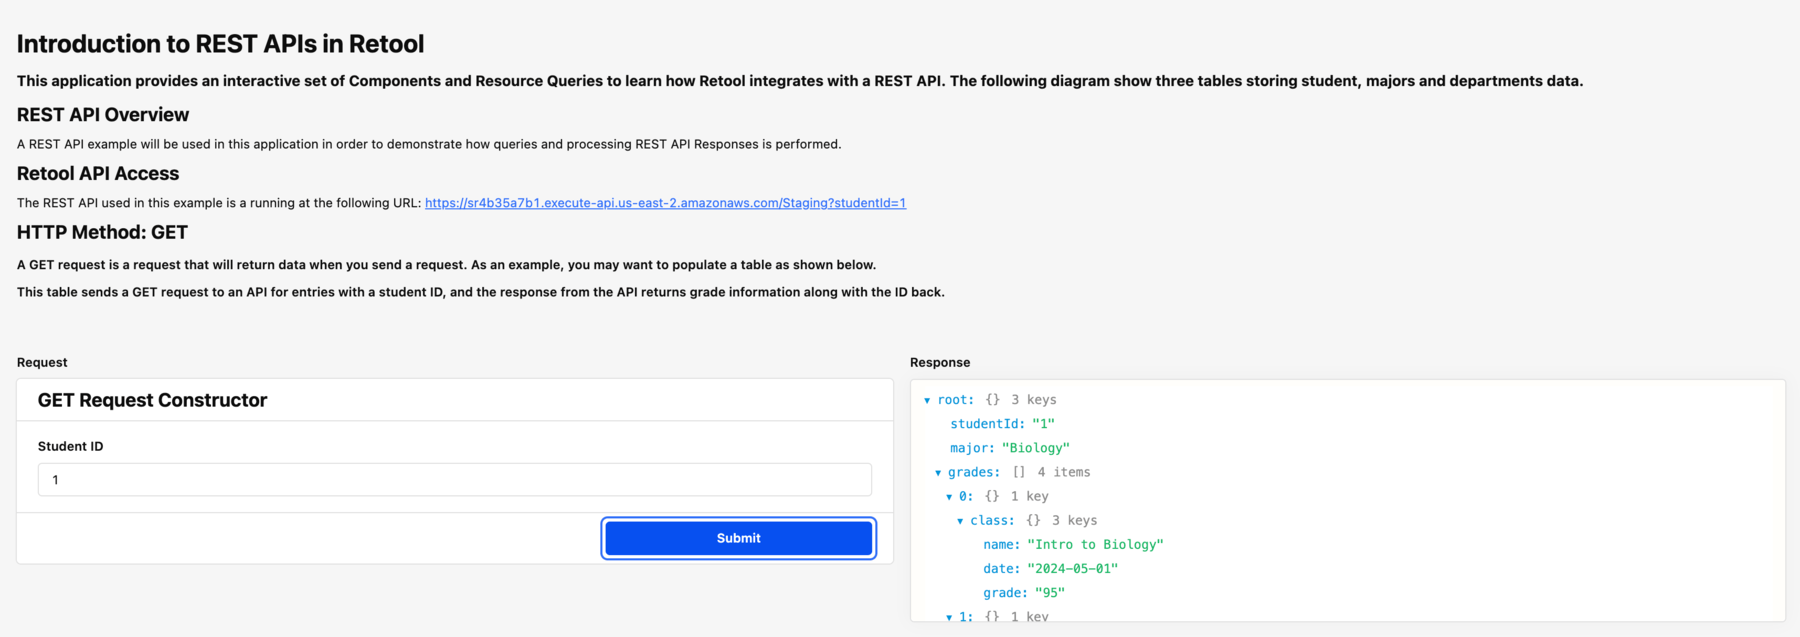
REST API Overview
The REST API supports GET, POST, PUT and DELETE Methods. The GET provides a sample JSON payload as a response whereas the POST and PUT Methods echo what they received and expose HTTP Headers. Below is a sample of the HTTP GET Response:
Code Overview
The fundamentals-sql app has several API Methods that are leveraged in the following sections. To access these queries, go to Code.
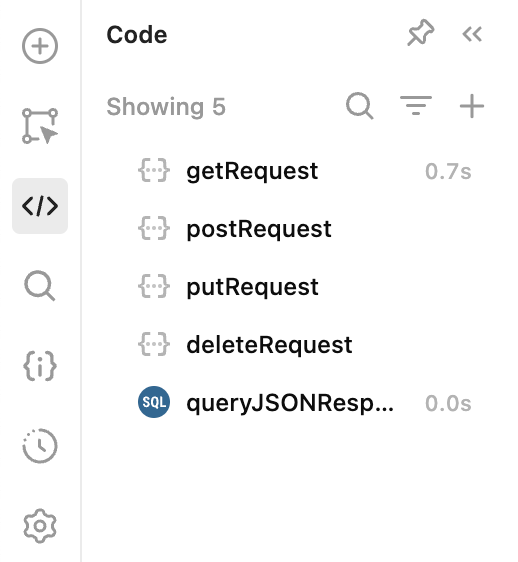
The following table provides an overview of each query that will be examined in the following sections.
| Query Name | Description |
|---|---|
| getRequest | This query uses a HTTP GET method to retrieve student entries. |
| postRequest | This query uses a HTTP POST method to simulate creating a student entry. It echos what was posted for this example app. |
| putRequest | This query uses a HTTP PUT method to simulate updating a student entry. It echos what was sent for this example app. |
| deleteRequest | This query uses a HTTP DELETE method to simulate deleting a student entry. It doesn’t echo anything in return as is common when using this method. |
| queryJSONResponse | This query takes a JSON response and uses SQL SELECT to query the data returned and render it in a table. |
Examine GET
In this section we will examine a HTTP GET method and how it can power a Retool JSON Explorer by retrieving JSON data. Select Edit App to be able to see how this application is created.
- Select the form in the HTTP Method: GET section. This will display a
formGetlabel.
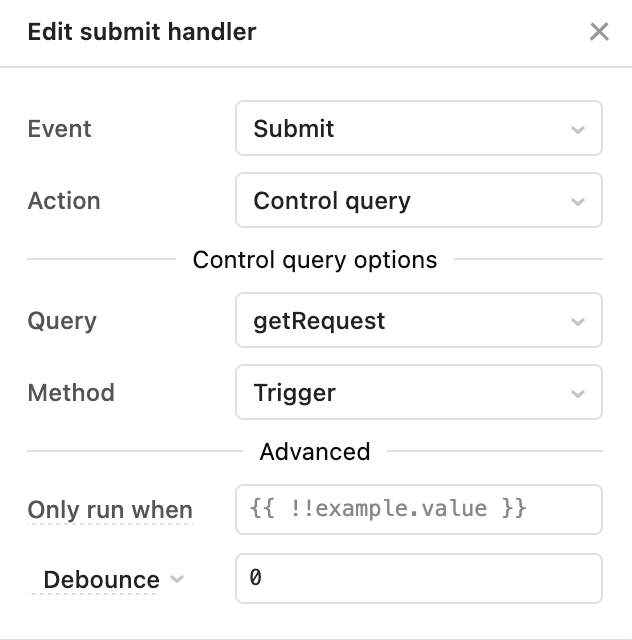
- Look at the Right Panel and inspect the form. Examine the Event handlers and edit the getRequest.trigger(). This will show the connected query when the submit button is selected.
- The query,
getRequest, can be examined by selecting the Code > getRequest query. This will display the REST API Resource, its configuration including the API’s URL.
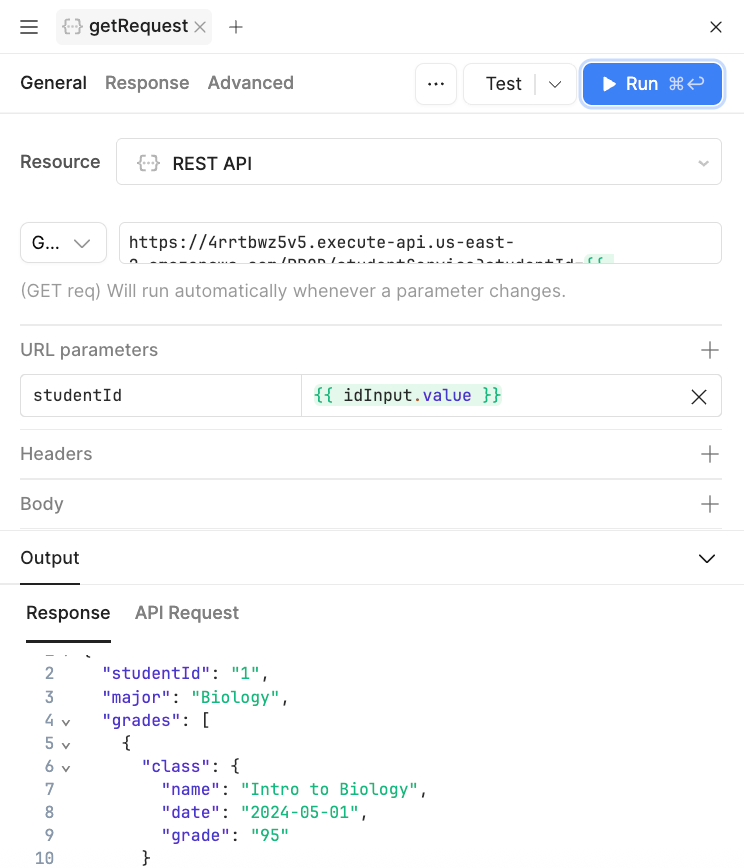
- Selecting the URL, we can more closely examine the API endpoint and a parameterized studentId. This id is retrieved from the form and the text input labeled
idInput.

- The results for this query are displayed in a JSON Editor to the right, that is fed by the results of the getResults query.
- Selecting the jsonExplorer1 component, the Content > Value is shown in the following image. The JavaScript Ternary Operator is used to either retrieve getRequest.data or populate with a simple JSON if empty.

Example Sample Table
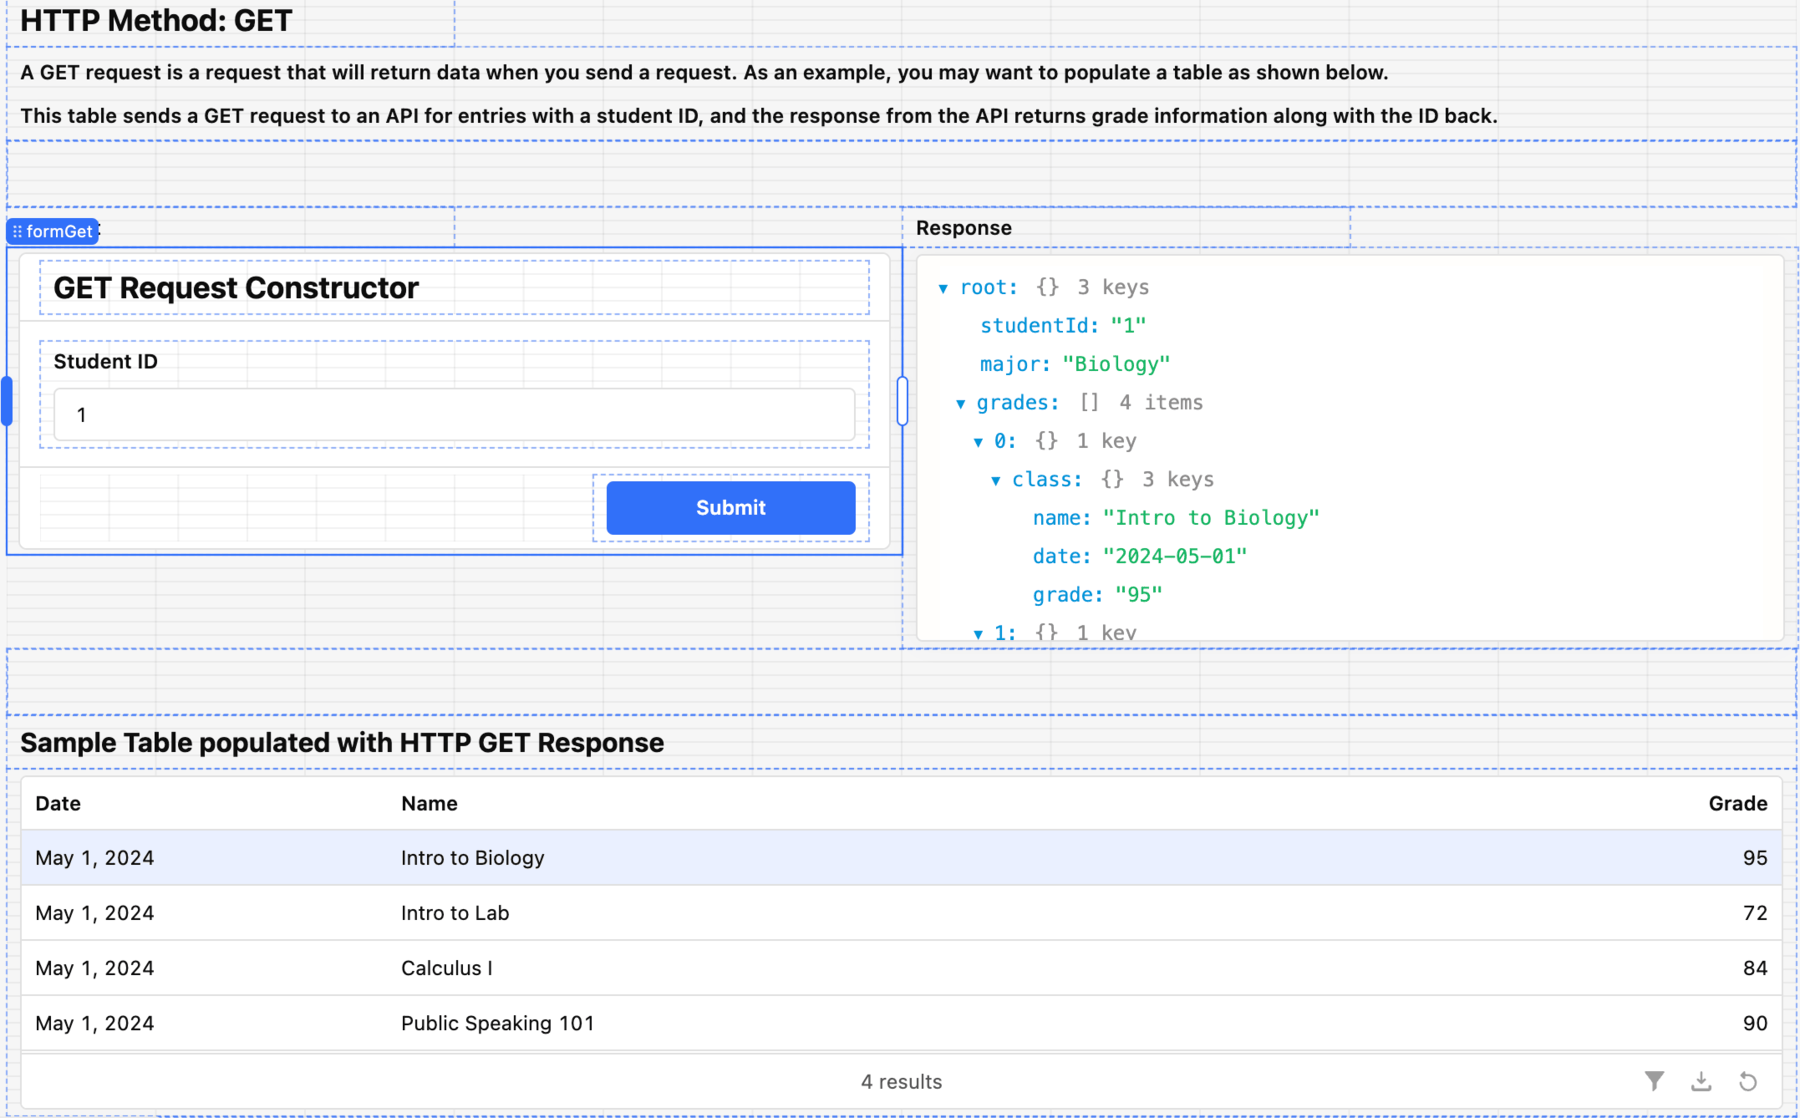
In this section we will examine a HTTP GET method and how it can power a Retool Table by retrieving JSON data. Select Edit App to be able to see how this application is created.
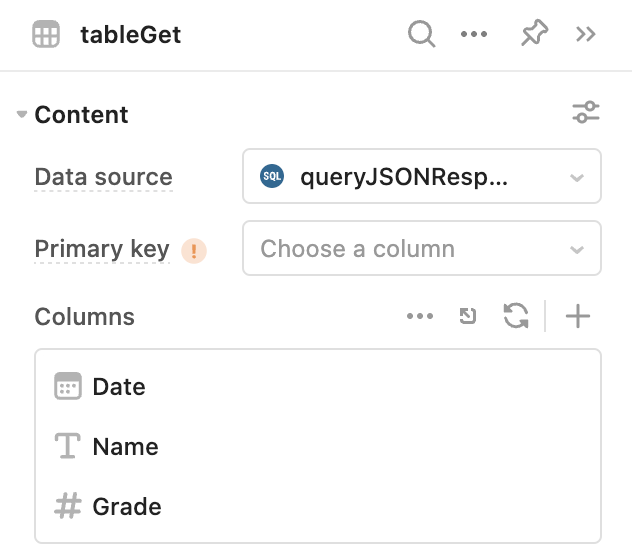
- Select the form in the Sample Table populated with HTTP GET Response section. This will display a table,
tableGet.
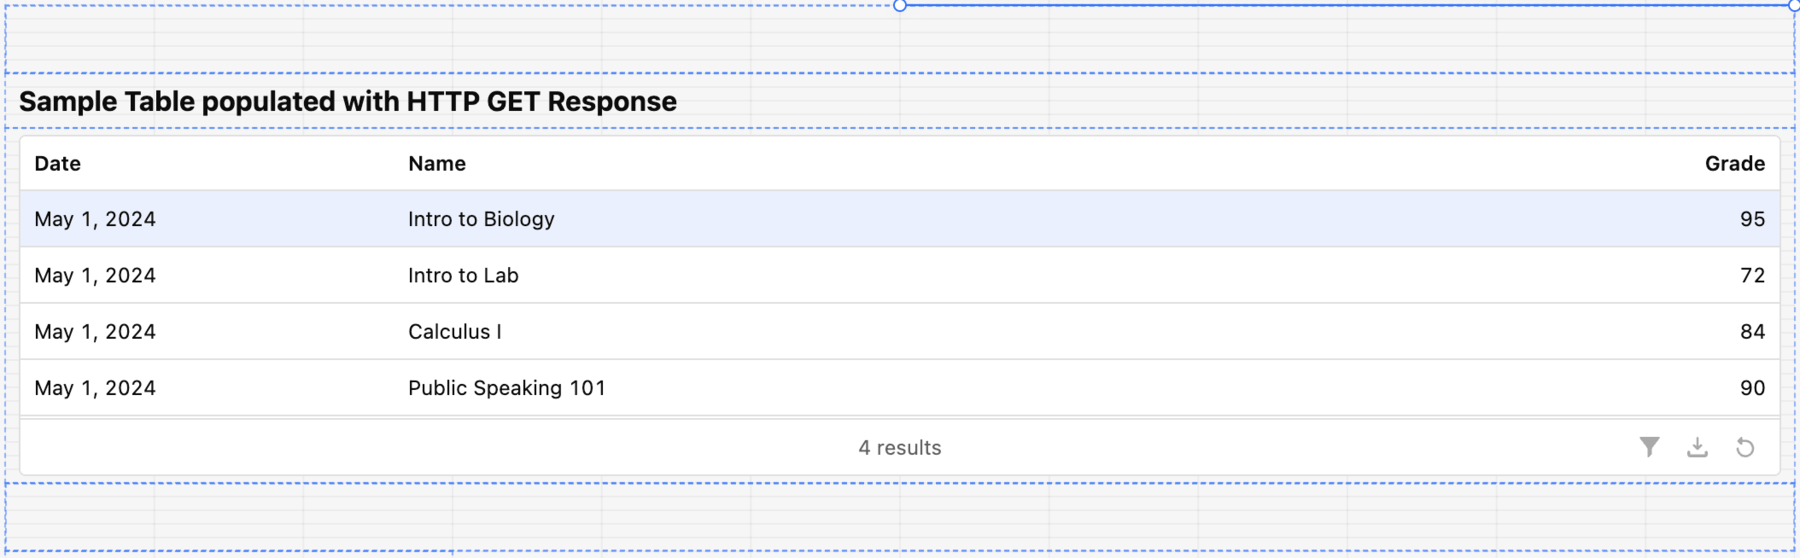
- Look at the Right Panel and inspect the table. For Content > Data source the app uses the getJSONResponse query. It also displays the columns in the table and how Retool will render the data in the table component (e.g. Date, Text, Integer).
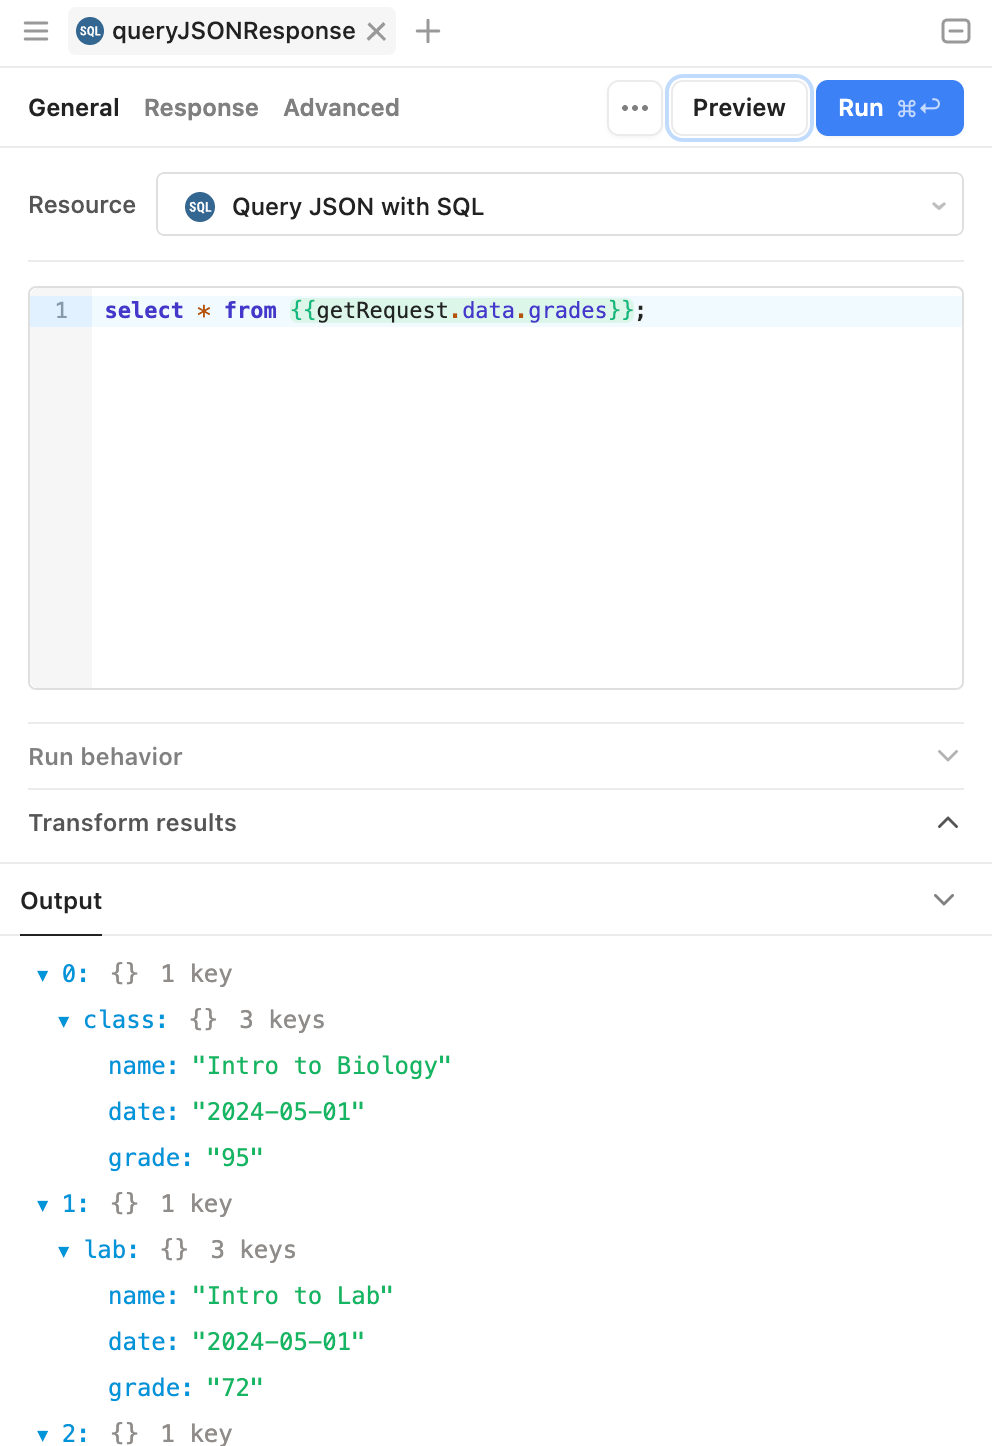
- A feature within Retool queries is the ability to use SQL to interact with JSON objects. The query,
getJSONResponse, can be examined by selecting the Code > getJSONResponse query. This will display the SQL SELECT where the JSON is passed in as a parametergetRequest.data.grades, focusing the data to process on just the grades portion.
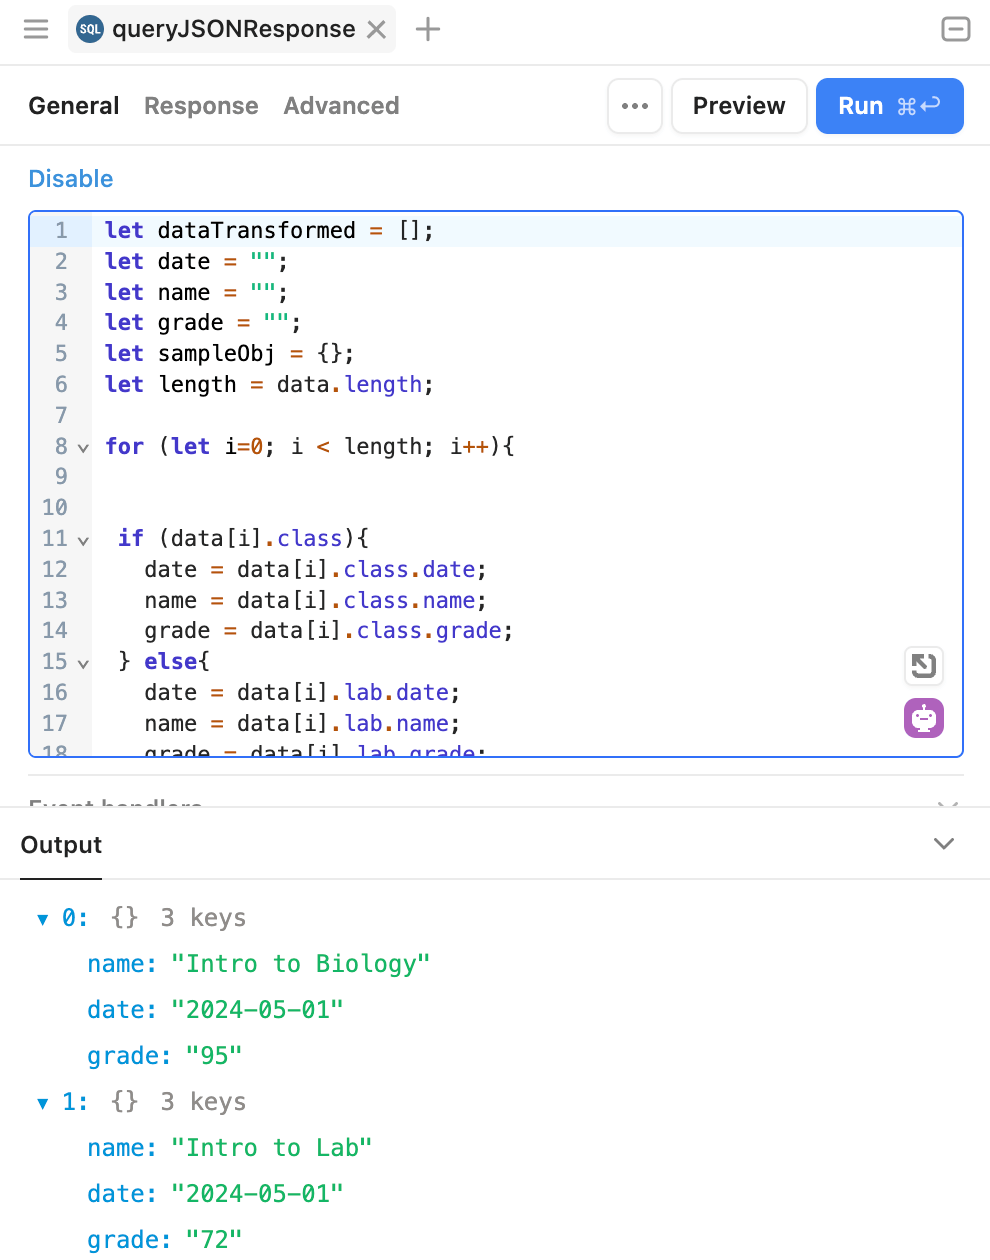
Since the data being returned from the query does not exactly match the shape of the table columns we desire, it is necessary to further transform the getRequest results. This is demonstrated via the JavaScript code in Transform Results that flattens the response to remove whether this is a class or lab.
// Variables to store transformed data and determine length of response
let dataTransformed = [];
let date = "";
let name = "";
let grade = "";
let sampleObj = {};
let length = data.length;


// Loop over received API response
for (let i=0; i < length; i++){

// Determine if it is a class or lab and extract date, name and grade
 if (data[i].class){
   date = data[i].class.date;
   name = data[i].class.name;
   grade = data[i].class.grade;
 } else{
   date = data[i].lab.date;
   name = data[i].lab.name;
   grade = data[i].lab.grade;
 }
// New object that will store the name, date and grade
 sampleObj = {
   "name" : name,
   "date" : date,
   "grade" : grade
 }
// Each object is added to the dataTransformed array
dataTransformed.push(sampleObj);

}
// Query results are available as the `data` variable
return dataTransformed;
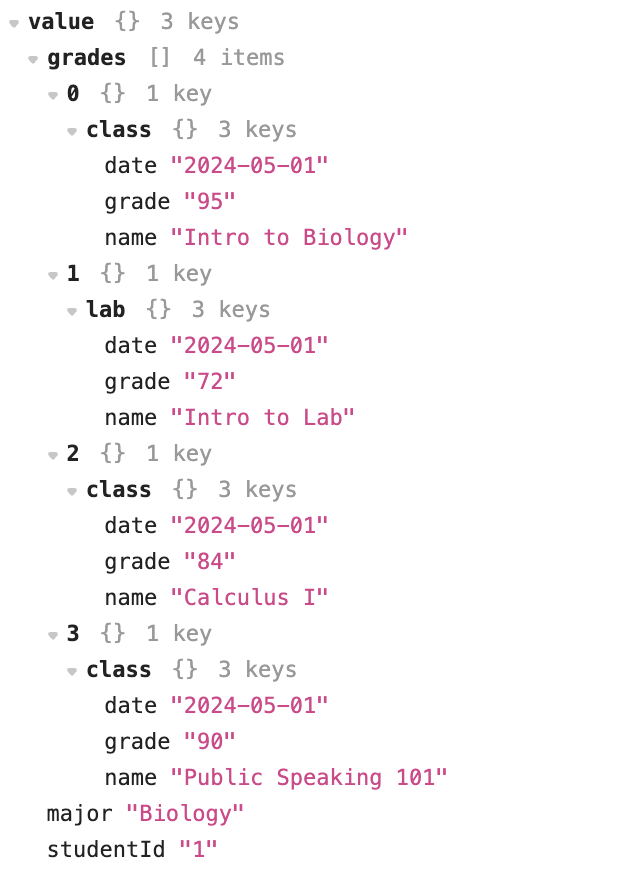
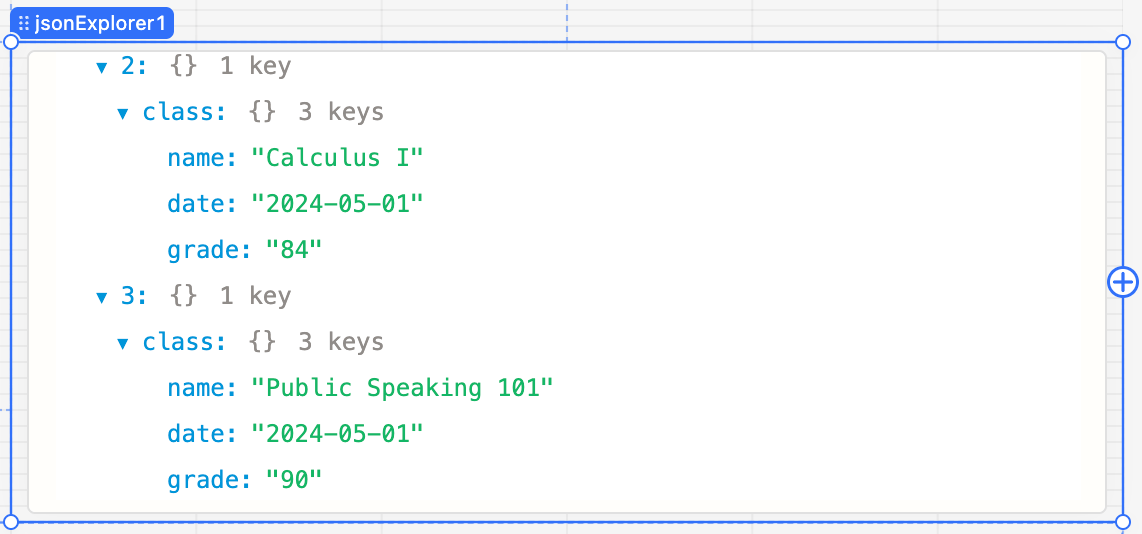
If we examine the input to this code we see the following structure:
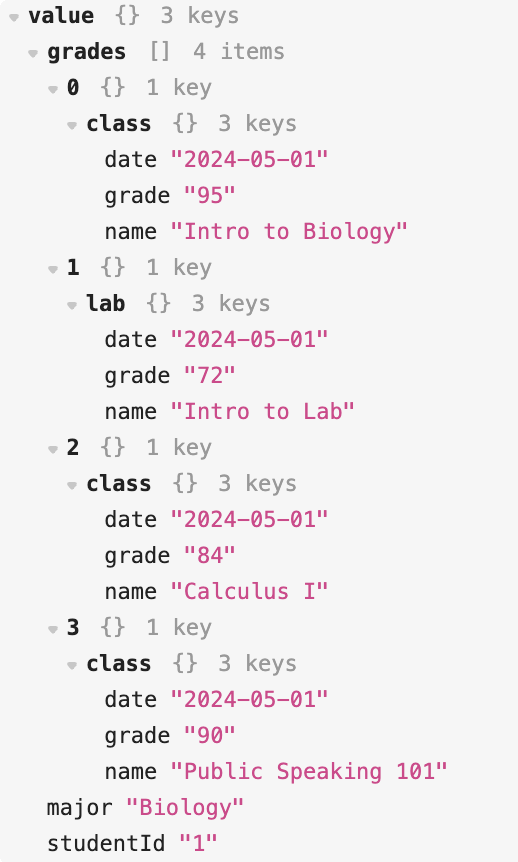
The Transform Results extracts the name, date and grade independent of whether this is a class or a lab and creates a flat result.
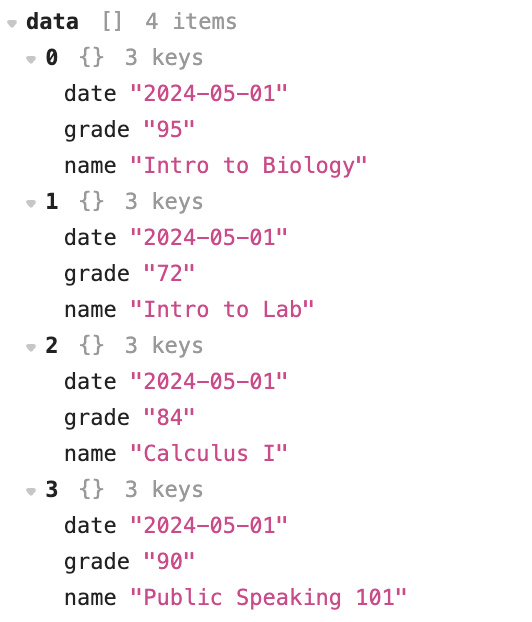
- Select the Run button to execute the query, transform, and examine the results.
Examine POST
In this section we will examine a HTTP POST method and how we generate it using a form and query. Select Edit App to be able to see how this application is created.
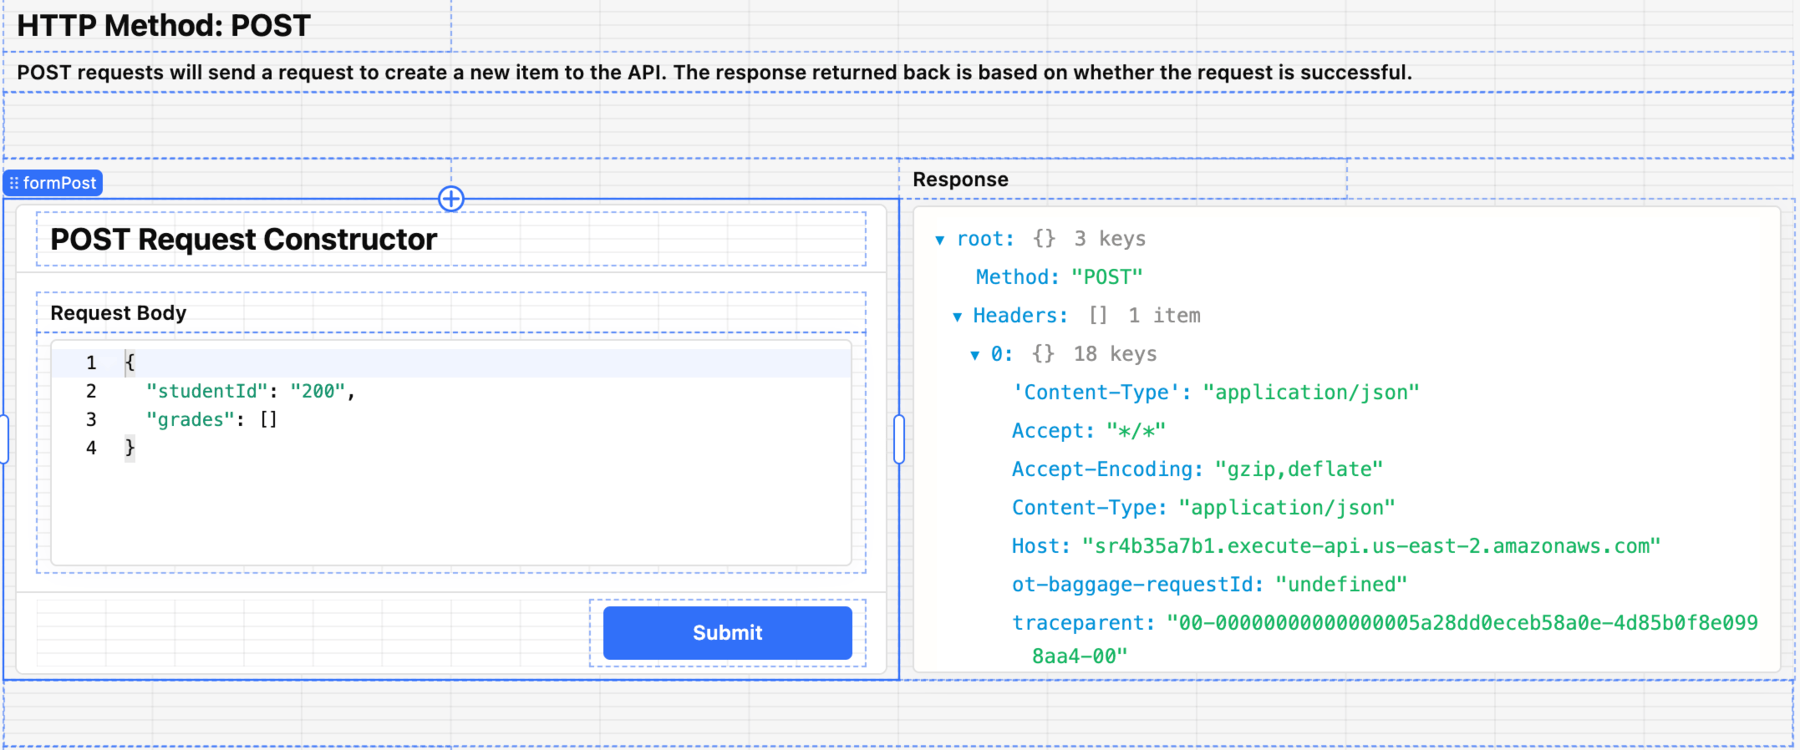
- Select the form in the HTTP Method: POST section. This will display a form,
formPost. Similar to the previous section, a Request and Response is provided. The Request portion utilizes a form to simulate a user entering in a payload that is processed by the mock API endpoint. The Response echos back what was received and also displays HTTP Headers.
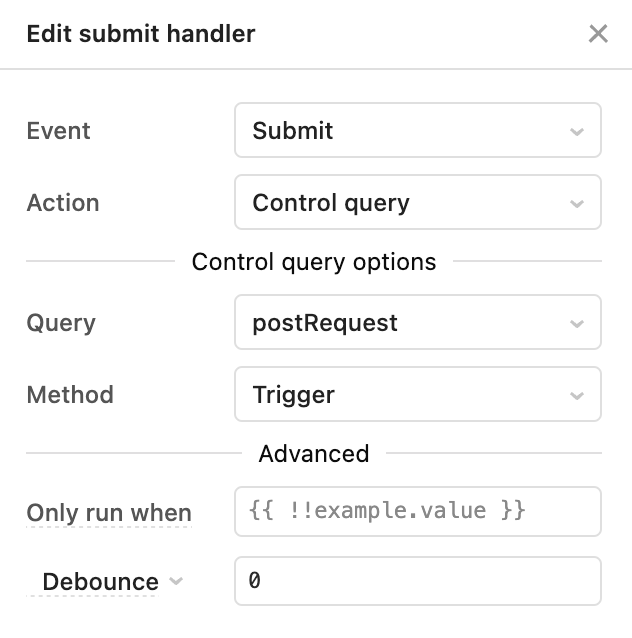
- Select the Submit button, labeled
formButton1, to examine what event handler and associated query is executed. - Examine the Right panel under Interaction to see that formPost is the form that will be submitted to the API and an event handler has been defined to occur when the button is clicked.

- Select Submit > postRequest.trigger() to identify the action that is run.
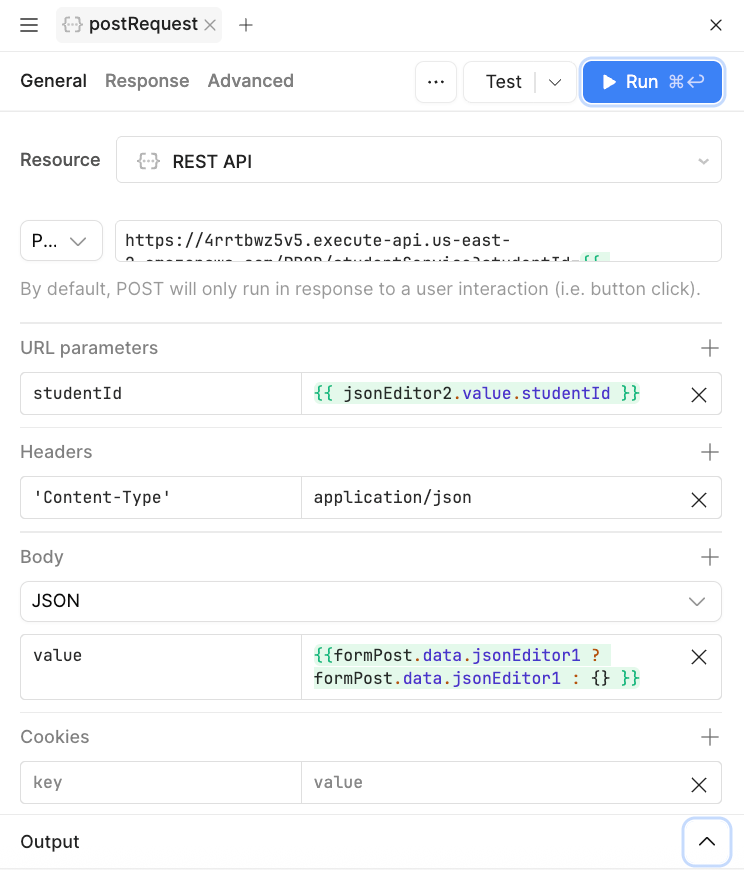
- The query postRequest is executed on submit. Access the query by going to Code > postRequest to examine the query configuration.
-
Examine the query definition
- Notice that this query identified a HTTP Header,
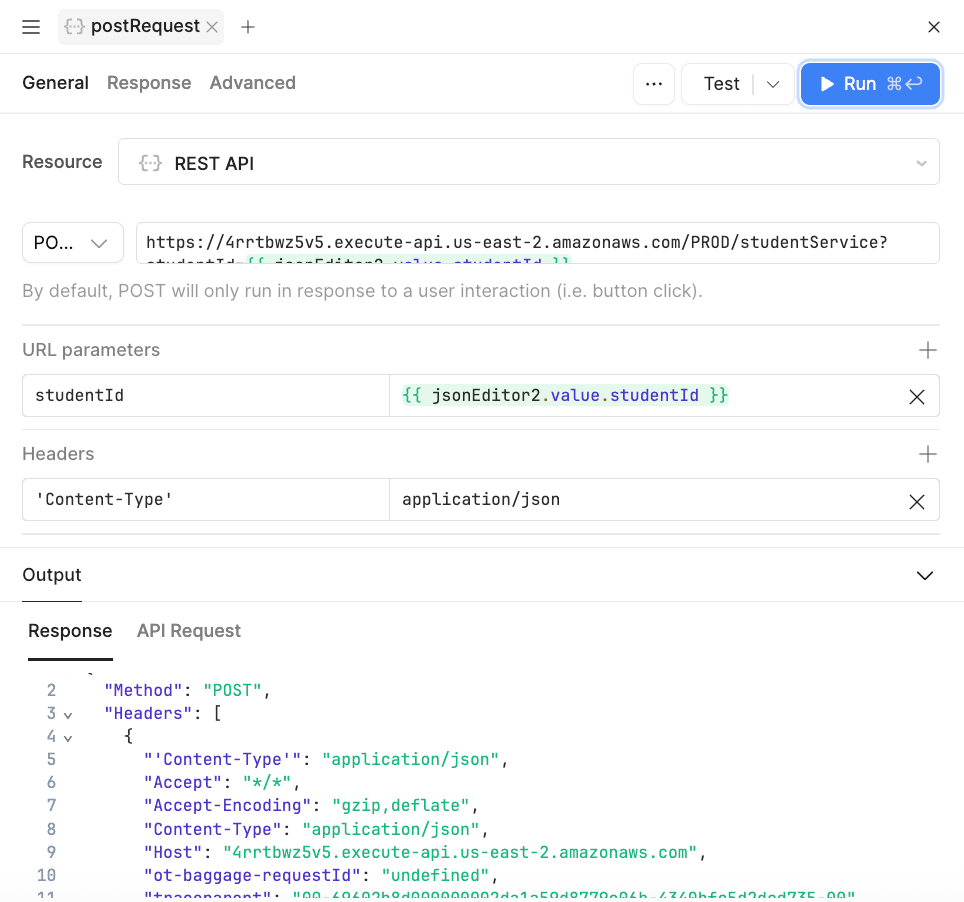
Content-type = application/json. This tells the destination API that the content that is being sent is of type JSON. - Examine the Body section, where it is using a JavaScript Ternary Operator, an if-else construct. In short it examines to see if there is data in the jsonEditor1 component and posts that or if there is nothing in jsonEditor1 an empty payload
{ }.
- Notice that this query identified a HTTP Header,
-
Select the URL to view the HTTP endpoint that is used as shown in the following image.

- Select the Preview button to run this query. Examine the results below without updating the component to confirm proper invocation of the API and a response.
Examine PUT
In this section we will examine a HTTP PUT method and how we generate it using a form and query. Select Edit App to be able to see how this application is created.
- Select the form in the HTTP Method: PUT section. This will display a form,
formPut. Similar to the previous section, a Request and Response is provided. The Request portion utilizes a form to simulate a user entering in a payload that is processed by the mock API endpoint. The Response echos back what was received and also displays HTTP Headers.
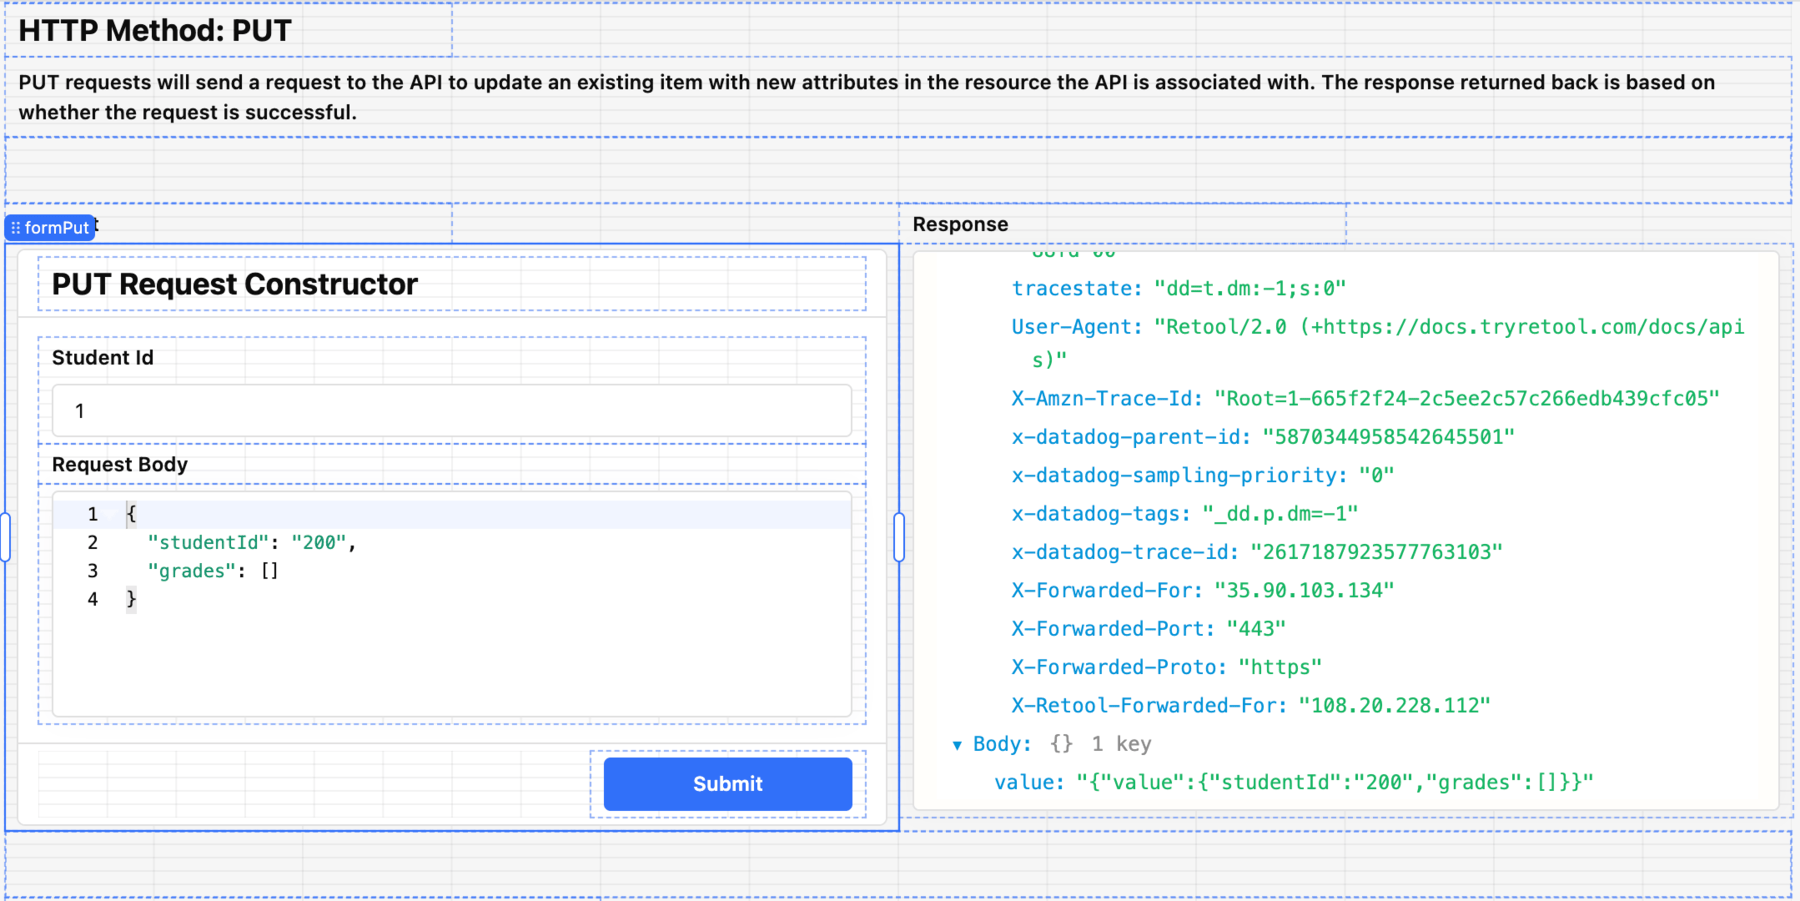
What is unique about a PUT method is that we need to identify which record we would like to update and the following instructions will share how that is performed.
- Similar to the HTTP POST example, the Submit button leverages an event handler and uses the form to post to the API endpoint. The following image shows the similar JSON payload setup as HTTP POST.
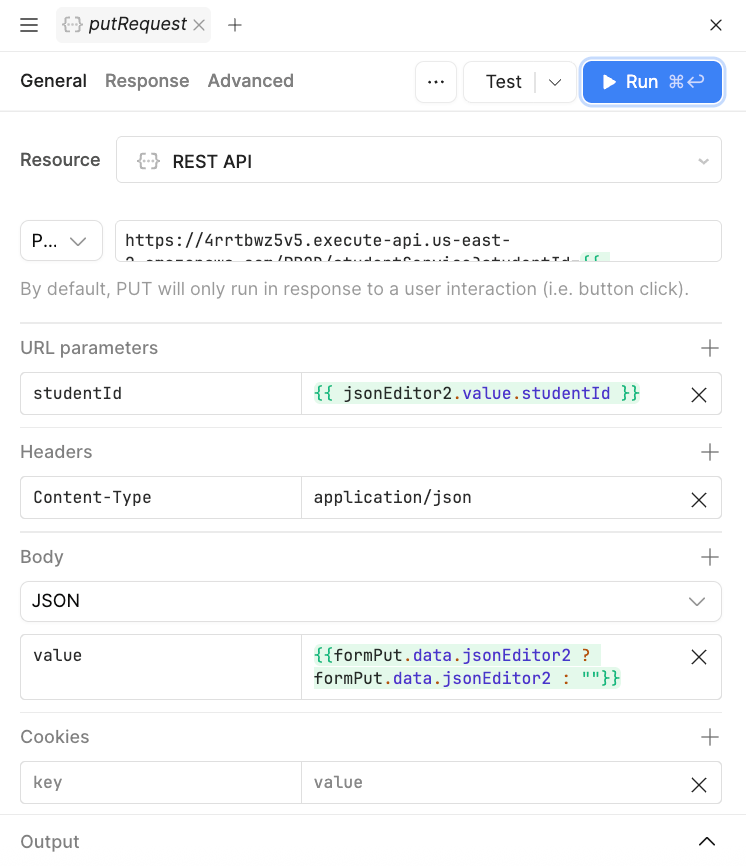
- What is different with this query, is the use of a parameterized URL as shown in the following image. A
studentIDis present in the HTTP PUT form, where a student ID can be entered. This helps inform the API which student is being updated. Similar to previous inline scripts we are extracting the value or sending an empty string if not populated.

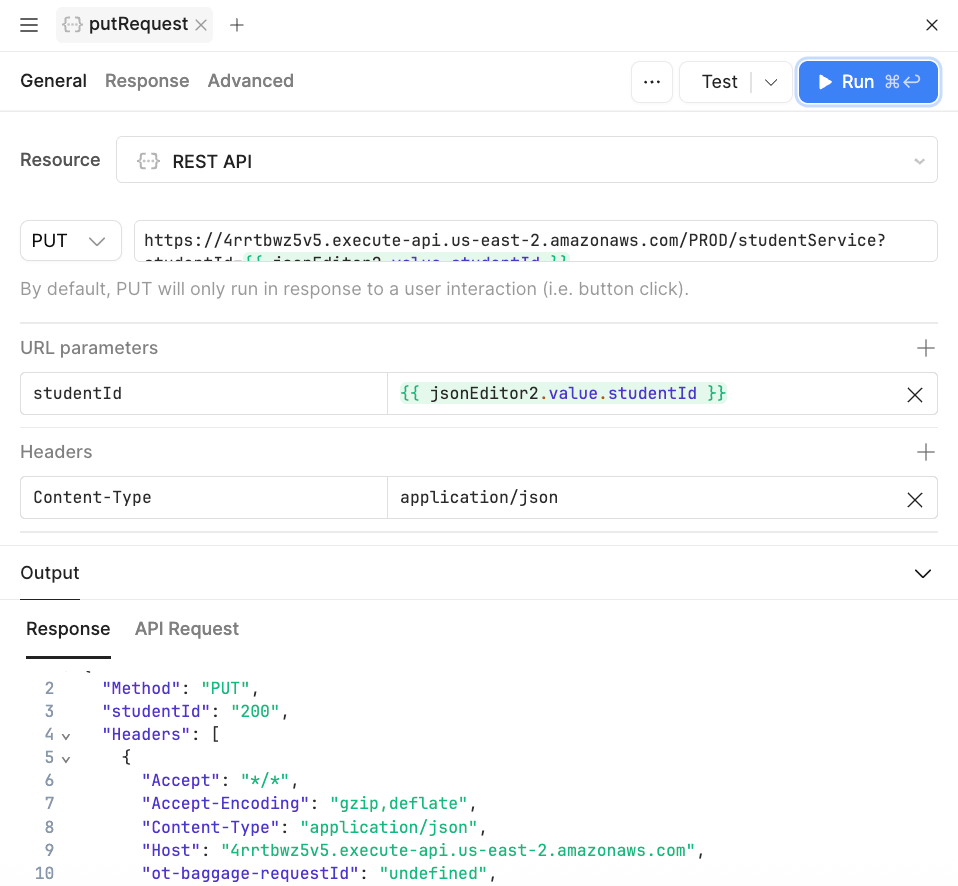
- Select the Preview button to run this query and examine the results below to confirm proper invocation of the API and a response.
Examine DELETE
In this section we will examine a HTTP DELETE method and how we generate it using a form and query. Select Edit App to be able to see how this application is created.
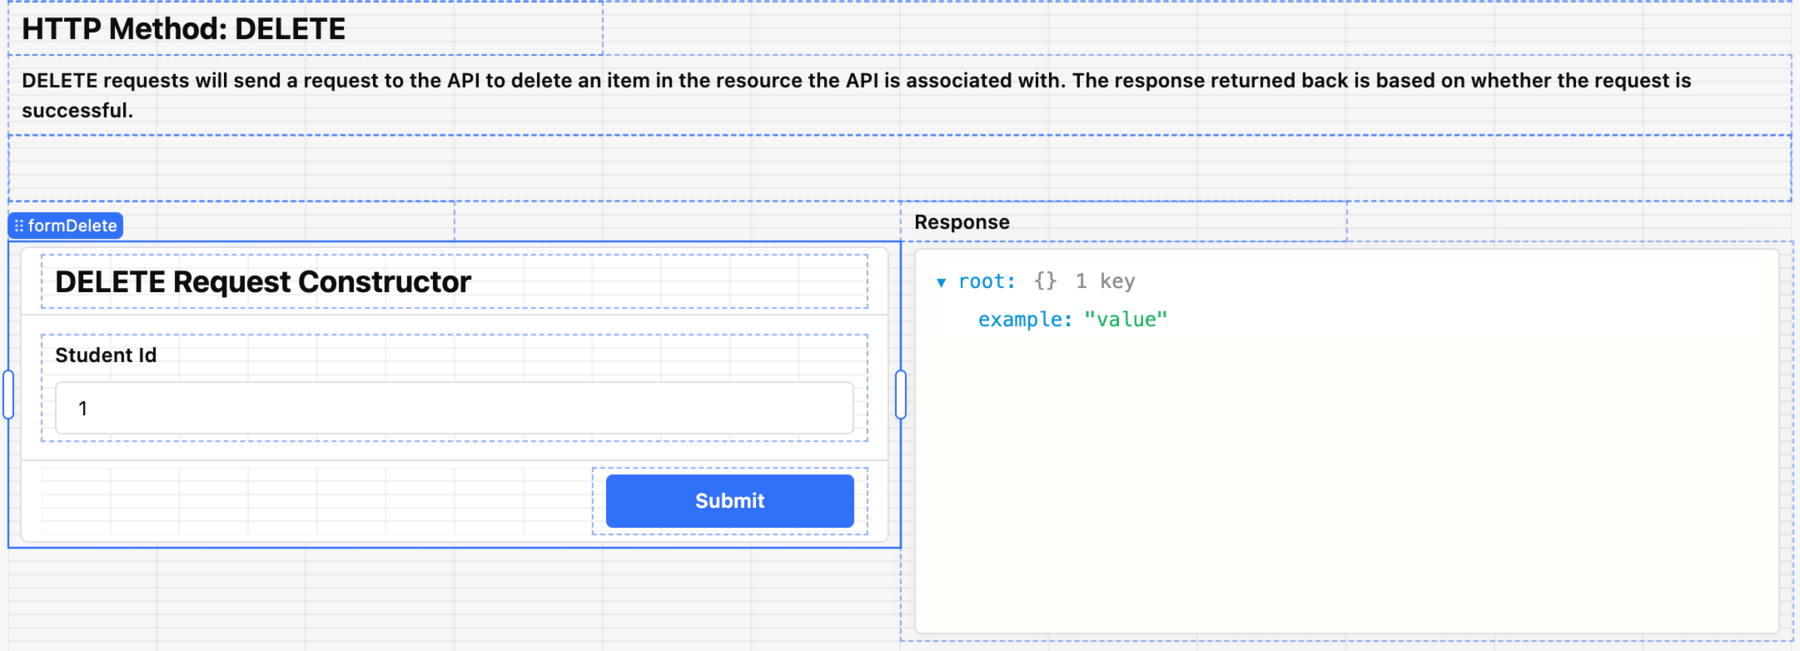
- Select the form in the HTTP Method: DELETE section. This will display a form,
formDelete. Similar to the previous section, a Request and Response is provided. The Request portion provides a text input to identify a student ID that is to be deleted by the mock endpoint. The Response echos back an empty response, that is common with HTTP DELETE.
- Similar to the HTTP POST example, the Submit button leverages an event handler and uses the form to post to the API endpoint. The following image shows the deleteRequest query that only needs to specify the URL.
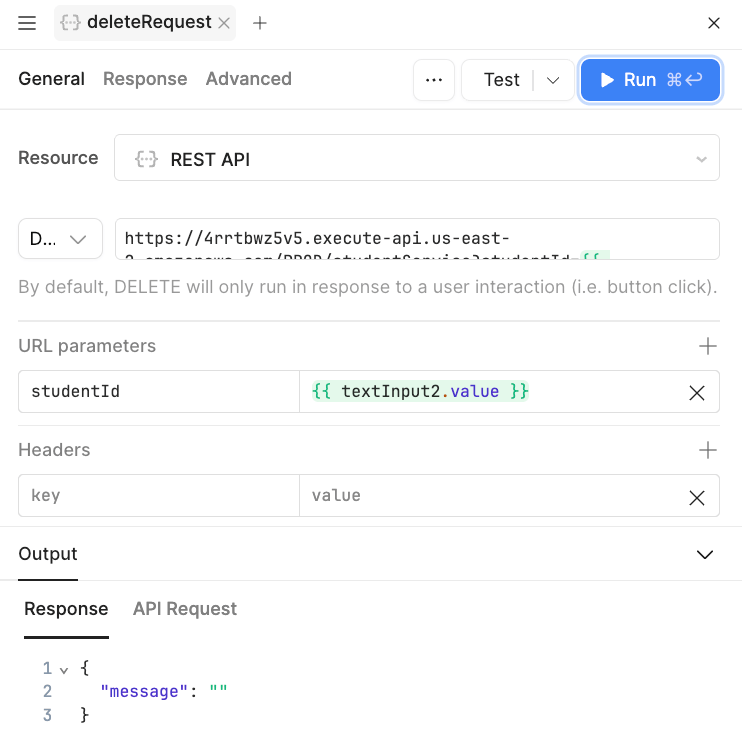
- If we examine the URL more closely, we can see an inline script that pulls the
studentIdvalue entered in the textInput2 field.

Summary
The API App is meant to provide some exposure to queries that operate against REST APIs. Due to the mock API used in this example, we cannot validate POST, PUT and DELETE entries. To test against third party APIs, use API documentation to properly configure REST API Resources URL, parameters, body and finally authentication schemes not covered in this example. For more information on authentication support, examine the following documentation.