Retool Workflow IDE
The Retool Workflow IDE provides the development interface for creating workflows. The following lab performs a walkthrough of common functionality a developer will use.
Workflow IDE walkthrough
The following image labels the core features of the IDE.
The Workflow IDE is the interface you use to build workflows. It is made up of these primary areas:
- Canvas (Green): Arrange blocks and build your workflow.
- Left panel(Dark blue): Add blocks and functions, configure triggers, and configure code libraries.
- Toolbar (Purple): Rename, run, and deploy a workflow.
- Status bar (Light blue): Select an environment and debug workflow runs.
Simple example
The following video shows a completed workflow that will be built using Retool Workflows and Database.
Import data
In this step we will setup a sample table that you can use in the example.
Create schema
The schema we will create is defined in the following table.
| Column name | Description | Value Type |
|---|---|---|
| id | auto-generated primary key | Int |
| vendor | Public Cloud Vendor | Enum (AWS, Azure, GCP) |
| instance_id | VM instance identifier | Text |
| created_at | DateTime the instance was created | Date + Time |
| cpu_count | Number of vCPU | Number |
| ram_count | Amount of RAM | Number |
| network | Network speed | Number |
| cost_center | Owner of the instance | Enum (engineering, operations, finance, support) |
| purpose | Description as to what the instance is being used for. | Text |
| instance_type | Virtual Machine instance type | Text |
| monthly_cost | Public cloud provider monthly charge for instance | Number |
- Select Retool Home > Database
Import CSV
Next we want to populate this table with data. Download this CSV to import into the new table.
- Select Import CSV > Into a new table
- A import window appears showing the column names and types.
- Select Create table.
We want to alter the vendor and cost_center columns to be of type Enum.
- Select the down carrot for the
vendorcolumn and selecting Settings. - Select Field type and change from
TexttoEnumand select Save. - Repeat this process for the
cost_centercolumn.
The following Arcade video will guide through importing the CSV and changing the columns.
Create a Workflow
- Select Home (Retool icon) to return to the home page. Select Workflow > Create Workflow. Provide an workflow name and save.
- The Workflow IDE screen will now display an empty canvas.
Remove Code Block and Create Trigger
Focus Area: Left panel + Canvas
The Left panel and Canvas provide access to the construction features in Retool. Let's remove the code block and update the startTrigger block.
- Select the workflow name and edit it to
infra-monthly-test - Select the
...on the upper right hand side of the Code block and select Delete. - Select the startTrigger block > Edit trigger.
- Enable the
Scheduleby selecting the switch. Clicking on the schedule will open the properties where you can then put in an Interval or Cron statement.
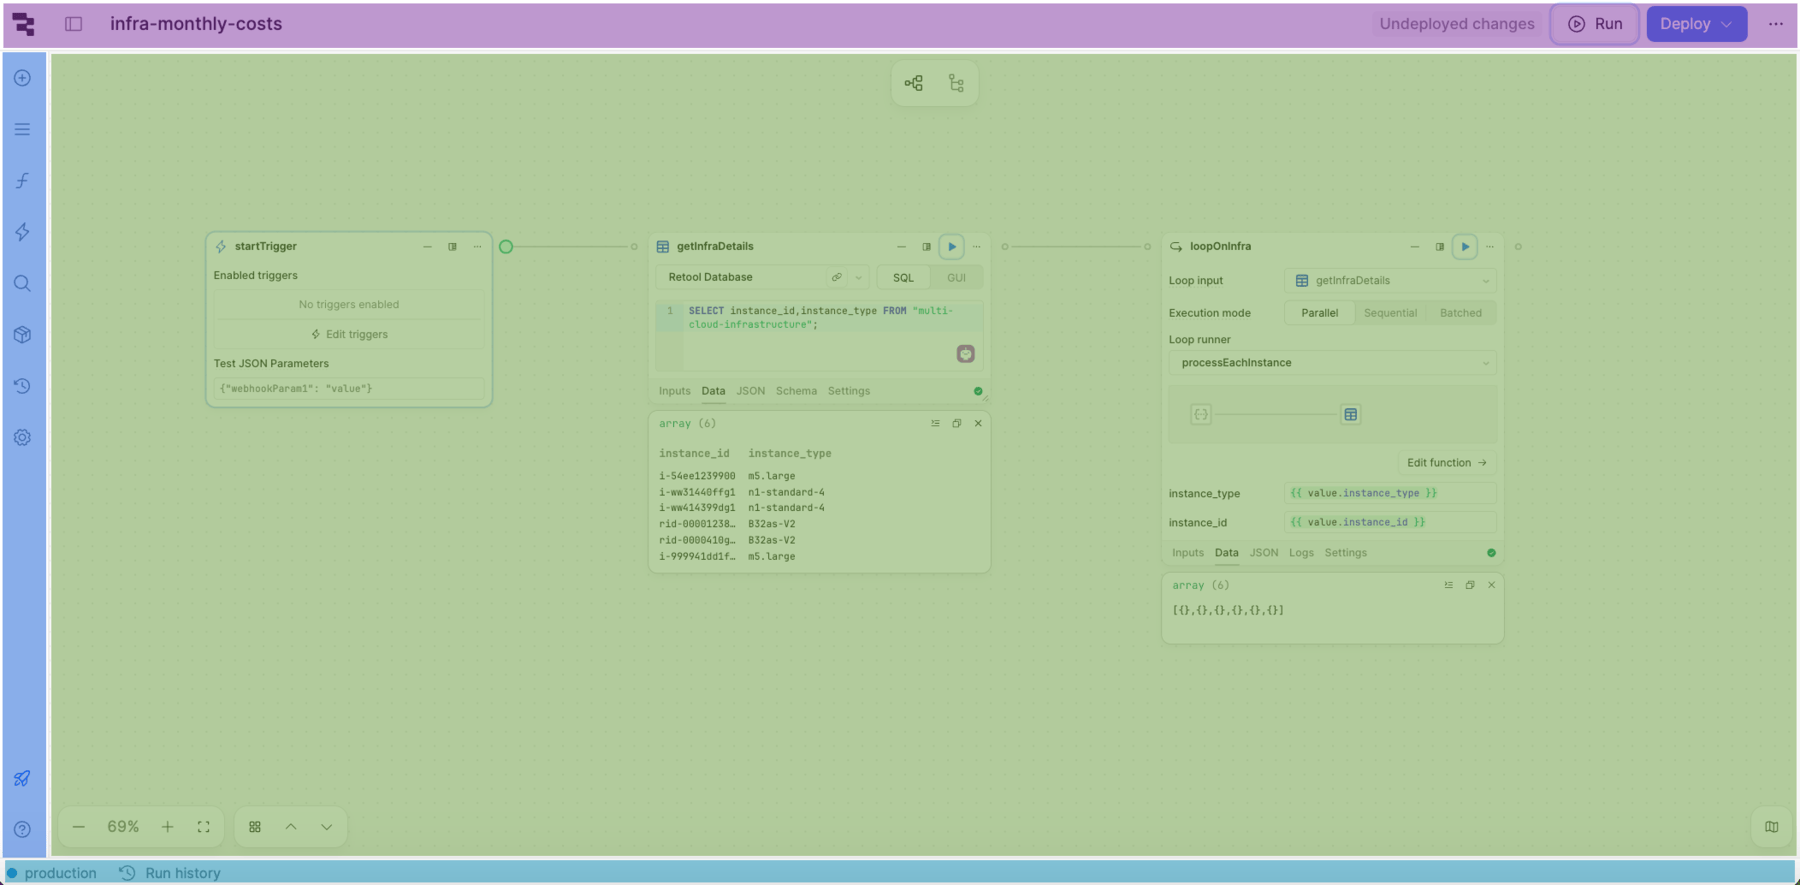
Add Resource query block (Database)
Focus Area: Canvas
We need to query the Retool Database table, multi_cloud_infrastructure to get the instance_id and instance_type information from all cost_center.
- Select the circle on the right-hand side of the startTrigger block.
- Select Add block > Resource query
- Change the name to
getInfraDetails. - Specify the resource of
Retool Database. - Use the following query to get the instance_id and instance_type values.
SELECT instance_id,instance_type FROM "multi-cloud-infrastructure";
Add Loop block
Focus Area: Canvas
With the results from the getInfraDetails block, we have an array that we can process. We will leverage the Loop block and multi-step function to call an external API and then insert the costs per each instance into the Retool Database.
- Select Add block > Loop (new)
- Change the name to
loopOnInfraDetails. - Loop input should be set to
getInfraDetailswhich returns an array of database entries. - Execution mode is left at
Parallel. - Select Loop Runner > Create multi-step loop. This will initialize a mult-step function.
Update Multi-step function params block and Loop block
Focus Area: Left panel + Canvas
Multi-step function provides a way of executing a series of blocks once or via a loop n-number of times. We will use this to call an external API to get the instance costs. Finally we will update the entries in the Retool Database to have a current cost value in the monthly_costs column.
- In the
paramsblock select Add parameter and add the following two parameters,instance_idandinstance_type. - Select the Return to workflow button. This will re-display the parent workflow.
- In the Loop block, the two new parameters are displayed
instance_idandinstance_type. - Select the empty field to the right of the
instance_idand enter:
{{value.instance_id}}
- Select the empty field to the right of the
instance_typeand enter:
{{value.instance_type}}
value.[parameter] provides the way that you can enter properties that are fed in by the Loop input, in this example that is getInfraDetails.
Add Multi-step function Resource Query block (API)
Focus Area: Left panel + Canvas
In this step we are calling an external API where we provide the instance_type as a query parameter. The response is the monthly cost of the instance.
- Select Edit function in the Loop block.
- Change
query1to getCosts. - Update the REST endpoint query to the following:
https://16a87obxu5.execute-api.us-east-2.amazonaws.com/costs?type={{ params.instance_type }}
Add Multi-step function Resource Query block (Database)
Focus Area: Left panel + Canvas
In the final step of the multi-step function we do an update of the monthly_cost column in the multi-cloud-infrastructure table using the instance_id.
- Select Add block > Resource query.
- Change the name of the block to
updateCosts. - Specify
Retool Databasefor the resource. - Enter the following query to update the database. The cost value will come from the previous block.
UPDATE "multi-cloud-infrastructure"
SET monthly_costs = {{ getCosts.data.instance_cost }}
WHERE instance_id = {{ params.instance_id }};
Run workflow
Focus Area: Navbar + Status bar
With the workflow completed, we can run it. This displays the Run history dialog that helps understand what blocks ran, how long it took and inputs/outputs/console logging.
- Select Return workflow.
- In the Navbar, select Run.
- The workflow will execute displaying the Status bar / Run history.
- When the workflow is complete navigate the block display to see the values that were retrieved.