SQL within Retool
The following examples use the Retool DB and Retool Query Editor to try out SQL first-hand.
Steps
The following steps focus on accessing Retool and using RetoolDB, Retool Workflow, Retool Email, and Retool Web Apps to provide a base understanding of the Retool Platform.
Create a Retool account and login
Create a Retool account and login to your account as shown below.
Create a table in RetoolDB using CSV files
A key component in the inventory management application is to define a schema / set of data that represents current inventory. Using the following common separate value (CSV) files, the schema can be identified along with sample data into RetoolDB table(s). In this step of the laboratory, two comma separated value files will be used to populate a Retool Database creating two separate tables. The following files need to be downloaded to your computer, in order to perform the following steps.
Once the files are downloaded, we can create tables in the database:
- In the Retool Home Screen, select Database.
- In Retool Database, select Import CSV > Into a new table.
- Select file inventory.csv.
- Verify id, quantity and replenish field are set to type
#int4in the CSV Import dialog.
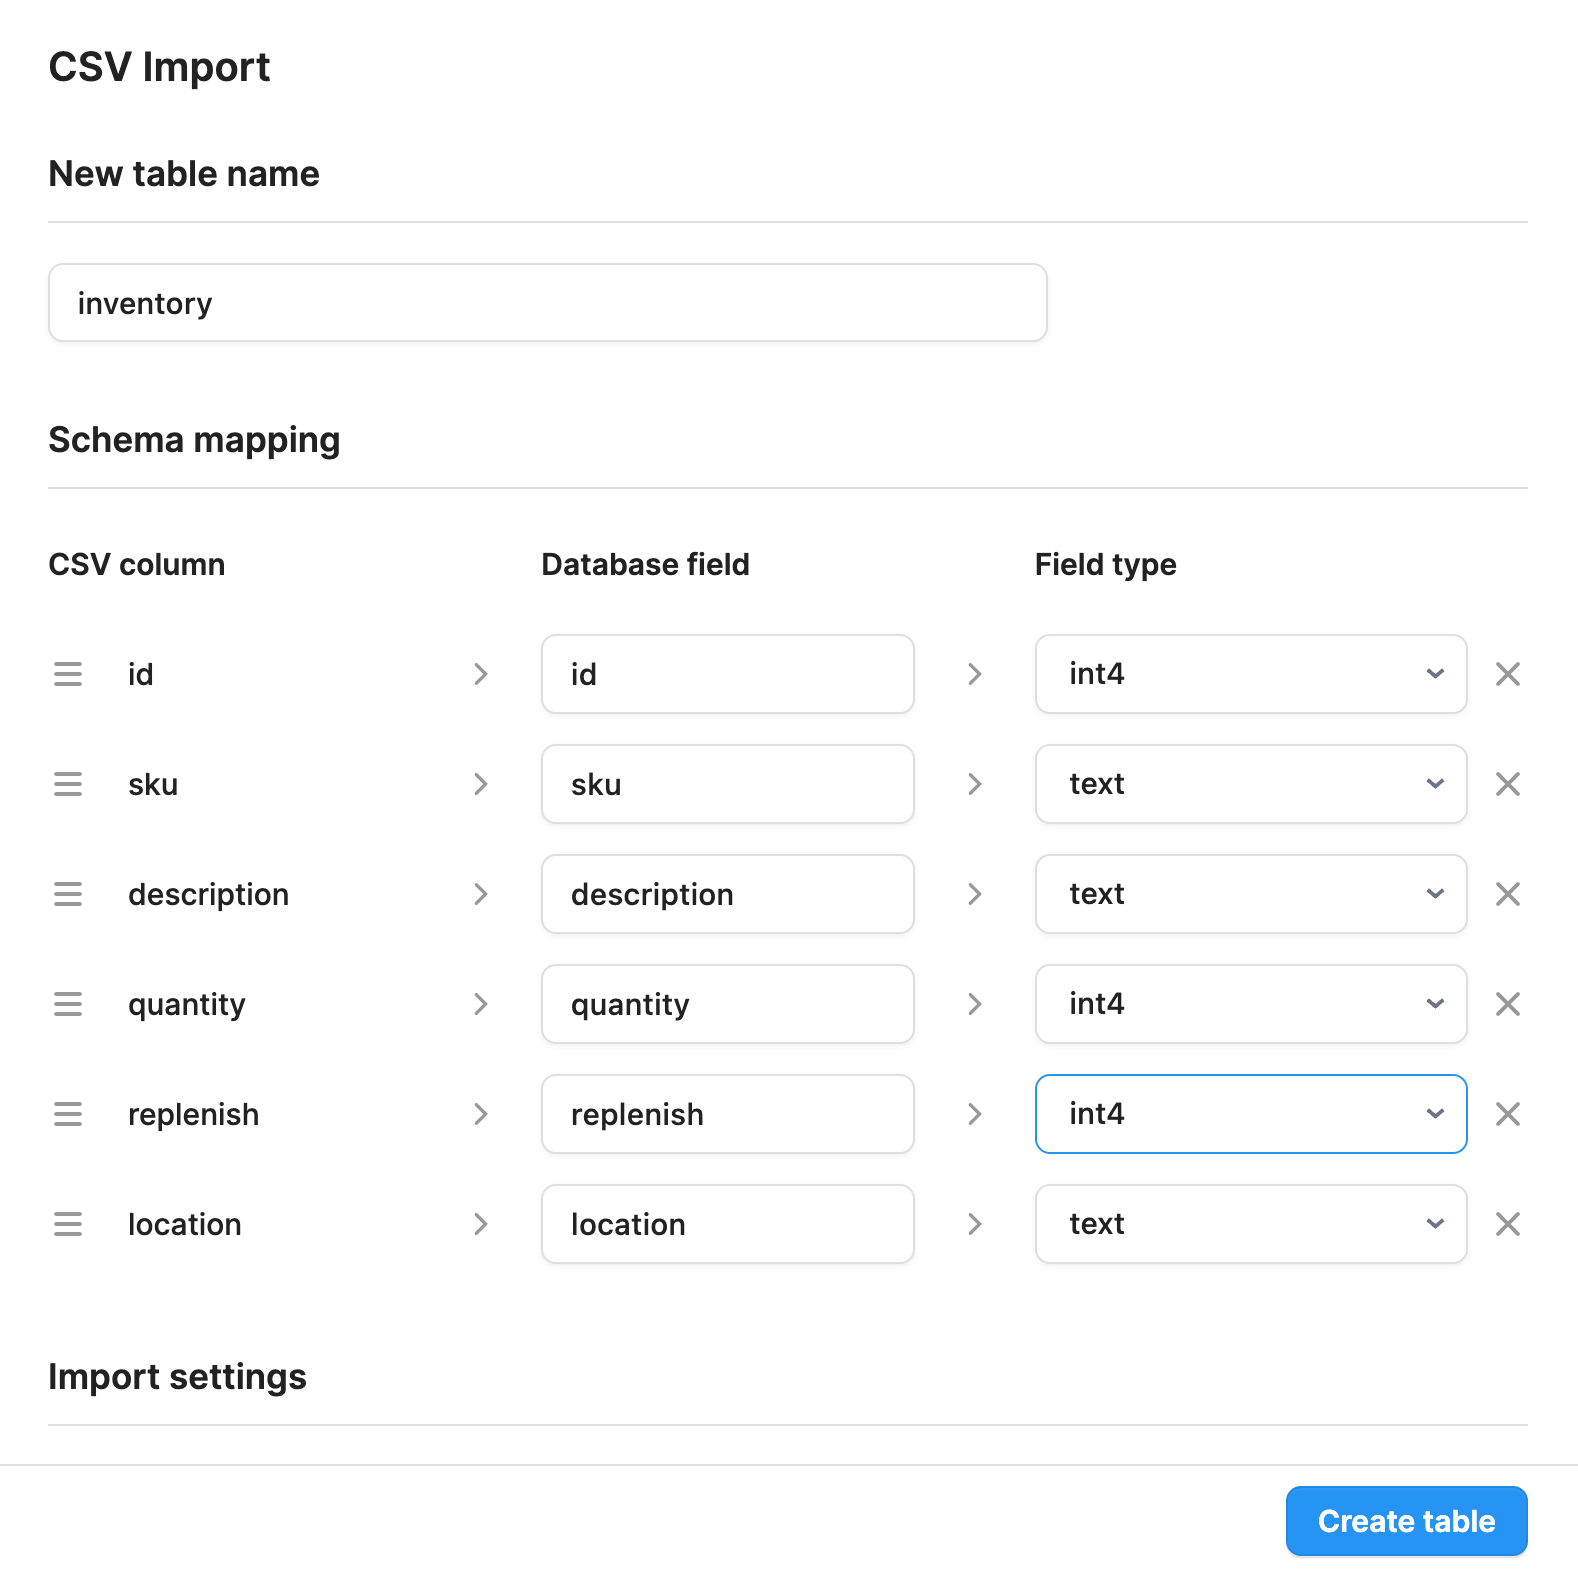
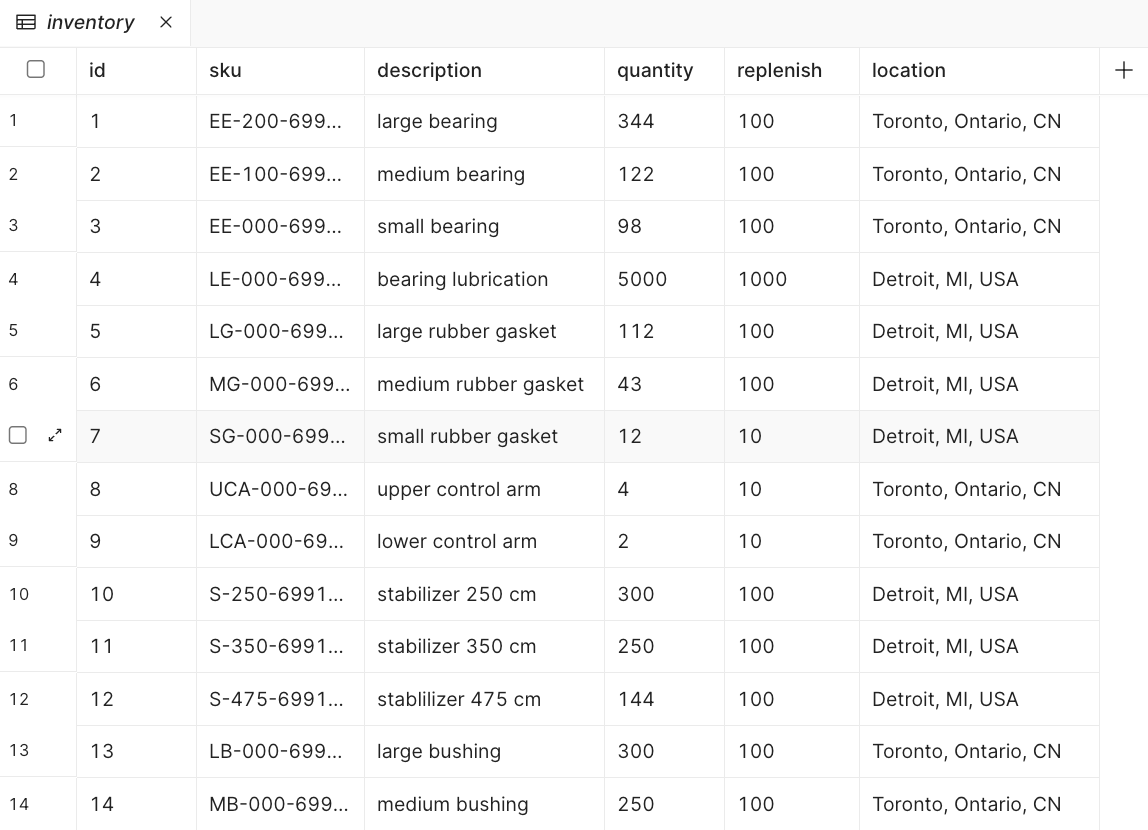
- Select Create table and the table will update as shown in the following figure.
Select
Select allows you to query the rows in the table for a matching condition. With the table that has been imported create a SQL query by doing the following:
- Go to the Retool home page. Select the folder that you want the sample application to be placed into and then select Create new / App. For App name, specify sample-query-app and make sure the folder is set properly.
- Select Code > + > Resource query.
- Under Resource specify Retool Database
- Within the SQL Query Text Area (e.g. Write query or Ask AI), enter:
select * from inventory;
- Select Save / Run and the result of the query will display below along with an information message
Query ran successfully.
Select with Pagination
In the previous example we had the select statement return all the rows in the inventory table. This can return an arbitrary large number of rows. To limit this and navigate through a large data set, consider using pagination. Within SQL we can do this via the following query:
First 10 rows
select * from inventory limit 10;
Second 10 rows
select * from inventory limit 10 offset 10;
Insert
Insert will add rows to the table.
- Select Code > + > Resource query to add a new query.
- Copy the following query into the SQL Query Text Area:
insert into inventory (id, sku, description, quantity, replenish, location) values (22, 'MP-001-6991', 'medium-flange-pin', 100, 10, 'Detroit, MI, USA');
- Select Save / Run and the result of the query will display below along with an information message
Query ran successfully. - Check the Retool Database table and you should see a new entry, with an id of
22. - Once the entry has been created, you can query to determine if the new item exists with the following query. Edit the query created in the previous section to use the following. Select Save/Run to see the query:
select * from inventory where id=22;
Update
To update the previous insert row, we can use the update command.
- Select Code > + > Resource query to add a new query.
- Copy the following query into the SQL Query Text Area:
update inventory set quantity=99 where id=22;
- Select Save / Run.
- Examining the table, the quantity for
id = 22is now updated to99from100.
Delete
To delete the inserted / updated row, use delete.
- Select Code > + > Resource query to add a new query.
- Copy the following query into the SQL Query Text Area:
delete from inventory where id=22;
- Select Save / Run.
- Examining the table, the row with an
id = 22is gone.
Retool JavaScript Parameters in SQL
Within Retool Queries, SQL queries can leverage dynamic queries using the {{ }} syntax. An example of this could be:
select * from inventory where Description = {{table1.selectedRow.description}}
The parameter for userId is generated by extracting the value of the table1.selectedRow.description.