Classic Retool App IDE with Assist
The Classic Retool App IDE provides the development interface for creating Web Apps. The following lab performs a walkthrough of the newly released Assist tab, bringing App Generation to Retool.
Classic App IDE with Assist walkthrough
In the Classic App IDE Walkthrough, the Retool App IDE was examined closely. With the introduction of App Generation in Retool, the following walkthrough focuses on the Assist tab and its support for mixed-mode development (Chat, Canvas, Code). The following image shows the new Assist icon / drawer.
Simple example
The following video shows a completed app that will be built using a Retool App and Database.
Import data
In this step we will setup a sample table that you can use in the example.
Create schema
The schema we will create is defined in the following table.
| Column name | Description | Value Type |
|---|---|---|
| id | auto-generated primary key | Int |
| vendor | Public Cloud Vendor | Enum (AWS, Azure, GCP) |
| instance_id | VM instance identifier | Text |
| created_at | DateTime the instance was created | Date + Time |
| cpu_count | Number of vCPU | Number |
| ram_count | Amount of RAM | Number |
| cost_center | Owner of the instance | Enum (engineering, operations, finance, support) |
- Select Retool Home > Database
Import CSV
Next we want to populate this table with data. Download this CSV to import into the new table.
- Select Import CSV > Into a new table
- A import window appears showing the column names and types.
- Select Create table.
We want to alter the vendor and cost_center columns to be of type Enum.
- Select the down carrot for the
vendorcolumn and selecting Settings. - Select Field type and change from
TexttoEnumand select Save. - Repeat this process for the
cost_centercolumn.
The following Arcade video will guide through importing the CSV and changing the columns.
Create a Web App
- Select Home (Retool icon) to return to the home page. Select App > Create Web App. Provide an app name and save.
- The App IDE screen will now display an empty app.
Prompt a Home page
Focus Area: Left panel / Assist tab
The Left panel provides access to the construction features in Retool. Let's rename the app.
- Select the app name and change to
infratest. - Select the Assist icon (bottom left) if the Assist drawer is not displayed.
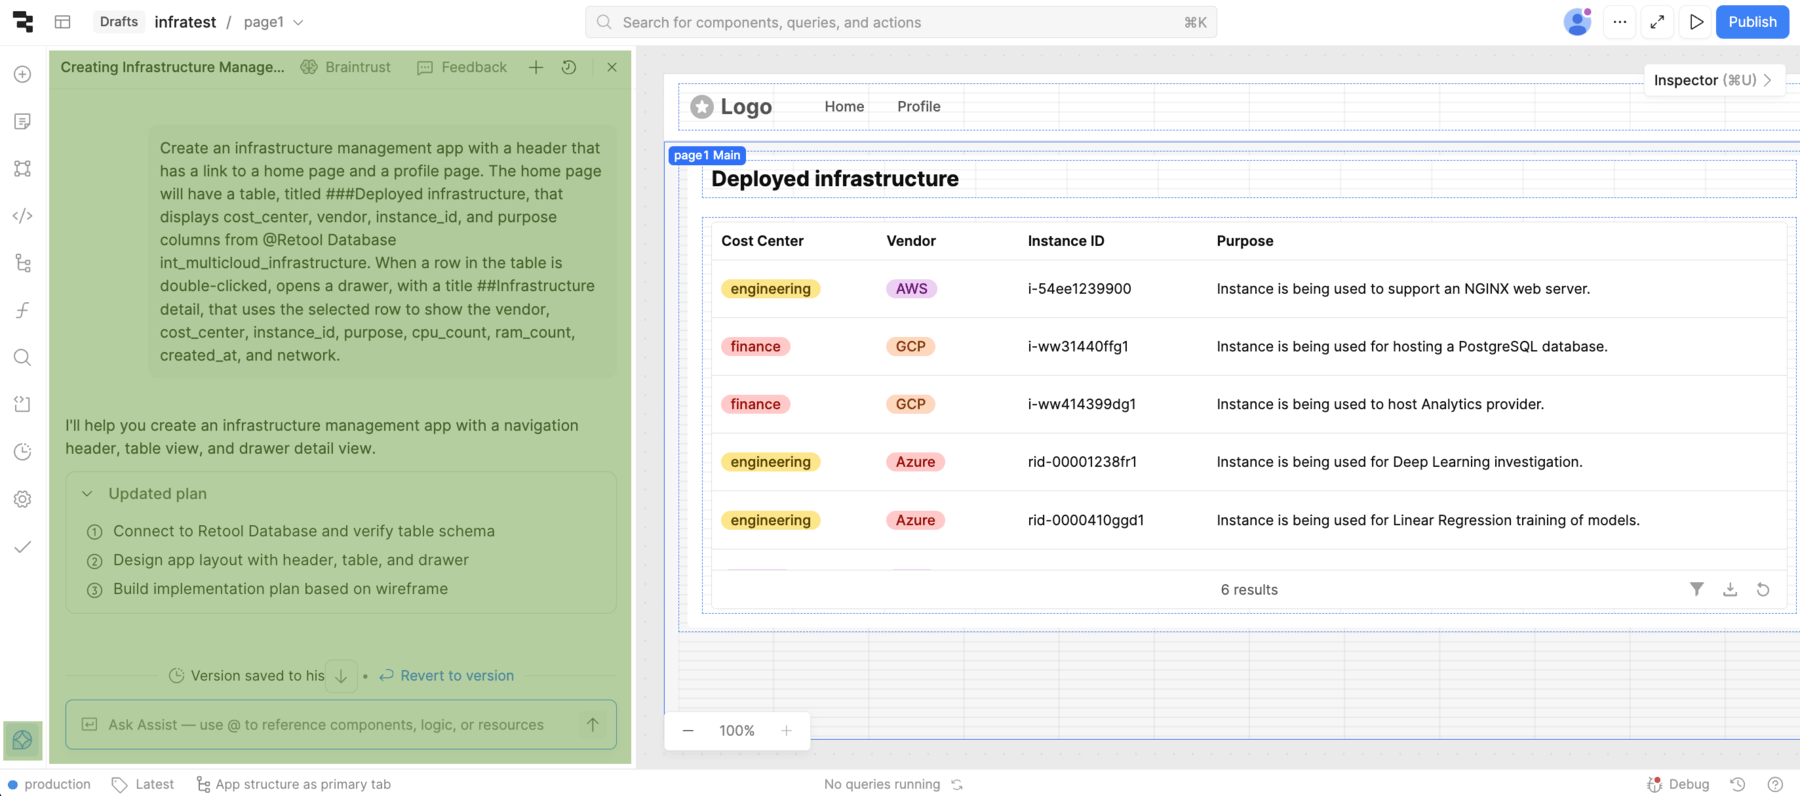
- Enter the following prompt to generate the infrastructure app.
Create an infrastructure management app with a header that has a link to a home page
and a profile page. The home page will have a table, titled ###Deployed infrastructure,
that displays cost_center, vendor, instance_id, and purpose columns from @Retool Database
int_multicloud_infrastructure table. When a row in the table is double-clicked, it opens
a drawer, with a title ##Infrastructure detail, that uses the selected row to show the
vendor, cost_center, instance_id, purpose, cpu_count, ram_count, created_at, and network.
Edit app to use container
Focus Area: Left panel / Assist tab
The original prompt left out the use of a container to organize the table. Let's use an edit prompt to change that and reference components by their tag name.
Create a container and use textDeployedInfrastructure as the title.
Place the tableInfrastructure inside the table.
- Once this is complete, the container may be far from the header. The following prompt will change that to have it move under the header.
Move containerInfrastructure to be right under the header.
Edit app to use tags
Focus Area: Left panel / Assist tab
The last prompt we will try is to update the table and drawer vendor and cost_center keys to use a Tag component vs. Text. Let's get the component names so the prompt is accurate when we ask to update them.
Update the tableInfrastructure component columns, ###Vendor and ###Cost center, to be Tag components vs. Text components. Do the same for drawerInfrastructure key/value entries ###Cost center and ###Vendor.