Connect to Snowflake
Connect Snowflake to Retool to query data, manage records, and build apps, workflows, and agents with SQL.
Snowflake is a cloud data platform built for storing, processing, and analyzing large datasets. You can create a Snowflake resource to securely connect to your data warehouse and build apps, workflows, and agents that use SQL queries to perform create, read, update, and delete operations.
What you can do with Snowflake in Retool
- Query large datasets with SQL using joins, aggregations, subqueries, common table expressions (CTEs), and Snowflake-specific functions using SQL mode for reading data.
- Insert, update, and delete records using GUI mode for write operations.
- Work with semi-structured data stored in VARIANT, ARRAY, and OBJECT columns using Snowflake's native semi-structured data functions.
- Run scheduled Snowflake queries as part of Retool workflows.
- Build dashboards and apps that display Snowflake query results in charts, tables, and other components.
Before you begin
To connect Snowflake to Retool, you need the following:
- Cloud instances
- Self-hosted instances
- Snowflake account: An accessible Snowflake account with a virtual warehouse available.
- Network access: Your Snowflake account must permit connections from Retool's IP addresses.
- Credentials: A Snowflake user with appropriate permissions, a programmatic access token, an RSA key pair, or an OAuth security integration configured in Snowflake.
- Retool permissions: Ability to create and manage resources in your organization.
- Snowflake account: An accessible Snowflake account with a virtual warehouse available.
- Network access: Your Retool instance must be able to reach your Snowflake account endpoint (
<account_identifier>.snowflakecomputing.com). - Credentials: A Snowflake user with appropriate permissions, a programmatic access token, an RSA key pair, or an OAuth security integration configured in Snowflake.
- Retool permissions: Ability to create and manage resources in your organization.
Create a Snowflake resource
Follow these steps to create a Snowflake resource in your Retool organization.
1. Create a new resource
In your Retool organization, navigate to Resources in the main navigation and click Create new → Resource. Search for Snowflake and click the Snowflake tile to begin configuration.
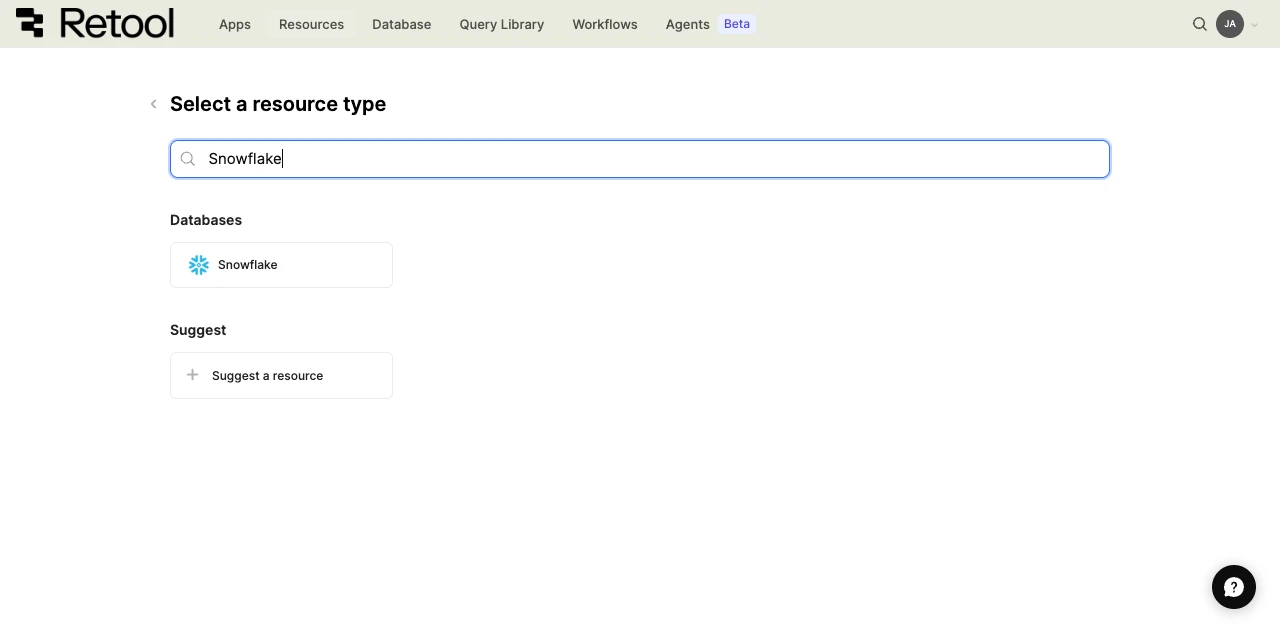
Snowflake resource selection.
Use folders to organize your resources by team, environment, or data source type. This helps keep your resource list manageable as your organization grows.
2. Configure general settings
Specify a name and description for the resource that indicates which warehouse or database it connects to. The description provides more context to users and Assist about how to use the resource.
| Example name | Example description |
|---|---|
Analytics warehouse | A read-only Snowflake warehouse containing marketing analytics data. |
Production data warehouse | The main Snowflake data warehouse with customer and transaction data. |
3. Configure resource credentials
Configure the connection settings for your Snowflake resource.
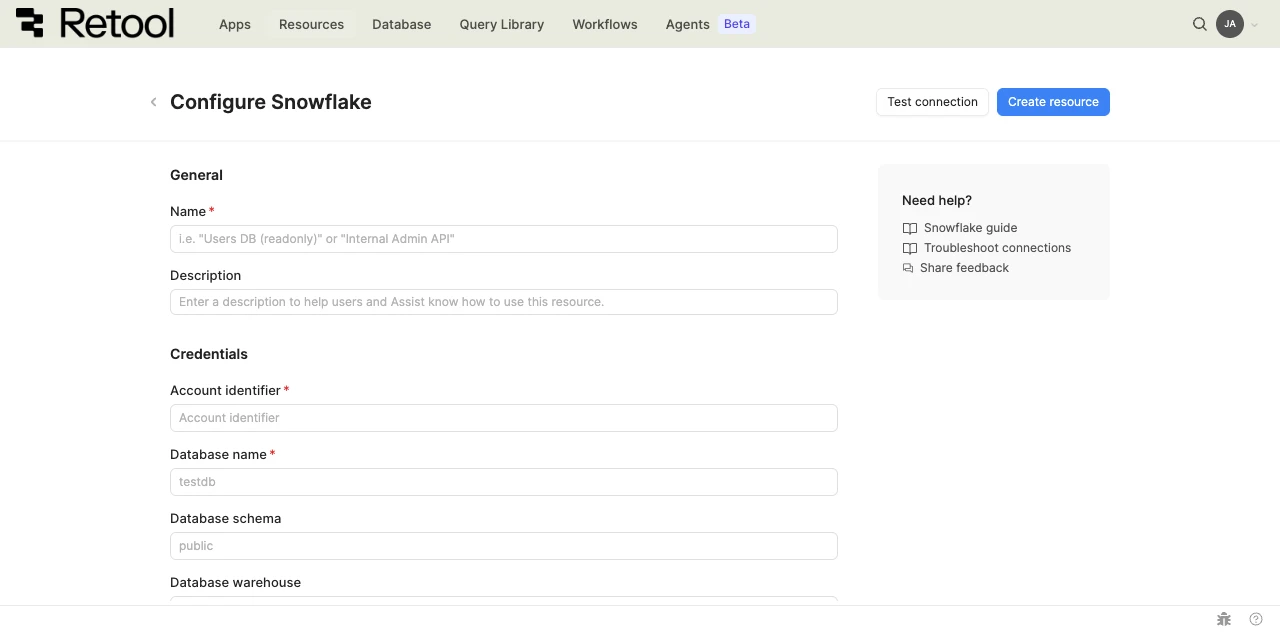
Snowflake connection settings.
-
Account identifier — The unique identifier for your Snowflake account, used to construct the connection endpoint (
<account_identifier>.snowflakecomputing.com). You can find this in your Snowflake URL.Examplesmyorg-myaccount
myaccount.us-east-1.aws
myaccount.eu-west-1.azure
xy12345.us-east-1 -
Database name — The default database to connect to in your Snowflake account.
ExampleANALYTICS_DB -
Database schema — The default schema to use within the database. Defaults to
publicif not specified.Examplepublic -
Database warehouse — The default virtual warehouse to use for executing queries and loading data. If not specified, Snowflake uses the default warehouse associated with your user.
ExamplesCOMPUTE_WH
ANALYTICS_WH -
User role — The default security role to apply when connecting to Snowflake. Roles control which objects and operations are accessible. Defaults to
PUBLICif not specified.ExamplesPUBLIC
SYSADMIN
ANALYST
4. Configure authentication
Snowflake supports four authentication methods. Choose the method that best fits your security requirements and deployment setup.
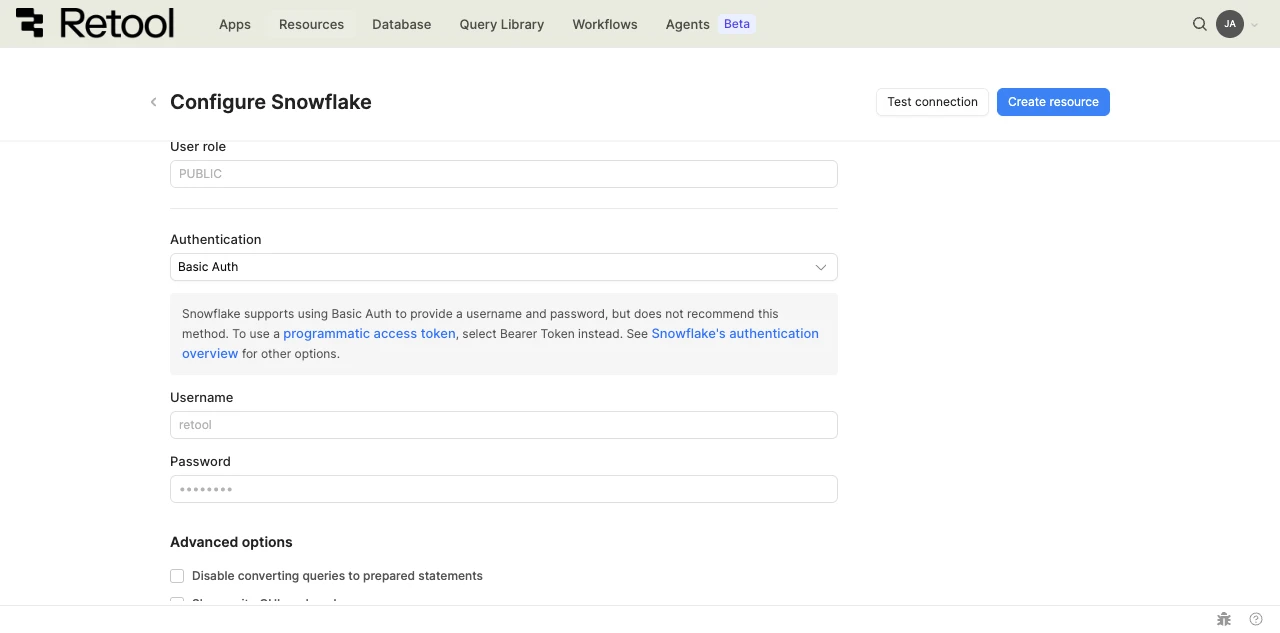
Snowflake authentication settings.
| Authentication method | Use cases |
|---|---|
| Bearer Token | Programmatic access token for service account access. Recommended for automated workflows and service-to-service connections. |
| Key Pair | RSA public/private key pair authentication. More secure than passwords, with no credential rotation required. |
| Basic Auth | Username and password. Not recommended by Snowflake for service accounts — use Bearer Token or Key Pair instead. |
| OAuth | Per-user authentication via a Snowflake OAuth security integration. GUI mode is unavailable when using this method. |
- Cloud instances
- Self-hosted instances
option A: Bearer Token (recommended)
Snowflake programmatic access tokens provide service account access without a username and password.
- In your Snowflake account, generate a programmatic access token for the user you want to connect as.
- In Retool, select Bearer Token from the Authentication dropdown.
- Enter the token in the Bearer token field.
option B: Key Pair
RSA key pair authentication requires generating a public/private key pair and assigning the public key to your Snowflake user. Refer to Snowflake's key pair authentication documentation for steps to generate and configure keys.
- Select Key Pair from the Authentication dropdown.
- Enter your Snowflake Username.
- Paste the Private key in PEM format. Unencrypted keys begin with
-----BEGIN PRIVATE KEY-----; encrypted keys begin with-----BEGIN ENCRYPTED PRIVATE KEY-----. - If the private key is encrypted, enter the Private key passphrase.
option C: Basic Auth
- Select Basic Auth from the Authentication dropdown.
- Enter your Snowflake Username and Password.
Snowflake does not recommend Basic Auth for service accounts. Use Bearer Token or Key Pair for more secure, password-free authentication. Refer to Snowflake's authentication overview for guidance.
option D: OAuth
OAuth uses per-user authentication, where each Retool user authenticates with their own Snowflake credentials. You must configure an OAuth security integration in Snowflake before using this method. Refer to Snowflake's OAuth documentation for setup steps.
Snowflake OAuth supports two grant flows. Choose the one that matches your security integration configuration:
| Flow | When to use |
|---|---|
| Authorization Code Grant | Standard OAuth flow. Requires a client secret. Use when your OAuth security integration is configured for confidential clients. |
| Authorization Code Grant with PKCE | Uses Proof Key for Code Exchange. No client secret required. Use for public clients or when your security integration supports PKCE. |
Authorization Code Grant:
- Select OAuth from the Authentication dropdown. Retool automatically pre-fills the authorization and token URLs from your account identifier.
- Select Authorization Code Grant as the OAuth flow.
- Enter your OAuth client ID and OAuth client secret from your Snowflake OAuth security integration.
- Click Connect to Snowflake to complete the OAuth authorization flow.
Authorization Code Grant with PKCE:
- Select OAuth from the Authentication dropdown. Retool automatically pre-fills the authorization and token URLs from your account identifier.
- Select Authorization Code Grant with PKCE as the OAuth flow.
- Enter your OAuth client ID. No client secret is required for PKCE.
- Click Connect to Snowflake to complete the OAuth authorization flow.
GUI mode (INSERT, UPDATE, DELETE operations) is not available when using OAuth authentication. Only SQL mode queries are supported.
5. Configure advanced options
Configure optional settings available under the Advanced options section of the resource configuration form.
Outbound region
- Cloud instances
- Self-hosted instances
If your organization uses outbound regions, select the region that should be used for requests to Snowflake. This controls which geographic region your requests originate from, which is useful for reducing latency or meeting data residency requirements.
Self-hosted instances do not have the outbound region field. Connections originate from your Retool instance's network.
Fetch Number() and Integer column types as Big Int
Enable this option to return NUMBER and INTEGER column values as JavaScript BigInt instead of standard number. Use this when working with columns that contain values exceeding JavaScript's Number.MAX_SAFE_INTEGER (2^53 - 1), such as large IDs or high-precision financial amounts.
Automatically set QUERY_TAG on all queries
When enabled, Retool sets a QUERY_TAG on every Snowflake query with context about the source (app, Query Library, or workflow) and resource ID. This helps with query monitoring and cost attribution in Snowflake's query history.
SQL mode and GUI mode
By default, both SQL mode and GUI mode are available for Snowflake queries. You can restrict queries to SQL mode only or GUI mode only using the mode toggle in advanced options. GUI mode is automatically disabled when using OAuth authentication.
Disable converting queries to prepared statements
By default, Retool uses prepared statements for Snowflake queries to prevent SQL injection. Enable this option to disable prepared statements and allow dynamically generated SQL using JavaScript. Only disable this when your query logic requires it, as it removes a layer of SQL injection protection.
Use dynamic database names
Enable this option to override the configured database name with a dynamically generated value per query. This is useful when your data is sharded across multiple databases and you need to route queries to different databases based on runtime conditions, such as a user selection or environment variable.
Use dynamic role names
Enable this option to override the configured role with a dynamically generated value per query. This allows queries to run under different Snowflake roles based on runtime conditions.
Use dynamic warehouse names
Enable this option to override the configured warehouse with a dynamically generated value per query. This is useful when you need to route queries to different warehouses based on query size, priority, or user context.
6. Test the connection
Click Test connection to verify Retool can connect to your Snowflake account. If the test succeeds, you see a success message. If it fails, check the following:
- Network access: Ensure your Snowflake account accepts connections from Retool's IP addresses or your self-hosted instance's network.
- Account identifier: Verify the format is correct (e.g.,
orgname-accountnameoraccountname.region.cloudprovider). - Credentials: Verify your token, key pair, or username and password are correct and have not expired.
- Warehouse: Ensure the specified warehouse exists and is accessible to the user's assigned role.
- Network policy: Check that your Snowflake account's network policy permits connections from Retool's IP range.
After testing the connection, click View in console to open the Debug Tools console. The console displays detailed information about the test, including the test query executed and its response, execution time, and error details if the test fails.
7. Save the resource
Click Create resource to save your Snowflake resource. You can now use it in queries across your Retool apps, workflows, and agents.
Query Snowflake data
Once you've created a Snowflake resource, you can query Snowflake data in your Retool apps, workflows, and agents.
Create a query
You can create a Snowflake query in a Retool app using Assist to generate queries with natural language, or manually using code.
- Assist
- Code
Use Assist to generate queries from natural language prompts. Assist can create queries to retrieve, filter, and manipulate data from your Snowflake resource.
To create a query with Assist:
- In the Retool app IDE, click the Assist button at the bottom of the left toolbar to open the Assist panel (if not already visible).
- Write a prompt describing the data you want to retrieve, referencing your resource using
@. - Press Enter to submit the prompt.
- Select your Snowflake resource when prompted.
- Review the generated query and click Run query to add it to your app.
Action types
Snowflake queries support two modes: SQL mode for reading data with custom SQL queries and GUI mode for write operations. In GUI mode, you can select from multiple action types for different write operations.
GUI mode is not available when using OAuth authentication. Use a different authentication method if you need to perform write operations.
| Action type | Description | Use case |
|---|---|---|
| Insert a record | Add a single new row to a table. | Create records from form submissions. |
| Update an existing record | Modify an existing row identified by primary key or filter. | Edit individual records with inline editing. |
| Update a record, or create a new record if it doesn't exist | Update an existing record or create a new one if the record doesn't exist. | Upsert operations based on filter criteria. |
| Delete a record | Remove rows based on filter criteria. | Delete records with confirmation. |
| Bulk insert records | Add multiple new rows to a table in a single operation. | Bulk create records from imported data. |
| Bulk update via a primary key | Update multiple records identified by primary key. | Batch update operations. |
| Bulk upsert via a primary key | Insert or update multiple rows based on a primary key. | Import data that may contain new or existing records. |
Query configuration fields
Configuration fields vary based on the mode and action type you select. Field values can be static (e.g., ORDERS) or dynamic using an embedded expression (e.g., {{ dropdown1.value }}).
SQL mode
For reading data with custom SQL queries.
SQL query
The SQL statement to execute. Available in SQL mode.
simple select
SELECT id, name, email, status, created_at
FROM users
WHERE status = 'active'
ORDER BY created_at DESC
LIMIT 100
joins and aggregations
SELECT
  u.id,
  u.name,
  u.email,
  COUNT(o.id) AS order_count,
  SUM(o.total) AS total_spent
FROM users u
LEFT JOIN orders o ON u.id = o.user_id
GROUP BY u.id, u.name, u.email
HAVING COUNT(o.id) > 0
ORDER BY total_spent DESC
common table expression (CTE)
WITH recent_orders AS (
  SELECT user_id, SUM(total) AS total_spent
  FROM orders
  WHERE created_at > DATEADD('day', -30, CURRENT_TIMESTAMP())
  GROUP BY user_id
)
SELECT u.name, u.email, ro.total_spent
FROM users u
JOIN recent_orders ro ON u.id = ro.user_id
WHERE ro.total_spent > 100
parameterized query
SELECT id, name, price, category
FROM products
WHERE category = {{ dropdown1.value }}
  AND price BETWEEN {{ minPrice.value }} AND {{ maxPrice.value }}
  AND name ILIKE {{ '%' + searchInput.value + '%' }}
ORDER BY price ASC
GUI mode
For write operations using the graphical interface.
Action type
Select from the action types listed in the Action types table above.
Table name (all action types)
The database table to query.
// Static table name
users

// Dynamic table name
{{ dropdown1.value }}
Records
Applies to: Insert multiple records, Bulk upsert by key.
The data to insert or upsert.
{{ table1.data }}
{{
  fileInput1.parsedValue.map((row) => ({
    name: row.Name,
    email: row.Email,
    status: "active",
  }))
}}
Filter by
Applies to: Update an existing record, Update/create if not exists, Delete a record.
The WHERE clause conditions for filtering rows.
{{ { status: "active", role: roleSelect.value } }}
Primary key column
Applies to: Update a record, Delete a record, Bulk upsert by key.
The column used as the primary key for identifying records.
// Primary key column name
id

// Composite key (for bulk upsert)
["user_id", "product_id"]
Changeset
Applies to: Update a record, Update multiple records.
The columns to update with new values.
{{ table1.changesetObject }}
{{ form1.data }}
Data types and formatting
Snowflake queries return and accept specific data types. Understanding these formats helps you work with Snowflake data effectively in Retool.
Request data formats
| Value type | Description | Example |
|---|---|---|
| Strings | Use single quotes in SQL or embedded expressions. | 'text value' or {{ textInput.value }} |
| Numbers | Provide numeric values directly. No quotes needed. | 123 or 45.67 |
| Booleans | Use TRUE or FALSE in SQL. | TRUE or {{ checkbox.value }} |
| Dates | Use ISO 8601 format strings or Snowflake date functions. | '2025-01-21' or CURRENT_DATE() |
| Timestamps | Use ISO 8601 format with timezone or Snowflake timestamp functions. | '2025-01-21T10:30:00Z' or CURRENT_TIMESTAMP() |
| NULL values | Use NULL in SQL or null in embedded expressions. | NULL |
| Variant | JSON strings or JavaScript objects for semi-structured data. | '{"key": "value"}' or {{ JSON.stringify(obj) }} |
| Array | Snowflake array syntax or JavaScript arrays. | ARRAY_CONSTRUCT(1, 2, 3) |
Response data formats
| Data type | JavaScript type | Notes |
|---|---|---|
| NUMBER/INTEGER | number or BigInt | Returns as BigInt if the Fetch Number() and Integer column types as Big Int option is enabled. |
| FLOAT/DOUBLE | number | Standard JavaScript floating-point number. |
| VARCHAR/TEXT | string | Returns as a JavaScript string. |
| BOOLEAN | boolean | Returns true or false. |
| DATE | string | Returns an ISO 8601 date string (e.g., 2025-01-21). |
| TIMESTAMP | string | Returns an ISO 8601 timestamp string. |
| VARIANT/OBJECT | object | Automatically parsed to a JavaScript object. |
| ARRAY | array | Returns as a JavaScript array. |
| NULL | null | Returns JavaScript null. |
Common use cases
The following examples demonstrate typical Snowflake operations in Retool apps.
read and display data in a table
First, create a query named tableQuery and write an SQL statement to retrieve some data.
SELECT id, name, email, status, created_at
FROM users
WHERE status = 'active'
ORDER BY created_at DESC
LIMIT 100
Next, add a Table component to the app and set its Data property to {{ tableQuery.data }}. The table dynamically updates to reflect the data returned by the query.
filter data with user input
First, add input components for users to specify search filters.
- A Text Input component (
searchInput) for search terms. - A Select component (
statusSelect) for status filtering. - A Date Range Picker component (
dateRange) for date filtering.
Next, write a query that references the input component values to filter data.
SELECT id, name, email, status, created_at
FROM users
WHERE
  name ILIKE {{ '%' + searchInput.value + '%' }}
  AND status = {{ statusSelect.value }}
  AND created_at BETWEEN {{ dateRange.value.start }} AND {{ dateRange.value.end }}
ORDER BY created_at DESC
Queries that read data automatically run whenever any referenced input values change by default. As you update the input fields, the query retrieves new data based on the new values.
insert new rows from a form
Add a Form component (form1) with input fields for the data you want to collect (name, email, role).
Create a query in GUI mode to insert a new row using the form data:
| Field | Value |
|---|---|
| Action type | Insert a record |
| Table name | users |
| Records | {{ { name: form1.data.name, email: form1.data.email, role: form1.data.role, status: 'active' } }} |
Add an event handler to the form's Submit event that runs the insert query and displays a success notification.
update data with inline editing
Add a Table component and enable inline editing by setting Enable saving to true.
Create an update query in GUI mode that saves changes made in the table:
| Field | Value |
|---|---|
| Action type | Update a record |
| Table name | users |
| Primary key column | id |
| Changeset | {{ table1.changesetObject }} |
Add an event handler to the table's Save changes event that runs the update query and refreshes the data query.
delete rows with confirmation
Add a Table component that displays your data and a Button component in an action column for deleting rows.
Create a delete query in GUI mode:
| Field | Value |
|---|---|
| Action type | Delete a record |
| Table name | users |
| Primary key column | id |
Add an event handler to the button's Click event:
- Set the action to Show confirmation modal.
- If confirmed, trigger the delete query.
- Then refresh the data query.
query semi-structured data
Snowflake's VARIANT type stores semi-structured data such as JSON. Use the : operator to access nested fields and LATERAL FLATTEN to unnest arrays.
SELECT
  id,
  metadata:category::STRING AS category,
  metadata:price::FLOAT AS price,
  metadata:featured::BOOLEAN AS is_featured
FROM products
WHERE metadata:featured::BOOLEAN = TRUE
SELECT
  p.id,
  p.name,
  f.value::STRING AS tag
FROM products p,
LATERAL FLATTEN(input => p.tags) f
WHERE f.value::STRING = 'sale'
Best practices
Follow these best practices to optimize performance, maintain data integrity, and secure your Snowflake queries.
Performance
- Use clustering keys: For large tables frequently filtered on specific columns, define clustering keys to improve micro-partition pruning and reduce data scanned per query.
- Limit result sets: Always use
LIMITto restrict the number of rows returned, especially for large tables displayed in tables or charts. - Use prepared statements: Retool automatically uses prepared statements for Snowflake queries, which improves performance and prevents SQL injection. Use embedded expressions instead of string concatenation to take advantage of this.
- Avoid SELECT *: Select only the columns you need rather than using
SELECT *to reduce data transfer and improve performance. - Leverage result caching: Snowflake automatically caches query results for 24 hours. Identical queries reuse cached results at no additional cost — write deterministic queries to maximize cache hits.
- Right-size your virtual warehouse: Choose a warehouse size appropriate for your workload. Use smaller warehouses for simple queries and larger warehouses for complex aggregations over large datasets.
- Use connection pooling: Retool automatically manages connection pooling for Snowflake resources. For high-traffic apps, consider increasing the pool size in the resource's advanced settings.
Security
- Use configuration variables: Store values referenced in queries — such as schema names or environment-specific identifiers — in configuration variables or rather than hardcoding them.
- Apply least privilege: Grant Snowflake users only the minimum roles and permissions needed. Use read-only roles for resources that only need to read data.
- Validate user input: Validate and sanitize user input before using it in queries, even when using embedded expressions or prepared statements.
- Prefer Bearer Token or Key Pair: Avoid Basic Auth for service accounts. Snowflake programmatic access tokens and key pair authentication are more secure alternatives that eliminate password rotation.
- Use resource environments: Configure multiple resource environments to maintain separate Snowflake configurations for production, staging, and development.
Data integrity
- Use transactions: Wrap related write operations in transactions to ensure atomicity. Snowflake supports
BEGIN,COMMIT, andROLLBACKfor multi-statement transactions. - Validate before delete: Always show a confirmation dialog before executing DELETE operations to prevent accidental data loss.
- Handle errors gracefully: Configure error notifications and fallback behavior for failed queries to improve user experience.
- Implement soft deletes: For sensitive data, consider marking records as deleted rather than physically removing them to preserve audit trails.
- Test with resource environments: Use separate development and staging Snowflake databases to test queries before deploying to production. Configure different credentials per resource environment.
Related resources
Create a resource
Learn how to create and manage resources in Retool.
SQL queries
Write SQL queries to read data from your database.
GUI mode writes
Insert, update, and delete records using the graphical query editor.
SSH tunnels
Connect to databases that are not publicly accessible using an SSH tunnel.
Resource environments
Configure separate credentials for production and non-production environments.
Configuration variables
Store sensitive values securely for use in queries and apps.